How To Install A Pet Door

Advantages of a Pet Door In a Wall vs. A Door
Pet doors can be installed in walls, in a door and even come as a special panel to allow a pet door installation in a sliding door unit.
Wall units have several advantages over door units. First, a wall unit allows for a double flap pet door to be installed. A double wall pet door creates an air space between flaps and provides a superior weather seal and less air leakage. Double door flaps are far superior in energy efficiency than single door flaps.
A pet door cut through a door typically ruins the door and that door will need to be replaced when the owner decides to remove the pet door. A flap door cut into an existing door is typically more costly than a wall unit which only requires repairing wallboard and some siding.
A pet door in a wall also gives the owner more options for placement. A wall entrance placed in low traffic areas (an alcove, closet or rarely used hallway) keeps it away from entrance doors which are usually highly visible.
How To Measure Your Dog:
To determine the proper width of the pet door for your animal open a door just wide enough for your animal to comfortably walk through. That measurement is your pet door flap width.
- The top of the door flap should be mounted an inch, over or higher, above the top of the pets shoulder. This way the pet does not have to crouch to use the door.
- [Note –for double flap pet doors install the door 2-inches above the pets shoulders]
- One common mistake is to measure the pet’s head height: all pets duck their heads and pick up their paws when passing through a pet door.
- The lower the pet door bottom the better. Try to avoid installing a pet door that the is too high, a good rule of thumb is to avoid exceeding 1/3 of the height of the animal’s shoulders.
- Make adjustments if your dog has a deep chest or is low slung.
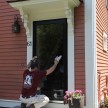
Sometimes the install location dictates height as well, a baseboard radiator dictated our minimum height: real world conditions. Always follow recommendations but also deal with the environment as you find it where the install will take place.
Special Considerations and Issues? [Exterior wall finishes]
In our situation we had two things working to our disadvantage. The location where we wanted to place our pet door also had 8-inch high hot water baseboard radiators along the wall at the floor level. This meant that our pet door had to be installed over the radiator.
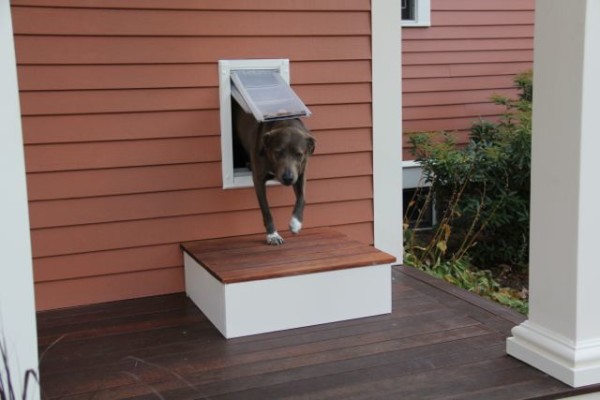
The pet door exited onto a covered porch that was 7-inches lower than the floor of the mudroom closet. This meant that the pet door was 13-inches off the exterior porch deck which was much too high for my dogs.
Because this was the only location for the pet door we decided to install it and construct a 2-foot square stoop for the dogs to stand on as they entered or exited the pet door. This worked very well.
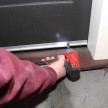
Hidden dangers inside the wall – tips to look for.
Prior to installing a pet door in the wall, pay close attention to what is behind the wallboard. Things like pipes and wires can cause problems and you don’t want to have to relocate you door and then patch an area you didn’t use.
Some tips for locating hidden obstructions is to do the following:
- Look for electrical outlets or switches in the vicinity of the pet door. If an outlet is within 12 to 14-inches from your location you may not have enough room to fit the door between the wall studs.
- Look for radiators, adjacent bathrooms or kitchen plumbing by looking below, above and beside the wall being used for the pet door.
- Poke a small hole the size of a quarter or larger if needed and look inside with a flashlight.
- Use wire or a straightened coat hanger to probe the cavity for obstructions.
- Inspection Scope: If you’re lucky enough to own an inspection camera – this is the perfect place to use it.