
Vara Safety RACT B V2 Installation Guide

 Vara Safety RACT B V2: Secure Biometric Rifle Storage Review
Vara Safety RACT B V2 Installation Guide Safety RACT B V2, biometric rifle mount, smart gun storage, biometric firearm storage, rifle wall mount, secure rifle storage, fast access gun storage, home defense storage, gun mount review, firearm security system
As a contractor and carpenter, I constantly look for ways to solve unique residential problems. When it comes to home security, the challenge is always balancing secure storage with fast, reliable deployment.
 What Is the Vara Safety RACT B V
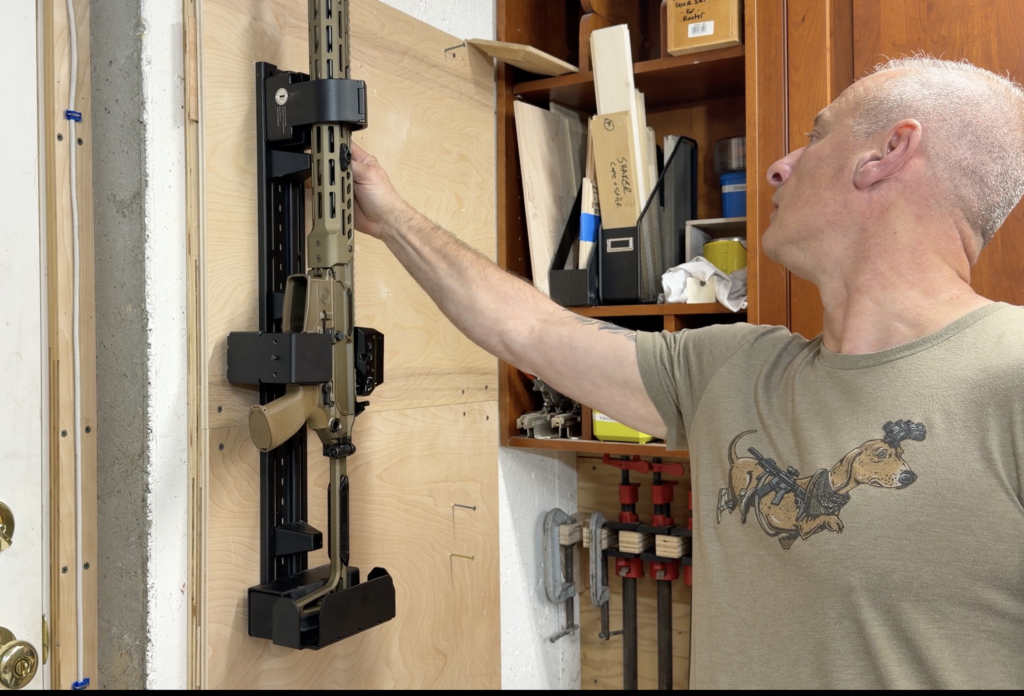
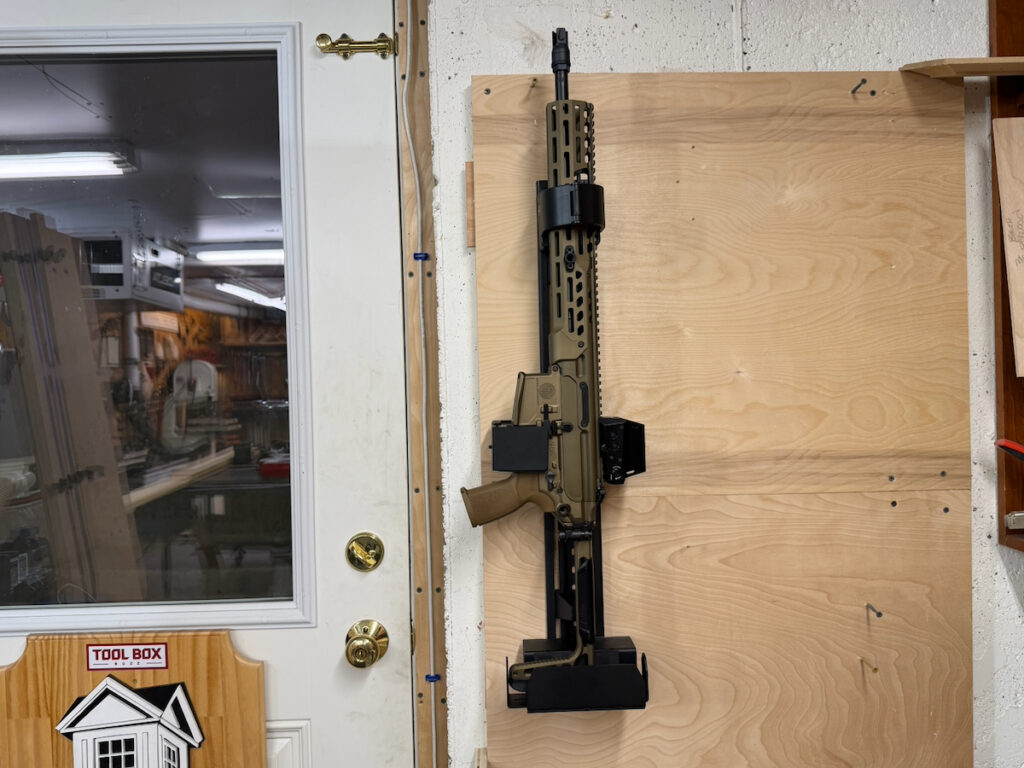
The Vara Safety RACT B V2 is a modular, biometric firearm storage system designed specifically to bridge that gap. Unlike a traditional, heavy floor safe that isolates your tools, this is a mounted rack system. It is engineered to keep a rifle or shotgun securely locked down while leaving it staged for immediate, quick-access use.
What This Vara Safety RACT B V2 Installation Guide Covers
On this website, we judge hardware by how the Vara Safety RACT B V2 installs. This review and installation guide focuses strictly on:
Engineering:
Assessing the durability and build quality of the rack system.
Biometric Technology:
Evaluating the reliability and speed of the biometric access.
Carpentry Requirements:
The structural blocking and fastening required to anchor this unit securely to a home’s framing.
Whether you are anchoring a heavy tool cabinet, a wall-safe, or a security rack, the structural principles remain the same: you need solid framing | blocking and proper fastening.
My priority is always to provide you with the honest, field-tested information you need to keep your home and job site running smoothly.
Vara Safety RACT B V2 | Key Components and Design
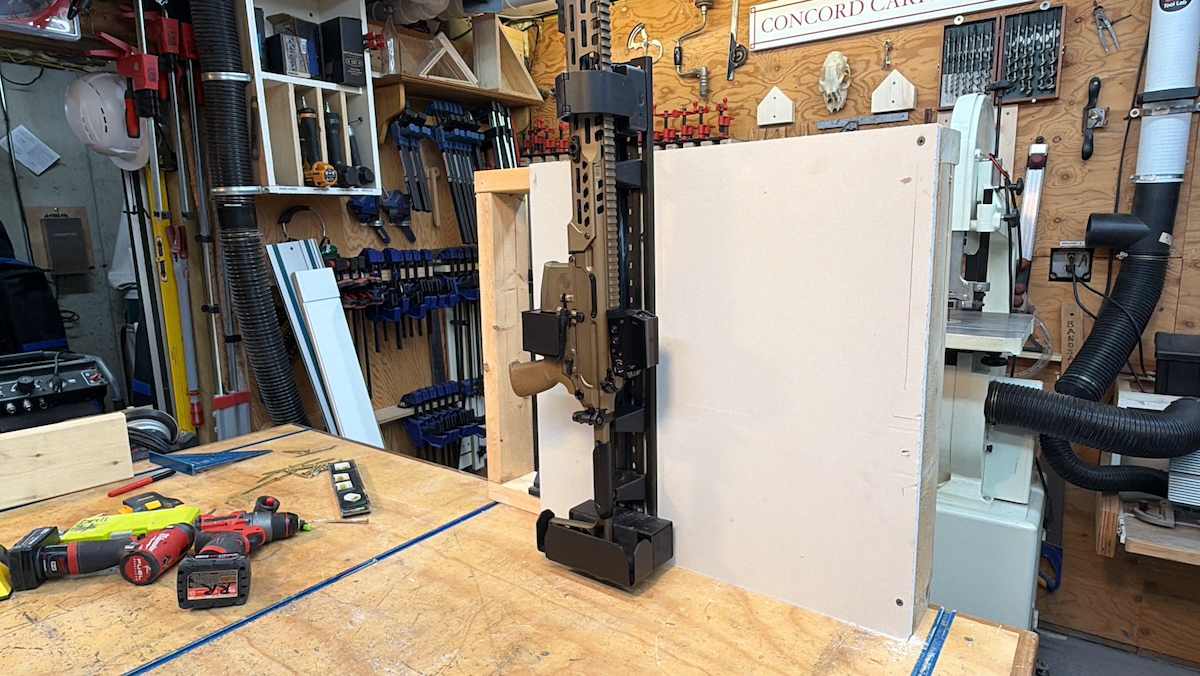
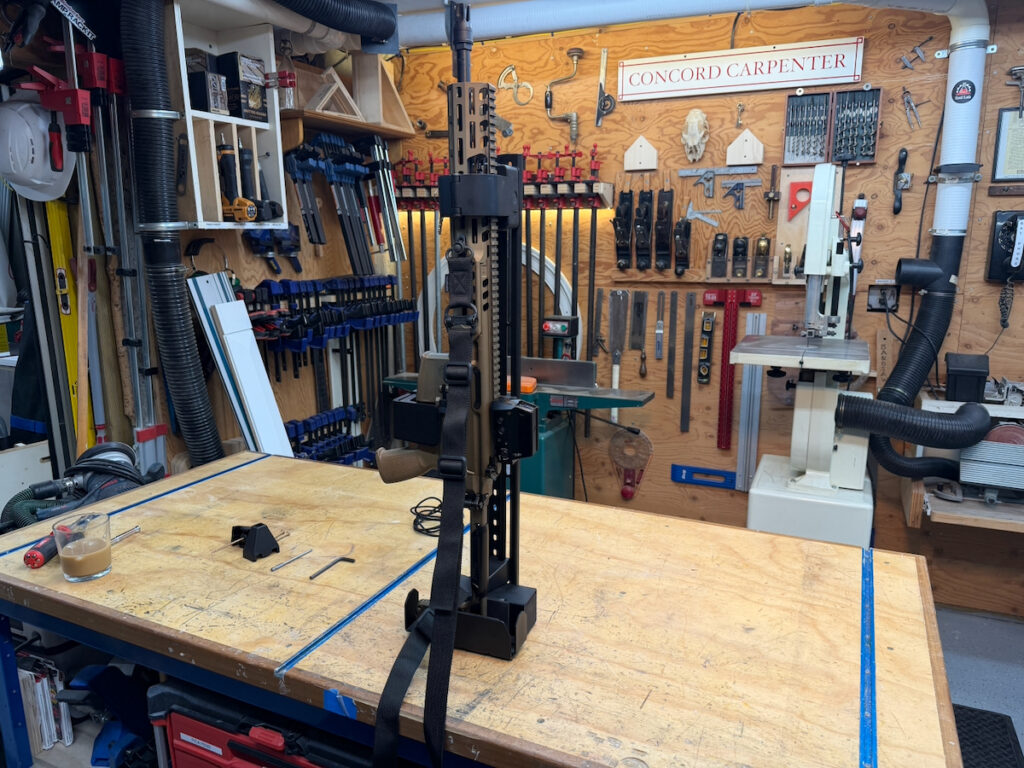
Out of the box, the RACT B V2 feels less like a tactical storage rack and more like a heavy-duty clamping system. It features a minimalist, vertical footprint designed to mount flat against a wall or inside a closet.
The system is constructed from 12-gauge steel and heavy nylon composites, weighing in at roughly 15 pounds. It consists of three core components mounted onto a central aluminum back rail:
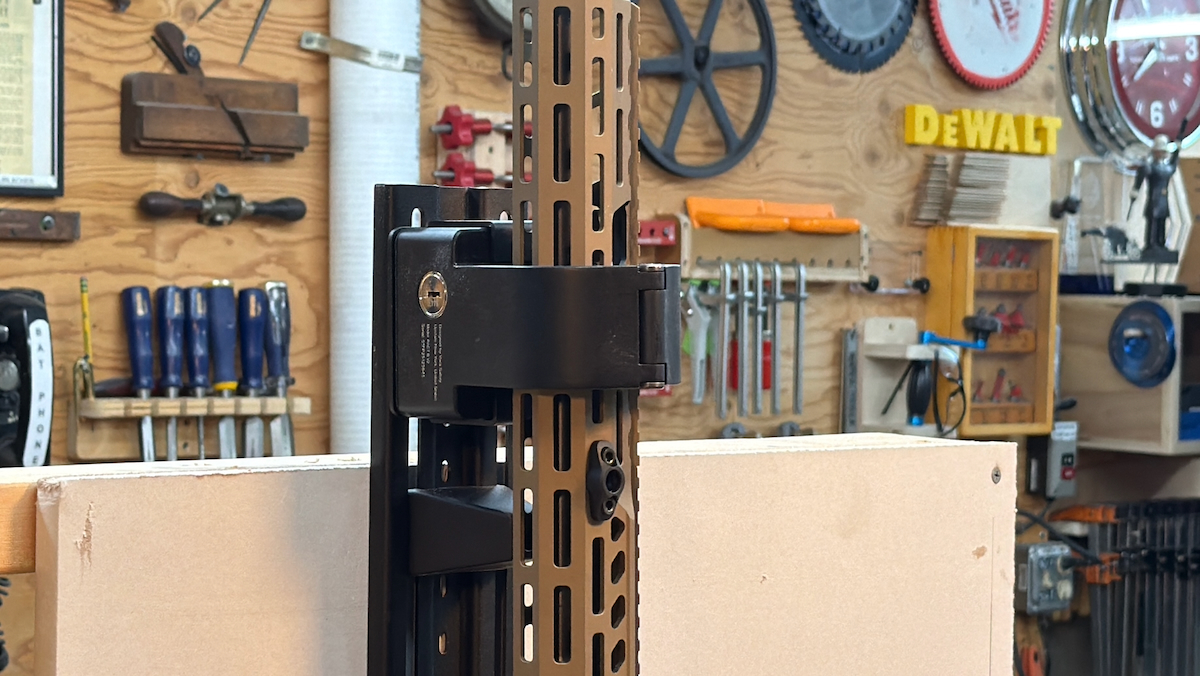
- Biometric Barrel Lock:
A heavy-duty, motorized clamping jaw that encircles the barrel or handguard.
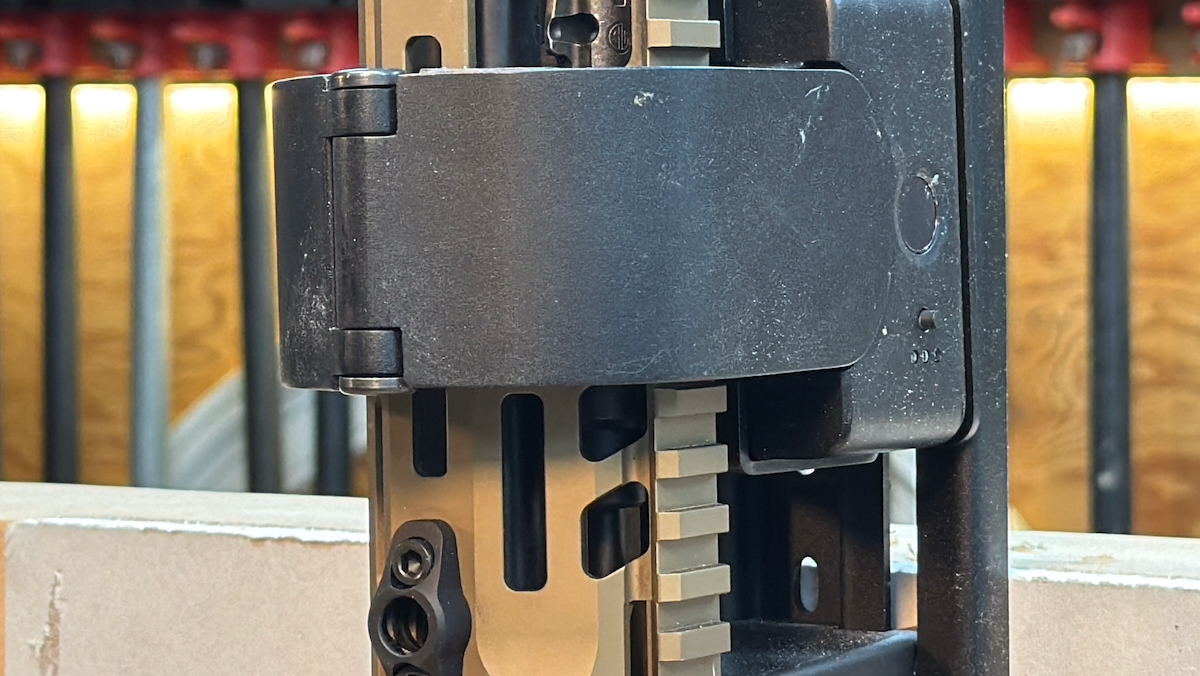
- Trigger Cover:
A solid enclosure that completely shrouds the trigger guard to prevent unauthorized manipulation. Vara Safety includes interchangeable inserts here for AR-style receivers or traditional hunting rifles/shotguns.
- Stock Support:
A rugged bottom boot that cups the buttstock, taking the vertical weight of the firearm off the locking mechanisms, as well a preventing the rifle from being slid out.
Vara Safety RACT B V2 Adjustability
What appeals to me as a tradesman is the Vara Safety RACT B V2 design. By loosening a few bolts on the back rail, you can slide the barrel lock, trigger guard, and stock support up or down to custom-fit the exact dimensions of your firearm. Once tightened, the setup is rigid, preventing any excessive wiggling or leverage points.
Vara Safety RACT B V2 Features and Specifications
The brain of the Vara Safety RACT B V2 is its capacitive fingerprint sensor, which is a significant upgrade over older optical scanners.
Capacitive technology is the advanced method used by the biometric scanner to read your fingerprint via natural electrical currents in your skin rather than taking a simple visual photograph.
By measuring the electrical variance between the ridges and valleys of your finger, it maps a precise 3D blueprint that cannot be fooled by a photocopy or picture. This makes capacitive sensors significantly more secure, faster, and more reliable than older optical scanners, even if your hands are dry, damp, or slightly dirty on the job site.
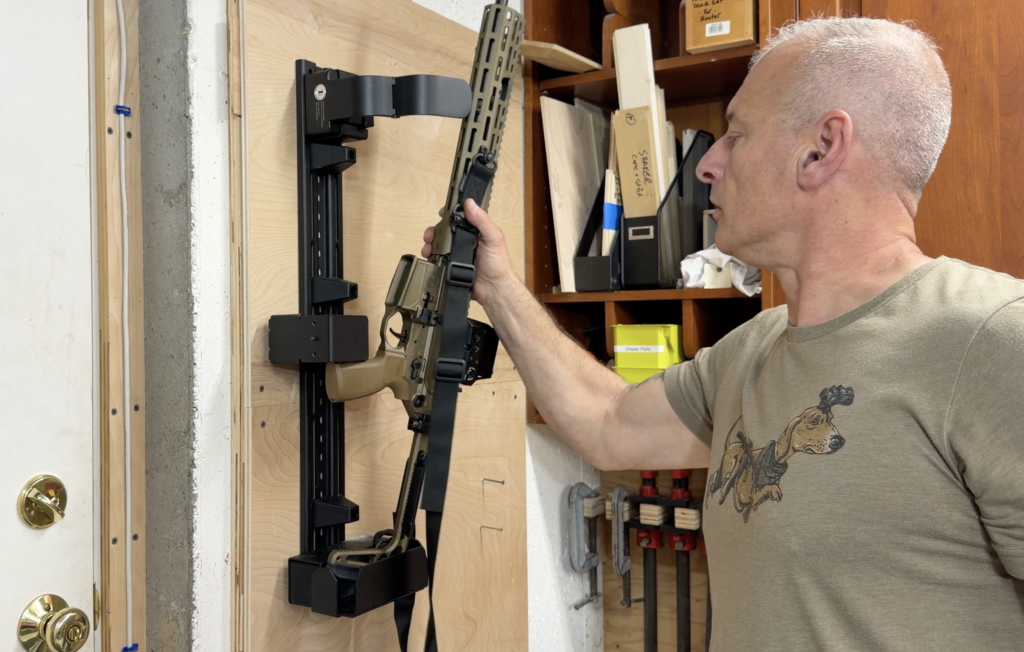
Unlock Speed:
Vara Safety claims a 0.2-second response time, and in testing, it is incredibly fast. Touch the pad, and the motorized barrel clamp springs open with a distinct, mechanical “pop.”
The system holds up to 10 fingerprints. The sensor updates its registered data every time you use it, meaning it theoretically adapts to minor changes like small cuts or scrapes on your skin.
Power Management:
The Vara Safety RACT B V2 runs on a rechargeable battery with a claimed 12-month lifespan. It alerts you with an audible beep when the battery runs low.
It charges via USB-C, and my professional recommendation is to mount this near an outlet to keep it constantly tethered to a dedicated power line, leaving the battery strictly for backup during a power outage.
Mechanical Override:
If electronics fail, the unit features a physical key override.
Professional Fastening Installation Overview
The security of this safe is only as good as the material it is fastened to. You should select a mounting surface stronger than the rack itself. A properly installed anchor system should resist both vertical pull-out force and lateral prying force.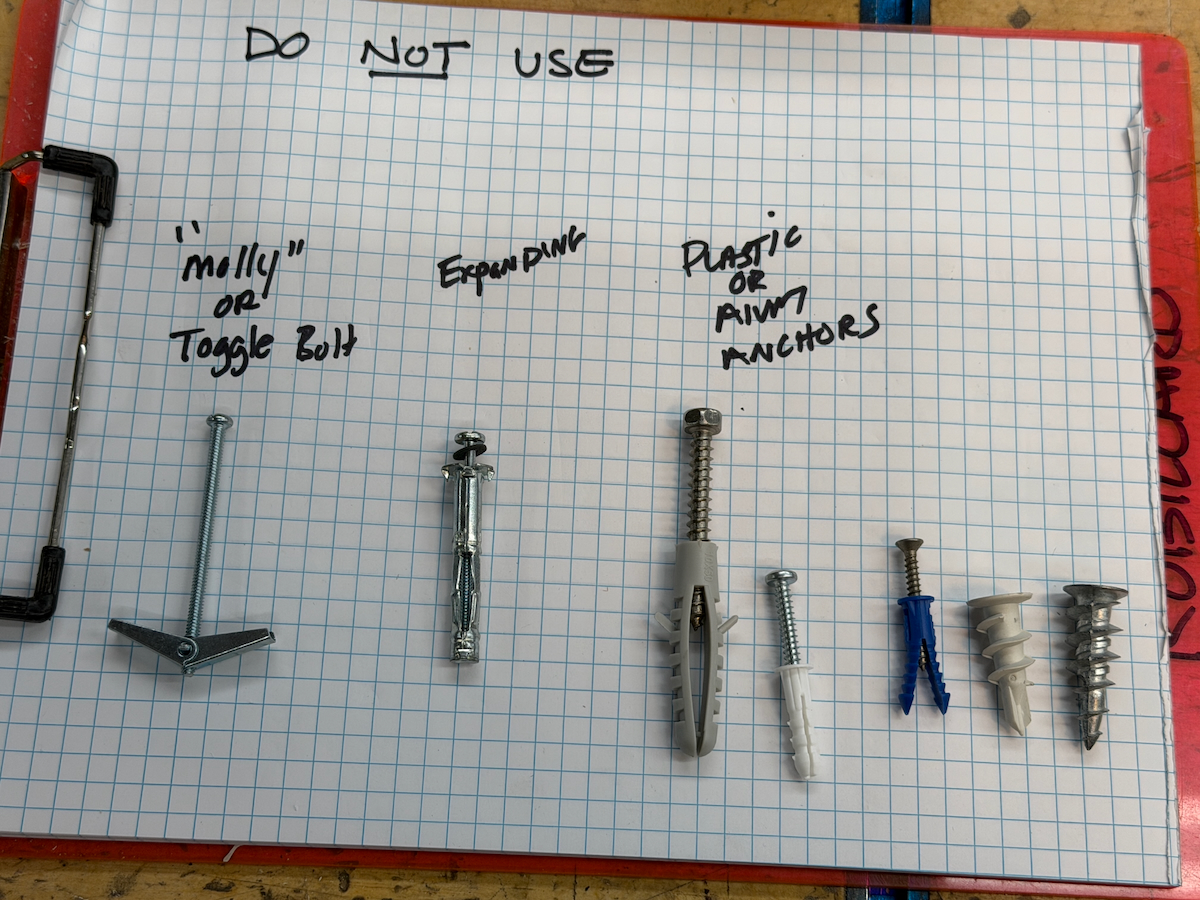
A standard drywall anchor mount will fail if someone attempts to pry the unit off the wall. Here is the professional approach for both stud and between-stud mounting. I’m going to discuss three methods for securing this unit:
- Direct Fastening to a vertical or horizontal studs
- Installing Solid Blocking for Custom location mounting
- Mounting to Masonry
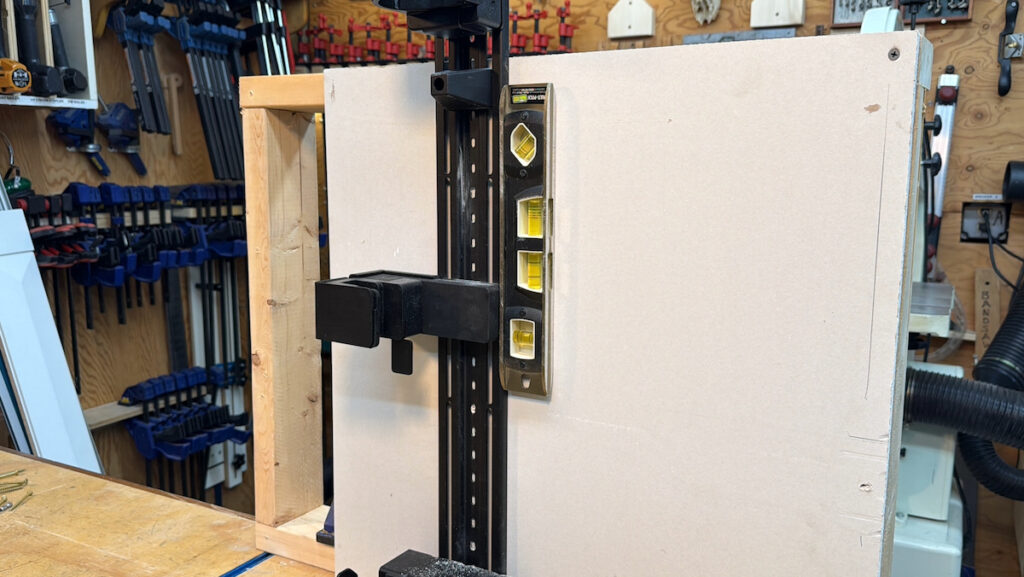 Direct Mount | Wall-Stud Framing
The Vara Safety RACT B V2 features a 30-inch back rail with pre-drilled mounting holes designed to span standard 16-inch or 24-inch on-center framing if mounted horizontally.
If you are mounting it vertically (the more common setup for a closet wall), you must center the rail perfectly on a single structural wall stud or install solid blocking.
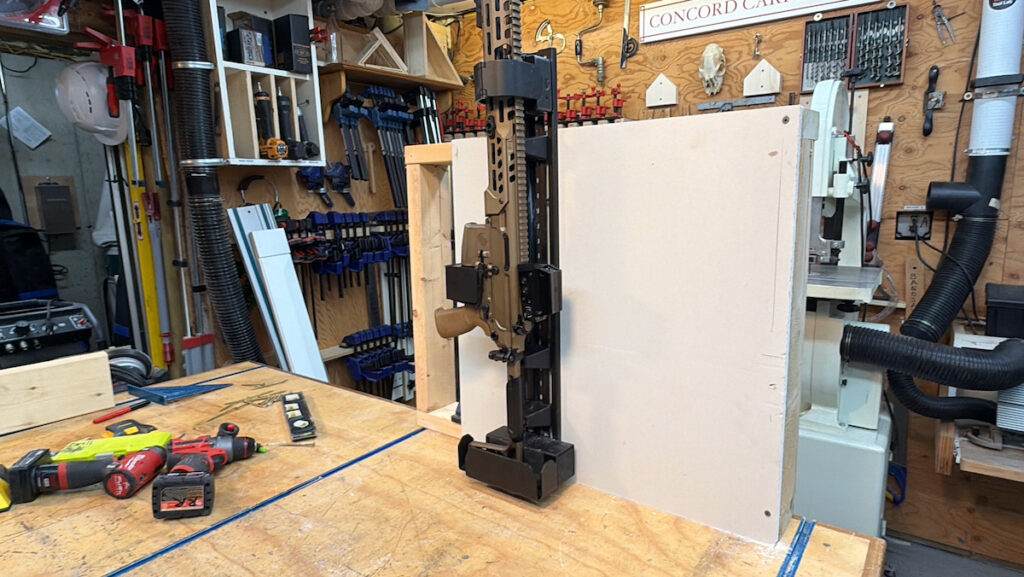 While direct wall-stud mounting is an excellent way to ensure the safe cannot be pulled from the wall, how many installations have you performed where a wall stud was exactly where you needed it?
If mounting to a wall stud, you need to use 3-inch structural screws to ensure deep engagement into the center of the framing member. I feel you should install 5 to 6 screws spaced evenly along the rail.
Pro Install Tips:
Locating a Wall Stud:
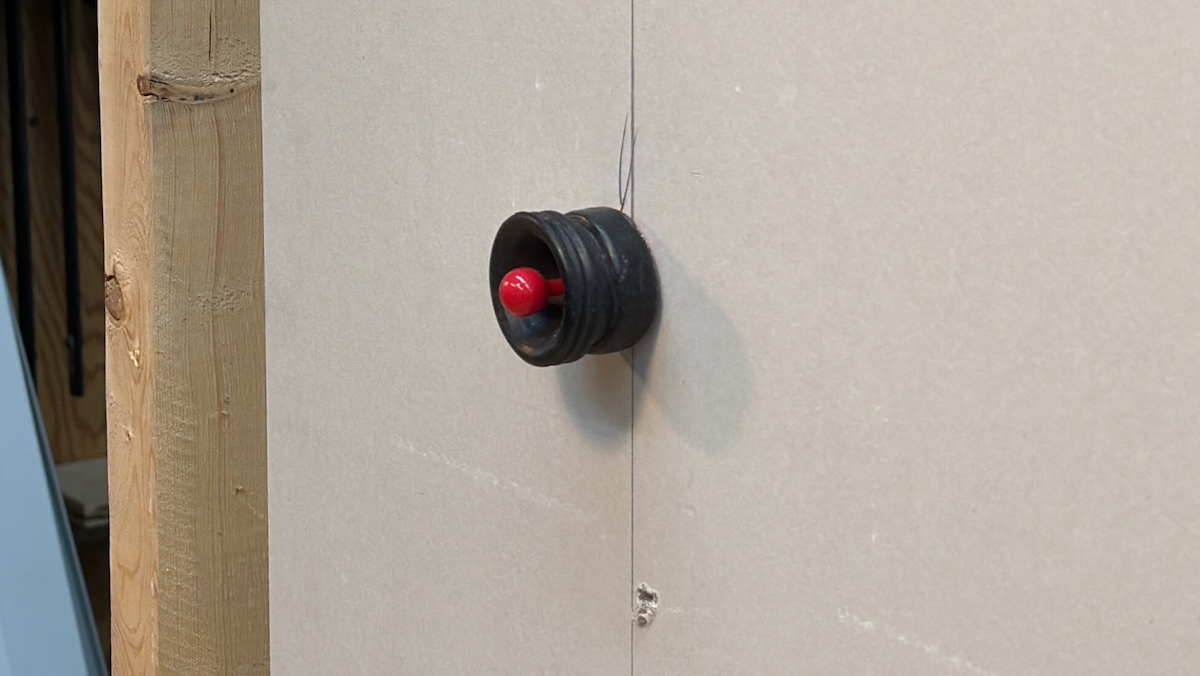
Use a high-quality stud finder [or a magnet] to locate the center of the vertical wall framing. I use an $8 Stud-Pop Magnet to go back and both, up and down on the wall to locate drywall screws. These screws are typically installed in the center of wall studs.
Pre-Drill Pilot Holes:
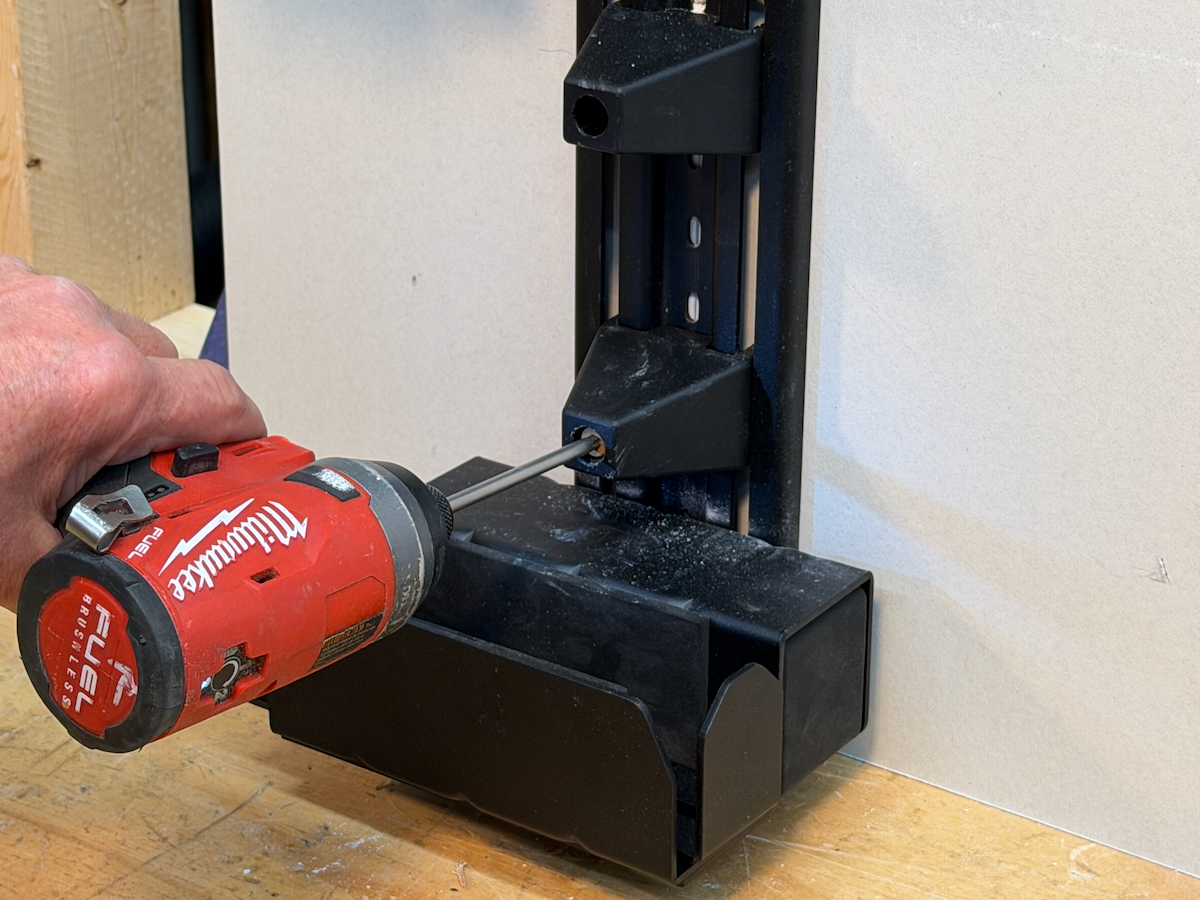
Don’t skip this step. Drill a pilot hole using a drill bit sized to the smooth shank of the lag screw. This prevents old, dry framing wood inside your walls from splitting when you drive the 3-inch screw home.
Alignment:
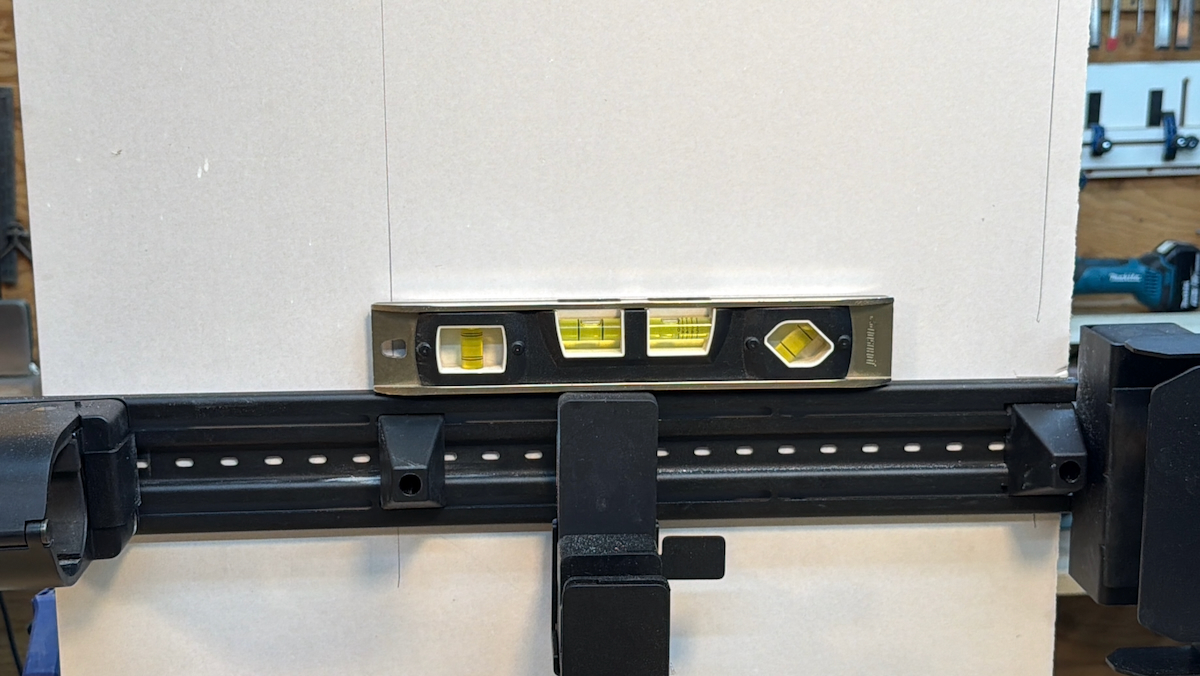
Ensure the mounting plate is level | plumb before driving the second screw. A level or plumb unit ensures the biometric holster operates smoothly without binding.
Pro Tip:
Vertical Install:
- Install the top fastener first then use a torpedo level to plumb the rack and install the other fasteners.
Horizontal Install:
- Install one fastener [Left or right] then use a torpedo level to level the rack and install the other fasteners.
Fasteners:
Use 3-inch GRK or similar structural screws with a built-in washer head, or a deck screw and washer. The washer offers significantly higher pull-out resistance than standard wood screws or drywall screws.
3” Solid Blocking | Between Wall-Studs
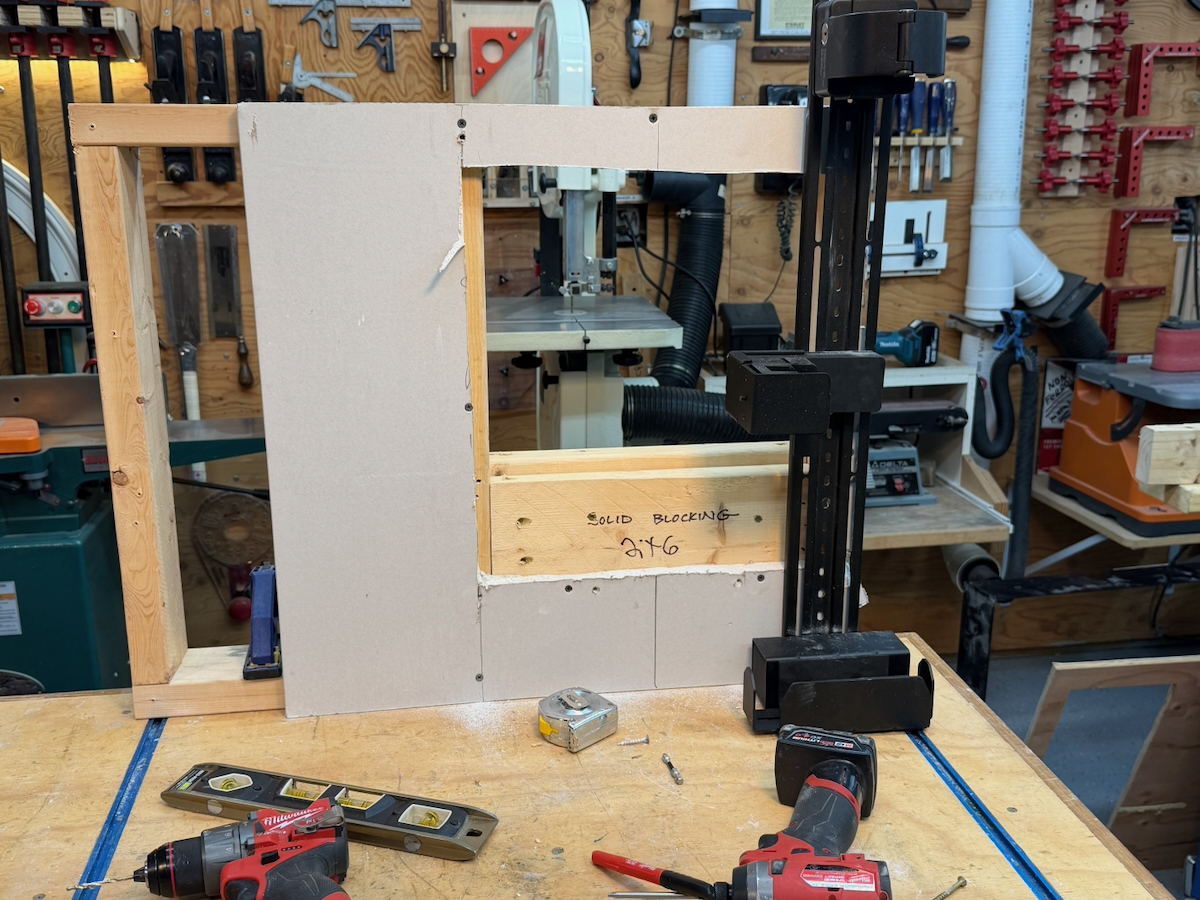
If the desired location for the Vara Safety RACT B V2 is between two studs, you can install 2 layers of 2×6 or 2×8 horizontal blocking. This provides a solid wood surface to mount the rack between wall-studs. You’ll need to install 3-4 blocks flush with the edges of the wall studs. to allow you to install 4 to 6 screws vertically along the safes mounting rail.
Pro Tip:
Solid blocking should be direct fastened when possible. This means that your blocking is fitted from wall stud to wall stud and screwed thru those studs into your blocking.
This is method allows you to mount the Vara Safety RACT B V2 anywhere on a wall and still achieve 3-inches of solid wood penetration.
Unfortunately, it also means that you may have to open the drywall to expose a larger wall cavity, so you can get a fastener and installation driver through the wall studs.
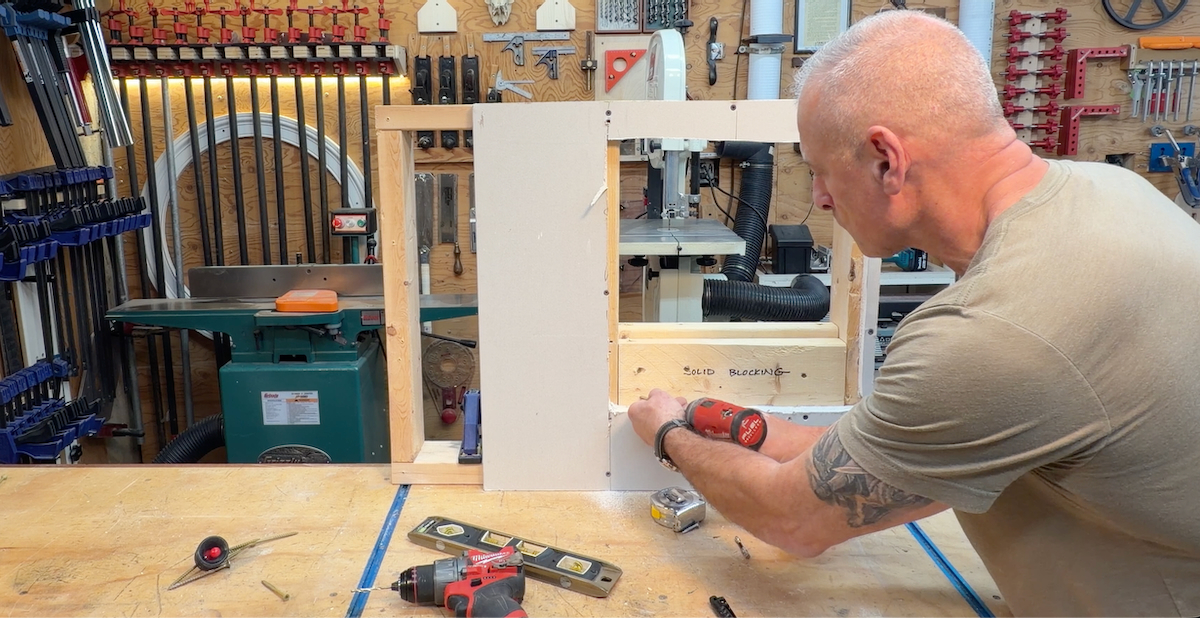
Install Tips:
Opening the Wall:
Determine the location and height where you want to mount the Vara Safety RACT B V2 . After locating your wall studs, in your desired location I suggest you poke a few inspection holes to look for wires, pipes or other obstacles. This can save you a ton of time later.
Wire Location Tips:
Here are a few reliable ways to locate wires behind drywall without opening the wall:
- Start with logic and layout
Electricians usually drill through studs at a consistent height.
Wires often run:
-
- straight up from outlets/switches
- horizontally between boxes
- Use a stud finder with AC detection
Many modern stud finders can detect live AC wiring.
Cutting Open the Wall Board
Once you’ve located a good spot, mark the top and bottom height of the Vara Safety RACT B V2 rack [27”] Use a level to mark center of your wall studs, this is your cut line.
Remember that to direct fasten blocking, [strongest method] you’ll need to cut open the wall board [left and right] an additional stud. [that’s 3 wall cavities exposed.]
Alternative Fasten Method: If you want to reduce the size of the wall opening you can open just one wall cavity and toe-nail the blocking into the sides of the wall studs. This method is not as strong as direct fastening.
Cut the Drywall
You can use a utility knife, multi-tool or if you’re me a drywall cutting tool attached to a vacuum.
When using a utility knife, you will need to make multiple scores thru the drywall vertically along the wall stud. A drywall saw can be used to cut the drywall horizontally between wall studs. Be careful NOT to penetrate too far into the wall cavity so you avoid any wires or pipes.
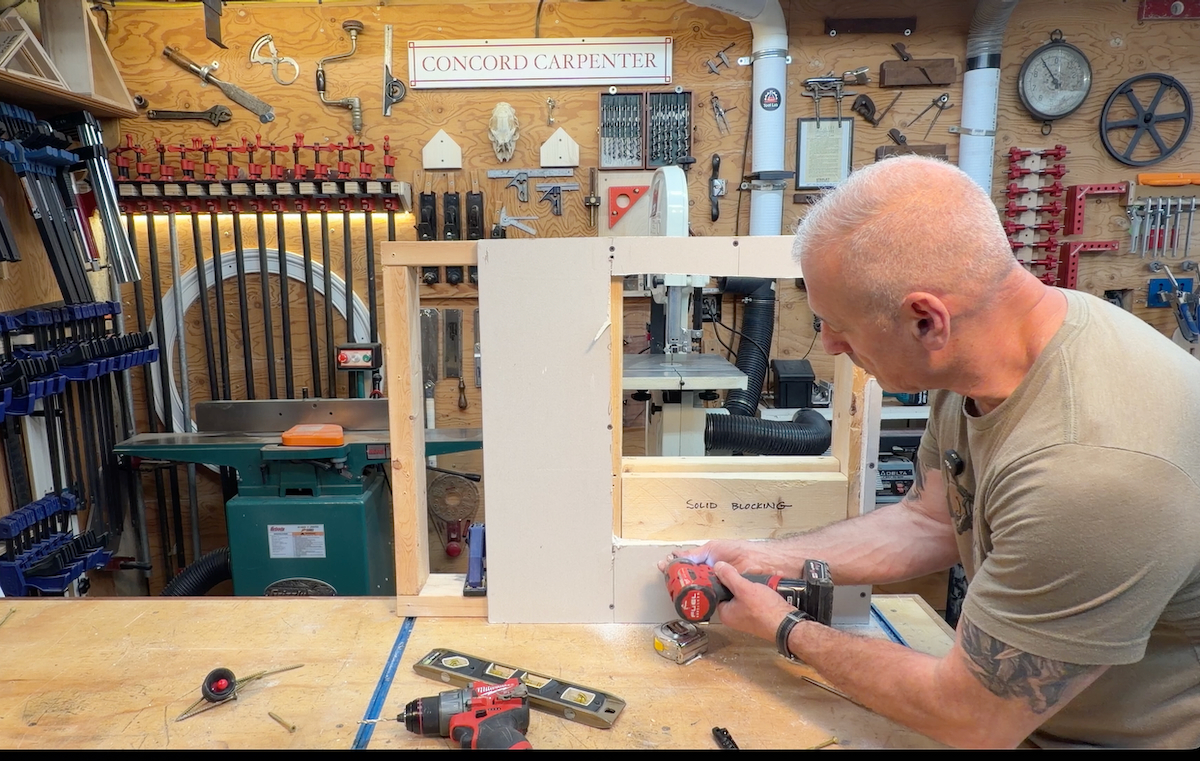
Installing Blocking Material
Use a piece of 2×4 or 2×6 kiln-dried lumber.
Direct fasten or toe-screw the block into the adjacent studs so it sits flush with the front edge of the framing.
- Fastening:
Use two or three, 3-inch screws on each side of the block for maximum rigidity.
Install blocking either with direct fastening [thru stud and into the blocking] or by toe nailing. [angled thru blocking and into wall stud]
- Patching:
Once the block is in, replace the drywall and secure the safe’s mounting plate directly through the drywall into the new solid wood backing.
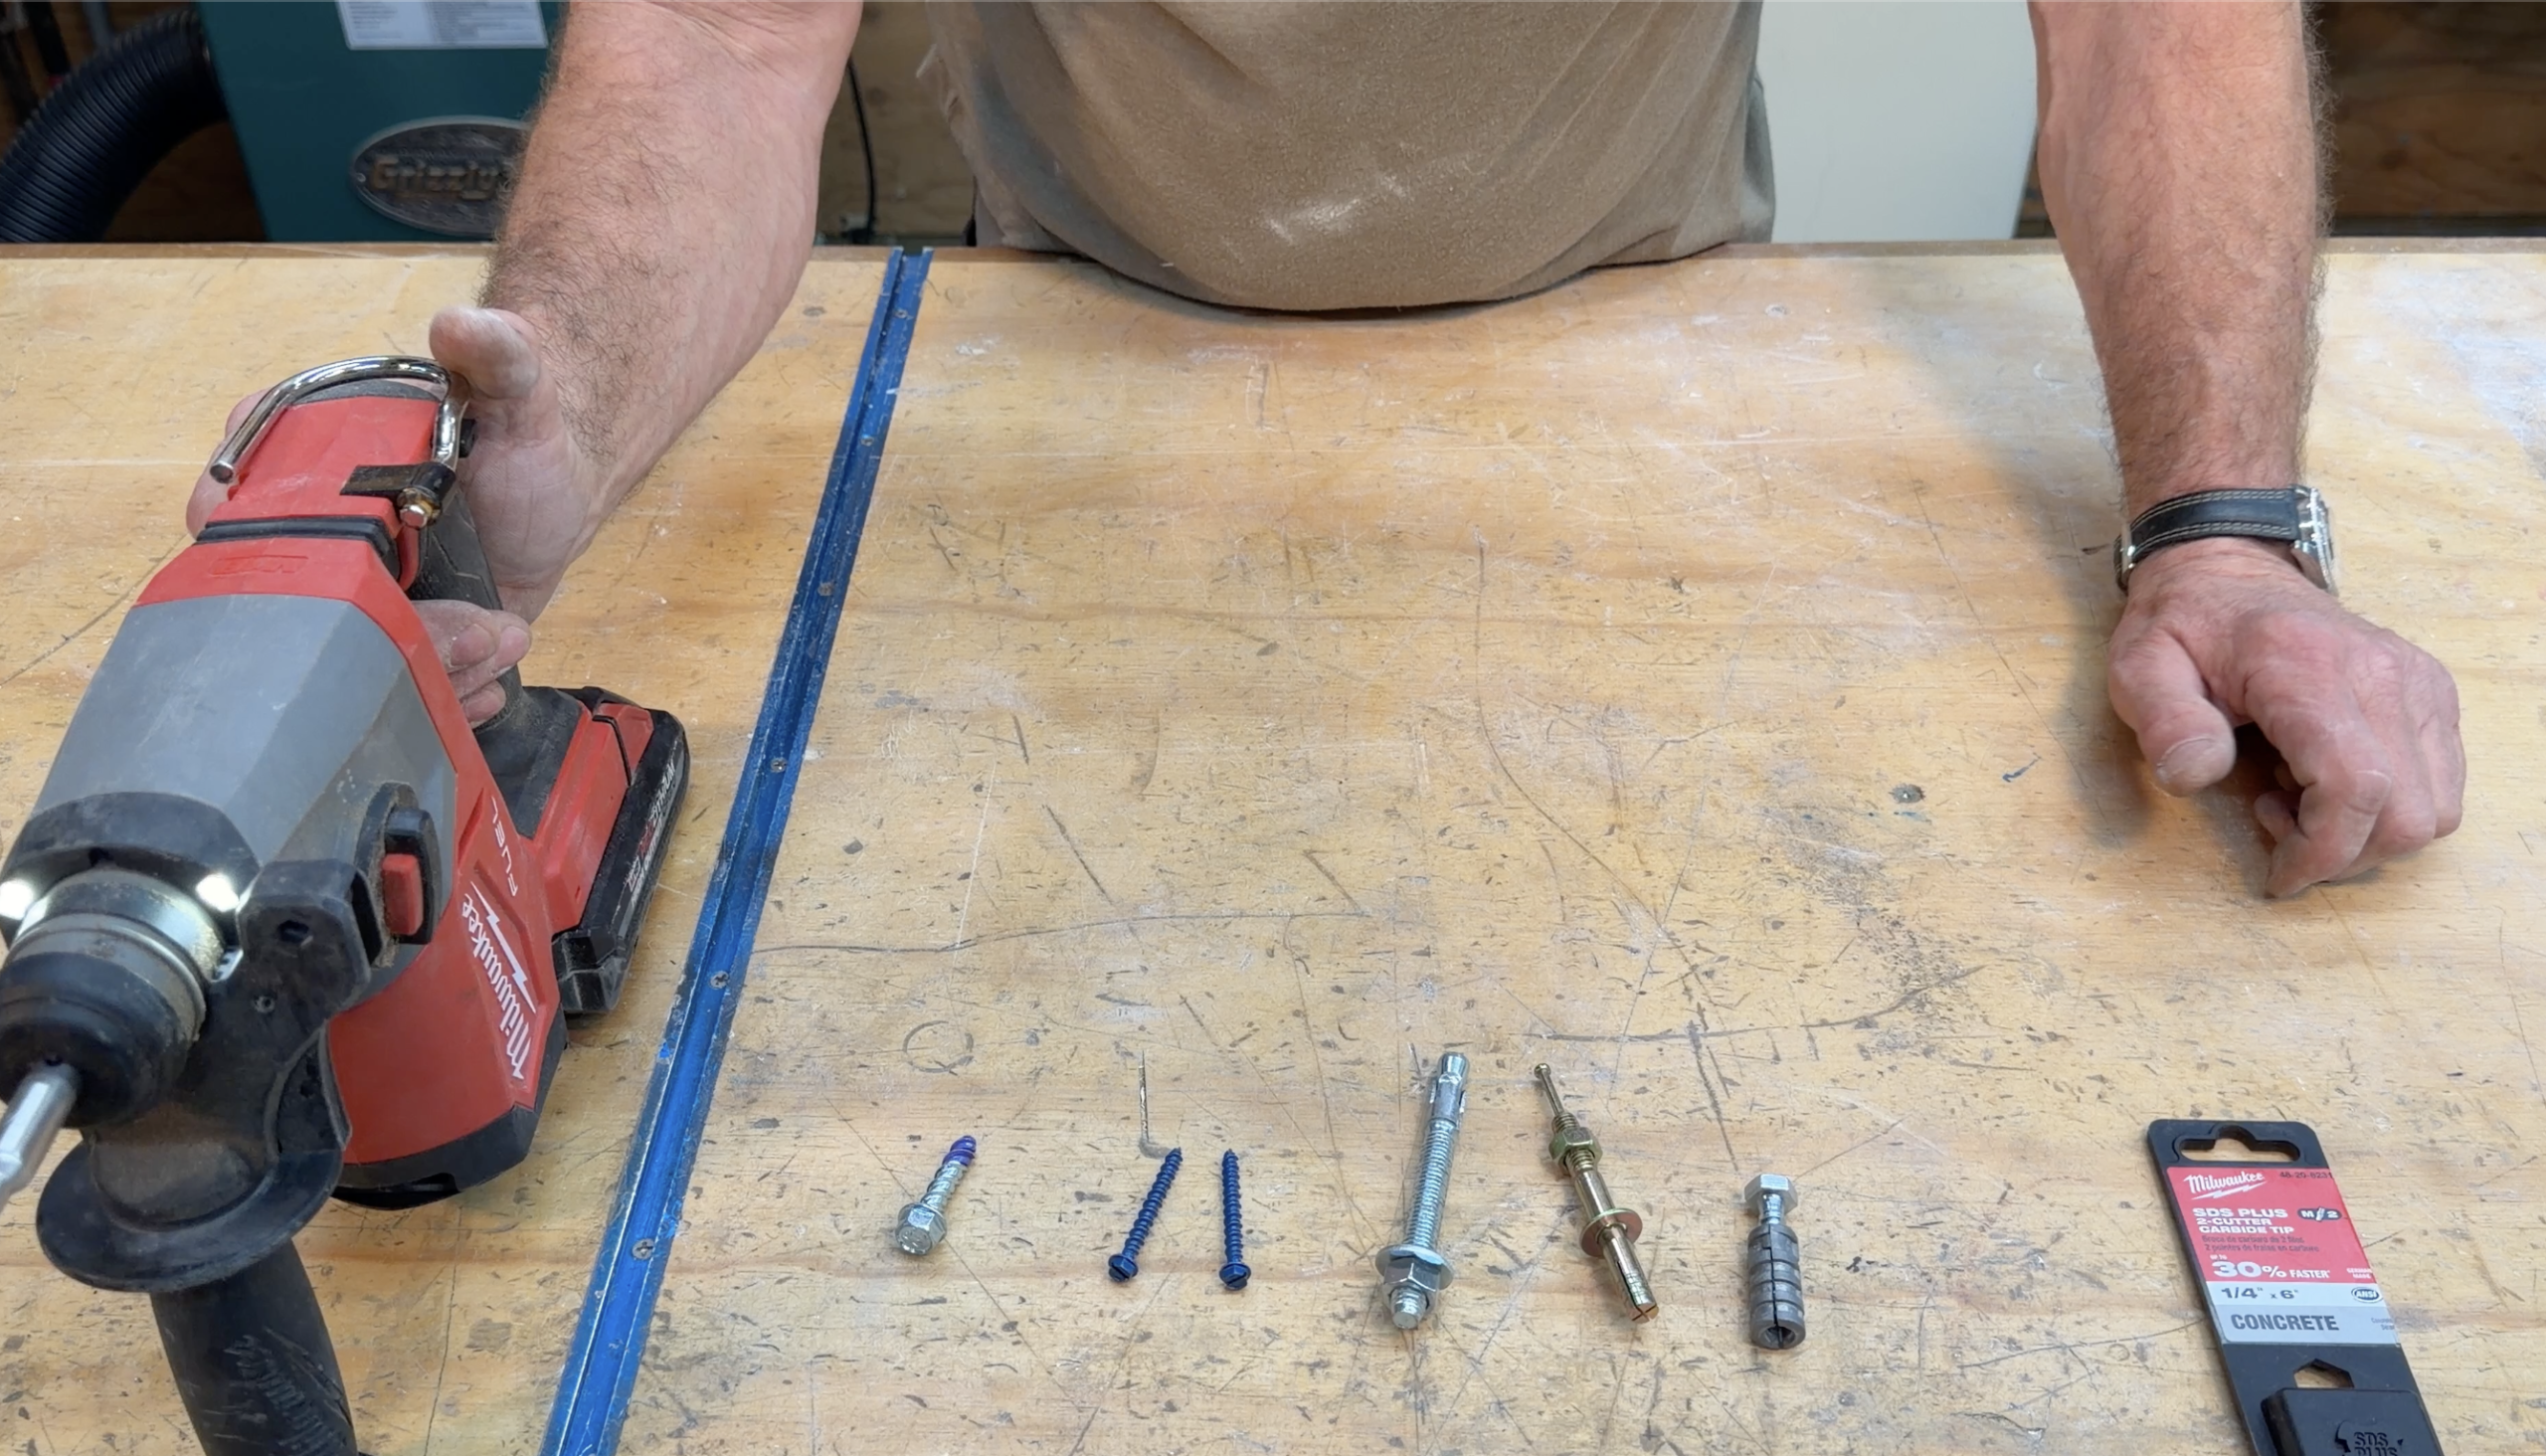
Masonry Anchoring:
For brick, Concrete block or concrete, you can install 3” Tapcon screws directly into holes drilled into concrete, or drill and install sleeve anchors, which accept lag screws.
In these situations, make sure you follow the manufacturers sizing recommendation or the proper drill bit size and hole depth. Also make sure you vacuum out the hole before installing your fastener or anchor – doing this will prevent the anchor from spinning or pulling out under force.
Before Drilling Into Masonry
Not all masonry is structurally equal. Old brick, hollow block, soft mortar joints, and parged foundations can have significantly reduced holding strength. Always inspect the substrate before drilling. Avoid anchoring into cracked brick, deteriorated mortar joints, or hollow areas whenever possible.
Anchor Placement and Spacing
For maximum strength, fasteners should be spaced evenly across the mounting rail to distribute pry forces. Avoid placing anchors too close to the edge of brick or concrete, as this can cause cracking or blowout during tightening.
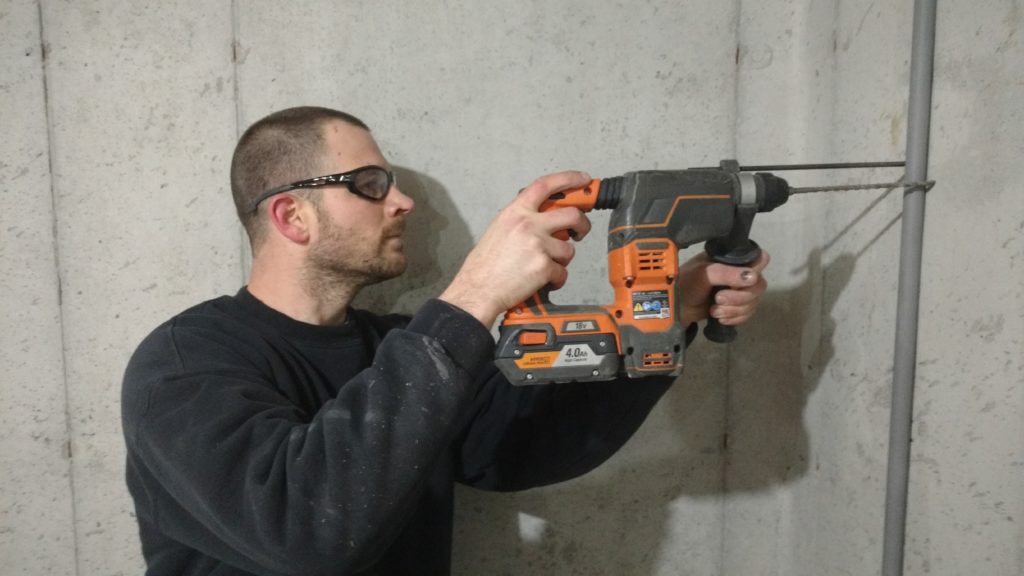
Recommended minimum edge drilling distances:
- Brick:
Install into the center of the brick, or at least 1-1/2” from edges
- Concrete:
Stay at least 2” from edges
- Block:
Avoid hollow cells unless using specialty hollow-wall anchors
Drilling Tips:
Use a rotary hammer instead of a standard hammer drill when drilling into dense concrete. A quality SDS rotary hammer produces cleaner holes with less effort and reduces anchor installation problems.
If the masonry surface appears questionable, install a steel backing plate or relocate the mounting area to a structurally sound section of wall.
Concrete Block:
Hollow block requires caution. If possible, fasten into the solid webs of the block or use epoxy-set anchors designed for hollow masonry applications.
USB-C Charging Cord Cable Management
While it’s not needed, if you decide to keep the unit plugged in for constant power, the USB-C cable should be secured and tucked away to prevent snagging or accidental disconnection.
Use a 90-degree USB-C adapter to keep the cord plug profile slim against the wall or inside a cabinet, ensuring the cable doesn’t interfere with the quick-draw motion of the holster. I also recommend using zip ties and fasten the cord to the side mounting rail.
Final Thoughts
The Vara Safety RACT B V2 is less about “hiding” a firearm and more about controlled access, responsible storage, and fast deployment.
From a builder’s perspective, the heavy 12-gauge steel construction, the inclusion of proper structural fasteners, and the smart, adjustable rail system make this a highly reliable piece of hardware. If you take the time to mount it properly into solid wood framing, it becomes a permanent, rock-solid fixture in your home.