Mount an Upholstered Headboard to the Wall

Attaching an Upholstered Headboard To A Wall
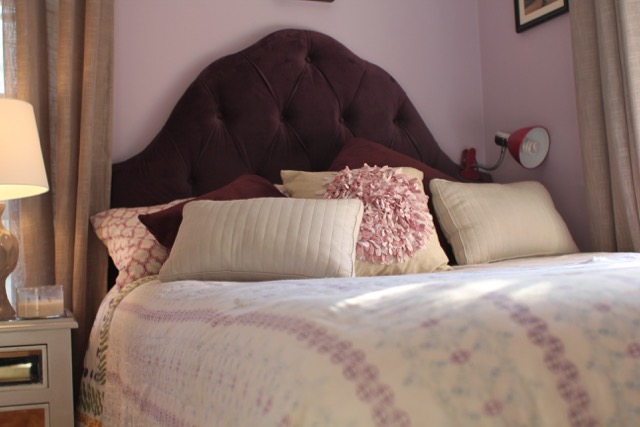
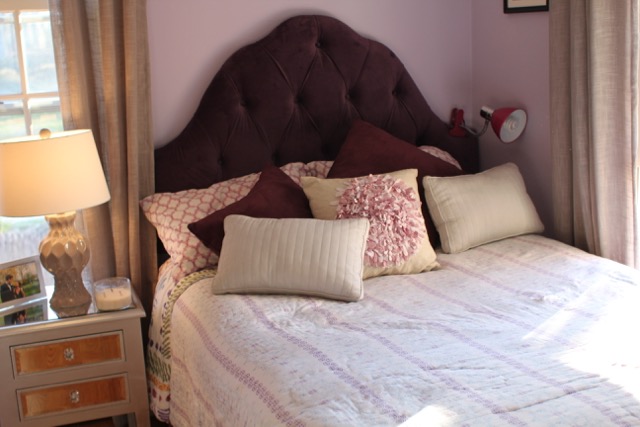
We recently purchased an upholstered headboard for my daughter. The headboard came with black metal bars that bolted vertically to the bed frame. The problem was that even with two bolts per bracket, the headboard swayed back and forth and did not allow my daughter to lean back against the headboard. The solution was clear; we needed to mount the headboard to the wall. This article will address how to mount an upholstered headboard to the wall.
Why Mount a Headboard to a Wall?
Attaching the headboard to the wall, with hidden, interlocking fasteners, creates a floating effect. Once mounted the bed simply pushed up against the headboard – similar to a lot of hotel set-ups. The goal is when you push the bed back into place; the two pieces will look as if they are one complete unit.
Mounting Fasteners
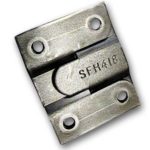
There are several types of hardware parts that you can purchase for flush mounting a headboard to a wall. Many hardware stores and even Amazon.com sells interlocking flush mount brackets, Z clips for heavier objects, or you can make an interlocking cleat. For really heavy objects or in difficult fastening situations, you may want to use interlocking plywood cleats, often referred to as a French cleat. French Cleats are easy to make, and super strong making and often span numerous wall studs making them a good choice for mounting heavy objects. For more on making and using French Cleats reference these two projects where I explain them in more detail.
How to Make A Crown Molding Shelf
How To Make A Custom Slate Chalkboard
4 Steps on How to Mount an Upholstered Headboard to the Wall

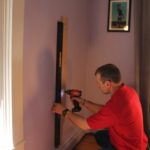
1. Locating the Headboard on the Wall
Position the headboard before moving the bed away from the wall. Keeping the bed in place helps give you a visual reference and is useful in locating the headboard placement.
If the headboard will rest in the middle of a wall, between windows, or other items; you should determine that center location, mark it on the wall, and use that center mark as a reference benchmark.
You will also want the bottom of the headboard to sit at least a couple of inches below the top of the mattress so the wall does not show between the two pieces.
Measure the headboard width and bottom edge, and mark it on the wall with a pencil. Use a 4-foot level to level over and locate the headboards left, right and the bottom edges. Locate the headboards center on the wall and make reference marks with your pencil on the wall.
Note – Using a level to locate the headboard on the wall will ensure that your headboard sits level. A problem may occur in an older house were the floors are out of level and the bed follows that “out-of-level” line. You can either mount the headboard level to the wall, or measure off the floor [left and right sides] to mark the same measurement and ensure that the headboard is parallel to your bed.
When done, pull the bed away from the wall, allowing you space to work.
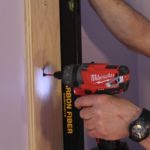
2. Measure For Interlocking Mounting Hangers
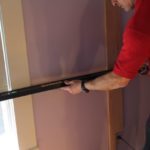
Lay the headboard on the bed backside facing up.
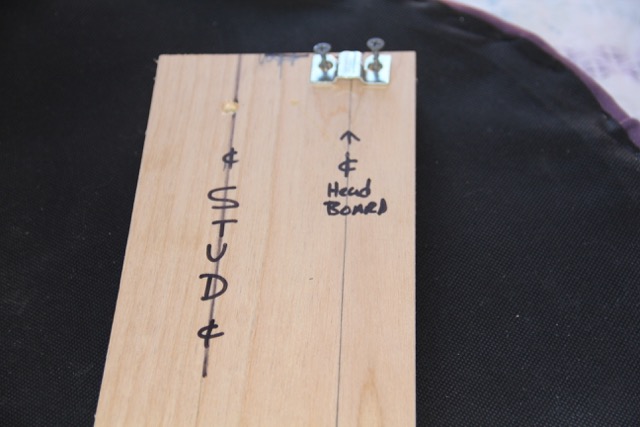
Locate the center-line of the headboard, if the back material is a dark fabric; consider using blue tape to make your pencil marks more visible.
You should have center-lines on the wall and on the backside of the headboard as your reference points. The next step is to examine the headboard for solid backing to screw into. Every headboard is different and you will eed solid backing to mount your fasteners to.
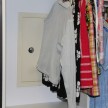
Photos: In my situation, out headboard overlapped 3/4” window trim so I needed to “pad” out the other end of the headboard to match the trim.
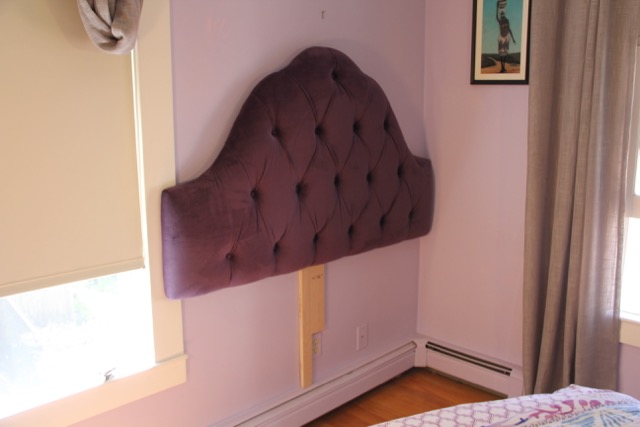
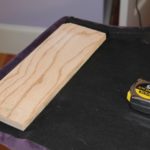
On my headboard, I had a continuous vertical solid divider and some solid material on the sides. I simply added plywood and some adhesive felt where it rests on the far sidewall. I also needed to add a vertical board to line up with the solid board in the center of the headboard. This board was used to pad out the wall ¾” similar to the window trim.
I purposely ran the vertical wall mounted board all the way down to the baseboard heater to give vertical point load, to carry weight. While the headboard is not that heavy, I thought it would help if I was not able to fasten the board into a wall stud. Turns out, the vertical strip was centered directly over a wall stud.
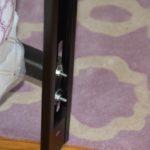
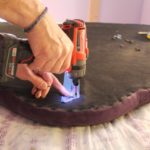
3. Mounting Hangers On The Headboard
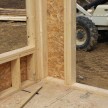
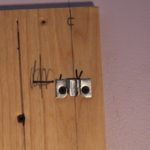
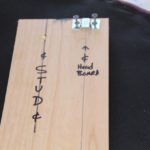
If possible, first locate wall studs to help determine the stud locations on the headboard framing. To locate the wall studs us a stud finder.
If wall studs are not available, insert wall anchors, or span some plywood [French Cleat] across two adjacent studs. The location of wall studs may influence your decision on where to attach your mounting fasteners, so take some time here and lay that out correctly.
For larger or really heavy headboards, use a third or fourth flush mount fastener to carry and distribute the weight, or a French cleat.
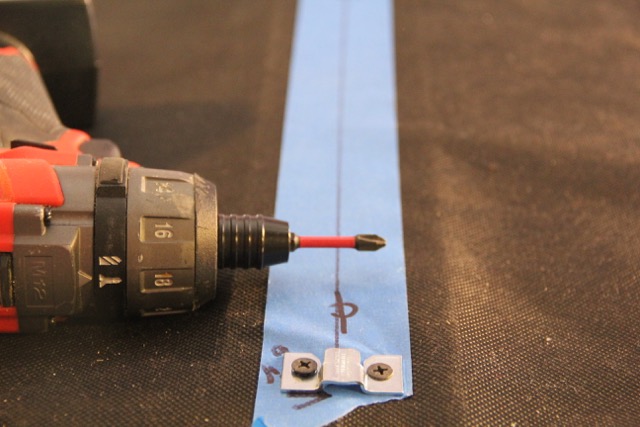
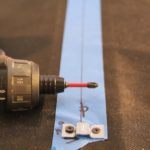
Measure and mark for the hardware placement on the back of the headboard. Depending on the size of your headboard, the spacing of your hanging hardware can differ. I placed two fasteners approximately 30-inches apart, slightly down from the top, and up from the bottom edges. The fasteners were mounted on the headboards vertical center-line, where there was a solid structure. I placed the opposing mounts on the wall center line.
Because the mounting fasteners interlock with each other, they should be installed at the same spacing measurements on the wall as on the headboard. The headboard fasteners will be mounted facing down, and the wall mounts are facing up. [Interlocking]
Tip: Use the headboards bottom edge, reference line you made on the wall to ensure you have the correct interlocking mounts spacing both objects. Use a tape measure to confirm the wall mounts and the headboard mounts are the same distance apart.
4. Install the Headboard
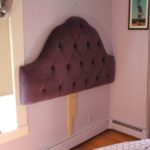
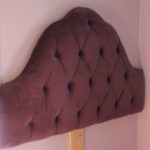
Slide the headboard down the wall and into place. If installed properly the mounts will interlock and secure the headboard to the wall. Adjust the mounting fasteners as needed to get a perfect look. If you need to rise or lower the headboard try to adjust one set of fasteners only, such as the two fasteners on the headboard.
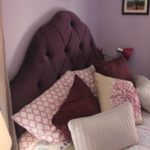
Once satisfied with the fit and finish, push the bed against the headboard. My daughter is a voracious reader, she now can sit up in bed and lean back when reading, and I’m a hero!
Tools and Materials Needed
- Measuring tape
- 48” level
- Blue tape
- Pencil
- Drill driver
- Stud finder
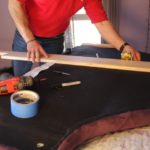
- 1-1/4”inch wood screws to mount fasteners, plywood to headboard
- 2-1/2 inch screws to mount to wall studs
- Drywall anchors
- Interlocking Fasteners, Z Lock or French Cleat
- Scrap plywood or material for cleats and padding
How to Mount an Upholstered Headboard to the Wall Video
-
- Old Bed Mount
-
- Pad to Match Window Trim
-

- Vertical Wall Mount
-

- Center of Wall
-
- Fastening To Wall Stud
-
- Plumbing
-
- Checking Window Trim Plane
-
- Installing INterlocking Mounts
-
- Installing Mounts
-
- Vertical Board on Wall
-
- Headboard
-
- Headboard Mounted
-
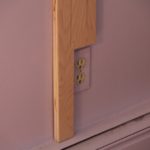
- Notch at Outlet – Allows Fastening into a Wall Stud
-

- Window Trim Holds Headboard out 3/4″
-
- Vertical Wall Board Centers
-

- Finished HEadboard
-
- Laying Out Mount Locations
-
- Inerlocking Mount