How To Make A Shaker Peg Rail

Making a Shaker Peg Coat Rack

Everyone seems to appreciate the quality and simplistic utilitarian style of Shaker craftsmanship. It’s super easy to make your own Shaker style coat rack with maple pegs.
Here’s how:
What you will need:
- A board [e.g. 1×4] of the length you need
- Enough pegs to fill your needs. A bag of four maple pegs cost $3.oo

- Wood plugs if you wish to hide your mounting screws.
- Glue
- ¼” bead bit for a router – in order to make an authentic looking shaker peg rail
- A drill bit sized to your peg diameter. I recommend using a Forstner bit for is consistent and quality hole.

How to make a Shaker Peg Rail:
- Size your board to fit your needs. I find a 1×4 boar at 3-1/2” works well and looks great without ripping it on a table saw.
- Locate the center of your board and mark the
 center.
 - Determine your peg spacing. Six inches works well.
- Lay out your hole spacing left and right out from the center mark. To start measure 3” left and 3” right. Mark those locations, then measure 6” off each mark till you get to the end of your board.
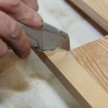
- Drill your holes at your marks. Make sure to mark your drill bit with tape or a marker so you know how to drill to the correct depth. If you drill all the way through that’s ok too.
- Sand all mill marks and pencil marks off your board.
- If you would like an authentic looking Shaker Peg Rail, use a router to add a ¼” bead to both long edges of each board.
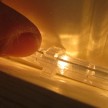
- Apply a little glue to the peg end and insert it into
 your bored holes. Use a hammer and a scrap block of wood to tap the pegs flush to the board.
 - Wipe excess glue off and let dry.


10. Mount your rail to wall studs with 2-1/2” screws.
11. Nicer finish options are to pre-drill, countersink and plug your screw holes. Wood plugs can be purchased at the same location as the Maple plugs.

If you enjoyed this post, make sure you subscribe to my RSS feed!