Adding A Wider Window Sill
Installing A Wider Window Sill
While installing this window last month my customer asked if there was any way to install a wider window sill. v The old window sill was 1 1/2″ to 2″ deep and was useless for displaying items.
If you enlarge the photo above you will notice that there is tile not wood underneath the window. There is also a faucet on the right side.
Both of these two items create concern. First there is no place to nail down and secure a large window sill and second the sill could not impede the faucet and we did not want it getting wet.
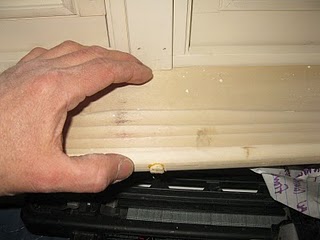
We decided on 4 1/2″ for a sill depth. This enough left space away from the faucet.
To secure this sill we drilled through and deeply counter set 4″ screws.
It is common knowledge that the best way to get a job done is to have the right tools, a countersinking bit makes this job much easier. Here’s a few tips:
1. Measure the length of the screws being used, and mark that measurement on the drill bit with a piece of masking tape. The bit will be used to drill a pilot hole, which is done in order to allow the screw to pass into the wood easier and to prevent splitting. The bit should be skinnier than the threaded part of the screw.
2. Use a larger bit to make the hole for the wood plug and drill this larger hole first. Drill the pilot hole, stopping at the tape.
Alternatively you can use a specialty countersink bit, shown below. Countersink bits are usually tapered and will drill the pilot hole as well as the hole for the wood plug.
3. Install the screws, making sure they are slightly embedded into the wood.
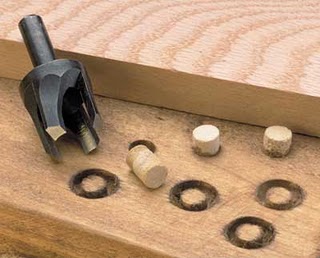
4. Use a plug cutter and make wood plugs with scrap cut offs from the same material of the window sill. Install the plugs with glue and set them proud so they can be trimmed and sanded to match the round edge of the window sill.
The screw holes were then plugged, chiseled flush and sanded.
Finished and awaiting paint!


