How to Install Speaker Wire Behind Crown Molding
Hiding Speaker Wire Behind Crown Molding
A client of mine asked for me to install crown molding in his living room.
We always buy the moldings we install at Anderson McQuiad, a local mill shop. All the moldings are made on site and always have very sharp, detailed profiles. This particular molding is made from poplar species.
This morning, when we arrived to install the molding, the client told us that he wanted to install a surround sound speaker system.
He asked us if we would be willing to run speaker behind our moldings and then let the four wires run down the corner of the wall.
Fishing Wires In The Wall
We agreed but told him that instead of leaving the wires visible we would hide the wires in the walls stud bay leaving him with a better looking, finished product.

Installing Speaker Wire
Speaker wire was installed in all four corners of this room. The wire was stapled 1-1/4″ inch down from the ceiling in order to allow for a 16 penny finish nail to be driven at a 45 degree angle through the molding and into the wall top plate.
We use 16 penny nails verse pneumatic driven nail because they tend to “suck” the molding tight against the wall and ceiling leaving less of a seam to caulk and a better installed molding.
A hole was made in the top of the wall just under the top plate. The molding covers this hole so no patching was needed.
Hiding The Wires In Stud Bay
A second hole was made in the same stud bay down at the floor level. The wires were routed through this hole and will run into a t.v. stereo receiver.
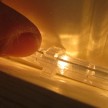
I did not have my electrical “wire fish-tape” with me so we used a coat hanger to “fish” the wires out of the stud bay.
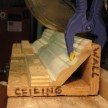
This photo shows a sample of the molding and how it corresponds with the speaker wire.
Notches were made in order to allow the speaker wire to run the perimeter of the room.
The client specified that he wanted to mount his speakers just under the molding.
Coping The Crown
We notched the bottom of the crown molding 3″ inches out from each corner for his speakers.
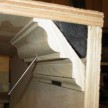
Speaker wire shown after crown molding installed.


