How To Install Crown Molding with Rope Lighting

Install Crown Molding with Rope Lighting
 Ever since I installed rope lighting behind crown molding on this 2004 project I wanted to do it again. Seven years later I got my chance.
Learning how To install crown molding with rope lighting is easy.
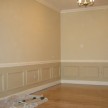
The screen porch pictured here is mine. I spend countless hours out here from working to relaxing to entertaining. I love this room and recently decided I wanted to install crown molding with rope lighting as accent lighting.
Adding rope lighting creates spectacular light accents and a inviting mood light. The problem I had was choosing the Crown molding. The room has a simple country design with its tongue and groove breadboard, wood floor and wide flat window casing. I thought crown molding would be too fancy for this room.
I almost gave up on the notion of rope lighting when I realized that I could make a simple Shaker style molding out of 1×4 flat boards. The Shakers were known for their Craftsmanship as well as their simplicity.
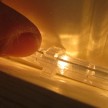
Once I decided to install crown molding with rope lighting I measured the room and went to the store to buy rope lighting. I took the easy road and bought rope lighting at a factory determined length with a wall plug. I think I spent $40.00 on the lights. An electrical supply store can provide you with the tools and materials needed for custom sizes.
Making the Shaker Style Crown Molding:

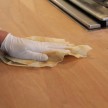
I started by buying long enough boards to span the three 14’ walls of my porch. Using my table saw I ripped all four edges of these boards . When ripping long boards like this make sure to use extension rollers to keep the board level and in line to the saw blade.
Two cuts opposite side cuts at 35 degrees gave me the wall angle and top edge of the crown molding, and two opposite cuts at 45 degrees gave the other angles. [See photo] Once all of the boards were ripped I used a hand block plane to remove the saw marks, lightly sanded the cuts out and primed all of the bare wood.