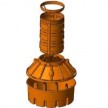
Installing A Wall Safe

How To Install A Wall Safe:
Most crimes committed are related to theft of personal property from a residential location.
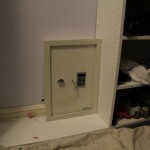
There are many precautions you can take to secure your home from locking your house to installing an alarm. Installing a wall safe is also a way to further secure items inside your home. I think of a wall safe as a lock box bolted to the wall. It will never totally prevent theft but it will seriously slow down anyone trying to remove it.
The best way to enhance the security of a wall safe is to install it in an inconspicuous location and tell no one about it.
Installing A Wall Safe:
 Installing a wall safe is a relatively easy process, I recently installed one for a client and wanted to share a few tips with you in this post.
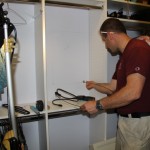
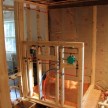
Start out by choosing your wall safe install location in a wall free from any piping and wires. There are several ways to do this from poking holes in the wall and peeking in, to using an inspection scope.
Wall Safe Installation Steps:
1. Purchase a safe that will fit in your wall. Most wall safes fit in a 2×4 wall cavity but there are deeper models  available depending on the location you choose. For my location I chose a wall safe that would fit in a 3-1/2″ wall cavity, between two 2×4 studs spaced 16″ on center.
2. Locate two studs in that wall area you have chosen. You can locate the studs with a stud finder, or look at the baseboard trim for finish nail locations. Stud finders are o.k to use but also can give false readings or pick up pipes. I would always confirm your meter reading with a visual hole after you determined a location with the stud finder.
Other ways to locate the wall studs are:
- Use a finish nail to penetrate the wall board until you find a stud, then measure 16 away and look for a second stud.

- Drill small holes or use a drywall saw to cut a narrow slot in the wall to look for and feel for anything that may hinder your installation. [i.e., pipes, wires, improper spacing of studs]
- Use a coat hanger wire or an electricians wire “fish tape” to search for studs.
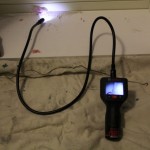
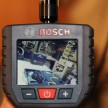
- Use an optical inspection scope. For this job I used the Bosch PS91-1A 12V Max Cordless Lithium-Ion Optical Scope.
- Read my post on How To Find Those 2×4 Wall Studs during a remodel.

Read this post on the Bosch inspection scope:

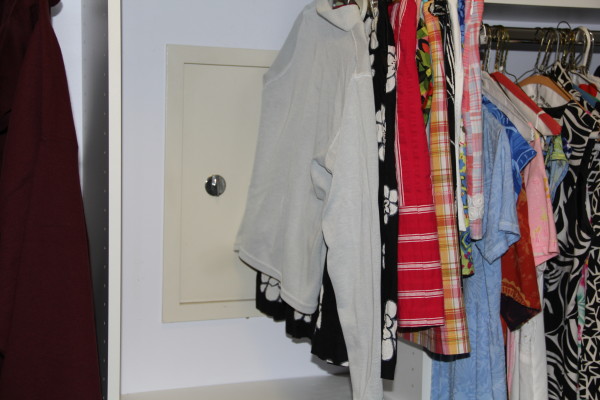
Clip from “Installing a wall safe” video
Looking Behind The Walls With A Bosch Inspection Scope
On the wall safe I recently installed I had to move my location three times because of obstructions; two locations had a masonry chimney in the way and the other location the studs were not spaced 16″ on center. Cutting out a stud is certainly an option but I did not want to, so I moved the wall safe location.
Video: Watch the install here
3. Avoid installing your wall safe in a wall space above electrical sockets. Many times the wires come down from above and may be in the way. Also avoid bathroom wet walls – walls where the plumbing pipes and vents run through.
4. Use dry wall saw to make a small hole that is large enough to find any plumbing or  electrical obstructions. If the area is not clear, find another wall space and repair the small hole later.
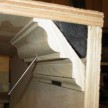
5. Once you have located a spot where the safe will fit, measure your safe and transfer your dimensions on the wall, next to a wall stud. Use a level to make level and plumb marks.
Most safes have a face flange that overlaps the cut out wall opening. Make sure you do not cut your hole to big or the flange will not overlap and hide your cut wall edges.
6. Cut out the opening: Cut the wall with a dry wall knife and remove the dry wall cut out. 
7. Fill in spaces: Depending on the width the safe you may need to add wood shims to the wall studs so the wall safe can sit snug between the studs.
8. I also recommend adding a stud on the bottom of the opening, between the two wall studs. Fasten this stud by toe nailing it to the wall studs. I use 2-1/2″ screws to so this and then use smaller screws to secure the dry wall to the new 2×4.
9. Secure the safe: Place the safe into the wall install the appropriate or supplied fasteners into the studs. Pre-drilling may be required if you are installing lag bolts.
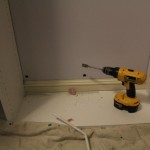
I used Timber lock fasteners and used my Dewalt 20V Cordless Impact driver with a nut driver to install them – super fast and no pre-drilling.
This 20 volt impact driver is super light and super powerful. Learn more about it and it’s sister tools in this post. Dewalt 20 Volt Cordless Tools
Stay safe!