Deckorators CXT Classic Railing Installation Guide

Deckorators CXT Classic Railing Installation Guide
Deckorators CXT Classic Railing system is an extremely durable system that is designed to withstand the toughest of elements. Deckorators CXT Classic Railing system is low maintenance and has the look of real painted wood. The CXT Classic Railing is constructed with co-extruded, 2 layer, scratch and weather resistant material. The railings are composite and are compatable with most Deckorators balusters and accessories.
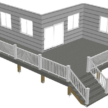
Deckorators Railing Installation Steps
Best part of the Deckorators railing system is that it is super simple to instal. With the right tools and following these steps, some would say installation is so easy that a weekend DIYer could do it. Having the right tools and material will make the process faster and more efficient. Here are the steps to install the Deckorators CXT Classic railing.
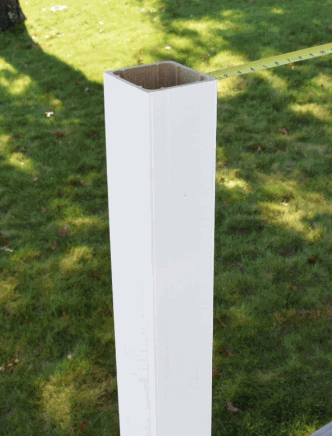
Step 1 – Installing Post Trim
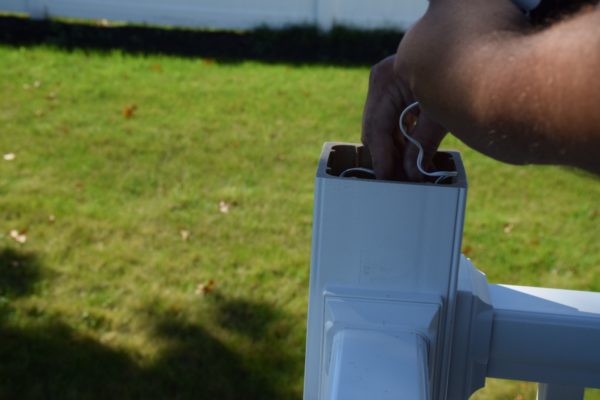
Instal the post sleeves over your decks pressure treated 4×4 post. Deckorators recommends the post sleeve be 1-1/2″ longer than your deck post but ultimately its your call on the post sleeve length. On our deck remodel our railing high was 36″ but we cut our post sleeves to 40″. The Client wanted the post light to be a little higher than the recommended 37-1/2″. We did this to allow room for low voltage wiring.
Note on tools:
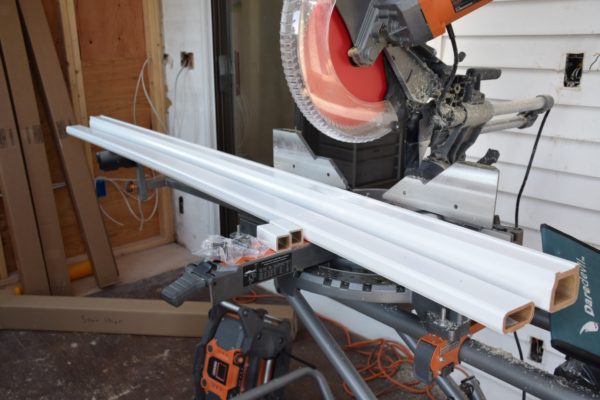
For our deck remodel we used the RIDGID R4221 12″ Miter Saw with mobile Saw Stand and a new Diablo 12″x 96 tooth blade.
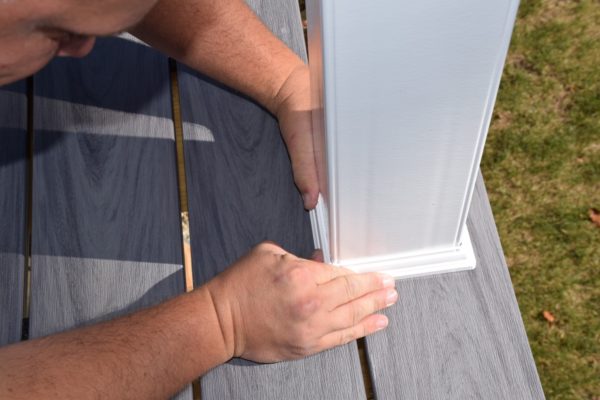
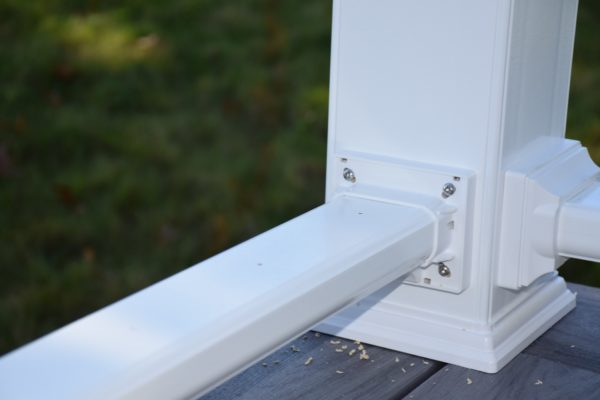
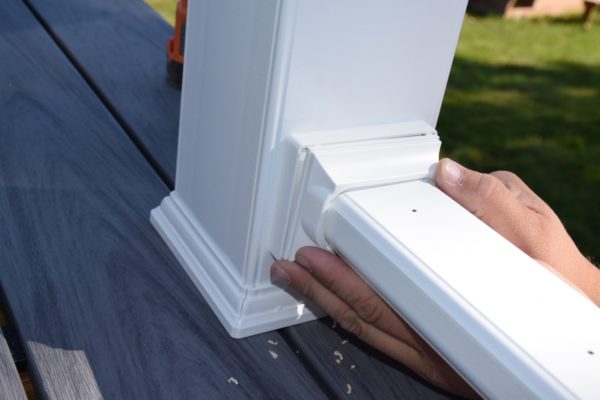
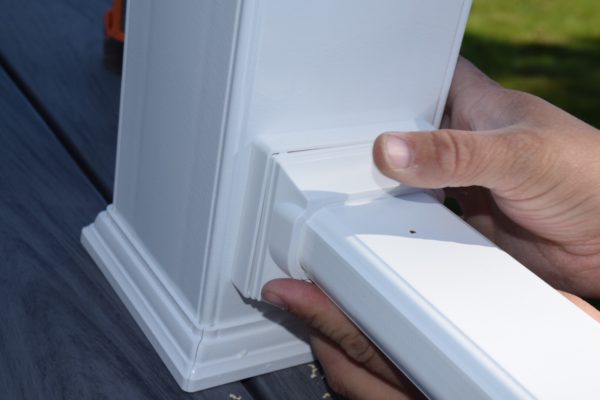
Once the post sleeve is installed you can add the post sleeve base trim. This is a 2 piece part that snaps into place and slides down the post sleeve hiding where the sleeve and decking meet.

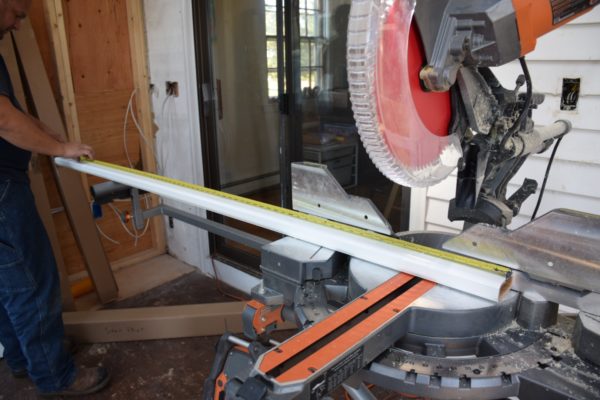
Step 2 – Determining Your Railing Distance
Measuring the distance between the posts is the easy part. The next part of the process can be tricky. Each of the top and bottom railing have pre-drilled baluster bracket holes. When cutting the railings to length you should make sure you are cutting off equally on either side. You want to make sure that your baluster spacing is equal, and looks right.

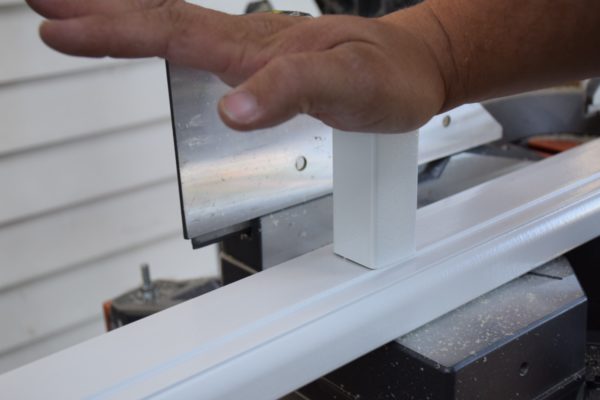
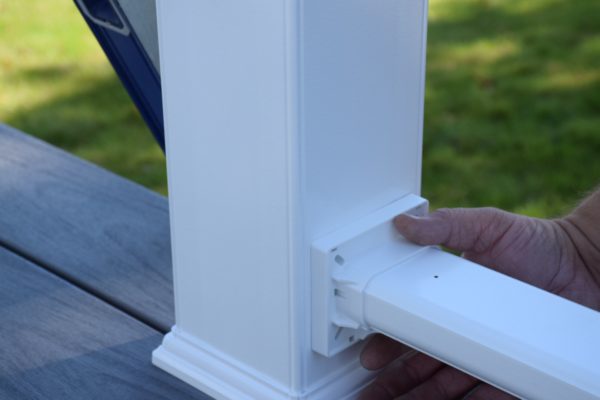
Step 3 – Installing Support Block to Bottom Railing
Support blocks are necessary to provid rigidity to the middle section of railing. To install this block, find the center of the bottom railing. On the bottom side, secure the support block(s) with the baluster connector and the screw provided. Deckorators provides one support block for their 6-foot railing sections and two for the 8-foot railing sections. For the 8-foot section, space accordingly, by measuring in one-third from both ends.

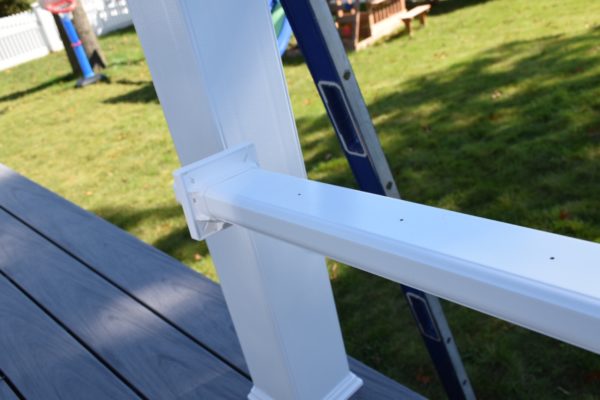
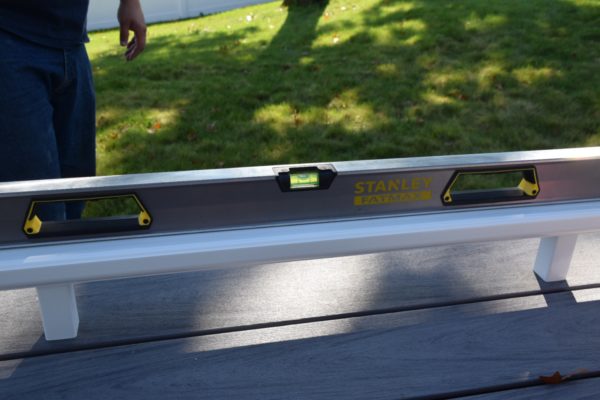
Step 4 – Installing the Bottom Railing
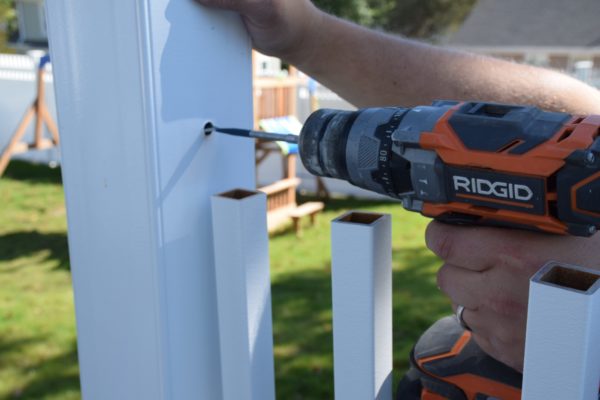
Now that the bottom rail support block is installed, you want to get the bottom rail in place and level. Put the bottom rail brackets on each side of the rail, and slide the rail into place. Use a 4′ level to ensure you are perfectly level.
Once the you have determined level, use a pencil and mark out the screw positions through the bracket. Pre-drill pilot holes and attach the brackets with the screws, provided. Deckorators uses #2 pan head square drive screws so make sure have a square bit handy!
Step 5 – Baluster Installation
Once the bottom railing connectors are secured you can now place the balusters on the connectors. This is as easy as it sounds. Once over the baluster connector slightly tap down with a rubber mallet.
if desired you can cut these balusters to achieve a different baluster / railing height.
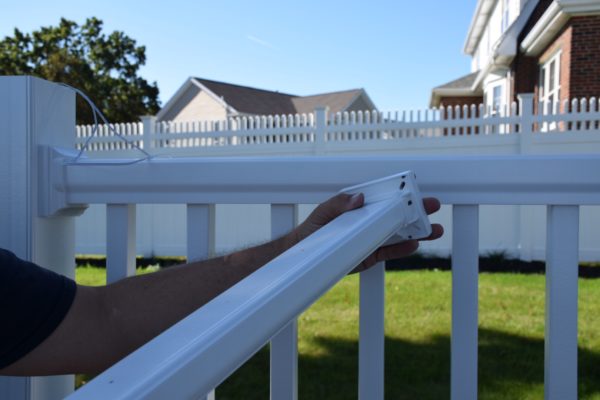
Step 6 Installing the Top Rail
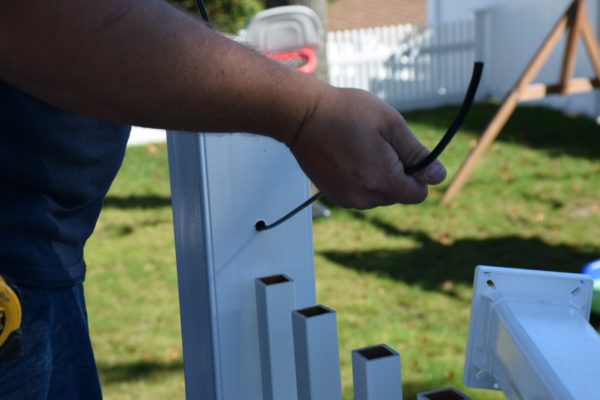
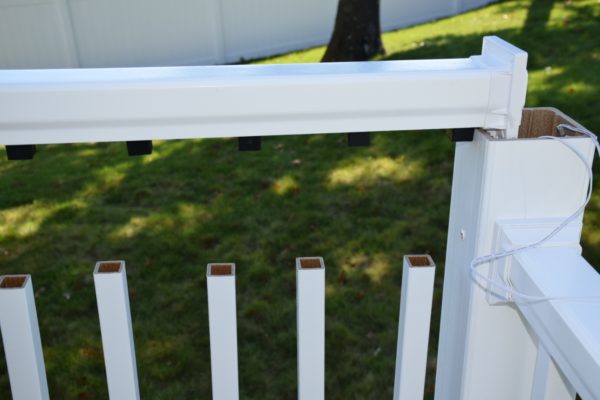
Now that the balusters are in place your next step is installing the top railing. For our deck remodel we decided to run out low voltage wire through the deck railings. Once the height was determined as to where the top railing would meet the post I drilled a small 3/8″ hole to fish the wires into the post sleeves. More on low voltage wire later in this article
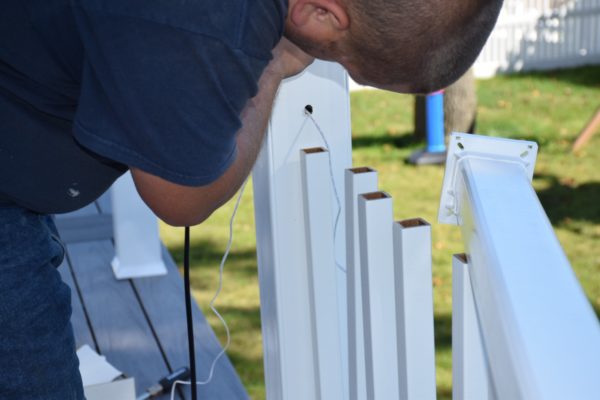
Similar to the bottom railing you want to place the top rail brackets on the rail. Working from one side start to install the balusters. Once all the balusters are installed, check again for level. Every baluster that we installed was 29-1/4″. Theoretically your top rail should be level, if your bottom rail was previously level, but I’ve seen stranger things.
Once level, follow the same the same steps for lower railings brackets, and secure the top rail.

Step 7 – Installing Rail Bracket Covers
Slide the rail bracket cover over the rail bracket and snap into place.

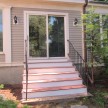
Step 8 – Installing Post Caps
Deckorators offers several styles of post caps. Our deck remodel we used low voltage post cap lights. The post cap lights fit extremely snug onto the 4×4 post sleeves. We followed Deckorators recommendation to install a thin line of exterior construction adhesive to the inside of the post cap before installing it. Our main focus was to keep the water out of these sleeves to protect the wiring.

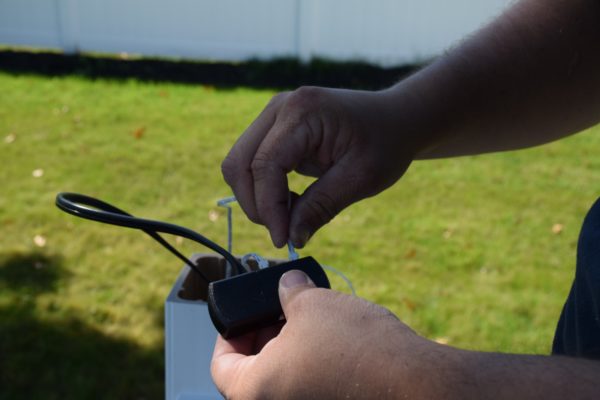
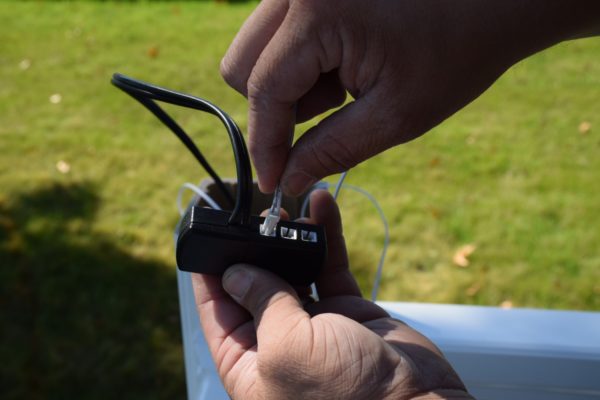
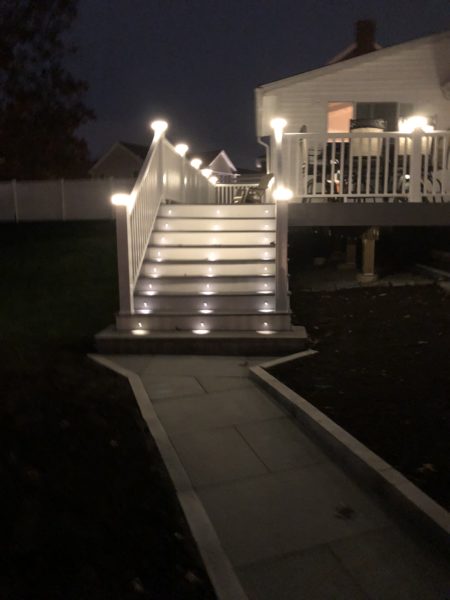
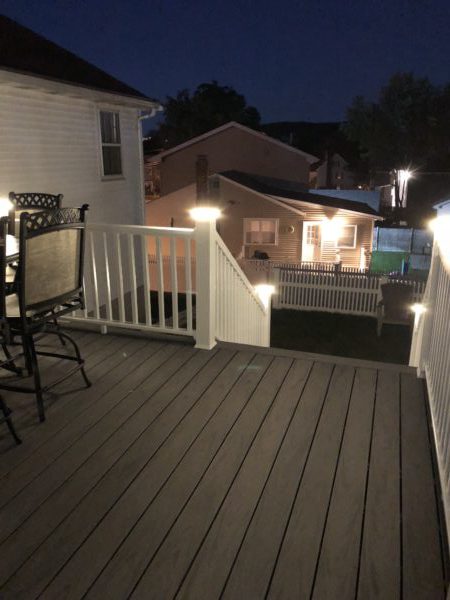
Deckorators Low Voltage Lighting
Deckorators low voltage lighting is easy to install and only requires a few steps to achieve an awesome look. There are a variety of lights you can chose from. In our deck design we used recessed lights on the stair risers and post lights. We ran all the wiring thru the railings when installing them. Once the low voltage wires were in place we needed to add weatherproof junction boxes so we could plug the lights in. The black wire was cut and spliced onto the junction box.
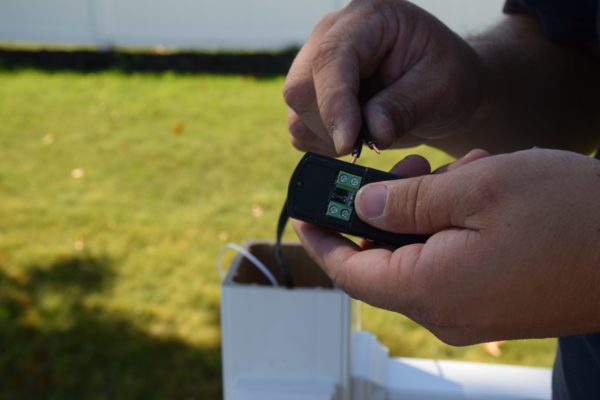
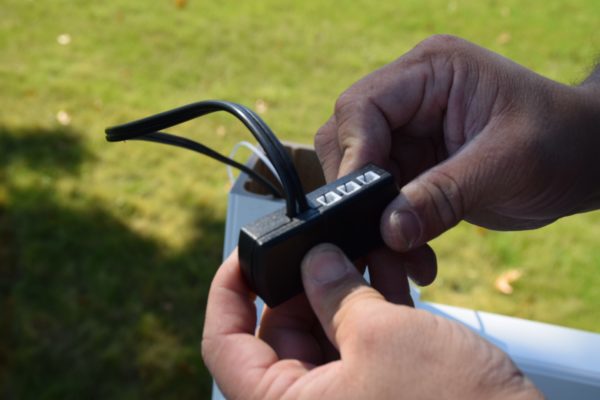
Once the junction box was secured with the black low voltage wires all you have to do is plug the lighting component into the junction box. Each junction box will hold up to 6 low voltage lights. Additionally Deckorators has 9′ extension you can purchase which gives you extra cord when your running these lights into junction boxes through the railings. With these additional extension cords I was able to plug in 3-4 lights per junction box. Worked out perfect!

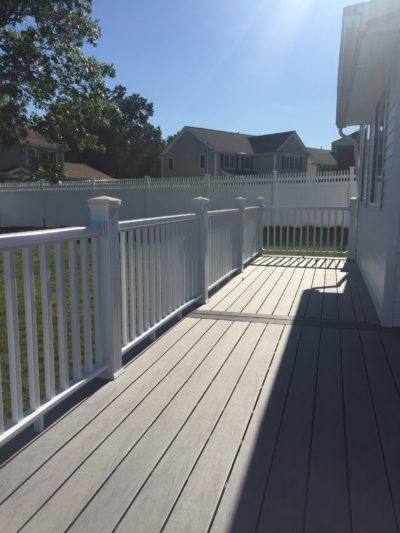
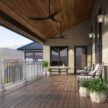
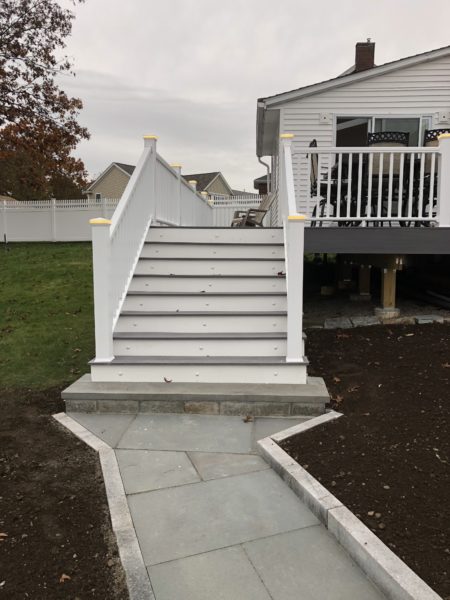
Final Product
Here are the pictures of the final product on our recent deck job. These railings and the low voltage lights were simple and add elegance to this deck. We can not wait for the next deck project!


Deckorators Warranty
Deckorators railings are backed by a 25 year structural, stain and fade and removal and replacement warranty.
Availability
Available in three colors (white, black and dark walnut), mix-and-match, CXT post sleeves, balusters and post caps will create a look you or your clients will love!