Using a Preacher Board for a Perfect Baseboard Fit

How to Use a Preacher Block for a Perfect Baseboard Fit: A Carpenter’s Guide
As carpenters, one of the best things we can do is pass on the knowledge we’ve gained over the years to help young apprentices build strong foundational skills. In this article, I’ll share a simple but highly effective “Preacher Board,” tip for achieving a perfect fit when installing baseboard trim: using a preacher block.
 What is a Preacher Board?
A preacher block is a simple tool used to achieve a precise fit between baseboards and casings, particularly in older homes where angles may not be perfectly square. It’s an alternative to using a bevel square for finding angles on out-of-plumb plinth blocks or door casings when running baseboard trim. The preacher block helps you scribe a perfect line on the baseboard, ensuring it fits snugly against the casing with no gaps.
 Why Use a Preacher Board
The main advantage of a preacher block is that it allows you to account for imperfections in the trim. Older houses, in particular, may have uneven walls and door frames, meaning standard measuring tools won’t always give you an accurate fit. By using a preacher block, you can achieve a precise cut that ensures your baseboard meets the trim perfectly, even when the walls aren’t square.
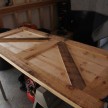
 How to Make a Preacher Board
I first came across the concept of the preacher block in Trim Carpentry and Built-ins by Clayton Dekorne (a fantastic book, by the way), but it didn’t go into detail on how to make one. Here’s how I build my own:
Materials Needed
- Wood of the same thickness as your baseboard
- Table saw
- Jigsaw
 Steps
Steps
- Select the Material: Choose a piece of wood the same thickness as your baseboard trim.
- Measure the Length: Cut the board to about twice the length of your baseboard height.
- Mark the Trim Thickness: From one edge of the board, measure in and mark the thickness of your trim (e.g., 1 inch for my baseboard).
- Add an Extra 1/8”: From the trim mark, add 1/8” to account for a small gap.
- Square the Lines: Square the lines vertically, approximately 1” taller than your base trim.
- Cut the Slot: Using a table saw, cut along the lines you’ve marked. Then, use a jigsaw to cut out the center, creating a slot that will fit over your baseboard trim.
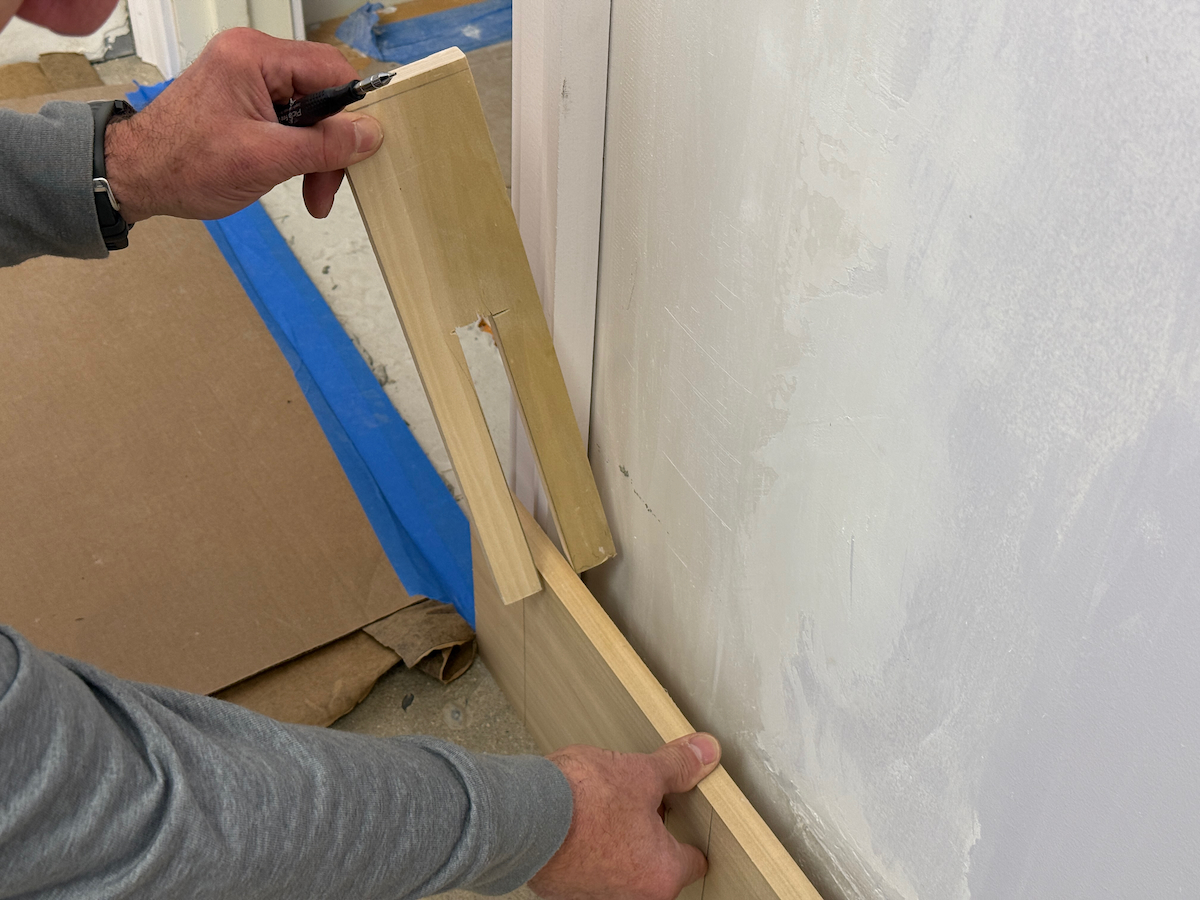 How to Use the Preacher Board
Now that you’ve made your preacher block, here’s how to use it to get a perfect fit for your baseboard:
Steps On Using
- Select the Right Board: Pick a board 2-3” longer than needed for your cut.
- Position the Preacher Block: If you’re working from a corner, start by fitting the preacher block at that end.
- If you’re working from a door trim, place the preacher block over the baseboard with the trim facing you.
- Press and Scribe: Press the preacher block tight against the door trim or casing, ensuring it’s aligned.
- Use a pencil to scribe a line along the edge of the trim
- Cut the Baseboard: Cut along the scribed line on your baseboard, ensuring the trim fits perfectly without any gaps. The cut should be in the same plane as the trim casing.
 Conclusion
When installing baseboard, don’t assume that your door casings or trim are perfectly square—they often aren’t. If you’re working in an older home, you’re likely to encounter angles that are off, which can result in unsightly gaps between the baseboard and the trim. That’s where the preacher block comes in!

By using this simple tool, you can ensure that your baseboard fits snugly against the trim, with no gaps or misalignment. This method is especially helpful when working with older homes or when precision is critical.
I hope you found this tip useful. And if you’re an experienced carpenter, make sure to share this knowledge with the next generation of tradespeople! Let’s keep passing down the skills that make our craft strong and precise.