Screen Porch Bead Board Ceiling

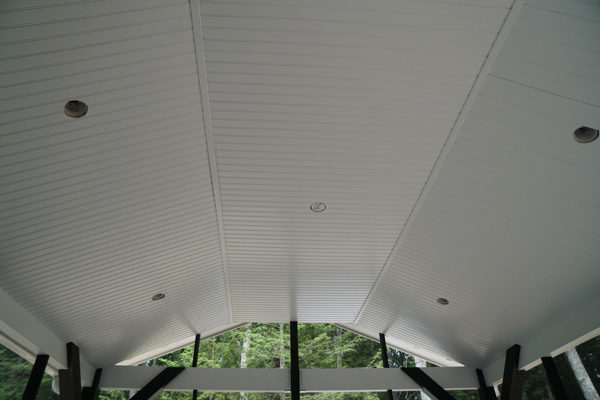
How to Install Bead Board on a Screen Porch Ceiling
Historically, bead board was a durable, basic wall or ceiling finish that was common by the 1880s and was also popular in cottages, camps and unheated buildings.
Screen Porch Bead Board Ceiling
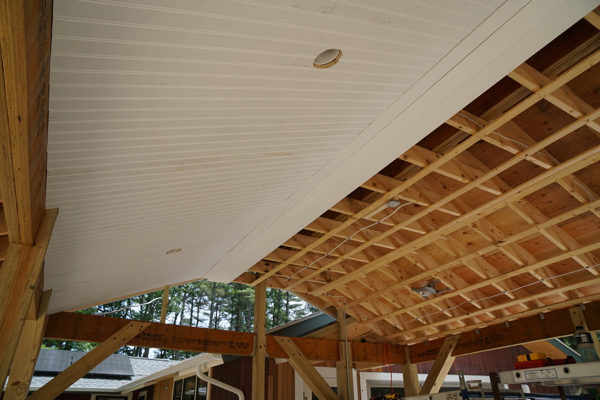
We recently built a screen porch for a client who wanted a bead board ceiling, but they wanted the orientation of the boards to be different than most ceilings they’ve seen. The wanted the boards to run parallel to the roof rafters, not perpendicular.The beauty of bead board is its versatility, which is really only limited by the user’s ideas.
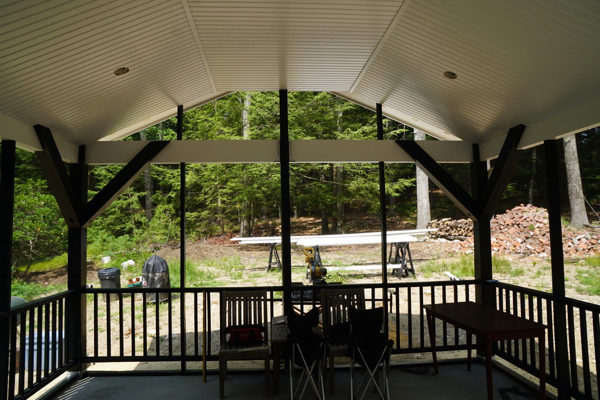
Getting the Bead Board Parallel to the Roof Rafters
In order to do this, we had to first install 1×3 strapping at 16-inch on center so we could install and fasten the bead board. This 90-degree alignment provides a nailer at every 16 in. for nailing
Getting started
We measured from the top of the roof down to the LVL on both ends of the porch. In a perfect world these two measurements would be the same but they were off by 1- inch.
Split the Difference and Use Repetitive Cutting Techniques
We decided to use a super highly technical carpentry trick called “splitting the difference, just kidding. We took the 1/2” off the largest measurement and cut all the sloped ceiling boards the same size. Once we know that measurement we snapped a chalk line across the top f the ceiling slope as a visual reference.
Tip: If your able, cutting all the boards the same size keeps things consistent and allows you to set up a cutting jig for faster, more efficient cutting.
We then installed a temporary board at the top ceiling slope, on the chalk line as a “stop,” for our boards. This enables me to be able to push the ceiling boards into the board to ensure a consistent line across the ceiling.
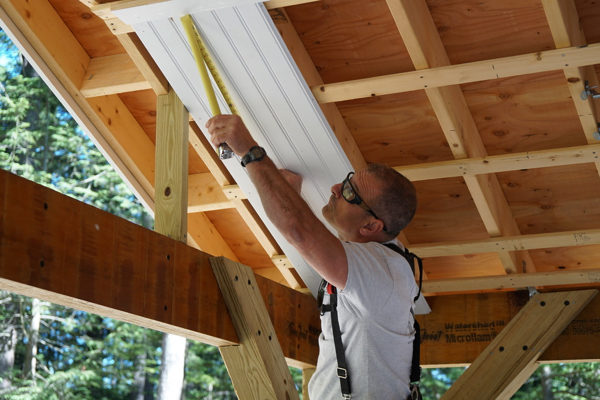
Installing that First Board
We installed the first board against the side wall, grooved edge facing the wall, tongue facing out into the ceiling field.
While holding Hold the first board up to the ceiling / wall we measured across the ceiling to the opposite wall to be sure the board is parallel to it. If both measurements weren’t exactly the same, we angled the board slightly until they are.
With the first board held in proper alignment, we installed 6d finish nails at an angle through the tongue and into the strapping, this is called blind nailing. The nails in the tongue will be hidden by the next boards groove edge. I also installed a few nails at the ceiling / wall edge, this is called face-nailing. You will only face nail on the first and last boards, not on the ones in between.
What about Gaps at the wall?
Don’t worry if there’s a slight gap between the board or boards and wall; it will allow room for expansion and will be hidden by molding.

Filing in the Field
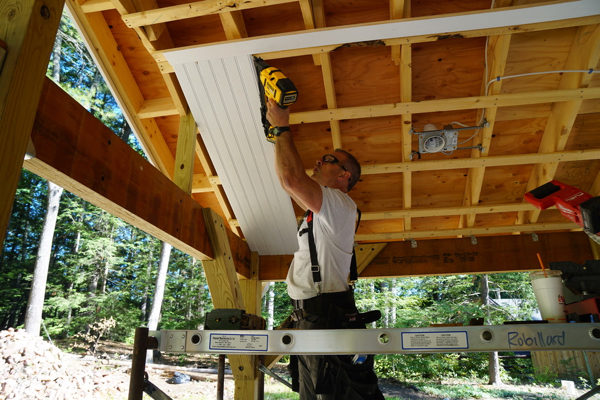
Install the second, and subsequent boards by pressing its grooved edge over the exposed tongue of the first board. If it doesn’t fit tightly, hold a scrap of bead board against its outer edge and tap it lightly with a hammer. Be careful not to damage the tongue. Secure the board by nailing through the tongue and into the strapping. Be sure all joints between the boards are tightly closed.

If you come to a ceiling-mounted light fixture, air-conditioning grille or other obstruction, remove it and cut the board to fit around the electrical box or duct hole. For a recessed light, remove the decorative trim and slip the board into position. Hold the trim against the ceiling fixture and trace where it overlaps the board. I then use a compass to finish the trace pattern. Cut the board along the line with a jigsaw, nail it to the ceiling.
Half-Way and Three-Quarter Marks
At both the half way and ¾ mark is a good idea to take parallel measurements to ensure that you are still running parallel. If not, you can make minor corrections by angling the boards slightly. Do this across multiple boards to get to parallel again.

Installing the last Board
Many times the last board needs to be ripped thinner. I sometimes rip a slight bevel [15-degrees] so the board angles into position, but the joint looks, and fits tight. One trick I sometimes use is to leave the second to last board loos and snap them both into place at the same time.
Whatever method you choose; you will need to face nail either the last or both boards when done.
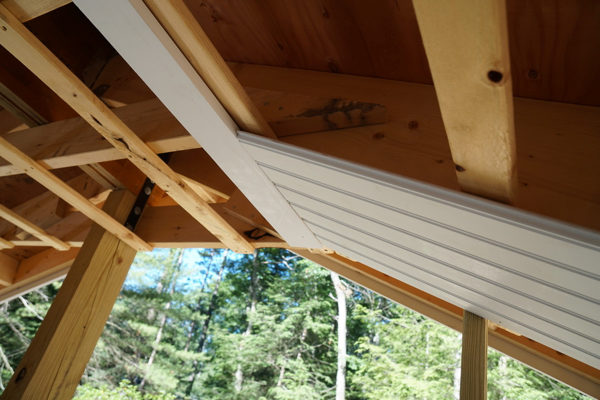
Boards Not Lining Up?
On our install we had three sections of bead board; the two slopes and the flat top section. One thing that is pretty typical is you’ll notice that the boards do not directly line up.
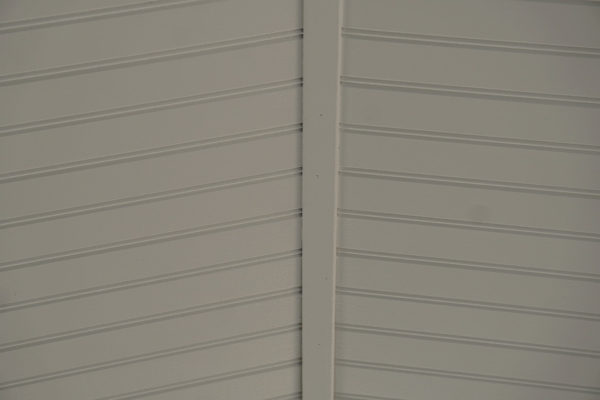
To combat this and also hide the butt joints of the joining sections we installed trim boards with the roof angle ripped on the edge. This trim board covers the seam and also breaks up boards, taking away some of the curse of the non-aligned boards.
Finish with Trim or Molding
While not always needed, one way to deal with the lower and side edges [seams] is to install a small molding or make one. We typically use leftover bead board and rip 1 x 1 strips to finish the edge seams.