Fitting Door Trim Close to a Wall
Fitting Door Trim Close to a Wall | Finish Carpentry Tips
Ever struggle with fitting door or window trim when there’s barely any space between the door jamb edge and the wall?
It’s a common issue in older homes and remodels, where a tight fit can throw off the balance and design of your trim.
I’ll show you a pro tip to solve this problem and still get a clean, polished look—without sacrificing style. In this project, we’re working with 3-1/2″ Winsor casing, but when the available space on one side is only 3 inches, and the other side even tighter at 2-1/2 inches, a full trim just won’t cut it. Stick around as I walk you through a smart, site-made solution using custom Poplar casing and precise techniques for a perfect fit—even when space is tight.
Current Situation
Trimming the Winsor casing to fit would result in noticeable inconsistencies, making the trim look unbalanced and lose most of its details.
The Solution: Site-Made Poplar Casing
To address this, I decided to use flat ¾” Poplar casing and route a 3/8” bead detail along the long edge. The bead replicates the bead on the Winsor casing and complements the house trim, even with the uneven reveals. It’s a subtle but refined solution for trimming out areas with space constraints.
I set up a job site router table with a fence and feather board to create the trim. The feather board helped maintain a tight hold against the router’s bearing bit while I ensured firm downward pressure on the table.
Fitting the Vertical Trim
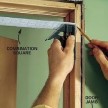
The first step is marking a 3/16” reveal on the door jamb sides and top. I make these marks low near the floor, at the midpoint, and at the top corner. Then, I measure the distance from the wall to these marks to check for any irregularities in the wall, as it’s rarely plumb and usually requires a scribe.
Next, I rip the trim to the largest measurement I took and hold the trim / plumb against the wall. I use a level to ensure the trim is plumb vertically. When ripping the board, I ensure the table saw blade is beveled to a 10-degree bevel.
This creates a point that touches the wall away from the rounded plaster corner and it ensures a tighter trim fit.
Once plumb, I scribe the gap and cut the scribe line on the table saw with the same 10-degree bevel. After test-fitting, I fine-tune the scribe line with a hand plane as needed for a perfect fit.
I follow this process for both side trim boards, then mark, and cut, the top miters before fitting them into place.
 Fitting the Top Casing
The top casing remains 3-1/2” wide. Due to the uneven walls, the miters need customization. The left side requires a miter and 90-degree square cut, while the right side is a regular miter cut.
First, I measure my short-to-short miter and record it. Then, I measure the total wall-to-wall distance. This measurement helps locate the square cut.
At the saw, I make a full 45-degree miter cut on the 3.5” trim board. Then, I mark the square cut, set the saw to 90-degrees, and make the cut. Afterward, I measure and cut the short-to-short miter at 45-degrees.
 Once everything fits well, I glue and nail the top casing to the wall and door jamb. To keep the miter tight while the glue dries, I sometimes use scrap wood as a pressure clamp.
 Conclusion
This method allows for a more precise and aesthetically pleasing trim installation in tight spaces where walls or other obstructions limit standard casing width. By customizing the trim and adapting the miters, it’s possible to maintain consistency with existing trim styles, ensuring a professional finish even in challenging situations.
Fitting Trim close To A Wall Video
<iframe width=”760″ height=”415″ src=”https://www.youtube.com/embed/QuWXMscgUEg?si=yiXma1VPAPc7xAqX” title=”YouTube video player” frameborder=”0″ allow=”accelerometer; autoplay; clipboard-write; encrypted-media; gyroscope; picture-in-picture; web-share” referrerpolicy=”strict-origin-when-cross-origin” allowfullscreen></iframe>


