Roof and Gutter Heating Cable

Improvise, Adapt, and Overcome [The MacGyvver Method]
If you were born after 1992, you may not remember MacGyver. There aren’t many action-adventure TV dramas that make it into the dictionary, but MacGyver was not like other shows. It starred Richard Dean Anderson as the eponymous hero who escaped life-threatening situations by avoiding firearms in favor of science, improvised engineering skills, and cobbled-together ingenuity.
While I’m not advocating “cobbling” this installation, I am warning you that there are many different gutters, overhang, fascia trim, and roof configurations and you will need to sometimes improvise and adapt your installation method.
I’ve used several approaches to install roof and gutter heating cable. While there is always a clip at the top of the cable, I have used varied methods to accomplish the lower cable fastening, depending on my situation.
Some variations include:
- Two lower roof clips.
- UV resistant zip ties to the gutter straps or eye hooks.
- A roof clip fastened to exposed fascia board, exposed above the cutter.
- A clip secured to the aluminum leaf guard coving the gutter opening with stainless, aluminum or treated self-drilling screws.
- Clips secured to the roof with special adhesives.
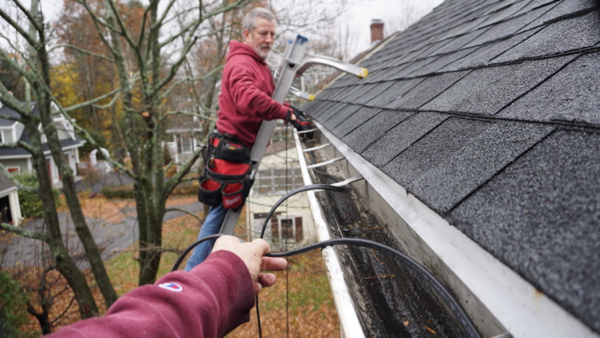
Installing the Heating Cable In A Gutter
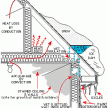
If you have a gutter installed under a roof with heating cable, you must run cable in the gutter as well, or the gutter will become a solid block of ice.
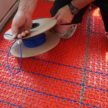
Run the heating cable in and along the gutter bottom. The cable has to be installed under all of the gutter straps. Use care to NOT damage that cable as you pull it through the gutter.
TIP: In order to get the cable under all of the gutter straps, I attach the heating cable to an electrician’s “fish-tape” and feed the wire and cable across the gutter bottom.
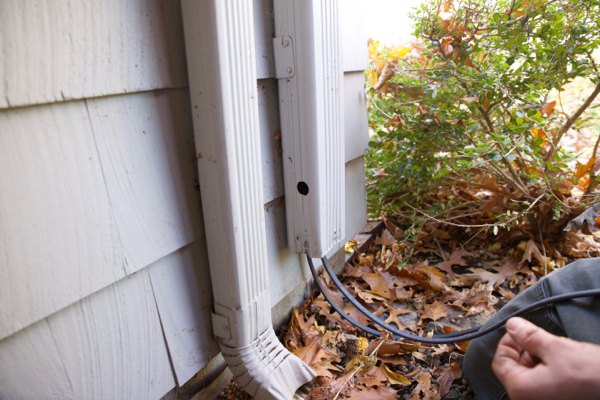
Installing the Heating Cable In a Downspout
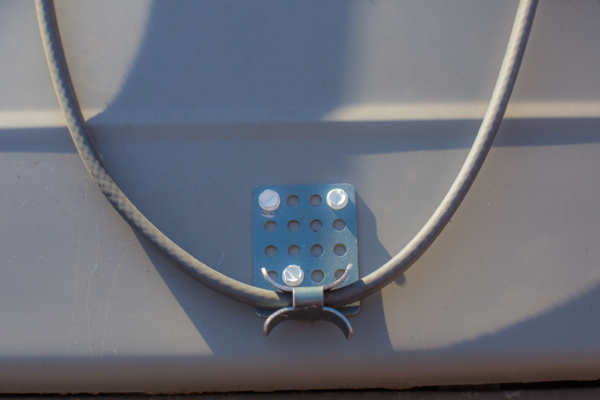
When installing the heating cable into the gutter downspout, I use the Warmup downspout hanger brackets that keep the cable bend from straining.
This bracket also protects the heating cable from damage caused by the sharp edges. Gutter-to-downspout transitions have sharp edges or exposed screws and you need to ensure that the cable is protected from damage.
TIP: For downspouts that end above the soil line, install the wire to the bottom of the downspout, but no further. Don’t leave the wire exposed outside the downspout or it may become damaged by lawn mowers or grass trimmers.
TIP: When downspouts drain underground to a drywell or are extended in an underground pipe away from the house, try to get the heating cable below the frost line or to the end of the pipe. The frost line in my areas can extend as much as 36-48” deep.