Warmup Pipe Freeze Protection Heating Cable
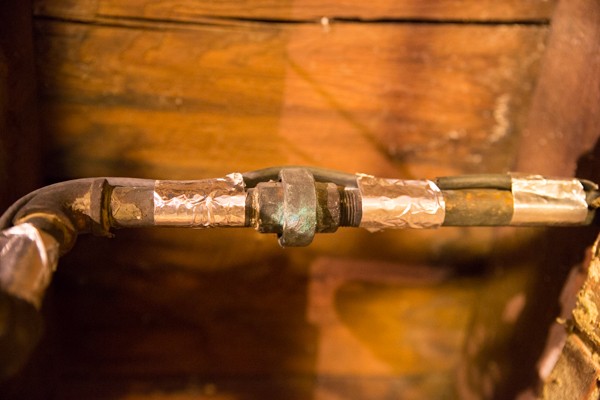 How To Install Warmup Heat Tracing Cable
Every winter approximately 250,000 American families have one or more rooms in their homes ruined by water pipes freezing and breaking, according to State Farm Fire and Casualty Co. With temperatures dropping during the winter months, freezing pipes are always a major concern for homeowners, businesses and industry alike.
Ice Expands, Pipes Don’t
When you stop to think that water, when frozen, will expand 9% in volume, it’s easy to see why metal and plastic pipes can burst. Just a 1/8″ (3-millimeter) crack in a pipe can release more than 250 gallons of water per day, destroying everything in its path.
Water in a pipe freezes when cold temperatures, or the wind, chills the pipe to a temperature a couple of degrees lower than freezing. As ice forms inside the pipe, the pipe expands and eventually bursts. Water starts to flow out of the burst pipe once the ice thaws. But by maintaining the ambient temperature inside the pipe, frost cannot build up and pipes will neither freeze nor burst.
Can Frozen Pipes be Prevented?
To avoid frozen pipes, homeowners should have adequate insulation where pipes run along outside walls, floors, and ceilings. Disconnecting outside garden hoses, wrapping exposed pipes with insulating pipe sleeves, and sealing foundation cracks that let arctic air all help.
In cold locations, there is no guarantee that using pipe insulation will prevent a frozen pipe. Sometimes these freeze prevention measures are not enough; in which case, it’s time to add pipe freeze protection heat cables.
What Are Pipe Freeze Protection Heat Cables?
Electric pipe freeze protection heat cables, also referred to as heat trace cables, raise the ambient temperature inside the pipe and can be used in a wide range of applications.
The first and most widely needed benefit of pipe freeze protection cable systems is the prevention of freezing within pipes on residential and commercial applications such as:
- Water Lines
- Cooling Towers
- Plumbing lines
- Discharge Pipes
- Exposed P-traps
- Sprinkler lines
- Tanks, Valves
- Processing lines
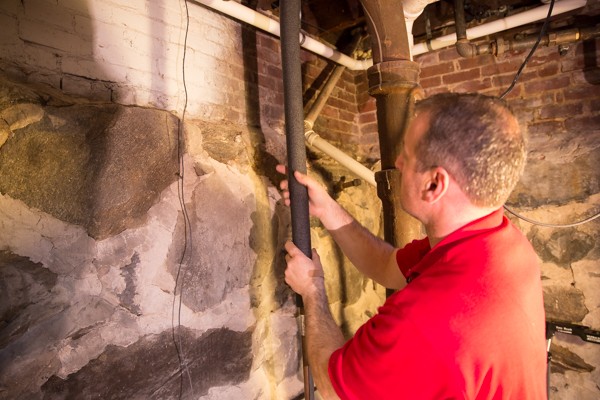 Warmup Pipe Freeze Protection System
We chose to install a product from a company called Warmup Inc. Warmup offers a wide range of easy-to-install pipe freeze systems, snow melting systems, and radiant floor heat.
Warmup cables are approved for dry and wet locations and suitable for non-hazardous locations. Warmup offers two types of pipe freeze protection:
- Pre-Terminated Cable Kits
- Self-Regulating Freeze Protection Heating Cable
Both types of Warmup cables are self-regulating. Self-regulating heat cable has a special conductive core between two internal bus wires. This core becomes more conductive during cold ambient conditions; therefore the heating cable will increase its wattage per lineal foot, in response to the cold. Smart, right?
There are two different kinds of pipe freeze protection cable: self-regulating and constant wattage. Both can serve the same purpose, and the constant wattage is designed to maintain higher temperature and uses more electricity than self-regulated cable.
This self-regulating feature makes it ideal for the freeze protection of exposed pipes in the winter, and is ideal for pipes and gutters and frost protection applications as it regulates its heat output depending on the ambient temperature, using just enough heat to get the job done, making it more energy efficient to run.
Pre-Terminated Cable Kits:
Pre-terminated cables come factory assembled in lengths of 6, 12, 18, 24, 75, and 100 feet and terminate with a 30-inch power plug. The cables are self-regulating and adjust heat output according to ambient temperatures. The colder the pipe the more heat cable output, up to 5 watts of heat per lineal foot.
The cables are specifically designed to use on plastic or metal pipes susceptible to freezing in open, accessible areas, such as piping located inside of unheated buildings mobile homes or in unconditioned residential basements, attics, or buildings subject to freezing temperatures. They are not designed to be buried inside wall, ceiling, or floor cavities.
5 Tips For Installing Pre-Terminated Cable:
- Do not bury pre-terminated cables cable in a wall, ceiling floor, underground, or any inaccessible location.
- These systems are usually manufactured to protect water lines. Check your systems specs if you are trying to protect other types of lines and drains.
- Make sure to use wrap-insulation of ½” to 1”, especially on larger diameter pipes or PVC water lines.
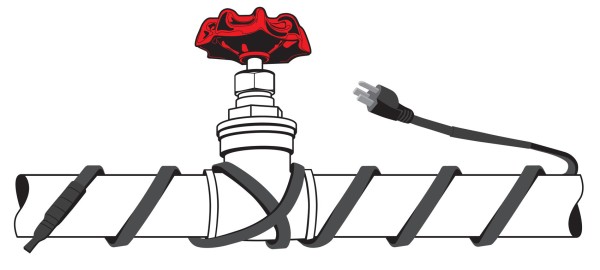
- The cable can cross and overlap. Always buy a little “long” and spiral the cable or double runs if necessary. Specifically on turns, valves and exposed areas.
- Test the cable, both upon purchase and after installation. Make sure to manually inspect the cable after powering up and before wrapping with insulation. The cable should reach temperatures of 50-65F within minutes.
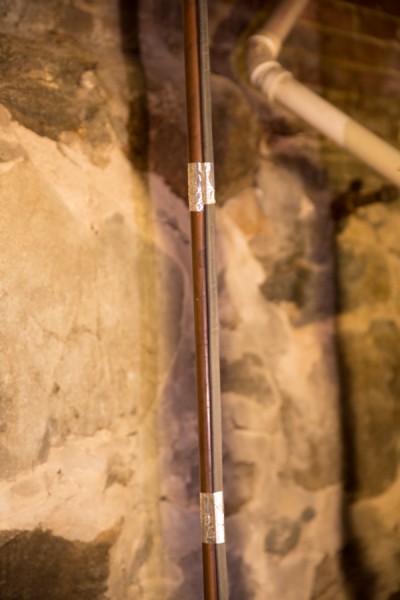
Pre-Terminated Cable Specifications:
- Service voltage: 110-120V
- Normal cable width: 42 / 10.6 in/mm
- Normal cable thickness: 23 / 5.8 in/mm
- Cable bus wire gauge: 16 AWG
- Cold lead length: 30 / 762 in/mm
- Circuit breaker size: (Amps) 15
- Exposure Temperature: 185°F / 85°C
- Electrical classification: Nonhazardous
- Cable Thickness: 23
- Cable Width: 42
Self-Regulating Freeze Protection Heating Cable
Self-Regulating Freeze Protection Heating Cable is a self-regulating, energy efficient, industrial grade, 16 AWG BUSS wire and is suited more for commercial and industrial applications.
The parallel bus wire construction makes it easier to install the cable in zones or series, since it can be cut to length at any point on the pipe. One nice feature is that it can be single overlapped, without overheating the cable.
It can be installed in any length up to 460 feet and will work in wet or dry locations. The cable operates on 120, 208-277 volts, and delivers 3, 5 and 8 watts of heat per foot.
A thermostat is required in these applications to ensure liquid temperature is properly maintained.
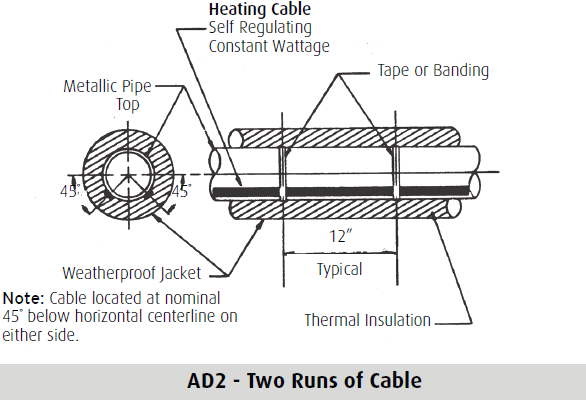
The self-regulating freeze protection cable is installed on the bottom of the pipe and at positions 5-o’clock and 7 o’clock, if two cables are used.
While suited for residential pipe freeze applications, we often see self-regulating freeze protection heat cable in commercial applications such as:
- Cooling towers
- Chilled water and plumbing pipes
- Sump discharge pipes
- Exposed p-traps
- Water treatment plants
- Vessel freeze protection
- Safety shower lines
- Sprinkler lines
- Sewer pipes
- A/C drains
Self-Regulating Freeze Protection Heating Cable Advantages
- Self-Regulating, Energy Efficient
- Reliable, varies with ambient conditions
- Industrial Grade, 16 AWG Buss Wire
- Approved for Wet and Dry locations
- Standard Braid with Over jacket
- Circuit Lengths to 460 Feet
- 3, 5 and 8 Watts per Foot
- 120, 208-277 Volts Available From Stock
- 10-year warranty
- Underwriters Laboratories approved
 How Much Cable?
On their website, Warmup provides a heating cable selection guide to help you determine the proper cable length. The chart is based on pipe diameter and pipe length, with allowances for valves and spigots. I found it useful for pre-planning my project.
If you don’t like using the chart you can simply call Warmup and they will walk you through the process. Additionally, Warmup also offers 24/7/365 technical support. I found this to be key since I often will do installs past normal business hours and on weekends.
You will need to determine the following information to enable proper selection of heating cable:
- Pipe diameter
- Pipe length
- Pipe material
- Minimum ambient temperature
- Type of insulation
- Thickness of insulation
- Number of flanges, pipe supports, shoes, etc.
- Power supply voltage:
- Number of valves
Minimum Start-Up Temperature:
This is the temperature at that the cable will typically turn on. Generally, the startup temperature is determined by consulting weather data compiled for your area and is based on recorded historical data. There are times, however, when the minimum ambient will not be the outside air temperature. Examples include pipesand equipment located underground or inside buildings.
Warmup offers cables ranging from -40-degree to 50-degree start-up rating. This allows you to use less energy on pipes containing liquids with a lower freezing point. The generally accepted maintenance temperature for freeze protection on water piping is 40° F / 5° C. The startup temperature will also have an effect on the maximum wire length and circuit breaker sizing for a given application.
 Pipe Insulation
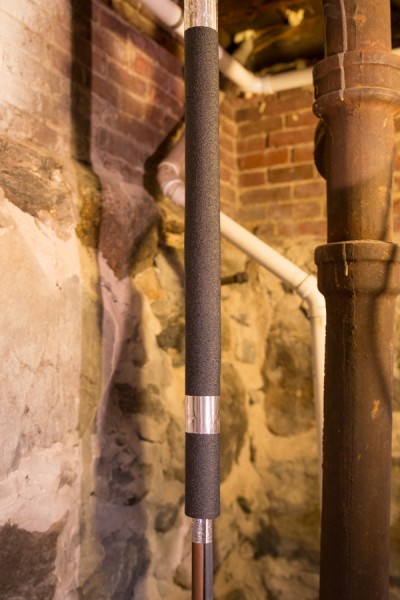
While an insulated pipe can withstand cold temperatures longer than an uninsulated pipe, self-regulating freeze protection cables are designed to be installed in conjunction with pipe insulation. This includes insulating all valves, tees, and spigots.
Accessories
Warmup has a complete line of accessories specifically designed for use with a heat tracing cable system.
- Aluminum Foil Tape for Self-Regulating Cable. Sold in 90ft. roll.
- Power Connection Kit for Self-Regulated Cable. Includes 2 warning labels.
- Splice/Tee Kit for Self-Regulated Cable.
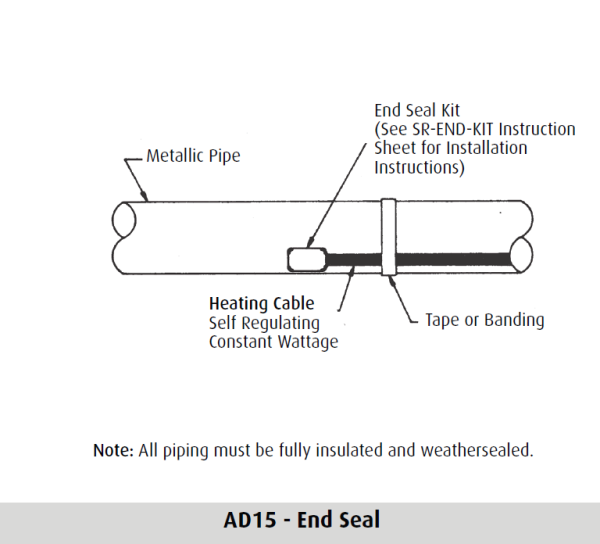
- End Seal Kit for Self-Regulating Cable.
All Heat Cables Are Not Created The Same [My Tips]
- Follow the manufacturer’s instructions, and use a non-flammable type such as fiberglass, not foam or vinyl that could catch fire from a failing heat tape.
- Visually inspect and check heat tapes at the start of every heating season and periodically during operation. Remove the tape if you see cuts or cracks, charring, animal chew marks, bare wires or a loose or missing end cap at the end of the tape.
- Do not install the heating cable on equipment that could become hotter than the heating cable’s maximum exposure temperature.
- Do not install the heating cable in an area or on equipment that contains potentially corrosive materials.
- The minimum bending radius for all Warmup heating cables is six times the minor diameter.
- Always install heat tracing on the outside radius of elbows.
Installation of Self-regulating Heat Trace Cable
- Inspect the heater cable and temperature controls for visible signs of mechanical damage; breaks or nicks in the cable jacket.
- Install insulation over heat cable. The type and thickness of thermal insulation specified on Warmup’s website. Insulate valves fully up to, and including, the packing gland.
- Megger the system again to determine if damage not readily visible has occurred. Check the resistance of the buss wires to braid or metal sheath with a Ohmmeter to assure the cables have not been damaged during shipping and handling.
- Any cable with an insulation resistance reading less than 10 megohms before installation should not be installed.
- Make electrical connections per manufacturers recommendation.
- Set the thermostat to the desired control temperature.
- Turn the main circuit breaker on
- Turn on the branch circuit breakers controlled by the thermostat.
Adding Additional Heat or a Redundant Back-Up Wire
When the lines being protected are considered important enough to install a backup (redundant) heat tracing system, allow a minimum of 2” between cable runs. Install the heating cable at the 5 or 7 o’clock position on a pipe.
One system can be set at your desired start-up temperature and the other can be set 5-degrees (or more) cooler. If the first system fails to turn on the other system should do so shortly afterward.
 Attaching the Wire to the Pipe
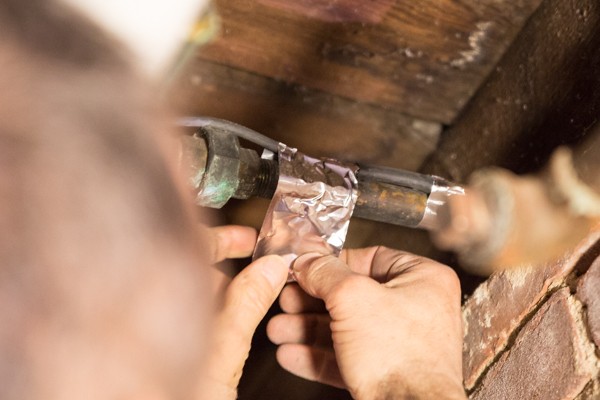
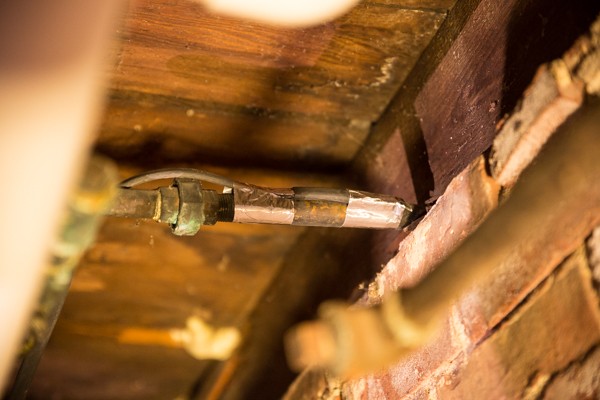
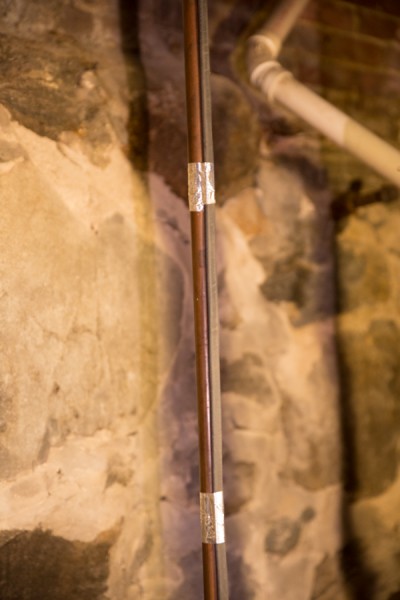
Use aluminum foil tape to cover and attach the heating cable to the pipe, or whenever the cable is not in good contact with the pipe (i.e. at supports, valves, pumps, etc.)
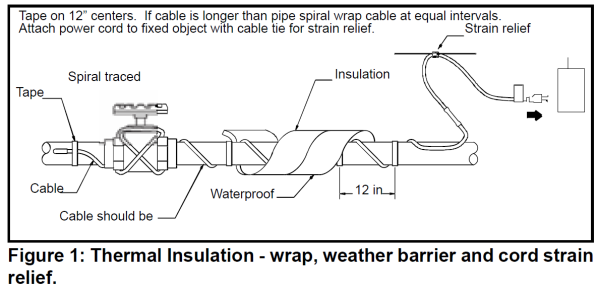
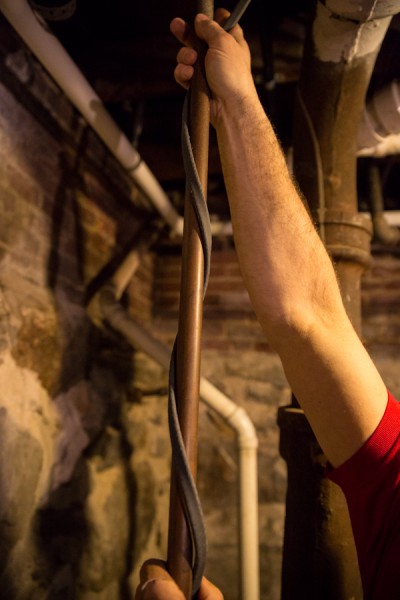
If using a spiral method, space the looping wire every 3 to 4 inches along the pipe. Continue to wrap the heat trace wire around the pipe until you reach the end of the pipe. Do not spiral if ratio of heater length to pipe length is greater than 1.5. Instead, use two cables or choose a higher wattage heater.
When a heat-traced pipe enters a heated building or facility, the heating cable should extend into the building approximately 305 mm (12″) to ensure the pipe temperature is maintained. This prevents temperature drops due to air gaps or compression of the thermal insulation.
Thermal Insulation
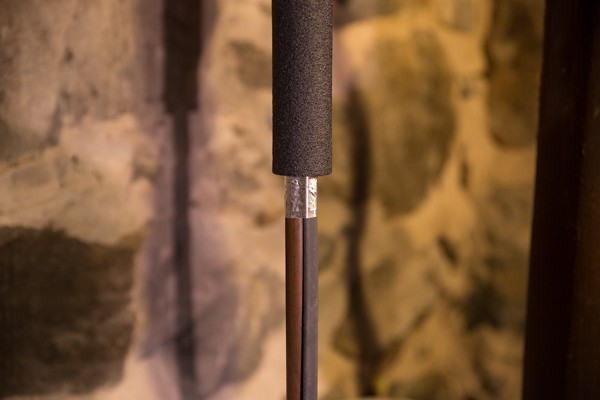
It is important to wrap the heat cable with pipe insulation. Insulation greatly increases the heated cable efficiency, and helps to prevent heat loss and ensure the proper performance of the heat tracing system.
Ground Fault Protection
According to the National Electrical Code (N.E.C.), electric heating equipment for pipelines and vessels should have ground-fault protection of the equipment for all projects related to electric heat tracing.
General Thermostat and Sensor installation
The pipe freeze protection controls thermostat is intended for temperature control and turns the heating circuit on and off to prevent freezing.
The sensor for surface temperature control is installed onto the surface of the pipe or equipment in accordance with the manufacturer’s instructions in a position that will provide a temperature representative of the overall circuit. The sensor should be positioned so as not to be influenced by the temperature of the heat tracer, or other factors such as heat sinks and solar gain.
Ambient temperature-sensing controllers should be sited in the most exposed position for the installation. Line sensors should be strapped in good thermal contact with the pipe or equipment and protected so that thermal insulation cannot be trapped between the sensor and the heated surface.
Summary
Neglecting your plumbing pipes in the winter months can lead to a variety of costs – costs that could be avoided with proper freeze protection steps, including heating cable.
Clean-up costs from water damage can run anywhere from a few thousand to multi-thousand dollars, depending on the extent of the damage. If a pipe bursts while you are not home, there is a good chance you will have significant flooding damage.
Installing a Warmup heat tracing system is not only cheap insurance, but it is a proactive and cost-effective way to protect your investment!
Video Review: Installing Warmup Heat Tape
Spiral Method Install
Self Regulating Constant Wattage Cable – Elbow Detail
- Heating cable is applied to the outside (long) radius of the pipe elbow.
Two Runs of Cable Detailed
Sensor Placement Detail
- Tape to hold heating cable tight against pipe


