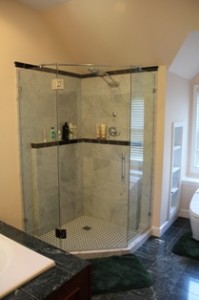
Frozen Shower Pipe Problem
Solution To Frozen Pipe
Correcting an Insulation And Air Leak Problem Solves Frozen Pipe Issue:
I’ve worked for a client for the past six or eight years and for as long as I can remember they have had a problem with their master bathroom shower pipes freezing.
One issue with this shower is its location. It is located above a garage [heated] and the water pipes are in a corner with two cold walls and a cold roof.
Frozen Pipes in Insulated Wall Space:
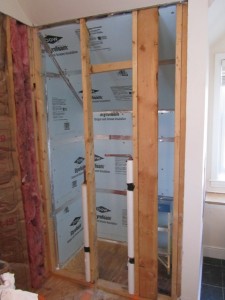
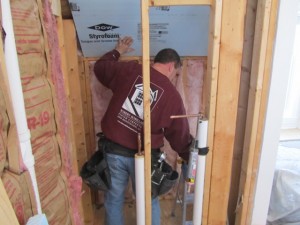
Pipe freezing is a particular problem when pipes are run through outside walls, uninsulated or under insulated attics or crawl spaces. The photo lower right shows the shower pipes running through an enclosed wall space.
Every winter the pipes would freeze, sometimes bursting into the garage ceiling below. Each time the pipes froze they either had a plumber respond to fix, unfreeze or add pipe insulation the pipes or they opened the wall to allow heat in, patching the wall later.
Freezing and bursting can cost homeowners thousands of dollars in repairs and can lead to more serious problems like mold if not properly repaired. Although older homes are 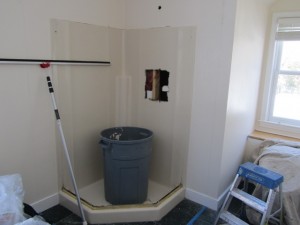 most susceptible to freezing pipes, poorly insulated newer homes are also at risk.
Pipes Running Through Unheated Wall Space
This year it happened again while I was working on a different project for them. When asked for my opinion and I theorized that there must be an air leak or hole in the siding / trim causing frigid air to blow on the pipes, or cold air from the continuous soffit vent was blowing through the insulation.
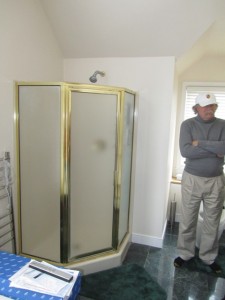
I suggested that they seal off the soffit vent bays with rigid foam to stop the air leaks. This week they told me that they wanted to replace their shower stall glass enclosure and install new tile. This was my opportunity to get behind the shower and figure out once and for all what was causing this yearly plumbing issue.
TIP: Seal Cold Air 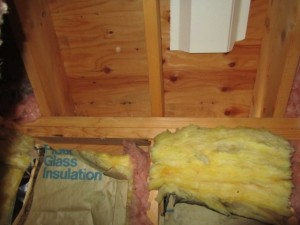 Leaks Where Pipes Are Located:
Seal any air leaks – wind is a major contributor to freezing pipes. Even a tiny opening can let in enough cold air to cause a pipe to freeze.
Look for air leaks around electrical wiring, dryer vents and pipes. Use caulk or foam insulation to keep the cold air out and the heat in. Today we ripped out the old shower and with in 30 seconds I had my answer. The photos below tell all but I will share my thoughts as we go.
Opening The Wall Revealed Insulation Problems:
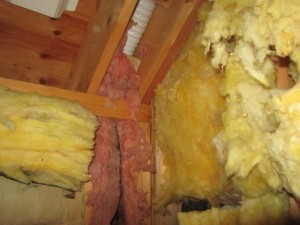
The first thing I noticed was that two major pieces of rafter insulation had fallen down. They were never stapled in place.
The lower wall insulation was observed to either be too short or it slid down. The key to a  quality insulating job is to install tight-fitting batts that completely fill the stud cavity with no voids or gaps.
The batts also need to be secured in place. That is why they have the folds along the sides. These folds can be folded out to staple to the wood framing. This was not done here.
Also the white “proper vent” shown in the right rafter bay does not do all the way down to the soffit vent and is completely missing in the left side rafter bay.
Proper vents are used to ensure proper ventilation from house ventilated eaves up to the ridge vent. Proper vents are typically made of Styrofoam and come in many different shapes and sizes. Insulation is then applied over them.
Proper vents are designed to allow fresh air travel through the soffit vent up the underside of the roof and 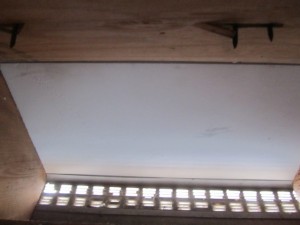 out the ridge cent.
A sofit vent allows air to flow into the attic or the proper vent. [space below the roof sheathing] This helps keep the attic cool in the summer and allows moisture in the attic to evaporate
Proper ventilation also helps prolong shingle life, cool attics and prevent ice dams.
The dark photo on the right was taken with no flash. Look at the amount of light coming from the soffit vents. the photo below that shows the continuous soffit vent taken from inside the rafter bay.
Even though the shower pipes had pipe insulation and fiberglass insulation in the wall they were installed in having this much cold air infiltration enter into an enclosed space was a recipe for disaster.
One thing that people do not realize is that fiberglass insulation does not stop air infiltration. Air leaks travel right through insulation. Air leaks must be stopped in order for fiberglass 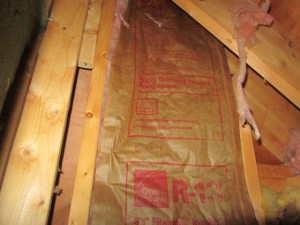 insulation to work .
Another problem observed was the lack of insulation around the bath exhaust vent running down the rafter bay. Look at the loose fitting and shoddy yellow fiberglass insulation on the right wall.
Still another problem observed was an un insulated shower wall pocket or wall intersection. A pocket is constructed to allow another wall to attach perpendicular. It is mostly done for attachment purposes and wallboard fastening. The problem with this is the framers do not usually insulate these pockets and by the time the outside plywood is applied they are covered up and it’s too late.
Some areas, like this small triangle area, was missing insulation altogether. This is a common find and either the install was lazy or he or she stuffed something in there and it fell out.
Another problem observed was insulation “jammed” into spaces or too much insulation compressed into a space. Fiberglass insulation wants to stay “fluffy” and loose. Compressed fiberglass loses its R-value because its dead-air space is reduced.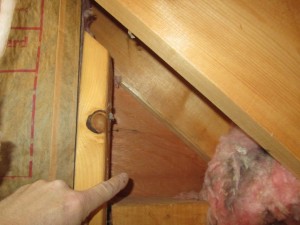
When properly installed, fiberglass insulation will not settle or deteriorate to maintain insulating value. An alternative to compressing fiberglass insulation is to split the batt to half its thickness.
Slide half of the batt behind the pipe, cable or electrical box and lay the remaining piece on top if possible.
Seal Air Leaks and Insulate Better
To address this problem I decided to install pull out all of the insulation and install new proper vents in the rafter bays.
The next step would be to install tight-fitting, high density fiberglass insulation. High-density insulation is specifically designed for these rafters, providing an R-38c for 2x12s and R-30C for 2x10s.
These products are appropriate for cathedral ceilings because the R-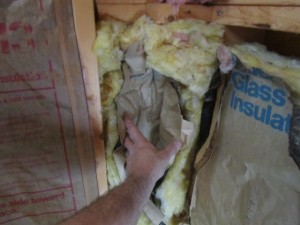 38C batt is 10 1/4 inches thick, which leaves over one inch of vent space for free air flow in a 2×12 joist.
The R-30C batt, at 8 1/4 inches thickness, is designed to do the same thing in a 2×10 joist.
One thing I did to avoid having gaps in the insulation was to cut the insulation batts to 1/2″ longer for a tighter fit. Accurate cuts are super important (slightly over sized batts are best). A batt cut too small leaves gaps and one cut too large bunches up and leaves voids.
Fiberglass insulation is available with and without Kraft paper facing. Faced batts are used in exterior walls as well as attics, finished basements, ceilings, floors, knee walls and cathedral ceilings. The facing material usually serves as a vapor retarder and makes handling and attachment easier to install.
Faced batts are attached 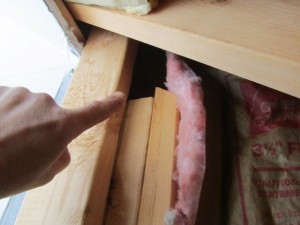 to framing members by stapling through the flanges. Unfaced batts are installed between framing members but not attached, allowing friction to hold them in place.
I used R-21 high-density insulation in the walls ans was sure to fill all spaces. We even removed the intersecting shower wall stud “pocket stud” and insulated behind that too.
Since I was treating this rafter space as a cathedral ceiling, leaving the inner shower wall uninsulated, I choose kraft faced insulation.
My plan was to cover this insulation with 1-1/2″ Styrofoam rigid board insulation to seal out any air gaps and increase the R-value. These boards fit together with a tongue and groove connection.
I glued the rigid insulation board to the studs and each other at the tongues with construction adhesive. I then secured them with 2-1/2″ screws and #12 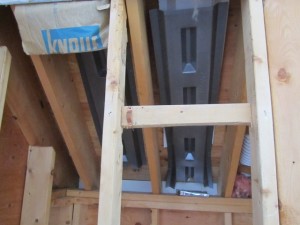 finish washers to hold it in place and tight to the studs while the glue dried.
Once the rigid insulation was installed we used foil HVAC tape to seal all of the seams including the floor and ceiling seams.
Any large gaps, holes or voids were filled with expanding foam.
Now this dead space that used to hold freezing temperatures will stay warmer and no longer have free flowing air flowing onto the shower pipes.
As an added precaution we will leave the pipe insulation on the pipes which is a good thing to do for hot water heat loss anyway.
We will also install a grille on a side wall into this cavity to allow room heat to enter the cavity and help keep the temperature up.
The owner, using a Fluke laser thermometer measured 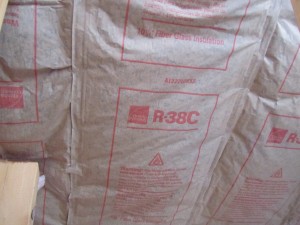 the temperature on the framing prior to the new insulation. The temperature in some spots was below 32 degrees. [it was real cold outside] Later that night after we finished he measured the wall and it registered at room temperature which was 68 degrees.
Problem solved! Finished photo below.
This repair was similar to how you should approach basement walls. See insulating basement walls.


