Warmup DCM-PRO Membrane and Heating Cable

Warmup DCM-PRO Uncoupling Mat and Heating Cable
As a remodeling contractor I’m always looking for more efficient, better ways to do our projects.
Recently I came across the Warmup DCM-PRO Membrane and Heating Cable. The mat is an uncoupling membrane, and the combination of the two gives me a faster way to install radiant heat and subsequent tiles.
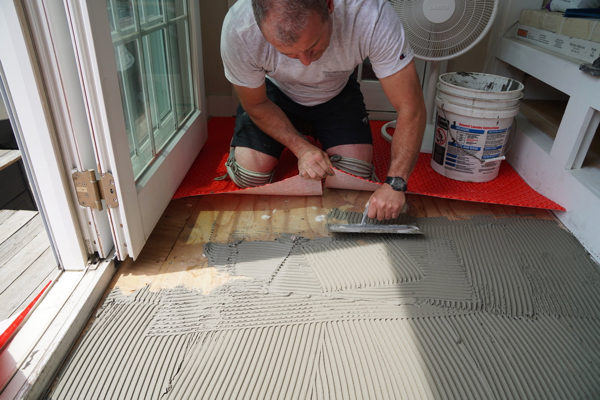
I’ve installed Warmup floor heat on many remodeling projects, mostly bathrooms. On these remodels, I would have to install a heat mat, then cover the mat with thinset and later return to tile. The DCM-PRO system is WAY faster than using cable spacing strips, it provides anti-fracture protection and it allows you to tile immediately.
The Warmup DCM-PRO Membrane is ¼” thick,is sold as a roll (to cover 150sqft in total) and sheets (box of 10 sheets, to cover 80sqft). It is designed for wood and cement subfloors using any tile adhesive.
The DCM-PRO design rated as an anti-fracture membrane and allows for more adhesive to connect with the cable which helps distribute more even heat. You can use either modified, unmodified thinset or self-levelling mortars (SLU’s) to allow installation of small format tiles and other floor types such as glue-down wood.
 DCM-PRO Membrane Features
- Under 6mm – 1/4” thick
- Rated as Anti-Fracture membrane as tested by the TCNA against ASTM 118-12
- Installs with regular or modified thinsets
- Ready to tile over
- Use any adhesives or SLU’s on top for flooring installations
- Highest heating outputs with DCM-PRO Cable
- Lowest running costs with 1/4” Warmup Insulation Boards (WSC-0725)
- Smart operation with 4iE-04 Smart WiFi Thermostat (WSC-0926)
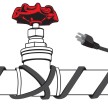
DCM-PRO Heating Cable
The Warmup DCM-PRO Heating Cable is a custom designed cable compatible with all uncoupling membranes such as:
- Schluter®
- DITRA-HEAT
- Prodeso Heat Mat
- Flextherm FLEXSnap
- Heatmatrix
- Warmup DCM-PRO Membrane
Warmup recommend a spacing that produces no more than 15w/sqft of heat input into the floor. That’s basically a 3-inch spacing.
When embedding the cable into the mat studs, ensure that the minimum bending radius of the heater wire is no less than 1-inch.
Note:
Follow manufacturers installation recommendations and guidelines.
Check the resistance of the heater before, during, and after installation to ensure that no damage has occurred A tolerance of +/- 5% is allowed
DCM-PRO Heating Cable Features
| Operating voltage | 120V, 208V or 240V |
| Thickness | 3/16” (4.5mm – +/- 0.2mm) |
| Output | Approx. 4W/lin foot |
| Construction | Multi-stranded, dual wire |
| Inner insulation | ETFE |
| Outer jacket | PVC |
| Earth braid | 85% min copper |
| Cold lead | 10ft (3m) long, 2 core braided |
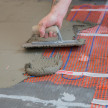
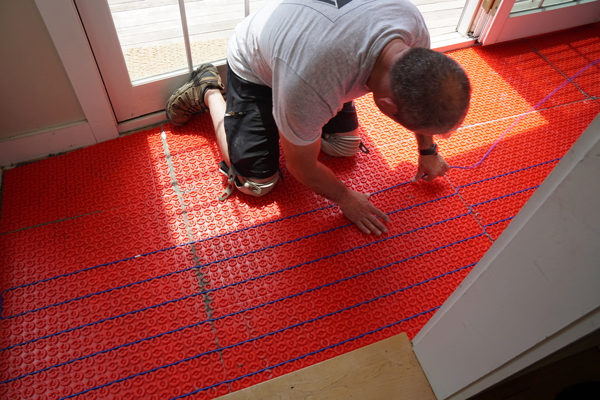
Installing the Membrane
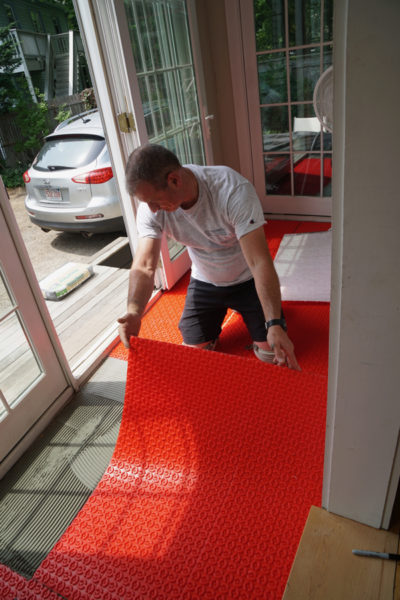
Measure and cut a length of mat to suit your room using a utility knife and/or scissors. It’s super easy to cut.
I recommend dry fitting the mats to the room prior to spreading any thin-set. Try to layout or line up the mats so the wire studs, line up and you have straight wire lines. This doesn’t always happen, but the mats are very forgiving.
The goal is to place the heat cables so that you will get the most efficient cable coverage.
Gluing the mats down is easy too. I suggest first, dry fitting the mat to the room prior to spreading thinset. Try to layout the mat placement so that you will get the most efficient cable coverage.
Apply a layer of polymer- modified thinset to the substrate using a 1/4” notch trowel. Position the mat, fleece side down and embed into the adhesive bed.
 Tip:
Tip:
Mark out the floor with a permanent marker showing where fixtures and other unheated areas are going to be. A marker is also helpful for marking the mat prior to cutting.
| TECHNICAL SPECIFICATIONS – DCM-PRO MAT | |
| THICKNESS | 1/4” (65mm) |
| COMPOSITION | POLYPROPYLENE MEMBRANE AND FLEECE BACKING |
| COLOUR | RED |
| SPACING | 3 1/2” (90mm) & 4 11/16” (120mm) |
| SIZE | 2’6” x 3’3” (770mm x 985mm) sheet 46’7” x 3’3” (14200mm x 985mm) roll |
| TECHNICAL SPECIFICATIONS – DCM-PRO CABLE | |
| OPERATING VOLTAGE | 120V and 240V: 60Hz |
| COLOUR | BLUE |
| THICKNESS | 3/16” (45mm) |
| OUTPUT RATING | 134W/ft2 (3 CASTELLATIONS – 3 1/2”) |
| INNER INSULATION | ECTFE |
| OUTER INSULATION | PVC |
| MIN TEMPERATURE INSTALLATION | 5°F (-15°C) |
| CONNECTION | 10ft (3m) “COLDTAIL” CONNECTION |
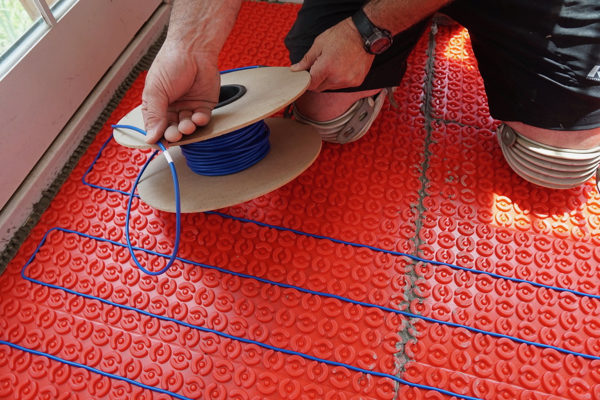
Installing The Heat Cable
The heating wire embeds in between the mat studs in a serpentine pattern or as needed, to access areas and around objects.
When installing the cable DO NOT cross the cable over another run, over cold tails or the floor sensor. This will cause overheating and will damage the cable. Also do not cut the wire, install under permanent fixtures, or use metal staples on the heating cable.
Secure the cold tail using tabs of electrical tape as necessary. DO NOT tape over the manufactured joint or heating cable. These must be fully embedded within the tile adhesive or leveling compound being laid over.

Tip:
The DCM-PRO cable has a marker at its midpoint. When you reach it, review your progress up to that point and check that you are correctly spacing the cable, ensuring that you will have covered, at least half, of the heated area needed.
This is a GREAT feature to let you know if you’re on track with your current spacing. It allows you to make changes as needed to finish the project.
Floor Sensor Install
The floor sensor for the Warmup DCM-PRO Membrane and Heating Cable is used for temperature regulation of the floor surface. The end of the probe wire contains a capped sensor that should be centered between two heating cables at least 12” (305mm) into the heated area.
The sensor wire MUST NOT touch or cross over the heating cables.
Tip:
It may be necessary to chisel out short channels in the subfloor to minimize the increased height presented by the cold wire joint and floor sensor probe. Before chiseling the area, ensure that the heating cable, unheated lead and floor probe are protected to avoid damage during chiseling. Place the floor probe into the channels and secure with fixing tape.
Pro Tip:
A router works great for this purpose, but does not always fit against the wall.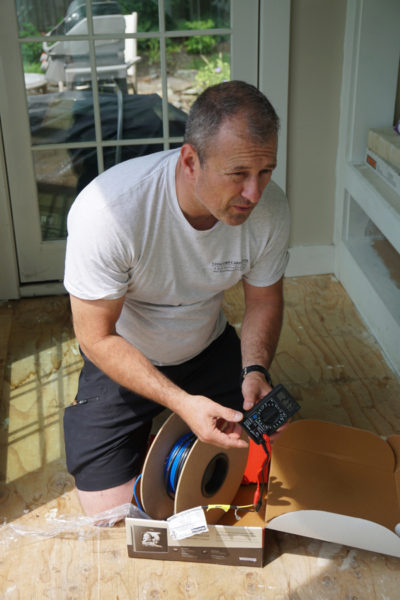
Electrical Requirements
The Warmup loose heating cables MUST be connected to the electrical system through a Ground Fault Circuit Interrupter (“GFCI”)
We have our electrician run a “homerun” dedicated ircuit for all our heat mats. The electrician also installs plastic conduit in the wall to separate the cold lead and sensor wires.
Thermal Insulation
The insulation levels of a floor will affect both the performance & running costs of under tile heating. Using the heating cable without thermal insulation can take up to 5 hours to heat a room whereas a system with thermal insulation takes less than an hour.
If the Warmup heating cable is being installed onto a concrete base it is highly recommended that a layer of insulation is used prior to installing the heating cable. The thermal insulation reflects the heat upwards instead of allowing heat to penetrate into the subfloor, greatly improving the warm-up times & running costs.
Click here to read an article and see a video where I install the thermal insulation boards.

Warmup 4iE WiFi Thermostat
Warmup only recommends listed or UL certified programmable thermostats designed for use with underfloor heating to control the Warmup loose heating cables.
We use their The 4iE Smart WiFi thermostat, which learns the heat-up and cool down rates of your home to automatically set the most efficient temperatures, reducing usage by up to 25%. The 4iE thermostat is simple to set up, intuitive and uses your smartphone as a remote interface.Warmup
Final Thoughts
Radiant heat is an efficient way to heat, and is now a permanent solution in my remodeling tool box. Probably the most attractive advantage the Warmup DCM-PRO Membrane and Heating Cable system is the ease of installation and speed of project completion. The DCM-PRO saves me from multiple return trips to a project, which means, time saved is money earned!