Site icon Concord Carpenter

How to Make A Custom Slate Chalkboard

Custom Slate Chalkboard

In this article we will show you how we cut a 100 year-old authentic schoolhouse chalkboard and created a custom frame in which to hang it. A client of ours came across some an old slate blackboard that was salvaged from an old Massachusetts boarding school. This blackboard was originally installed in the French room of the school over 100 years ago and was recently replaced with an interactive whiteboard projector during a remodel – how the times change!

Reusing Old Slate Blackboard

The client loved the antique look and feel of the slate and wanted to make a smaller chalkboard for their kitchen. They had a small space approximately 20 x 54 inches in front of an exposed brick chimney where they wanted to write notes, to do lists, grocery lists, and menus for dinner parties. They tried MDF with blackboard paint, but it wore quickly and didn’t feel authentic enough in their recently remodeled chef’s kitchen.
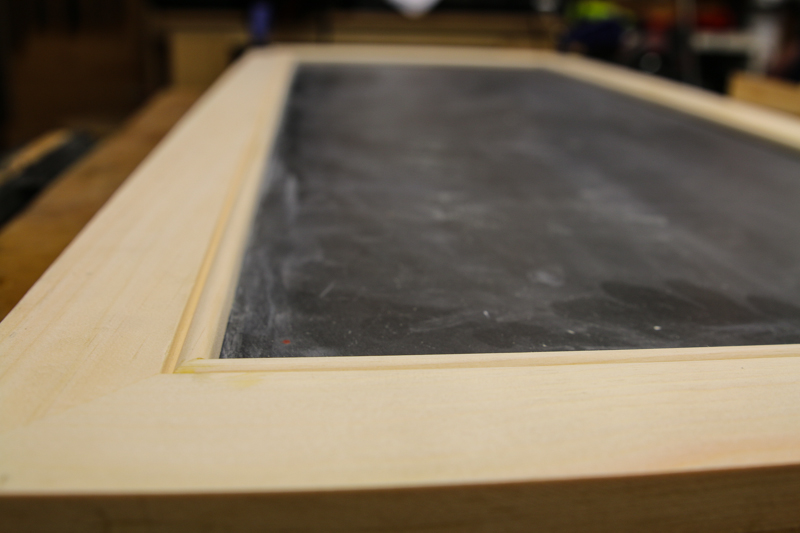
Why slate?

Salvaged slate chalkboard has a beautiful, aged look to it. It’s a creative alternative to the more common green chalkboards. The black color of slate compliments many designs and home projects – it’s an aesthetic that is both timely and timeless.

How to make A Real Slate Chalkboard Steps:

  1. Design Frame and Measure
  2. Source materials
  3. Cut wood to size
  4. Adding the Bead to the Frame
  5. Cutting the Rabbit to Receive the Slate
  6. Assemble Frame
  7. Cut slate to size
  8. Install Slate and Backer board
  9. Making the Chalk holder Shelf
  10. Apply Finish to the Frame
  11. How to Hang the Slate board
  12. Measure space
  13. Source materials
  14. Design Frame
  15. Cut wood to size
  16. Assemble Frame
  17. Cut slate to size
  18. Install Slate and Backer board
  19. Apply Finish to the Frame
  20. How to Hang the Slate board

Design Frame and Measure:

The first step in many projects like this is to determine the size of the chalkboard. Remember that width and measurement will be the frame edges, and the slate will be cut smaller to fit into this frame – similar to a picture frame.

We decided that a 2-1/2 inch wide frame was not only a nice proportion but it was similar to surrounding trim and cabinet styles and rail. We also decided that we wanted to include a 3/8” radius bead in the inside edge of the frame for aesthetics and to compliment the existing bead board back-splash in the kitchen.

Real slate chalkboard is heavy and we figured that we would need to mount this on the brick chimney with masonry screws and a French Cleat.

A French cleat is way of securing a heavy item to a wall. It involves using two “cleat” boards, each with an opposing 30-45 degree bevel. One cleat is mounted to the wall and the other to the item you want to hang, and the bevels interlock and secure the tem to the wall.

NOTE – If the wall cleat is left slightly shorter than the cabinet, the cabinet can be shifted left and right slightly after it is hung, for perfect positioning.

Once the cleat is secured to the wall, the cabinet can be just lifted on to it. Because no fine maneuvering is required even a relatively heavy cabinet can be hung easily this way.

Once we ironed out our design and took our site measurements, we went to work sourcing materials.


Source materials

Because this was a paint grade project, we decided to use clear, select pine, because it has little to no knots. We could have also used Poplar species, which is a cheaper alternative and is also known for its “knot-free” qualities.

As mentioned above we sources a large, heavy, 100-year old, black chalkboard from a local boarding school.

Cut wood to size

We took our materials into the Concord Carpenter shop and began construction.

The first step was to cut the chalkboard wood frame sides [long parts] to the exact height of our project, and then the top and bottom pieces, to the exact width. Because we were mitering the frame corners all four parts could be cut to the exact length and width.

Adding the Bead to the Frame

We then used a 3/8” radius router [with ball bearing bit] and mounted it into our router table. Choosing the “best face,” of the wood we routed a bead along one entire edge of all four-frame parts. The ball bearing guide on the router bit ensures that you get a consistent bead along the entire length. I used a router table fence only because I wanted to use my dust collection system. We’re huge fans of collecting dust at the source when doing long term sanding applications of making a lot of saw dust like sawing and routing.

Once the routing is complete we use a block plane to remove the mill marks that the router bit leaves behind. We then used 100 grit sandpaper, to sand the bead, and lightly break [round] the sharp routed edges.

Cutting the Rabbit to Receive the Slate

The next step is to cut a rabbit to recess the slate into. A rabbet is a recess or “one-sided,” groove cut into the edge of the frame. The purpose of the rabbit is to recess the slate and allow a back cover to attach to the frame. This allows you to hold and “lock” the slate securely into the frame.

We measured the slate in numerous locations and found it to vary in thickness. The average thickness was ¼ inch but there were some thicker spots. We decided to make the rabbit 5/16 inch deep and wide.

We figured a secure fit was better than a loose fit, and justified that the ¼ inch plywood backing board would span over any areas larger, further holding the slate in place.

Using a ½ inch rabbit router bit and our router fence we set the width and depth to 5/16 inches and cut a rabbit on the opposite face of our newly routed 3/8- inch bead.

Assemble Frame

We cut 45-degree miters on our frame parts and dry fitted the frame and slate to see how things were fitting. Once satisfied with the fit we used a Festool DF500 Domino cutter to cut slots in the miter joints.

Dominos provide a mortise-and-tenon joint, which is super strong, and durable. A biscuit joiner and biscuits can also be used for this purpose but are not nearly as strong a joint.

We then glued our dominos and miters together and clamped it overnight. The next morning we removed the clamps, cleaned up the face frame with a random orbital sander and some hand sanding. We then cut out 45-degree beveled, French cleat out of some scrap plywood. We like to use plywood because it does not split like regular wood does when installing fasteners.

We cut additional strips of pine to line the sides and bottom of the frame in order to hide out French Cleat hanging system. Doing this does add an additional ¾ inch to the depth or projection of the chalkboard of the wall but it’s needed. Personally, I like the added depth, and think it gives a nice sturdy look to the frame.

Cut slate to size

We then measured our slate opening.

We reduced the opening size by 1/8 inch off the width and length and then went outside to cut the slate.

We set up sawhorses and used 2×4 slats to support the slate and used one under our cuts to support the cut line. Compared to other stones, slate is fairly soft. You can cut it using a grinder, wet saw, or a circular saw all with a diamond blade.

To cut the slate we used a Bosch grinder and diamond-cutting blade and paired it with our Festool HEPA vacuum to collect the dust while cutting.

The Festool CT MINI vacuum is a tool activated, HEPA vacuum can be operated wet or dry and has a 2.6-gallon capacity with a suction capacity up to 99 CFM. The front interface has an outlet to plug in my grinder for tool activated dust extraction

We also used a dust collection hood for the grinder that had a nice flat cutting plate to guide the grinder along the slate. We measured and marked the slate with a permanent marker and a straight wedge.

We set the grinder to cut through the slate and into the wood 2×4 1/8 of an inch to account to irregularities in the slate thickness. We then cut “free hand,” slowly and steady through the slate – easy cutting. If desired, a straight edge can be clamped to the slate to assist the cut application.

Slate Cutting Tips:


Install Slate and backer board

After cutting the slate we check it for fit in our wood frame, once satisfied we cut a ¼ plywood backer board 2 inches larger in both the width and length of the slate. The 2-inches allow us to overlap the slate an inch on all sides and allowed us to install the backer board with ½ crown staples.

Once the backer board was applied we added the pine side strips to the backside of the chalkboard frame with glue and brad nails. We also glued and screwed our 45-degree bevel French cleat to the top section of the frame back.

Making the Chalk holder Shelf

Once the frame, slate and backer board were assembled we had a good idea of how this project was going to look. We then decided we wanted to add a chalk shelf. Doing this was going to add ¾ inch to the overall length to our project. We had the room and wanted it.

We took a 3 inch piece of Pine the same width of the chalkboard frame and added a thumb nail chalk holder slot to it with a thumbnail router bit. We wanted the shelf slot to start approximately 1 inch in from the sides, to prevent the chalk from sliding out of the slot onto the floor.

The key to doing this was to carefully mark out the slot on the board as a visual during the design phase, but more importantly, mark the backside of this board for the routing application. When routing, the grove is face down, and you will not be able to see it.

We placed center-mark reference on the router fence, where the router bit was located. This allowed us to drop the shelf down onto the router bit, 1-inch in from the edge, and stop it 1-inch in from the opposite edge. This is a similar look as a fluted column.

Apply Finish to the Frame

In this step you will fill any nail holes or imperfections with wood filler, sand, wipe off the dust and apply primer and two topcoats of quality paint.

This step can actually be done before the slate is installed; we chose not to do so.

How to Hang the Slate board

This is the last thing I did. We installed the plywood cleat to the chalkboard frame and the opposing cleat is installed to the brick masonry with Tapcon masonry screws.

TIP – leaving the masonry cleat slightly smaller in width allows you to later fine tune the left / right, placement of the chalkboard on the chimney

We measured and marked the location of our cleat, leveled it and then used a rotary hammer to drill through our cleat and into the masonry.

TIP – Drill and install one masonry screw first, then recheck the level and drill the second and any subsequent screws.

On a regular wall you would install this cleat to span across wall studs then use screws to make this connections. Otherwise you will need wall anchors or toggle bolt.

Slate Finish Tips:

We used a beater chisel and later a razor blade to remove old calking and paint build up around the slate edges. These areas were going to be hidden by the frame rabbit cut, but we wanted to remove them for a better fit.

For deep scratches and the removal of surface gunk, use a random orbital sander with fine grit sandpaper. Wet the sand paper and use a little water to keep dust down.

Conclusion

In the end, slate proved itself to be a strong choice for a number of reasons:

The other night I had dinner with this couple, and upon arriving I found a series of notes written on the chalkboard. By the end of the night, the dinner host had written “The Concord Carpenter Was Here!” Now that was a fun night!


If you enjoyed this post, make sure you subscribe to my RSS feed!
Exit mobile version