Custom Barn Cabinets for a Studio: Rustic Build with Modern Precision

Building Rustic Barn Cabinets with Kreg Tools (Step-by-Step DIY Guide)
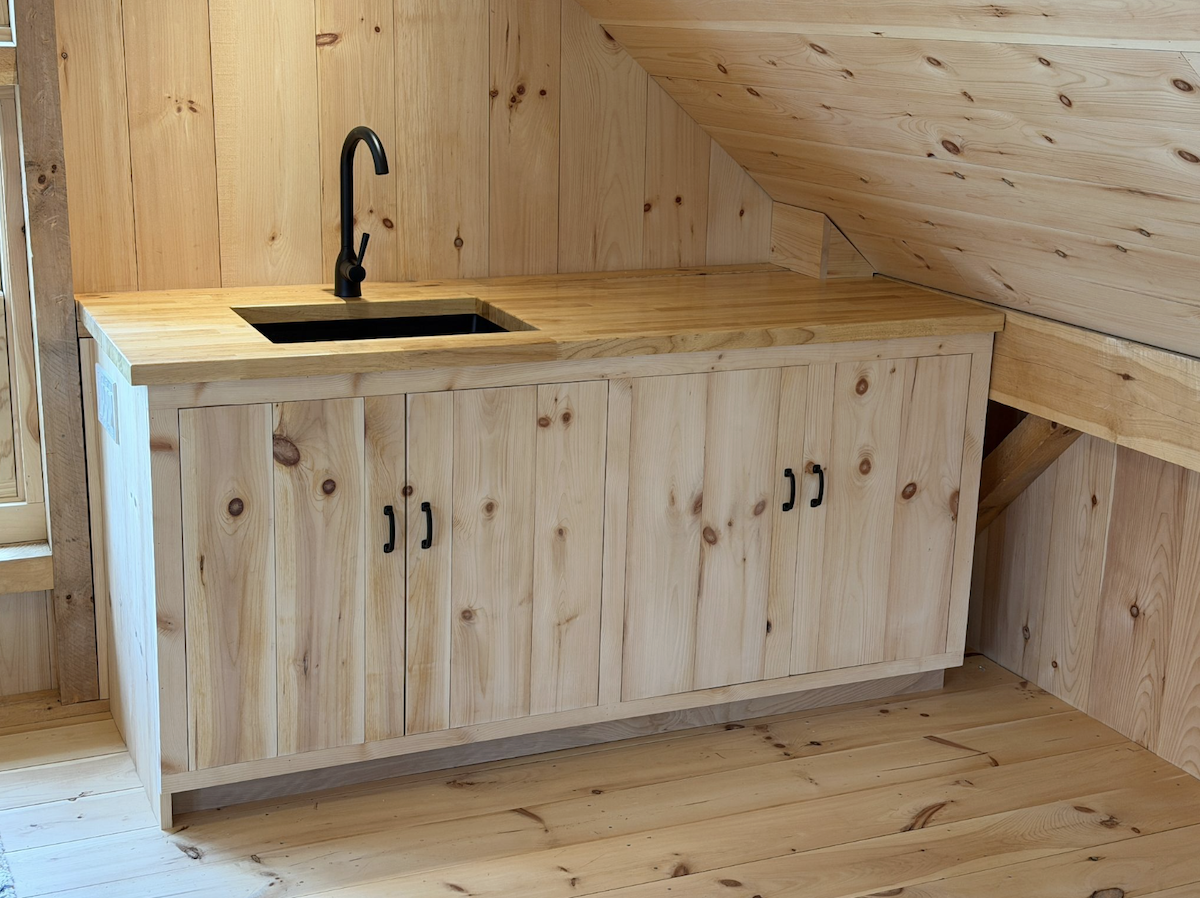
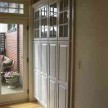
Transforming a rugged barn space into a functional studio requires cabinetry that respects the heritage of the structure while embracing modern efficiency. In this guide, we’ll walk through the process of crafting custom lower cabinets using eastern white pine and the precision of Kreg pocket-hole joinery.
Whether you’re matching century-old framing or simply love the warmth of rustic wood, this build offers a durable, professional-grade solution that any DIYer can master.
Note – this cabinet project is the last phase of our Barn Building Video Series
Materials & Tools You Will Need
- Leftover Eastern WhitePine barn boards and shiplap (for the facade and doors).
- 3/4-inch plywood (for the structural frame, backing, and toe kick).
- 1-inch or 1.5-inch pre-made butcher block countertop.
- Eurostyle inset hinges, [i.e., Blum.]
- Polyurethane.
- Door Handles
Tools Used:
- Online cut optimizer, like OptiCutter.
- Kreg track saw.
- Kreg Rebel pocket hole tool.
- Metal clamp-on corner squares.
- Kreg concealed hinge jig.
- Forstner bit for hinges
- Kreg jigsaw.
- Kreg random orbital sander
- Kreg ¼” impact driver
- Router with a flush trim bit.
Design and Cut Optimization
Like any good project, this one starts with a simple drawing. The basic idea here is to build two cabinet boxes, each fitted with a set of double doors. The doors will be in a classic board-and-batten style, opening from the center for easy access. Both cabinet boxes will sit on top of a toe kick base, which adds a recessed space at the bottom so you can stand comfortably when working at the cabinets.
Once you’ve sketched out your rough dimensions, the next step is to create a cut list for all the frame pieces. It’s worth plugging those measurements into an online cut optimizer to make the most of your materials.
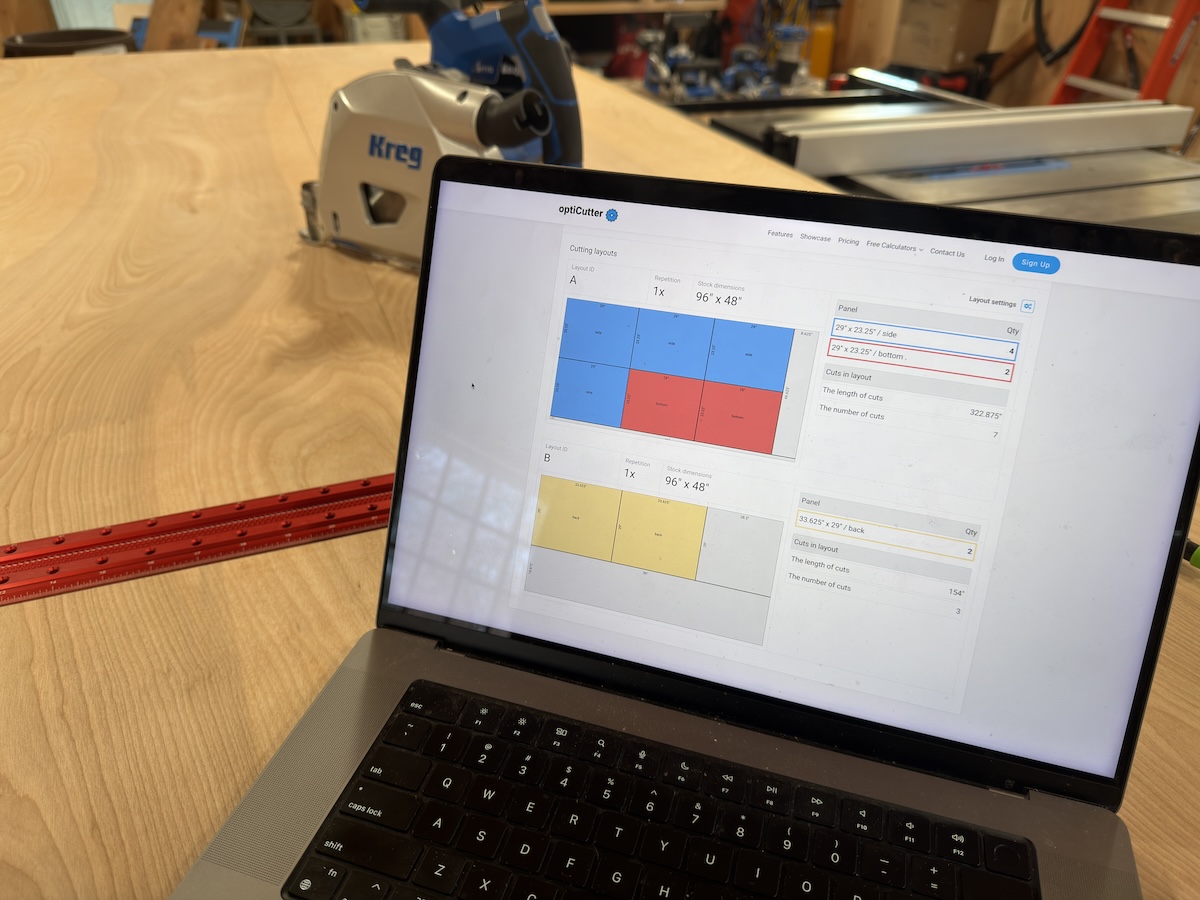
Tools like OptiCutter can help you map out the most efficient way to break down your 4×8 sheets, minimizing waste. With that plan in hand, you can move on to cutting—uI used my Kreg track saw to accurately rip down your 3/4-inch plywood panels.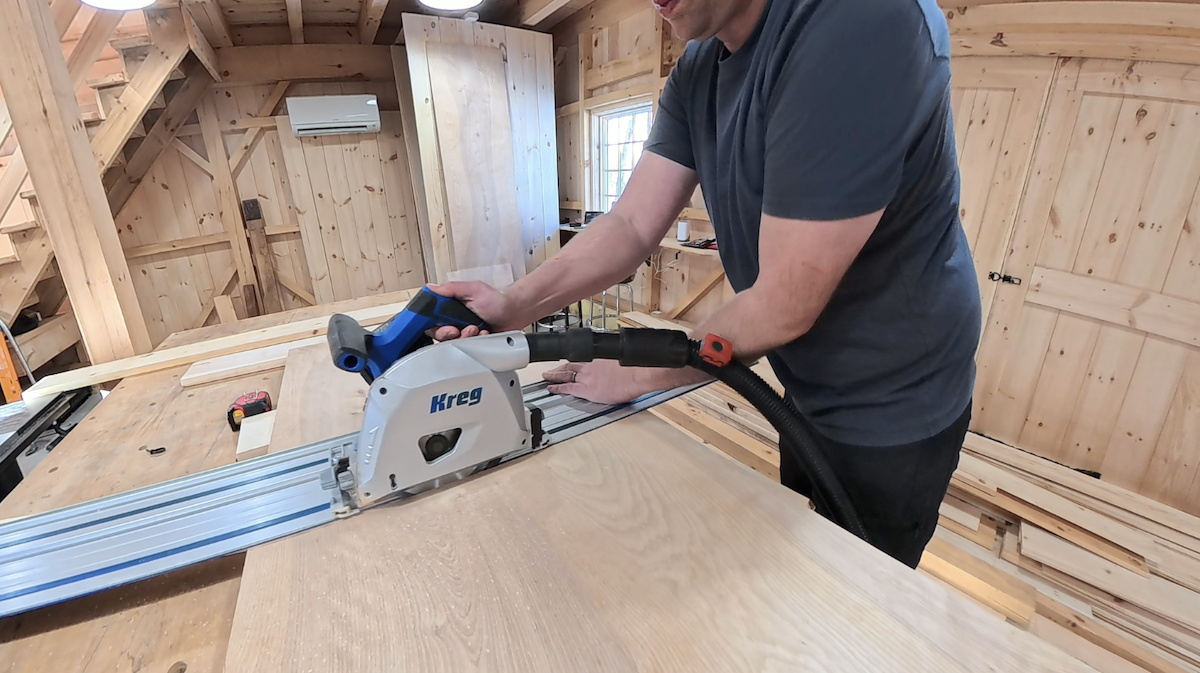
Assembling the Plywood Frame
Next, you’ll want to figure out which faces of your cabinet boxes need pocket screws so everything goes together cleanly and securely. Be sure to size your holes and screws apporpriately for the thickness of your material.We used 1 1/4″ screws given our 3/4″ plywood thickness. 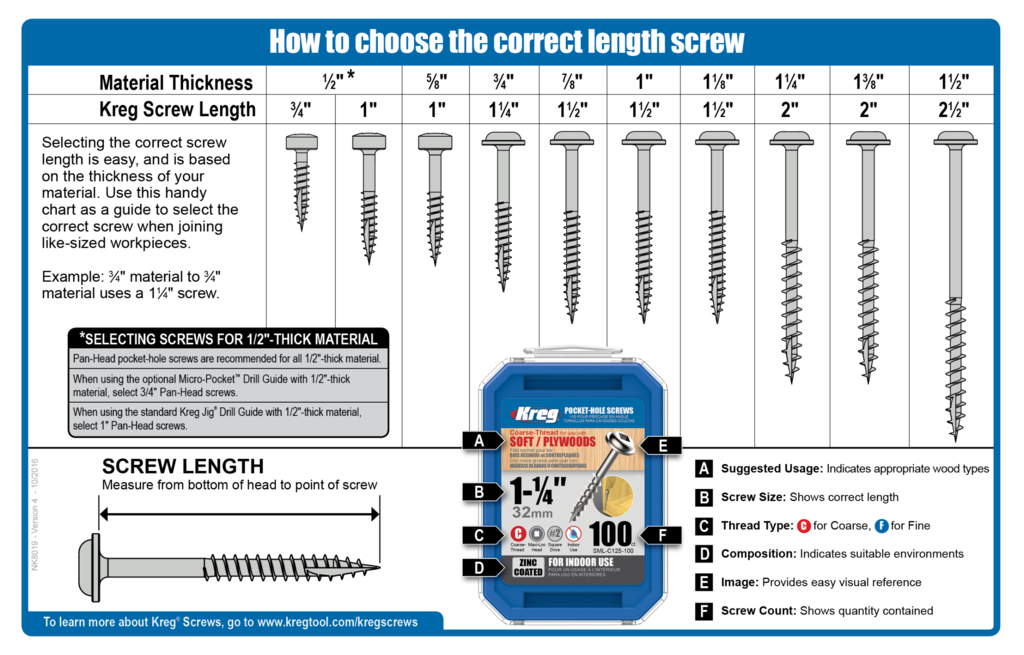 For this build, we used the Kreg REBEL pocket hole tool, which really speeds things up—it’s designed to let you drill pocket holes quickly, making it a great fit for larger projects like this one. Take your time to layout your panels and mark where the hidden pocket holes should go. Then you can lay out your panels and quickly drill all the necessary pocket holes.
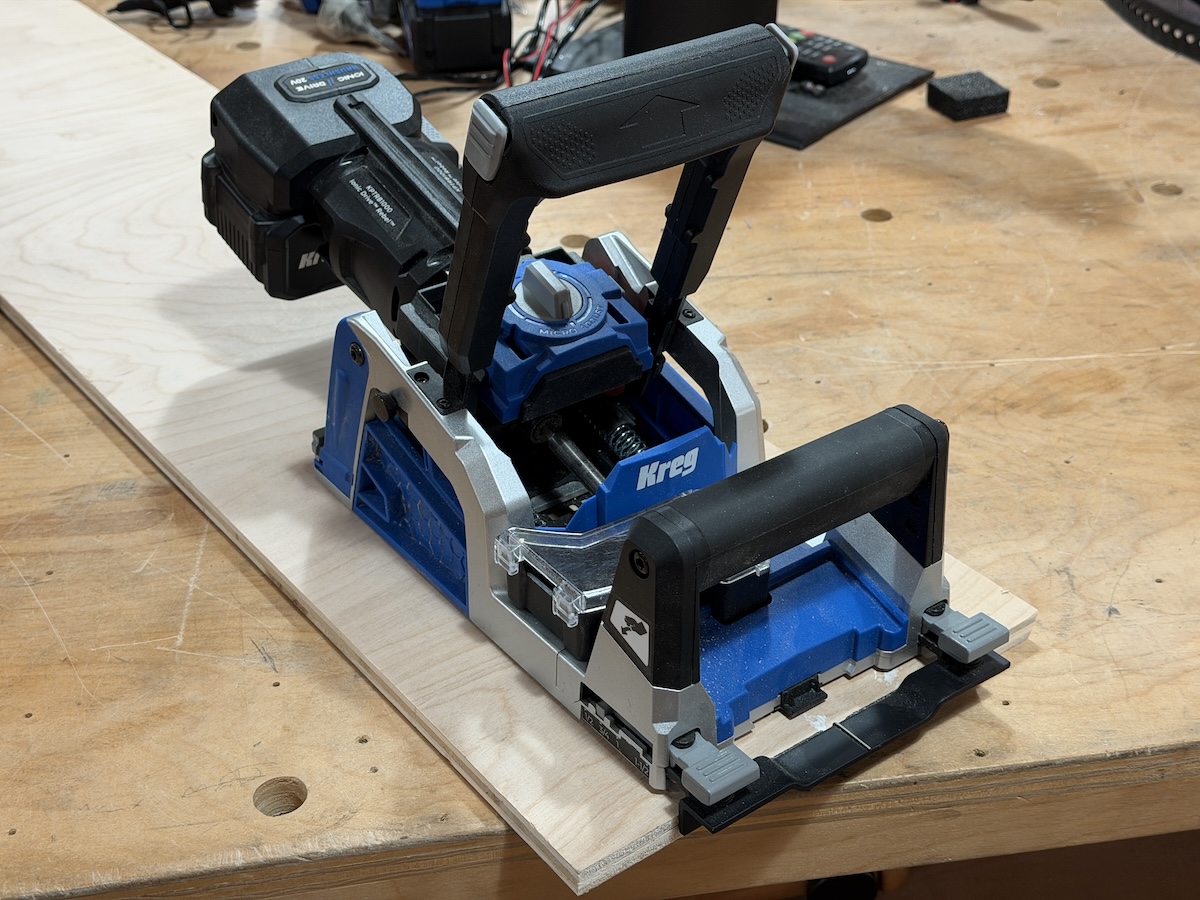
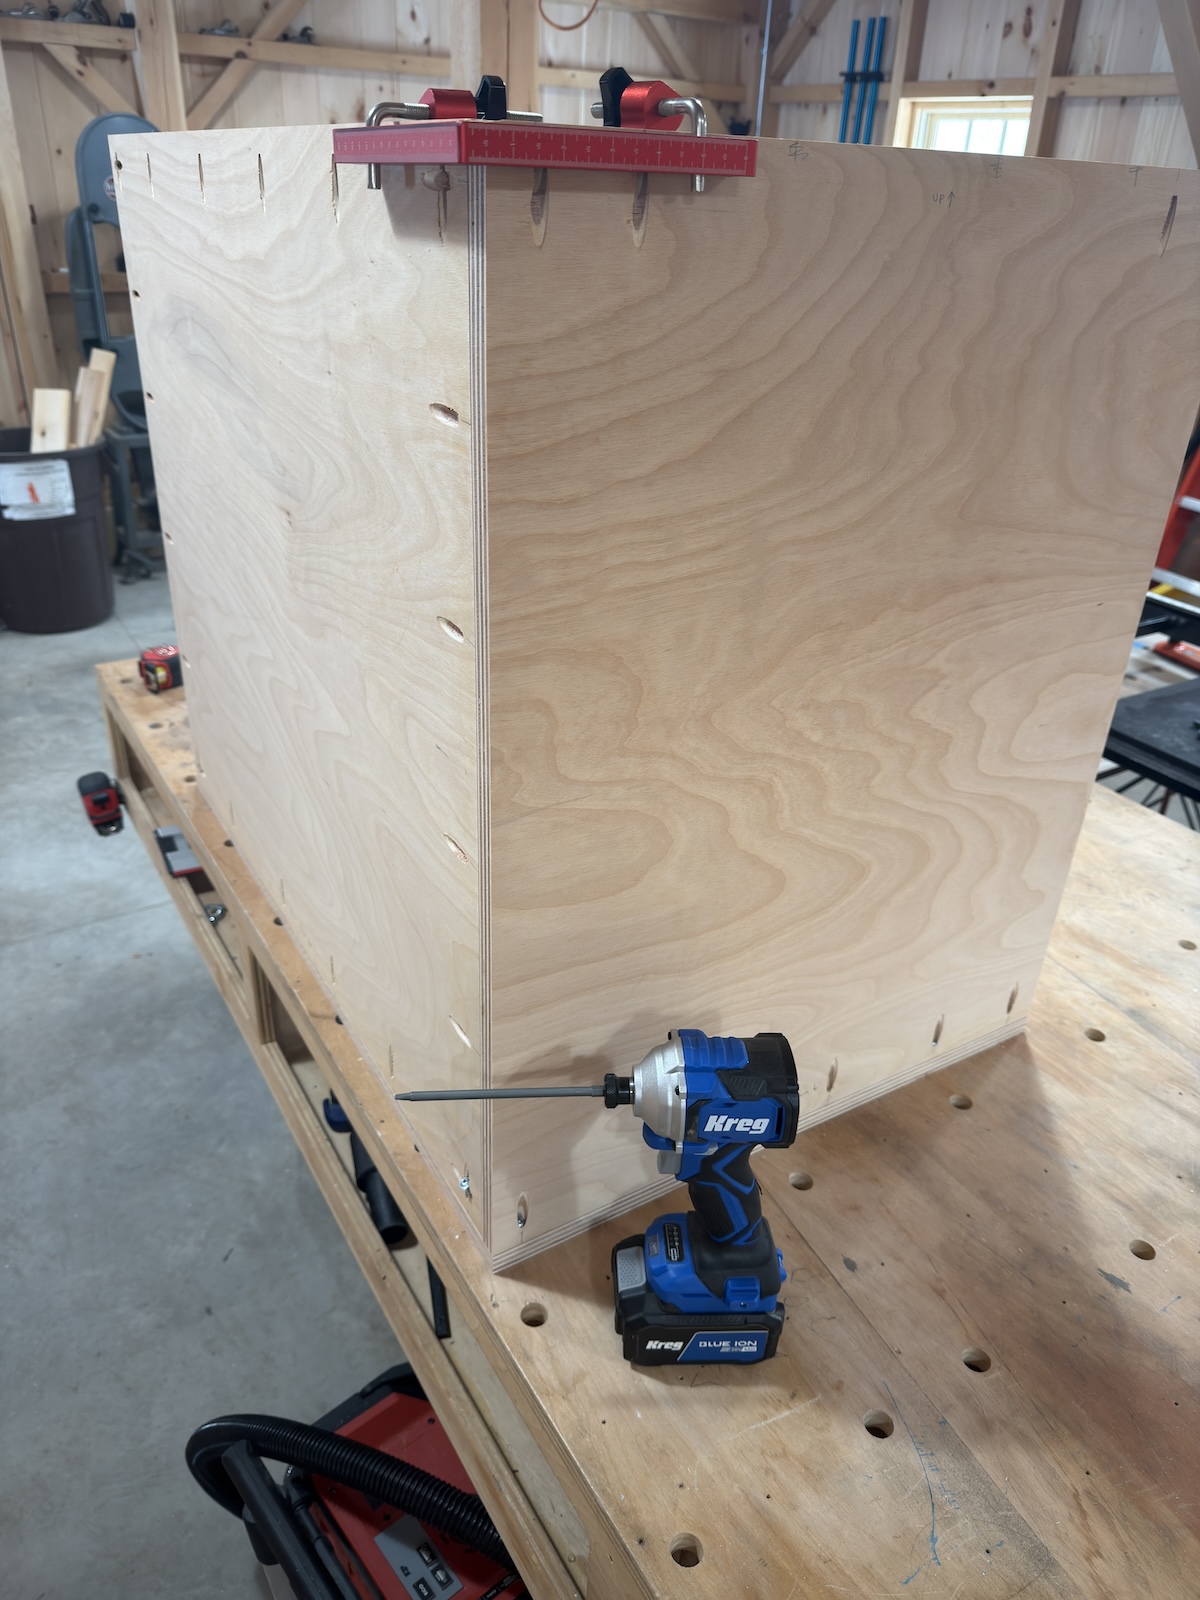
When it comes time for assembly, keeping everything square is key. We like using metal clamp-on corner squares and jigs to hold the boxes in place as we put them together, but there are plenty of different clamps and methods that can get the job done. The important part is to check for square as you go, rather than trying to fix things later.
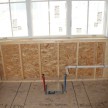
In our case, one corner of the cabinet needed to clear a barn post, so we cut out a section to create a utility chase for electrical and cooling lines. We used 3/4-inch plywood for our back panel, to keep the structure solid despite that missing corner. While thinner materials like 1/4-inch plywood or luan can often provide enough rigidity, using 3/4-inch plywood adds extra strength to make up for any structural compromises from the cutout.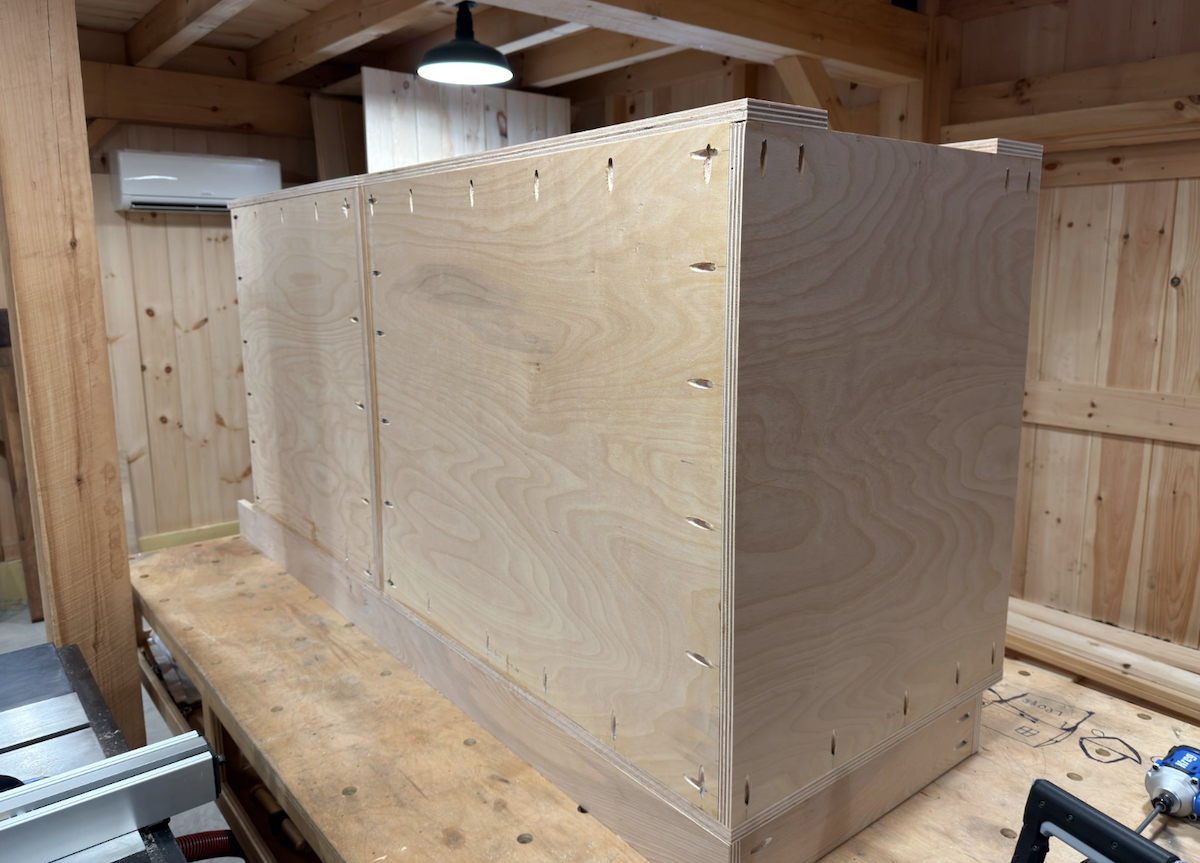
Building the Toe Kick and Top Support
Since it’s much more comfortable to stand at a surface with a bit of foot clearance, the next step is to build a toe kick box. This is essentially a torsion box made from 3/4-inch plywood, and you’ll want to use plenty of pocket hole screws to keep it nice and sturdy. 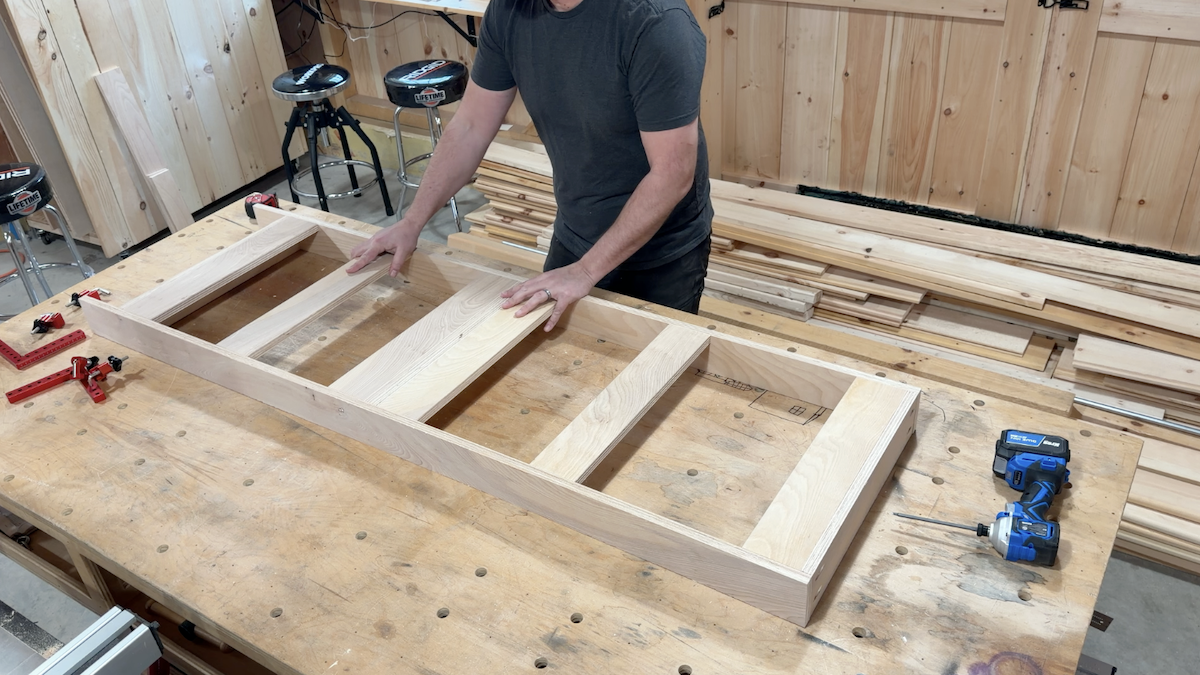 To make assembly easier and more precise, cutting all your pieces to the exact same length with a stop block at your miter station really helps everything line up smoothly.
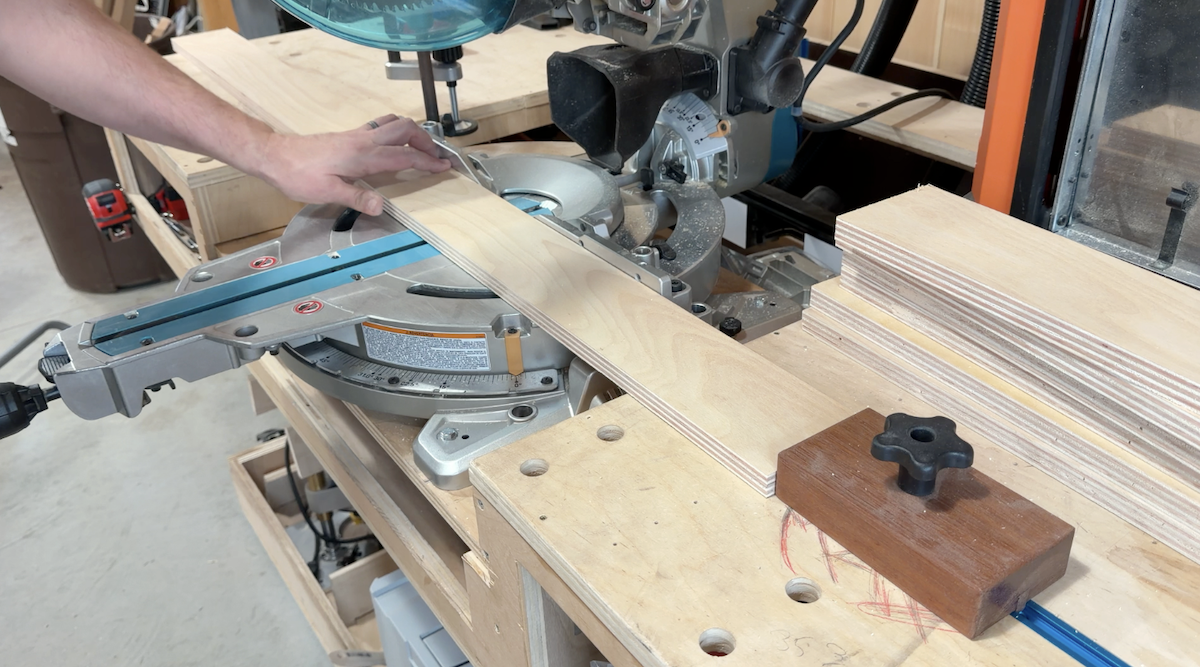
Helpful Links on How To Make A Mitersaw Stop Block:
Once the toe kick box is assembled, you can set your two cabinet boxes on top and secure them with screws. At this stage, you can also join the cabinet boxes together, by fastening the side panels together, just be careful not to drive the screws in too far since the ends may be visible inside the cabinet.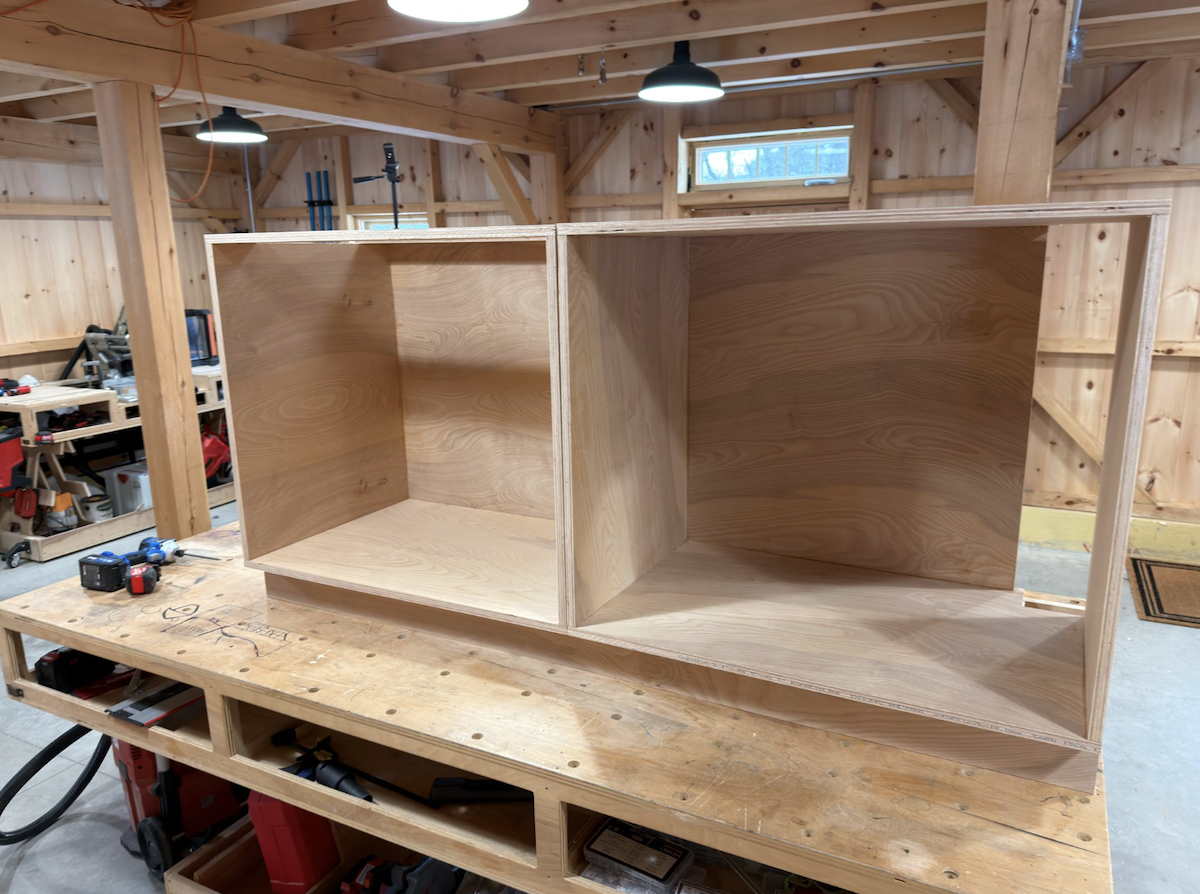
The tops of the cabinet boxes don’t need a solid top because the countertop will cover everything, but you still need some structure to keep the boxes square and stable, and to fasten the top down to.
Pro Tip: A good way to save on material is to use strips of plywood along the edges—just make sure to leave space if you’re planning to install a sink. This kind of edge strapping provides enough rigidity to properly support the countertop without using more material than necessary.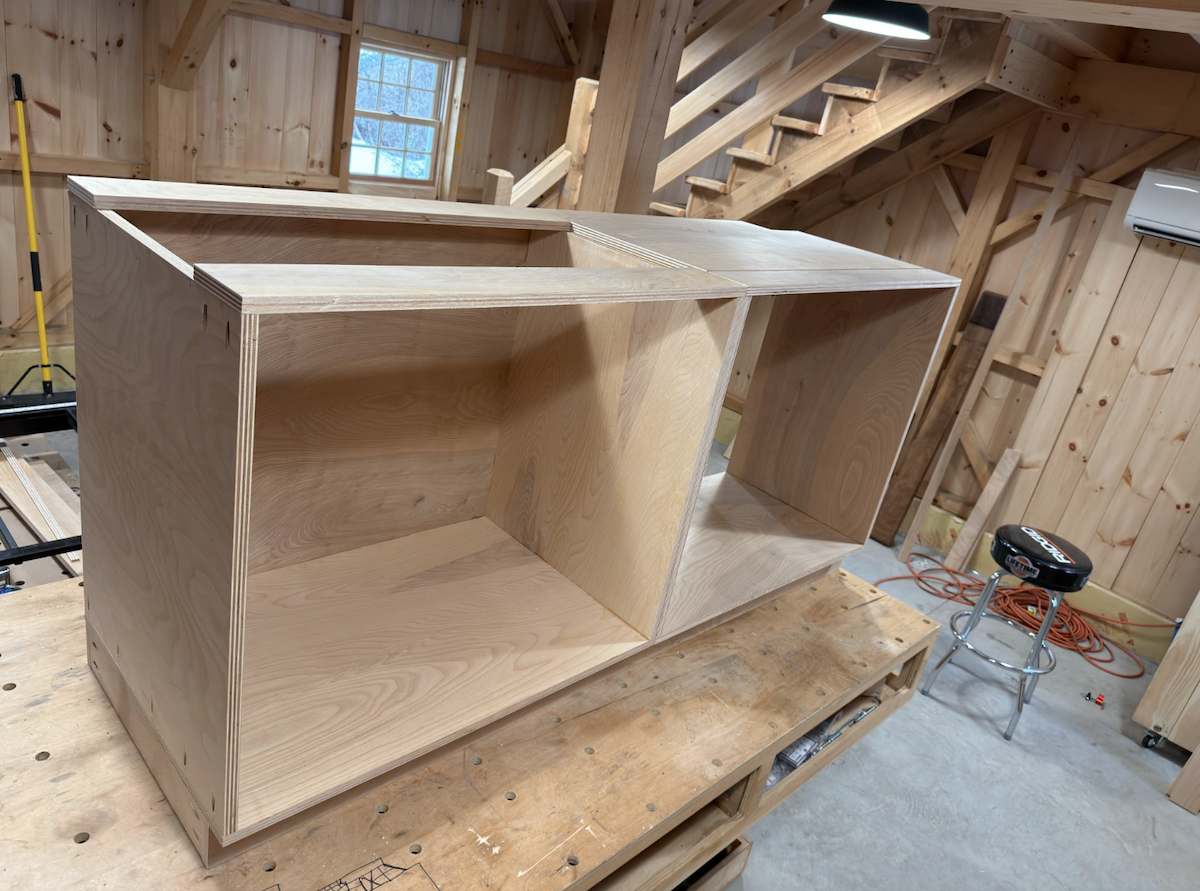
Crafting the Face Frame and Doors
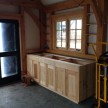
Once you’ve done a successful dry fit, it’s time to lay out a face frame using pine or whatever finish material you’ve chosen. The face-frame covers the exposed end grain of the plywood and gives the front of the cabinets a much cleaner, more finished look—plus it sets things up nicely for inset doors.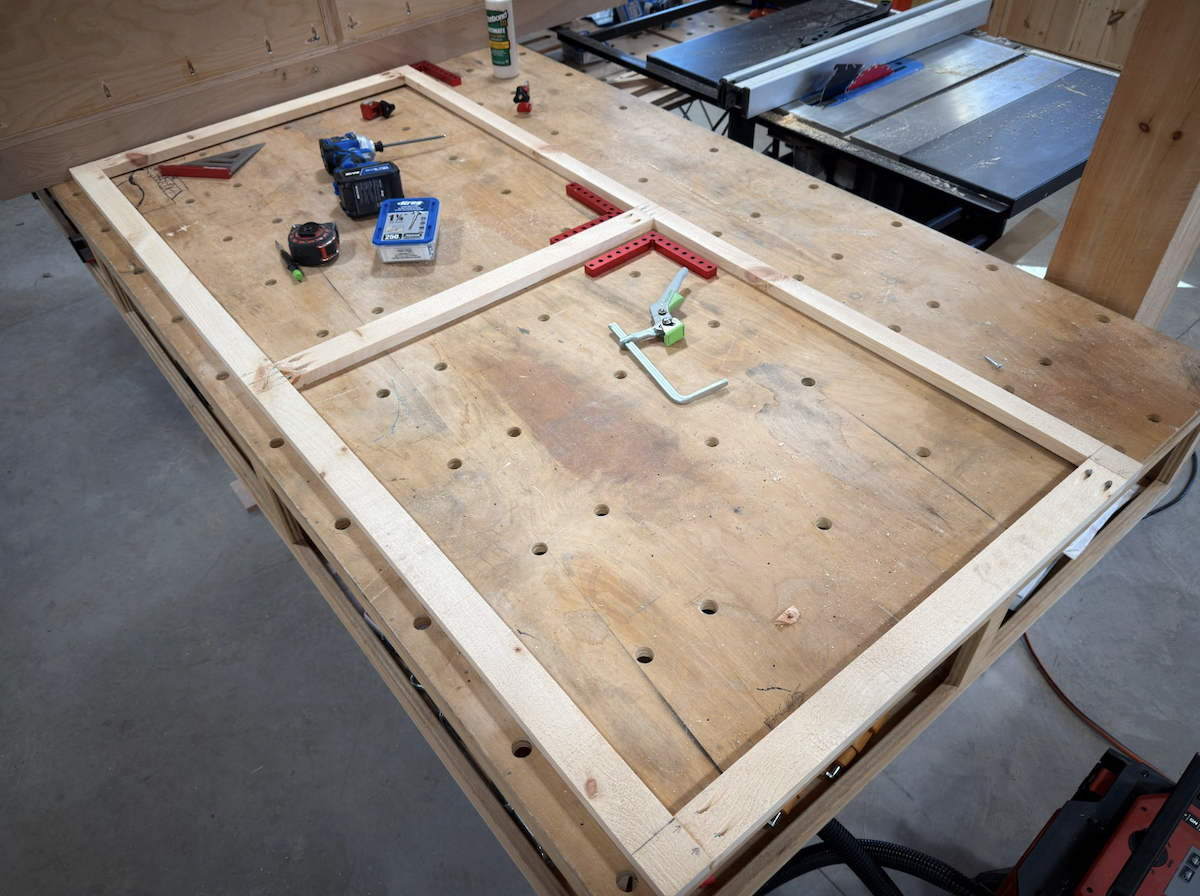
Face frame:
Once you’ve done a successful dry fit, it’s time to lay out a face frame using pine or whatever finish material you’ve chosen. This frame will cover the exposed end grain of the plywood and give the front of the cabinets a much cleaner, more finished look—plus it sets things up nicely for inset doors.
Cabinet face frames can be installed on each individual cabinet, or if you have the ability to install on site, they can be used to tie together multiple cabinets in a seamless look. There is no set right or wrong width for the rails (horizontal pieces) or styles (vertical pieces) but we elected to keep a uniform width on this particular cabinet so we could mill all our boards the same. Since we were joining two boxes with ¾ width walls, our styles needed to be wide enough to cover 1 ½ inches. We chose 2 inches to give ourselves a ¼ in interior reveal in the center.
Pocket holes can once again be used to join the rails and styles together. Its a good idea to add glue for these seams and the screws actually provide great clamping force for the glue to set. Is important to keep everything square and take advantage of any right angle clamps, squares or jigs you may have.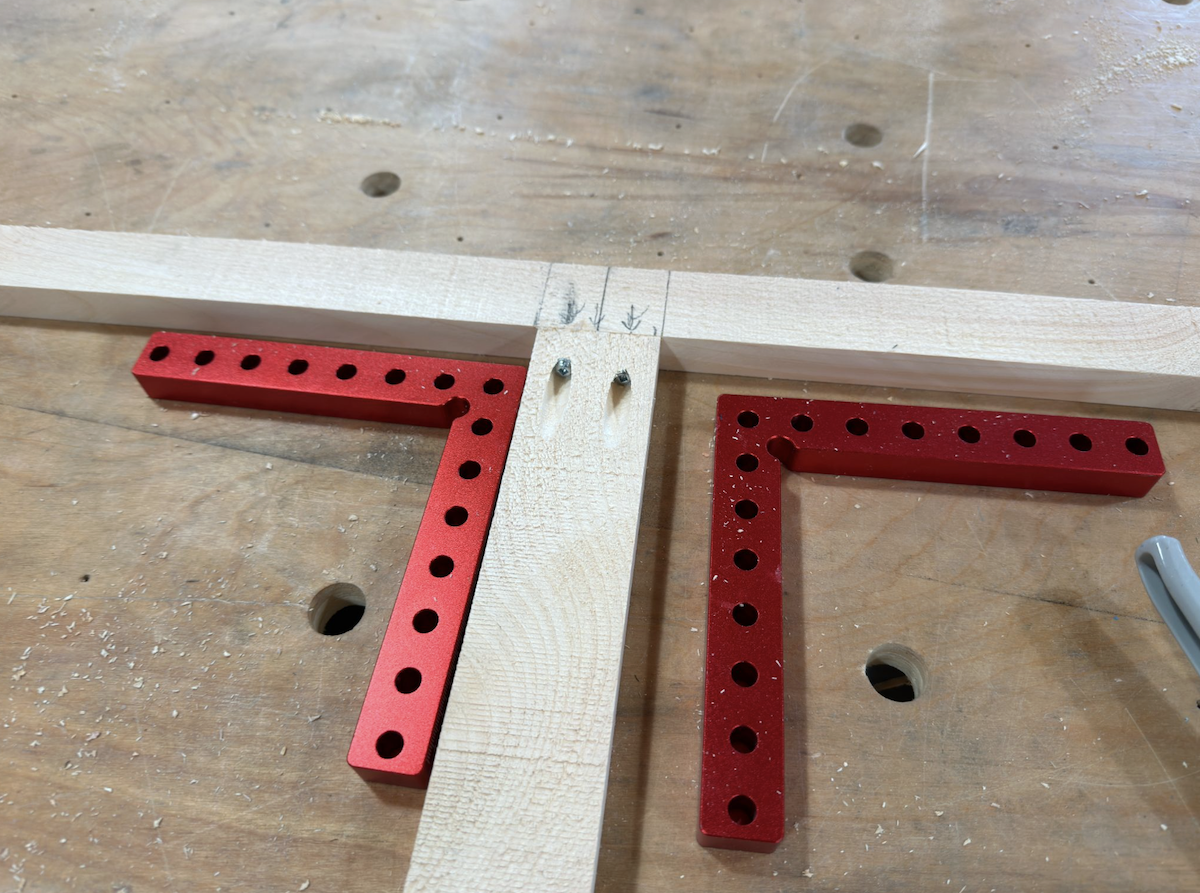
Doors:
After you’ve squared up and installed the face frame, you can actually use the opening itself as a template to build your doors right inside it. This approach makes it much easier to keep everything aligned and lets you dial in consistent gaps along the top, bottom, sides, and between the two doors.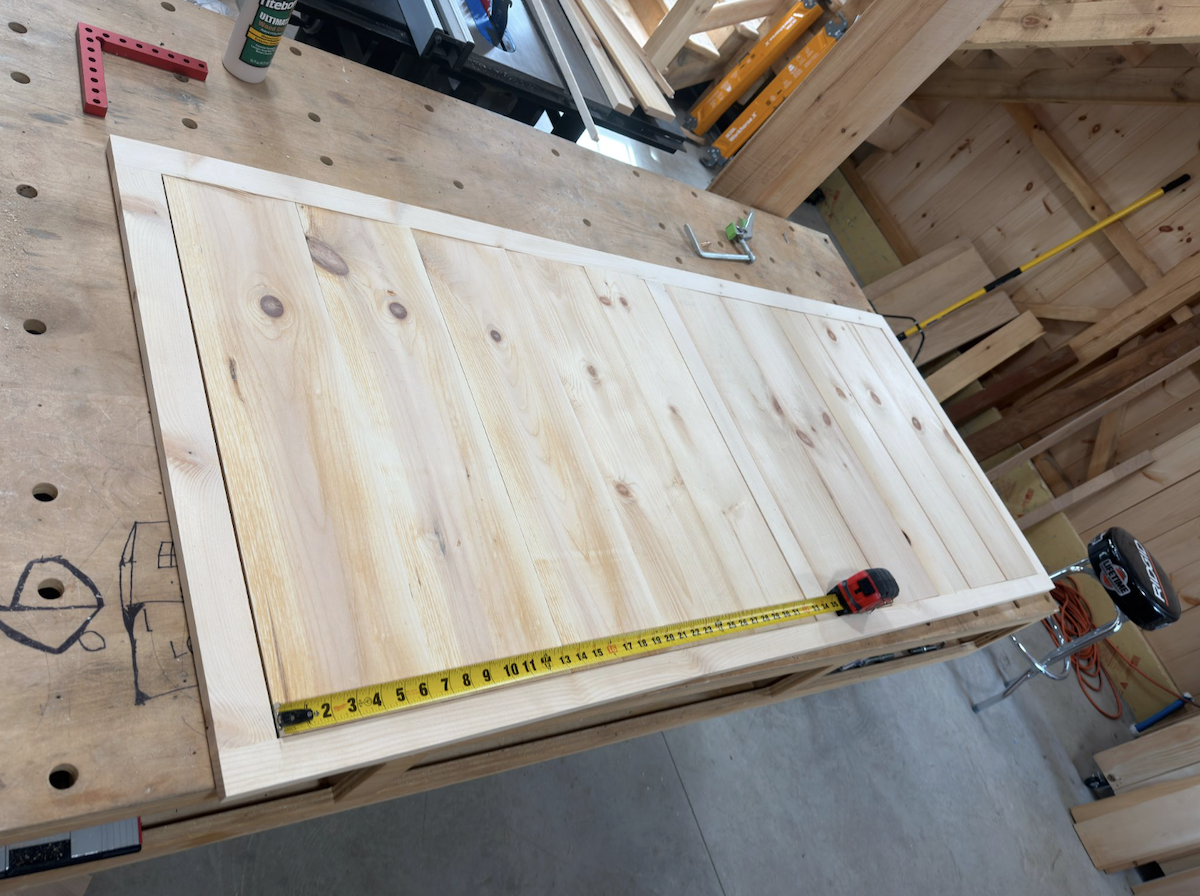
For the board-and-batten style doors, start by cross-cutting your shiplap boards to fit, then lay them out inside the face frame on a flat surface. From there, divide the layout in half to form two doors from the single opening.
To hold everything together, use a standard Z-batten pattern supports on the back. Use properly sized screws, to fasten the battens into the door z-braces to secure everything.
Pro-Tip for Door Sagging:
The orientation of your Z-battens really matters. To keep the doors from sagging over time, make sure the diagonal runs from the top corner on the latch side down to the bottom corner on the hinge side. In other words, the lower end of the “Z” should land at the bottom hinge. It might feel backward at first, but this positioning transfers the weight back toward the hinge side and keeps the door properly supported.
Before mounting the doors to the face frame, take a little extra time to sand and break all the edges, and clean up the surfaces. It’s a small step that makes a big difference in how the final piece looks and feels.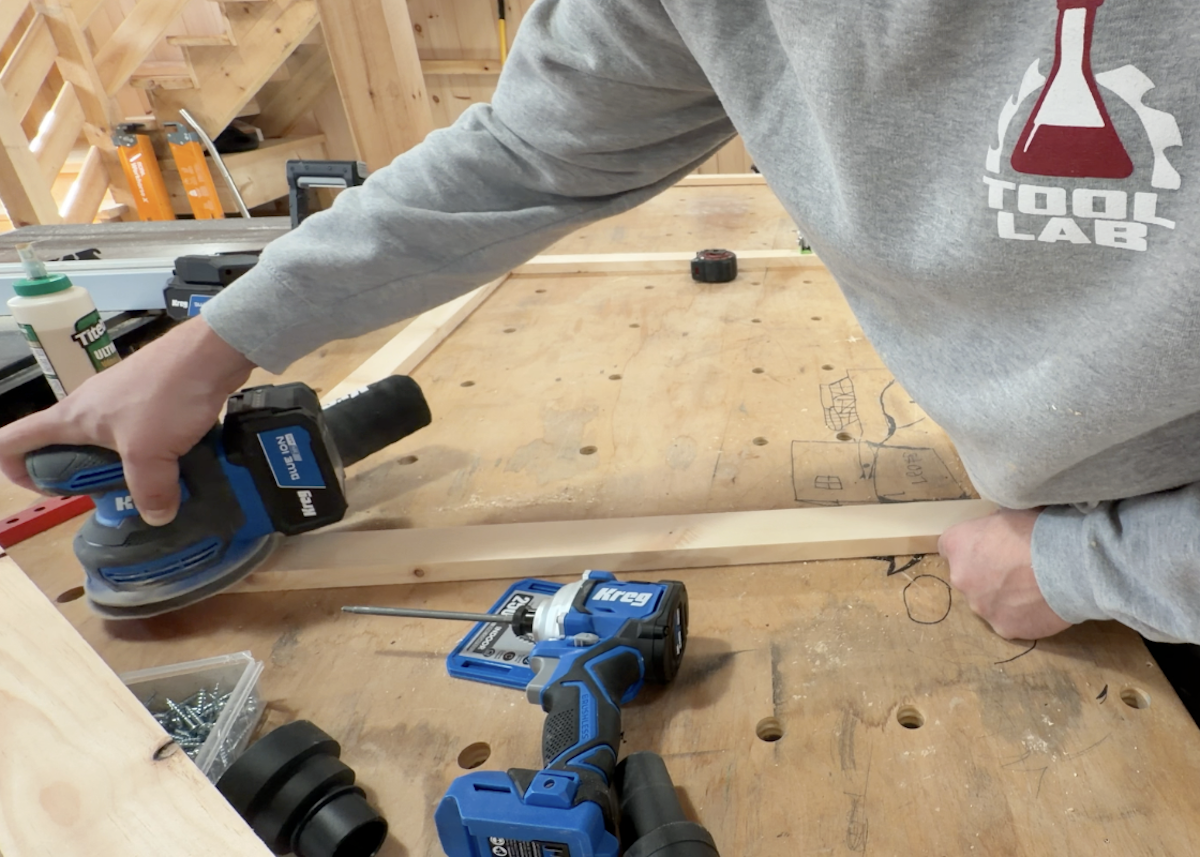
Prepping and Installing the Hinges
Now it’s time to prep the doors for hinges. We chose to use hidden Euro-style inset hinges. You don’t need a ton of specialty tools for this, but you will need a Forstner bit to drill out the recesses for the hinges. If you want to make the process faster and more consistent, a concealed hinge jig—like the one from Kreg—does a great job of lining everything up across all four doors.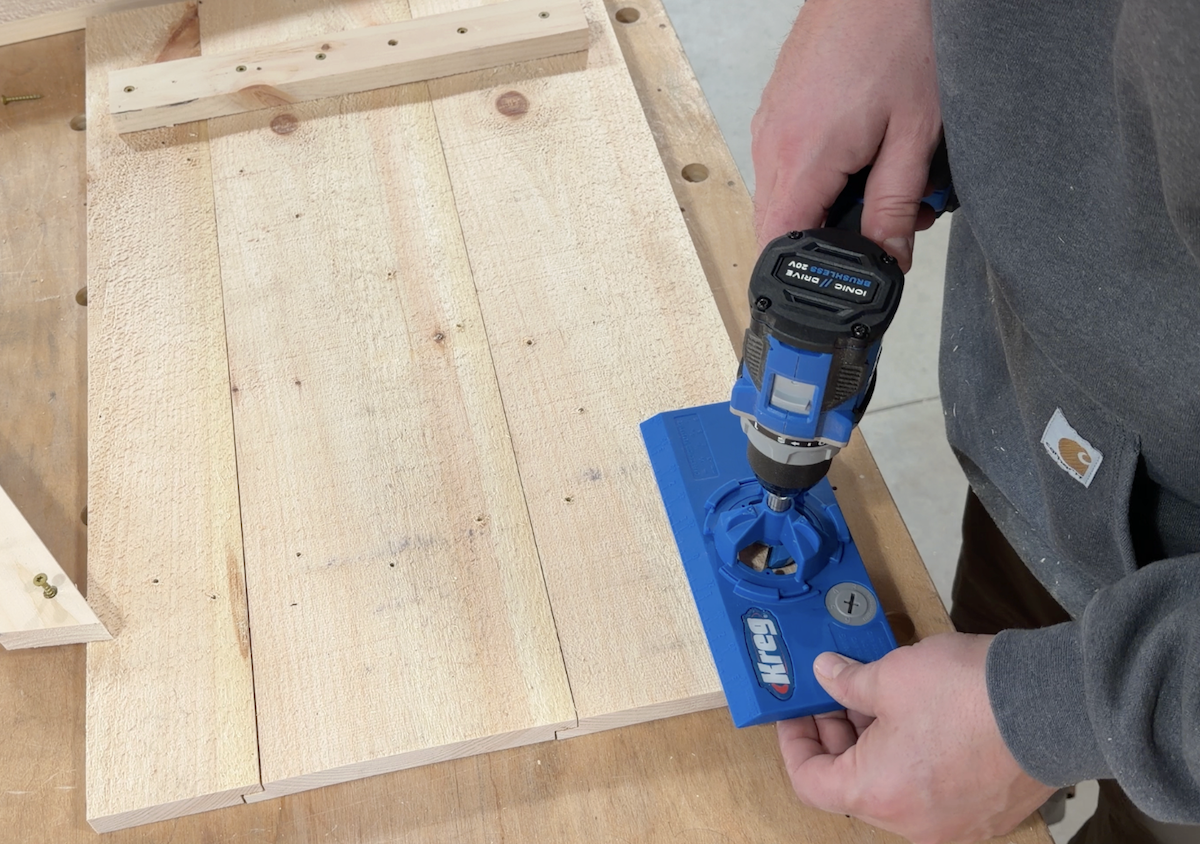
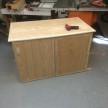
When you’re ready to hang the doors, it really helps to have a second set of hands to hold things steady while you make adjustments. Once everything is installed correctly, the doors should sit perfectly flush with the face frame, giving you that clean, finished look.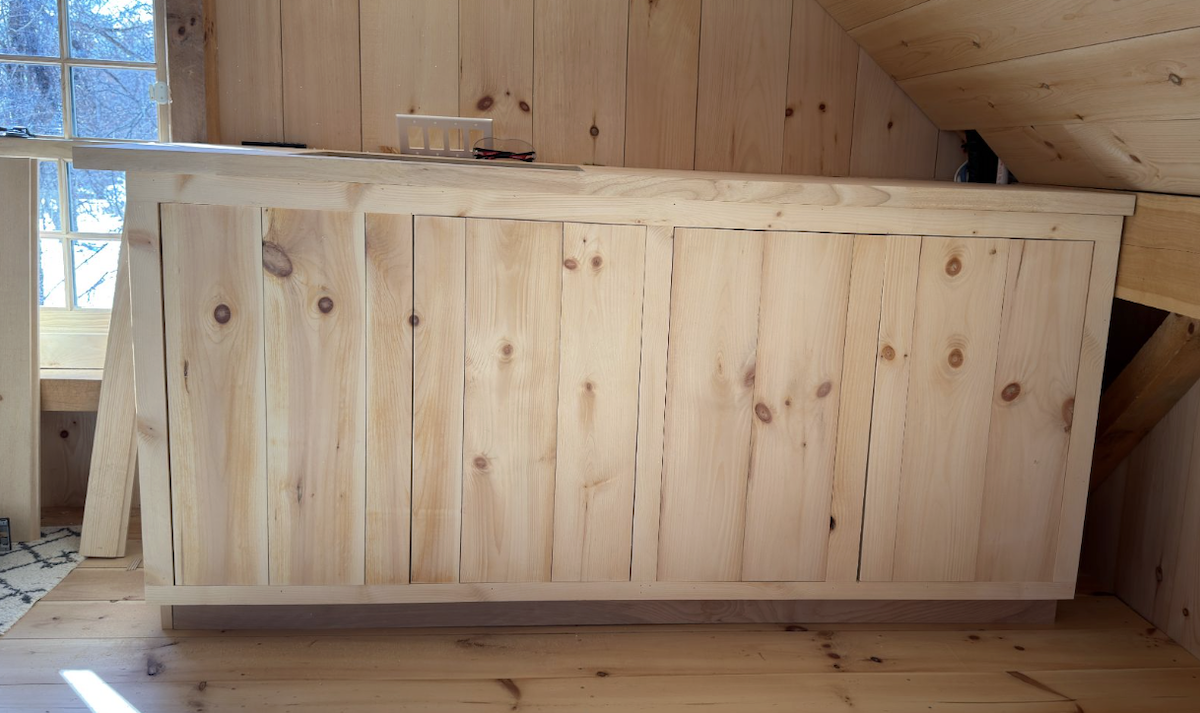
To wrap things up, you can use some leftover shiplap boards as a facade on the exposed outside corner of the cabinet to hide the plywood edges, working around any obstacles like light switches as needed. And if you haven’t already, go ahead and install your door handles or knobs to complete the project.
Countertop and Sink Cutout
Start by setting your pre-made butcher block countertop in place and doing a dry fit, trimming the edges as needed until everything sits just right.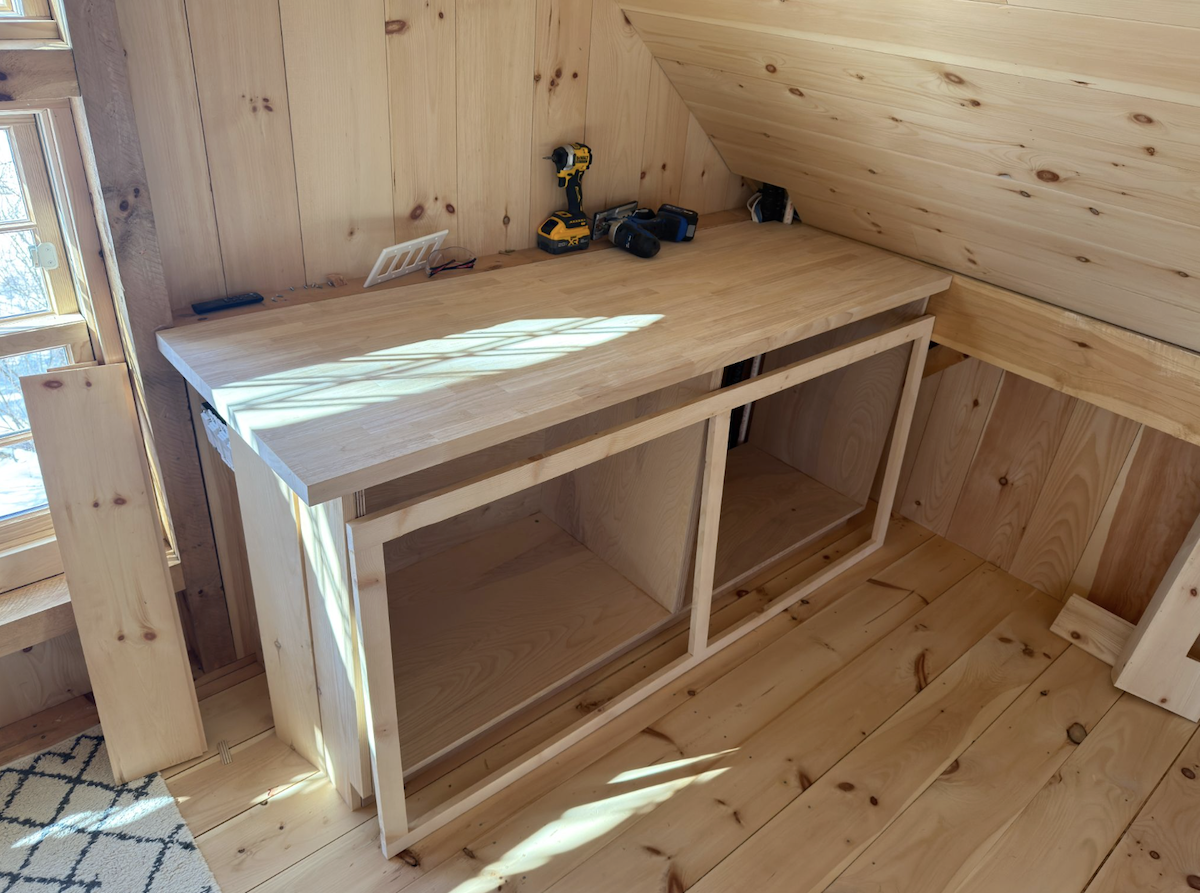 If one of your cabinet boxes is going to hold an undermount sink, now’s the time to plan for that as well. Flip the countertop over and use the provided sink template or create a router template on the underside to define the sink cutout.
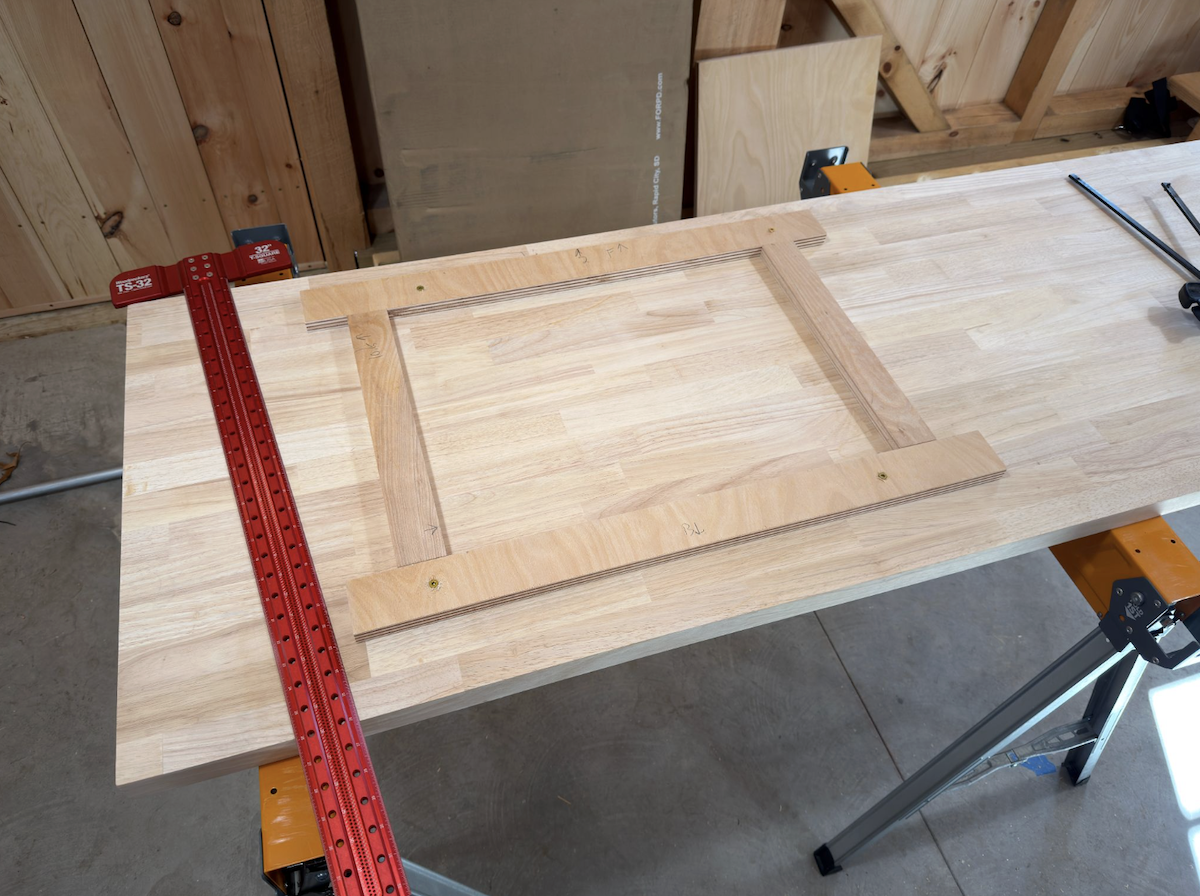
To remove most of the material, use a jigsaw to rough out the opening, staying just inside your lines. Then switch to a router with a flush trim bit to clean up the edges and get a precise, smooth cutout. Since butcher block countertops are typically around 1.5 inches thick, you’ll need to take it slow and make multiple passes with the router to work all the way through the material safely and cleanly.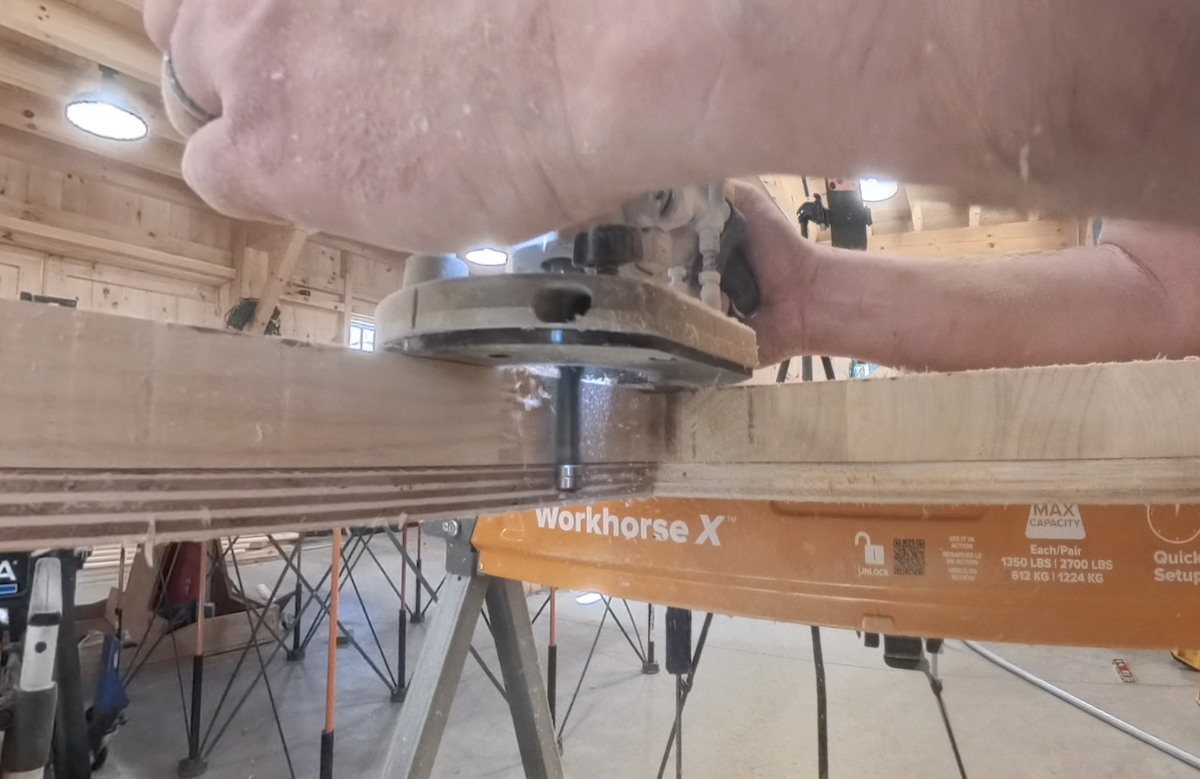
Sealing the Butcher Block
Even if the sink is only going to get light use—like in an art studio—it’s still really important to fully seal the butcher block. You want to cover it on all sides, 360 degrees, with extra attention paid to the sink cutout, and end grain since that’s where moisture can soak in most easily.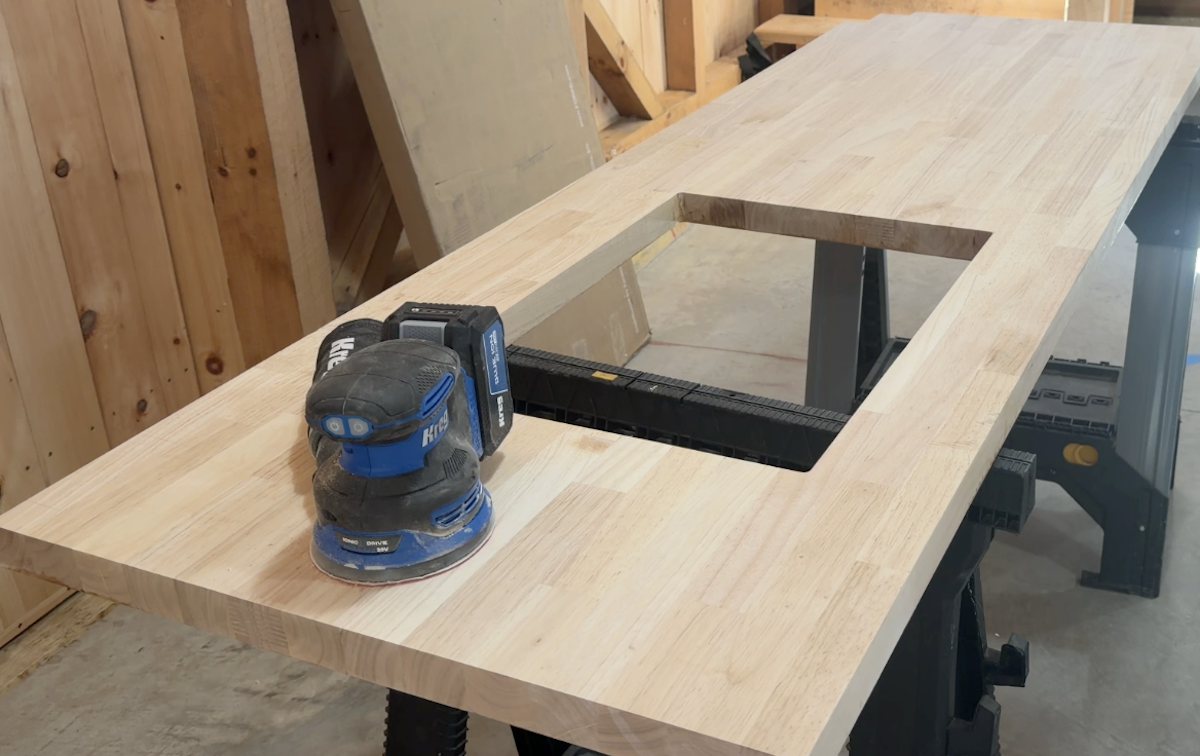 Apply several thin coats rather than one heavy one, and use 220 grit sandpaper to lightly sand between coats to smooth out any bubbles or imperfections.
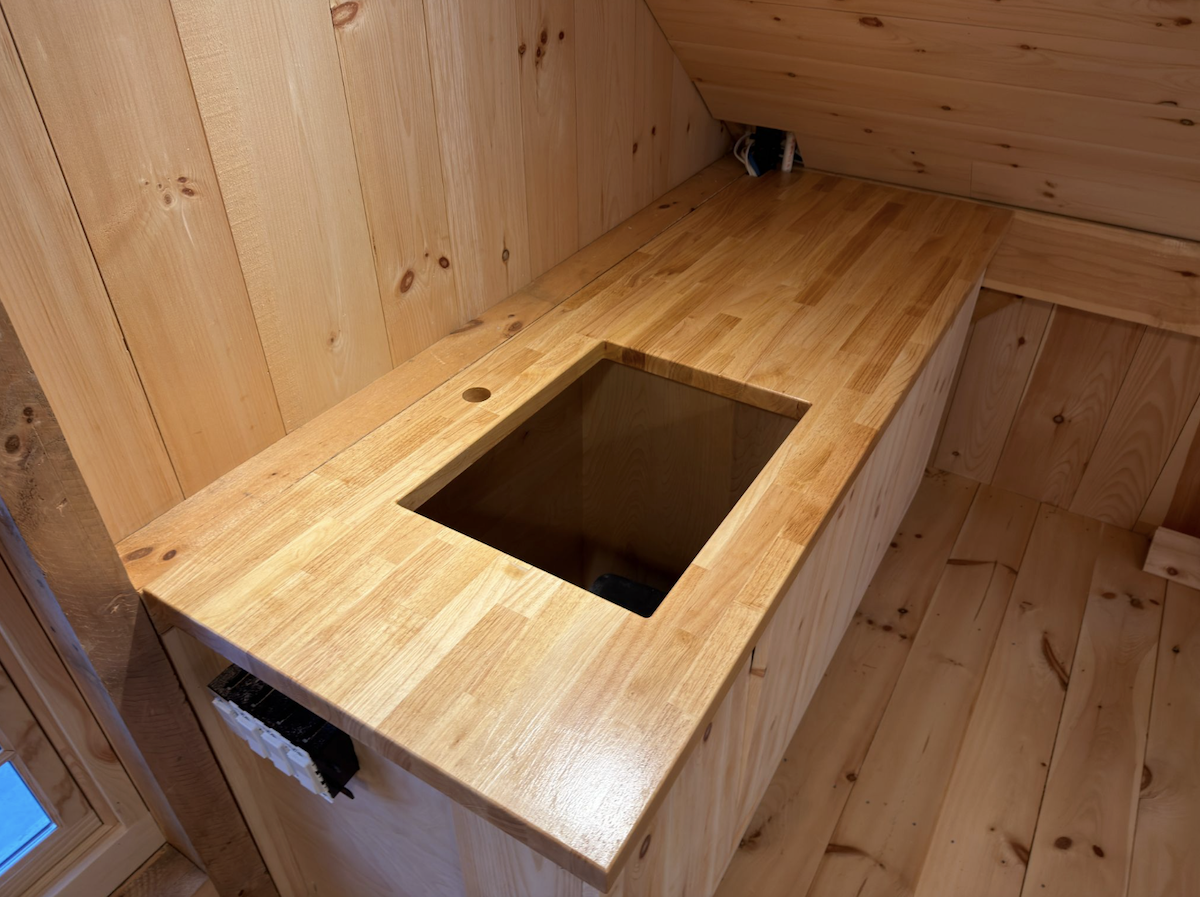
It’s also worth being mindful of any areas where water might sit or collect. The better your seal, the longer the wood will hold up, so taking the time to get full, even coverage really pays off. For an added layer of protection, you can even route a small drip edge on the underside near the sink cutout to help prevent water from creeping underneath.
Conclusion
Building these rustic barn cabinets is a perfect example of how traditional materials and modern tools can work hand in hand. By combining reclaimed wood with precise joinery and thoughtful design, you end up with cabinetry that not only fits the space structurally, but also complements the character of the barn itself.
From the initial sketch to the final coat of finish, each step builds toward a result that is both durable and visually timeless. Whether you’re outfitting a full studio or tackling a smaller project, the same principles apply—plan carefully, build accurately, and don’t rush the details. The end result is cabinetry that looks custom, functions beautifully, and will hold up for years to come.