Pollen Tec Screens Filter Out Pollen
Pollen Tec Allergy Screens Filter Out Pollen
I suffer from allergies. In fact I suffer so much that I have taken many steps inside my home to reduce allergens from avoiding wall to wall carpets, to limiting books, buying special mattress covers and HEPA filters for my AC and vacuum, etc.
Recently I came across the PollenTEC Allergy Screensand was intrigued enough that I contacted the company and spoke to Paul Honnen about his product.
Paul sent me a roll of PollenTEC screen material to review and evaluate.
FIRST IMPRESSION:
The PollenTEC roll came boxed, in the mail, as promised and on time. Looking quickly at the screen it looks and feels similar to nylon screening only “silkier.”
A closer look at the PollenTEC Allergy Screening revealed that it has a much tighter weave than conventional screen. [There are grids within the grids.]
When I held up a sample of the PollenTEC material next to conventional screening I noticed a marked difference in visibility.
USING PollenTEC SCREENS:
The aluminum and fiberglass screens lost most of the flour immediately and all of it when I shaked the screen.
Since installing PollenTEC screens in my screen porch the question most people have been asking me is “What is PollenTEC?”
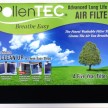
PollenTec is a screen material for windows and doors that allows fresh air to flow into your rooms while filtering out up to 99% of air borne pollens. The material will also significantly reduce the amount of dust and other particulate matter from entering through your screens.
According to Paul Honnen, President at PollenTec by Advanced Textiles, “PollenTec is made from 100 percent polyester that is precisely spun and then put through a patented coating process. It is this combination of precisely spun polyester with the patented coating that attracts pollen spores like a magnet and traps them onto the fine, fibrous grid of the material.”
PollenTEC Proven To Filter Air Borne particles:
PollenTEC has been certified and hospital tested by the European Center for Allergy Research Foundation (ECARF). The testing results verified that 100% of grass pollens, 99.71% of Birch pollen, 93.1% of Stinging Nettle-pollen, 90.9% of Ragweed pollen were captured.
INSTALLING SCREENS:
Step 1:
Remove the current screen material from the window screen frame.
Step 2:
Lay screen on a flat surface and remove the old spline and screen. An awl, small screwdriver or utility knife is helpful in getting the spline removal started. Slowly pull out the spline to prevent damaging the screen frame. Make sure the spline is free from debris.
When pulling the screen tight take case not to install the screen so tight that you “bow” the aluminum frame.
Step 3:
Lay new screening over the frame so it overlaps the screen retainer groove on all sides by at least one inch and cut to length with scissors or utility knife.
Step 4:
Starting at a corner, roll the spline and screen into the channel with the spline roller [round wheel tool] Hold the spline in line with the channel and roll lightly at first to avoid stretching the spline and screen fabric. Push the spline and screen below it into the “U” shaped groove.
Step 5:
Work your way around the screen frame. For the final two frame sides, pull the screen fabric slightly taut as you roll the spline. A gentle, even holding pressure near where you are rolling the spline into the channel will prevent sags or wrinkles in the screen fabric.
Step 6:
Use the back edge of your utility knife or the tip of a flat head screwdriver to press in the spline at each corner.
Step 7:
Any wrinkle in screening may be corrected by removing the spline in that area and pulling the screen tight and re-rolling.
Step 8:
When all of the spline is in place and all wrinkles are smoothed out you can then trim off excess screen material that is outside the spline with a sharp utility knife.
To avoid accidentally cutting the completed screen, angle the blade up and away from the screen material. Cut slowly and steadily.
Step 9:
Reinstall the screen in the window frame
Step 10:
Breathe easier!
MAINTENANCE
The PollenTec material should be cleaned at least once a season and, depending on the amount of pollen in your area, perhaps more often. PollenTec material can be cleaned with a mild detergent and a garden hose. You can even vacuum it with a soft brush attachment.
PollenTEC can be purchased as ready-made screens or in rolls for a do-it-yourself home improvement project.
PollenTEC costs about four to five times more than standard screens. With PollenTEC screens you will no longer need to run your AC during the pollen season which can be a huge energy and cost savings!
The average cost per window screen is nine square feet or 36” x 36” costing $45.00
Which equates to $4.50 to $5.25 per square foot depending on quantity purchased.
Purchase PollenTEC here.
OVERALL IMPRESSION:
PollenTEC was easy to install, and looks like normal screening. I found it very similar to convectional fiberglass screening. As far as difficulty I would rate this an easy to moderate DIY project.
Once the screens were in there WAS a reduced visibility and a slight blurry appearance to objects depending on the lighting. It is the blurry view that people will most likely object to and need to get used to. If your concerned about this I recommend purchasing one screen to test it out.
The reduced visibility does provide additional privacy which was an unexpected benefit.
So far visitors to my screen porch have not noticed a difference in the screen until I bring it up. Although it is not the heavy pollen season, I do feel that dust and pollen particulate has decreased as a result of the screens.
This screening material could possibly be the “silver bullet” that all of us allergy sufferers have been longing for.
As someone allergic to pollen I am willing to compromise the reduced visibility and airflowfor the enjoyment of my screen porch, I recommend it.
This review contains my opinion of a product. I take pride in providing my readers with honest and objective information as well as a practical approach to using a product. I never accept payment in exchange for a positive review. Many of the tools and products are provided to for free by a manufacturer for review.

If you enjoyed this post, make sure you subscribe to my RSS feed or receive updates via email


