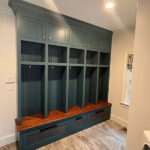
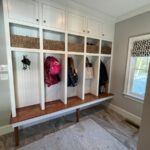
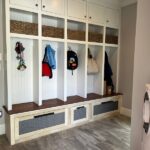
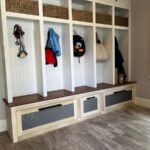
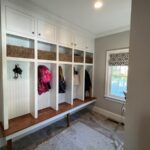
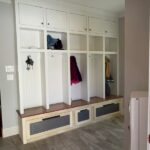
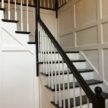
Mudroom Makeover

Mudroom Cubby and Drawer Builtin | Design | Decor
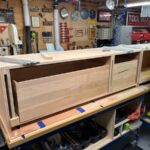
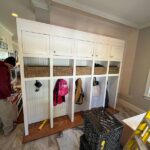
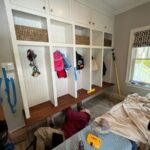
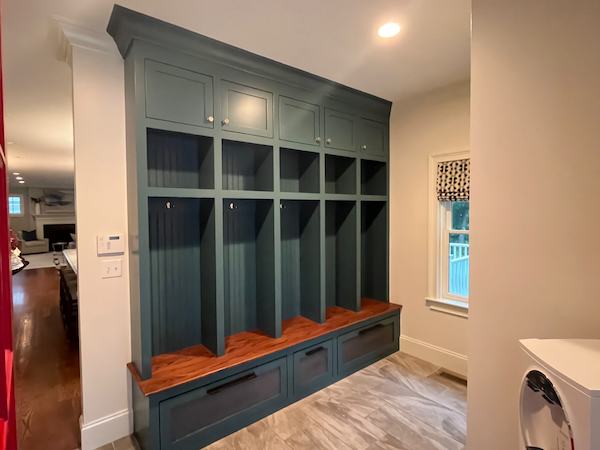
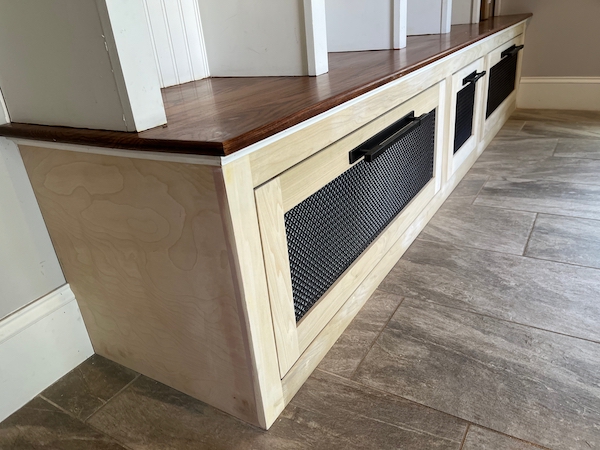
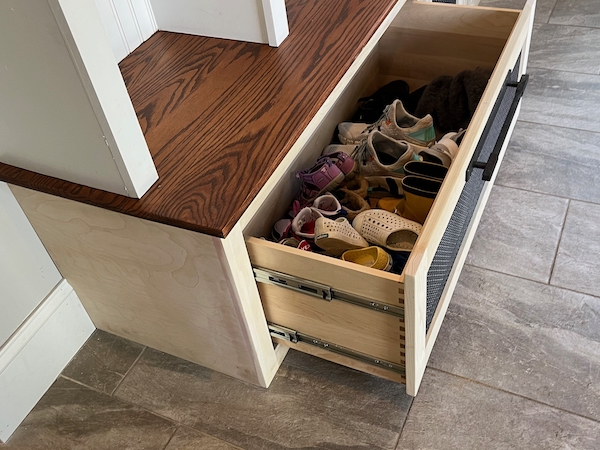
We recently were hired to do a mudroom makeover. The project scope required us to build a 3-drawer unit underneath an existing Mudroom cabinet and Oak bench.
Mudroom Drawer Unit Design
The client currently had an upper cubby and cabinet unit with an Oak seat that was supported by a ledger board on the back wall and two front Oak legs.

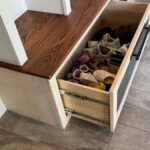
This client wanted three drawers, two large and one small, on full-extension slides. She also wanted the drawers to somehow complement or match the upper open cabinets in style and proportion. Later the plan was changed to create a metal grill look for the drawer fronts.
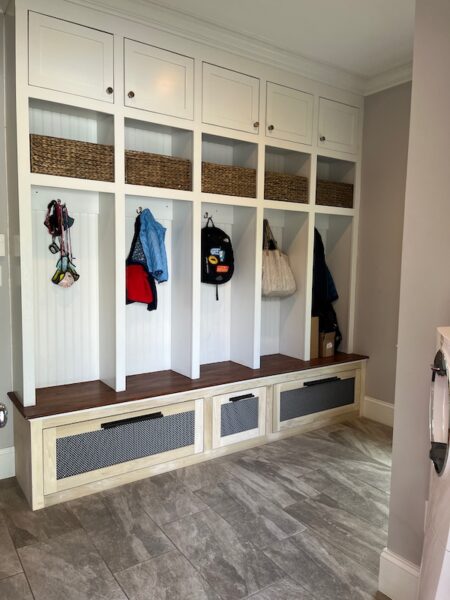
To accomplish this, we did our best to line up the upper cubby partitions with the new drawer face frames. An earlier plan had a faux style in the larger drawers, but when mocked up that looked too busy.
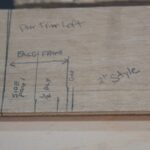
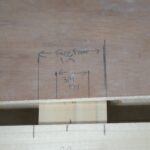
Laying out the Built-in
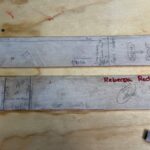
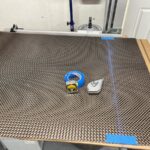
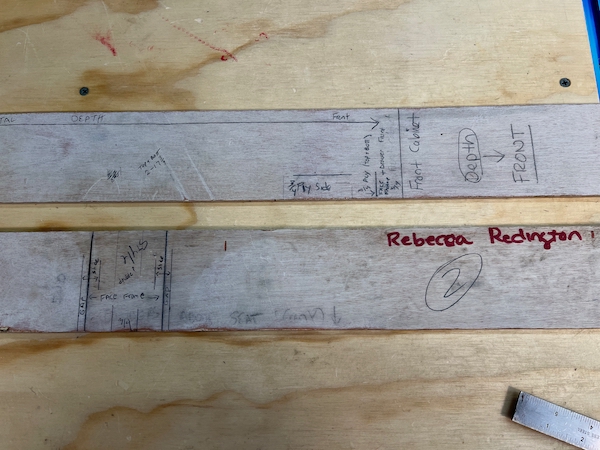
To layout the built-in we used strips of ¼” Luan plywood and created two-story poles, which became my working reference/blueprint. The story poles had three different elevations recorded on them
1. Length
2. Depth
3. Height
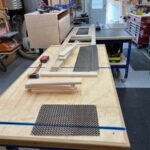
One long strip was for the unit width and double-sided, a short strip of luan recorded the depth and vertical elevation. Using a story pole allowed me to mark and record every detail on the upper cabinet cubbies. Doing this eliminated me from having to use a tape measure, which helps reduce the graduated errors that result from a tape measure and pencil marks. Once in the shop, I drew/build my drawer unit on the story pole, referencing the other details that I recorded.
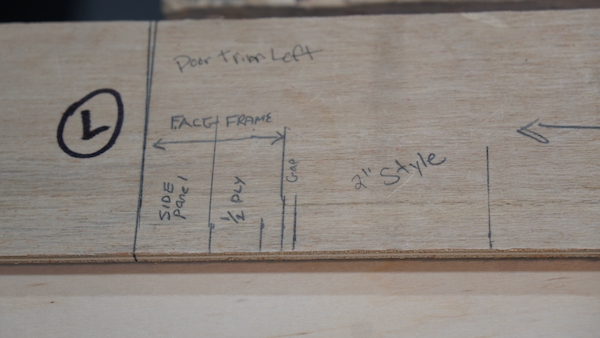
I started by drawing my face frame layout, to match the upper cubbies. Based on the face frames I worked backward and drew my ¾” drawer unit box sides, drawer slides, drawers, drawer gaps, and even the drawer front measurements.
Drawer Construction
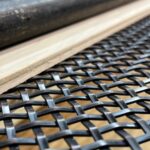
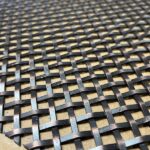
For the drawer unit boxes, I used ¾” Birch plywood, Maple dovetail drawers, Poplar face frames, and drawer styles and rails. The woven wire metal grill was purchased online at: OutWaterPlastics.com
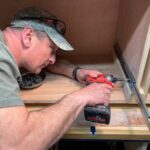
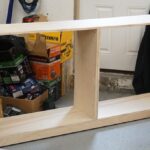
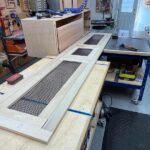
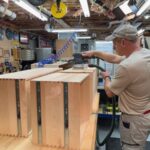
Assembling the Mudroom Drawer Boxes
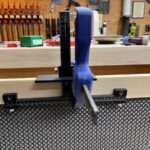
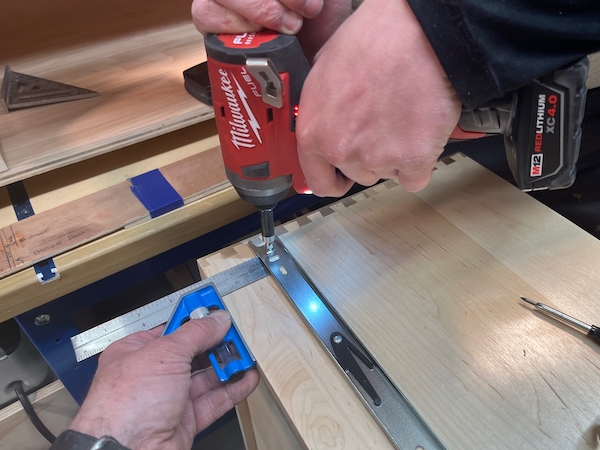
For many years I constructed my cabinets with a tongue and dado joint. Recently I started using direct fastening when the fasteners car is hidden, as well as pocket screws. This latter method is faster. I use a Kreg Jig to make these pocket screw holes in some of the box construction and partitions, as well as later the face frame
The drawer unit is paint grade and the only side that would be visible was the far-left end panel. The rest of the unit would be hidden behind the drawer fronts and face frame. This left panel had to be a ¼” longer, with a rabbit-cut to hide the ¼” Birch plywood back panel.

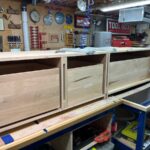
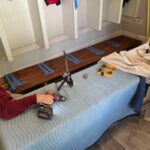
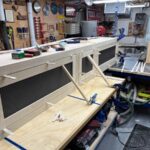
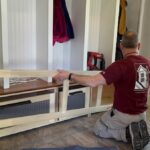
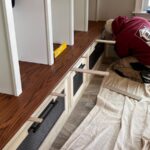
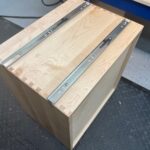
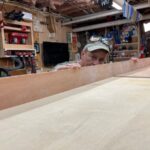
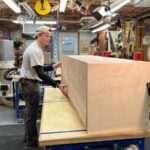
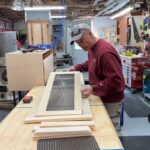
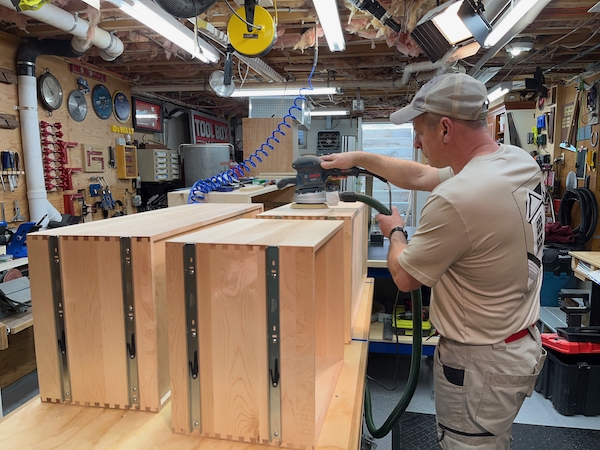
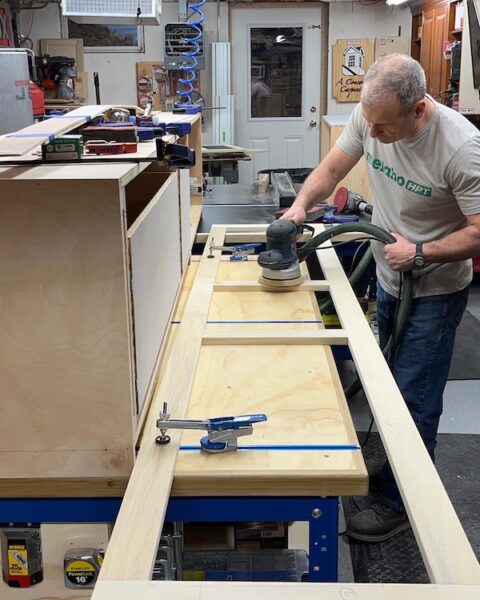
I built my drawer cabinet cases to the measurements drawn on the story pole and then moved on to the drawer units. For ease of maneuvering and transport, I decided to make the 9-foot-long drawer unit in two parts, and later, join them onsite.

Making the Drawers
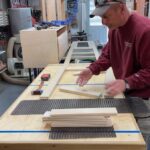
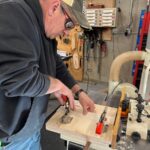
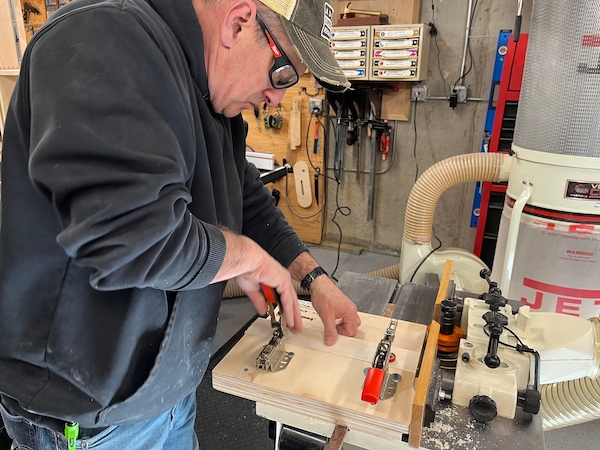
The drawers were constructed out of Maple with ½” front, rear, and side panels and a 3/8” bottom, dadoed, Maple plywood bottom panel. A dovetail machine was used to create the joints.

Once complete, I sand and coat the drawers with two coats of lacquer. The lacquer keeps the drawers clean and prevents them from absorbing odor.
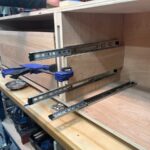
NOTE: I planned on mounting 16-inch, full extension drawer slides. The slides require a ½” spacing between the drawer and cabinet side, and this measurement needs to be built into the story pole design.
Mounting the Mudroom Drawers in the Drawer Cabinet
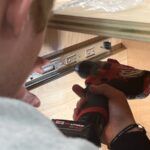
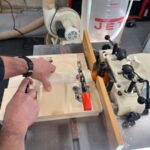
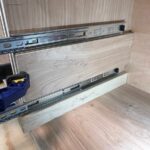
Because the drawer units were so deep, I was concerned about weight. The slide unit I purchased supposedly has a 100 lb. rating, but with kits, I wanted to be safe, so I doubled up the slides, two on each side of the drawer.
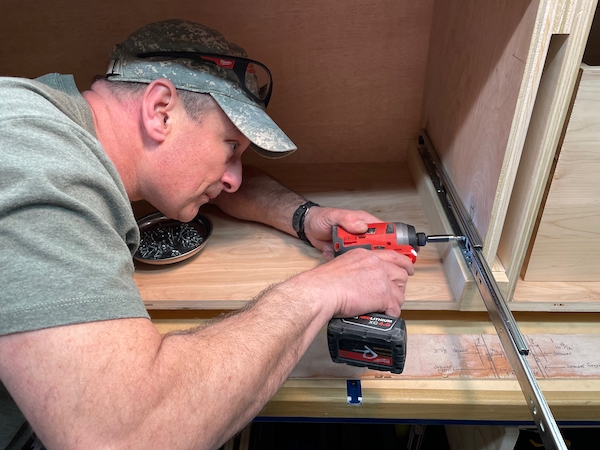
To keep things consistent and ease my installation I created two spacing jigs to keep the bottom slide and top slide at the same locations on all three drawers.
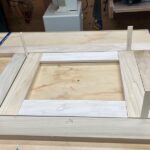
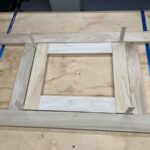
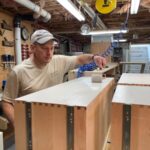
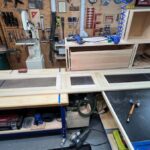
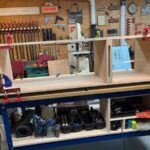
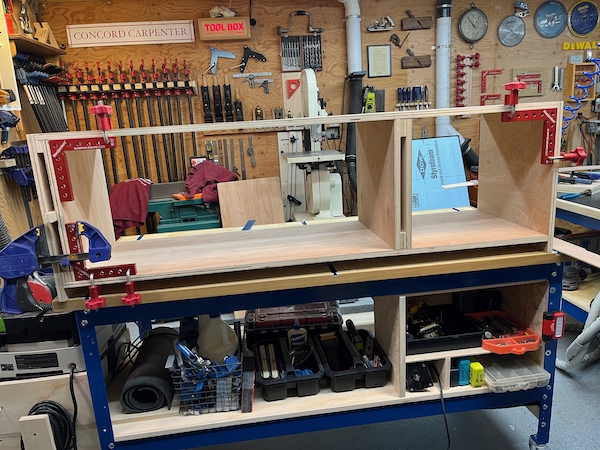
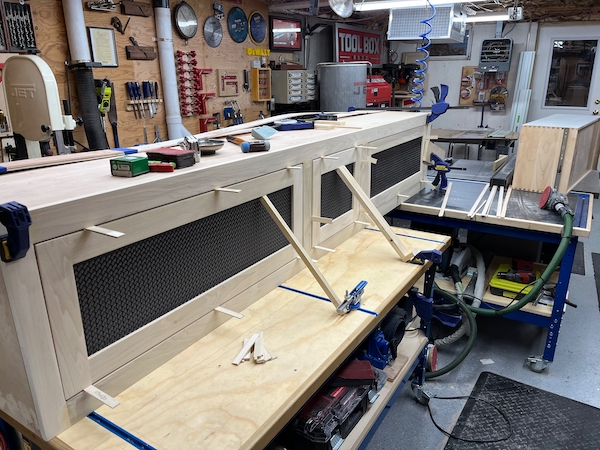
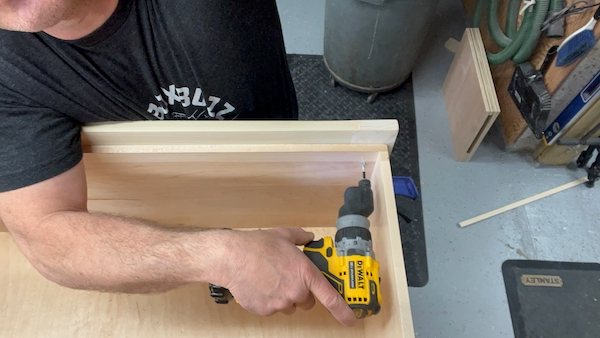
Making the Face Frames
Once the drawers were installed it was time to focus on the face frame. The face frame was long, it carried across the entire drawer unit.
Note – remember during ALL phases of this build – you need to dry-fit everything and continue to reference and check your parts to the story Pole.
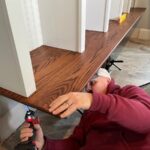
I used the story pole to get my lengths and vertical style locations correct. I purposely left the face frame ½” long on the right side as a scribe against the wall.
The face frame was 2” Poplar and was constructed with pocket screws and glue. I then sanded, eased all the edges, and temporarily clamped it to the drawer unit for drawer front fitment. The cabinet units were temporarily clamped together to dry-fit and test the face frame, and later drawers.
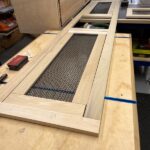
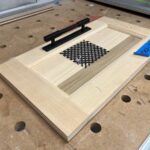
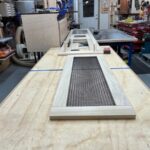
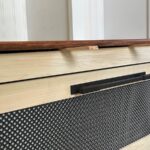
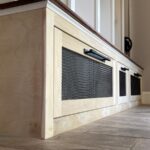
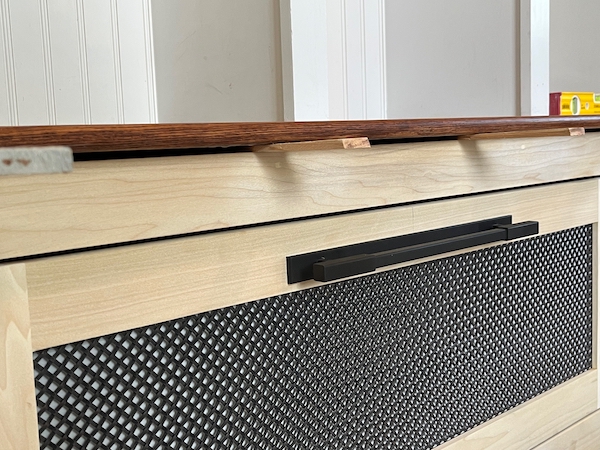
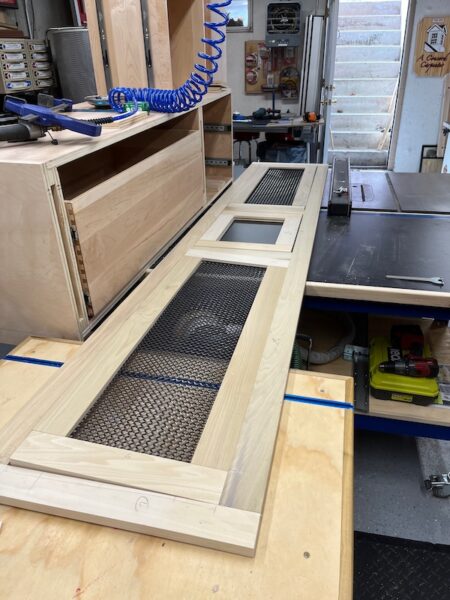
Making the 12-inch Mudroom Drawer Fronts [With Metal Grills]
The three drawers measured approximately:
- 36 x 16 x 12
- 16 x 12 x 12
- 36 x 16 x 12
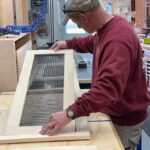
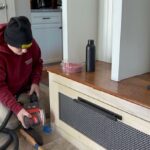
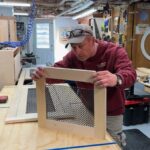
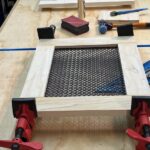
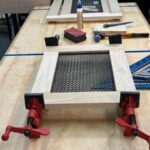
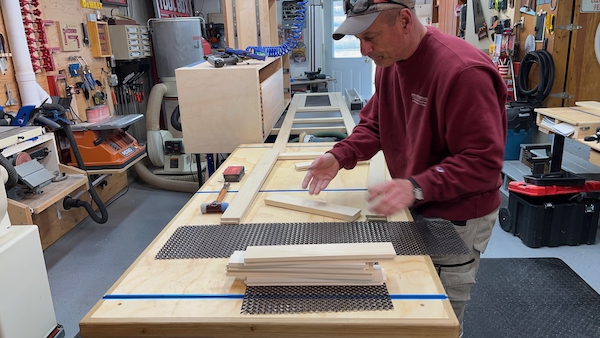
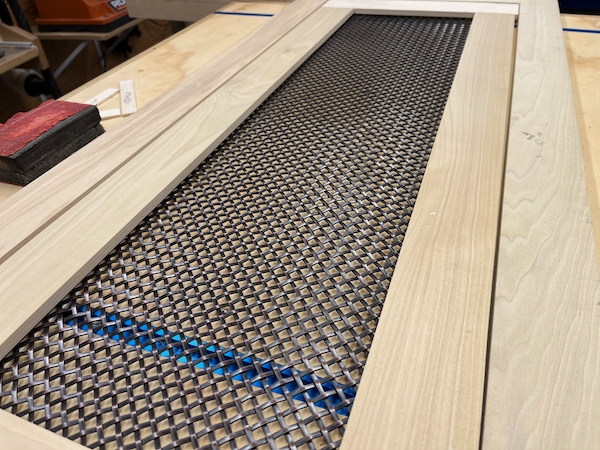
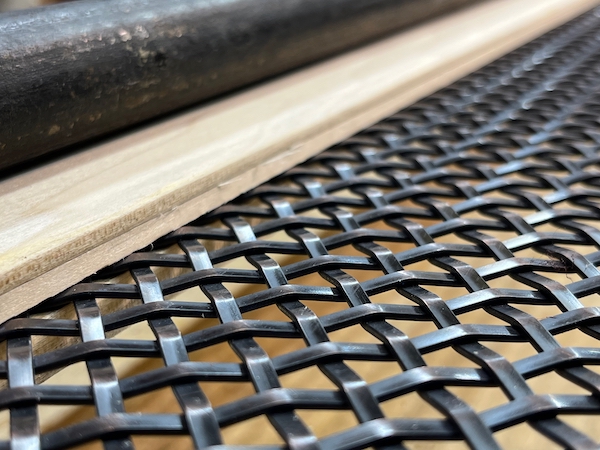
The Drawer front was a bit complicated and was going to be a new thing for me. It consisted of a Poplar style and rail construction, with metal grilles as a middle panel, inside the groove. The drawer front would then secure to the 12-inch-tall drawers via screws.
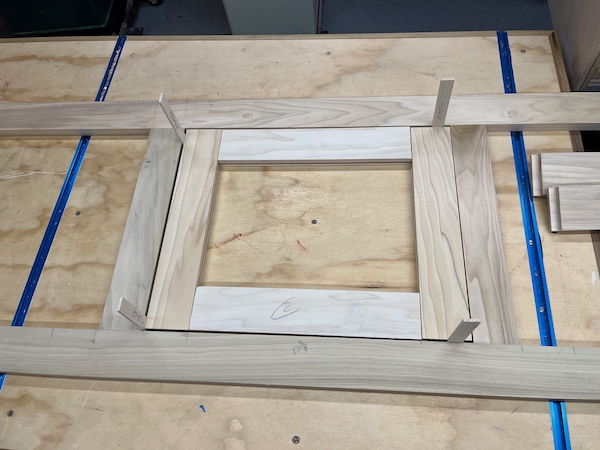
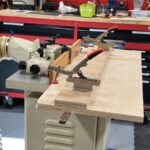
I used the existing face frame as a reference and cut all my parts to length [factoiring in a reveal gap on all sides] before heading over to the shaper machine.
I cut my rail ends first and then the long groove on the styles and rails. Once complete I dry-fitted the style and rail frame in my face frame opening, using shims to ensure good reveal [gap] spacing on all sides.

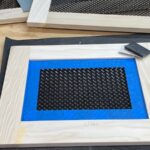
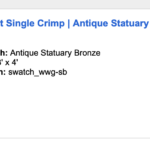
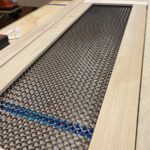
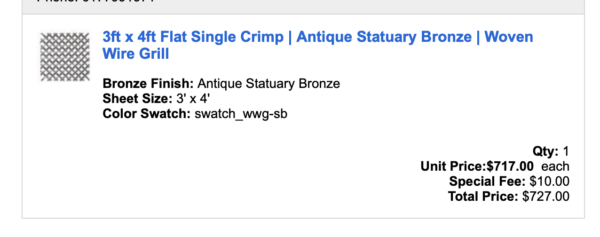
I sourced the 3′ x 4′ Antique Bronze metal grill material from OutwaterPlastics. It was pricy at $900 shipped. [see screen shot below]
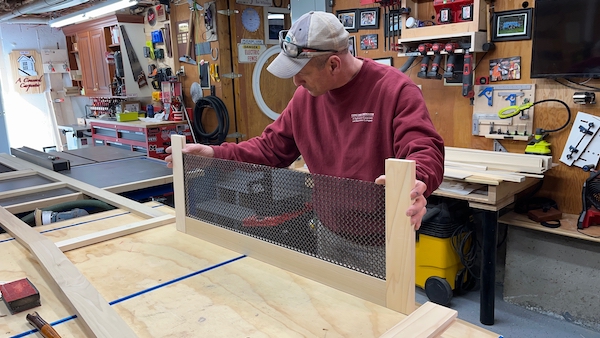

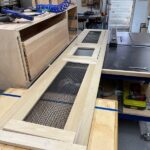
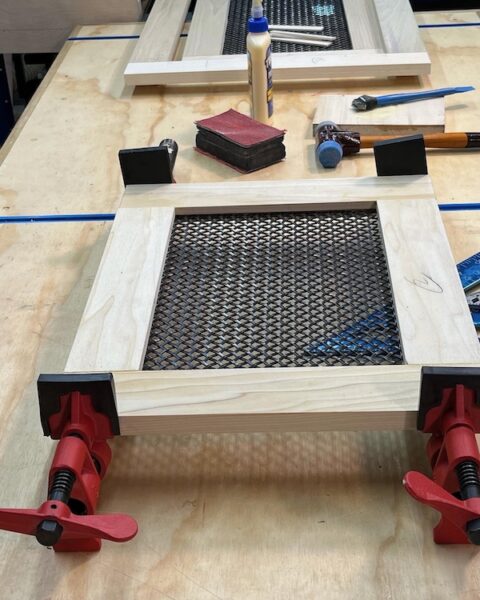
Once satisfied that the drawer frame was close, I cut the metal grill material to fit inside the drawer front frame, glued the coped ends, squared the frame, and then clamped it.
I cut long thin strips of wood and glued them inside the groove to make up the spacer between the metal grail and groove.
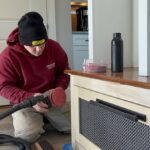
When dry, I sanded the back site to 80 grit to remove any uneven joints and clean up any glue. I used wood filler on all the front face joints to ensure no gaps, then sanded to 120 to remove mill marks for the painter.
Mounting the Drawer Fronts
The drawer fronts were screwed from the inside of the Maple drawer front panel. Because the drawer front is mostly metal grill and NOT structural I made sure to get the handle fasteners into the Maple drawer panel as well as several other fasteners around the handle and drawer front frame.
Installing the Drawer Unit
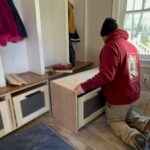
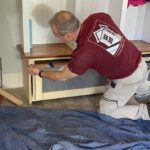
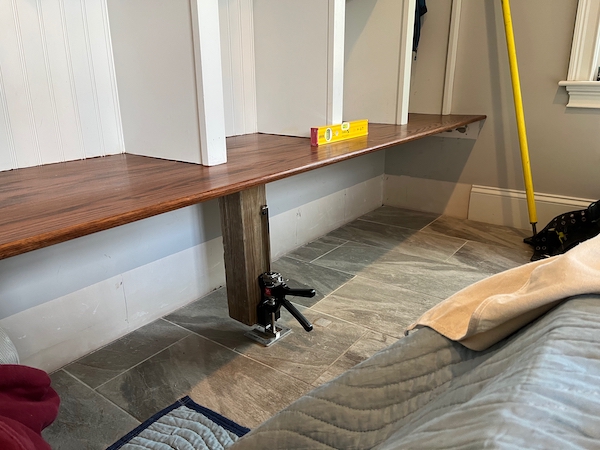
One of the requests from the client was for use to properly secure the existing Oak seat. Over time, and probably from people standing on it to reach the upper cabinets, this seat had moved away from the wall, as indicated by a 3/8” visible stain line.
Our plan was to remove the rear ledger board and front Oak legs, push the Oak seat back into position and fasten it to the vertical cubby dividers.
A Surprise Awaited Us
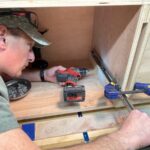
It wasn’t until we removed the rear ledger and Oak legs that we realized that the upper cubby and cabinets were never secured to the wall. The entire unit fell/slid down to the floor. This also explained why the Oak seat slid out from the wall – it was never fastened.
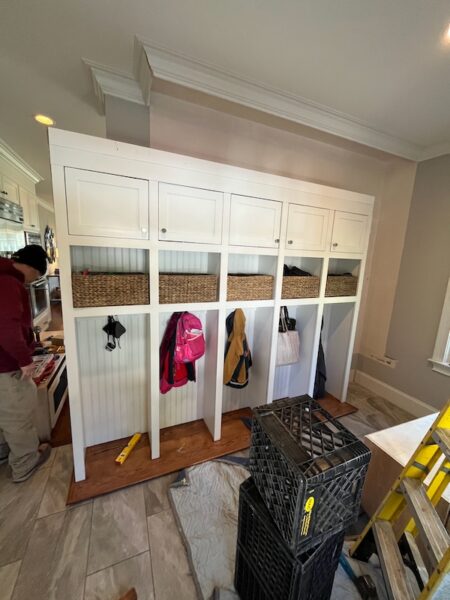
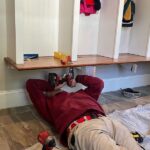
After some head-scratching, we lifted the until up onto milk crates and used two hydraulic jacks to lift the unit back to its original spot. We then located the wall studs and properly secured the unit to the wall.
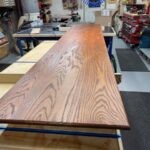
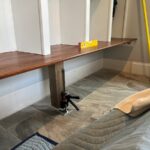
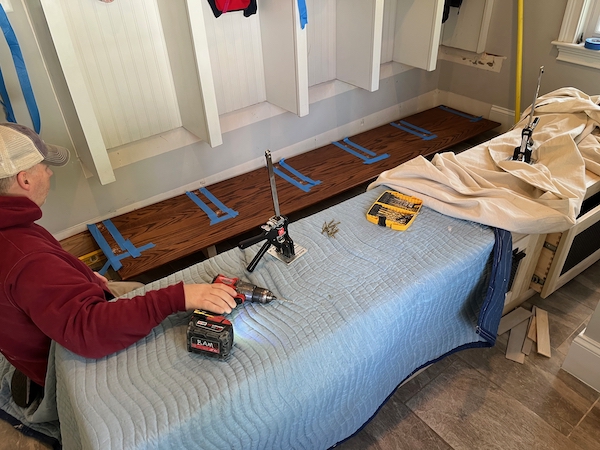
New Mudroom Oak seat
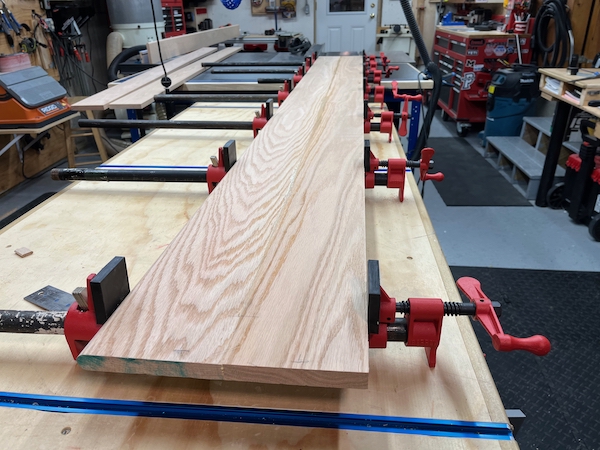
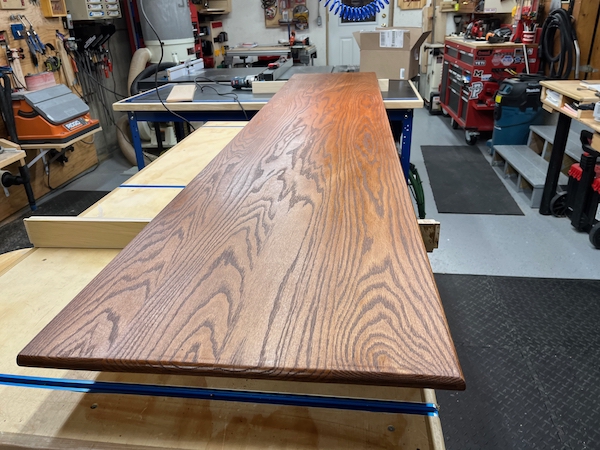
When the cubby unit slid to the floor, part of the Oak seat cracked. I ended up making a new Red with four 1×5 Oak. The boards were ripped, edged, and glued. Once glued I ran them through my mill shop’s wide belt board sander and then routed a two-sided thumbnail detail onto the edges. The seat was sanded to 220, stained to match the house flooring, and finished with 2-coats satin polyurethane.
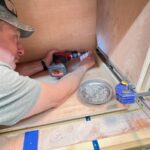
Once the new Oak seat was dry, we installed it on the underside of the cubby unit with 8-10 trim screws pre-drilled through the Oak and into the upper cubby vertical panels.
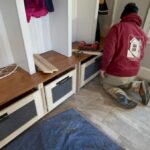
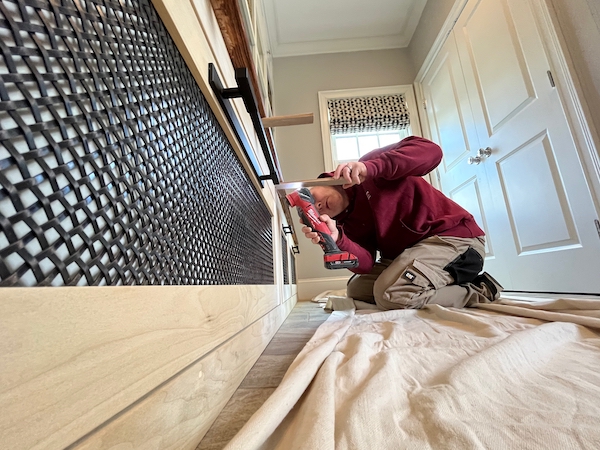
Installing The Mudroom Drawer Unit
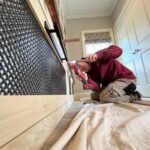
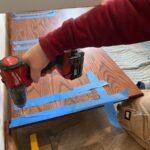
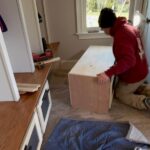
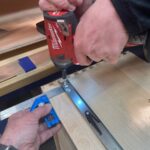
We removed the baseboard behind the drawer unit and on the sides, On the right side, we cut the baseboard trim so we could slide the face frame behind it. This avoided us having to remove the baseboard.
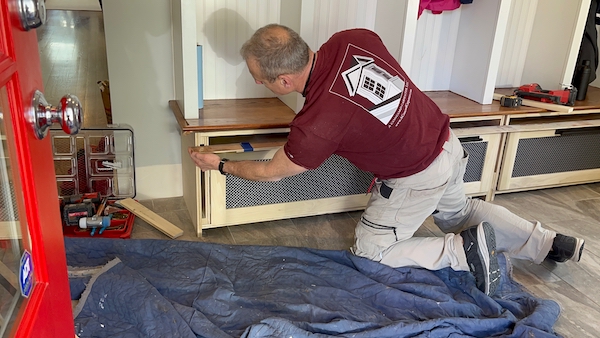
After cutting the base trim, we slid our two cabinets in place, secured them together, and installed and fastened the face frame with glue and brad nails.
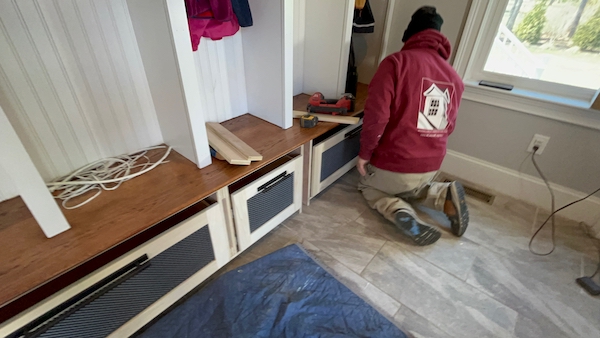
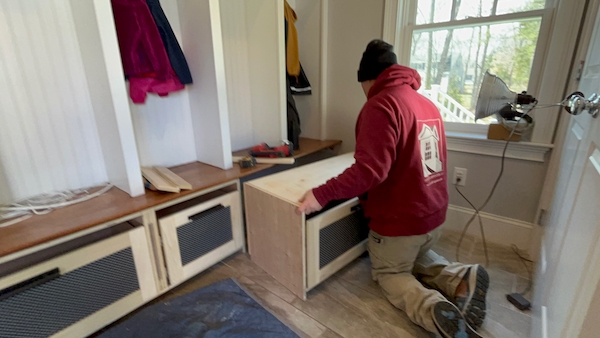
Final Mudroom Touches
To finish off the installation we installed shims between the Oak seat and drawer unit and added a cove molding under the Oak seat, to hide that seam.
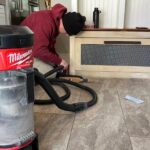
We tied in the baseboard, filled all the nail holes, and re-sanded everything. Ready for the painter!

Mudroom Makeover | Video