Cut Hub Workstation Review

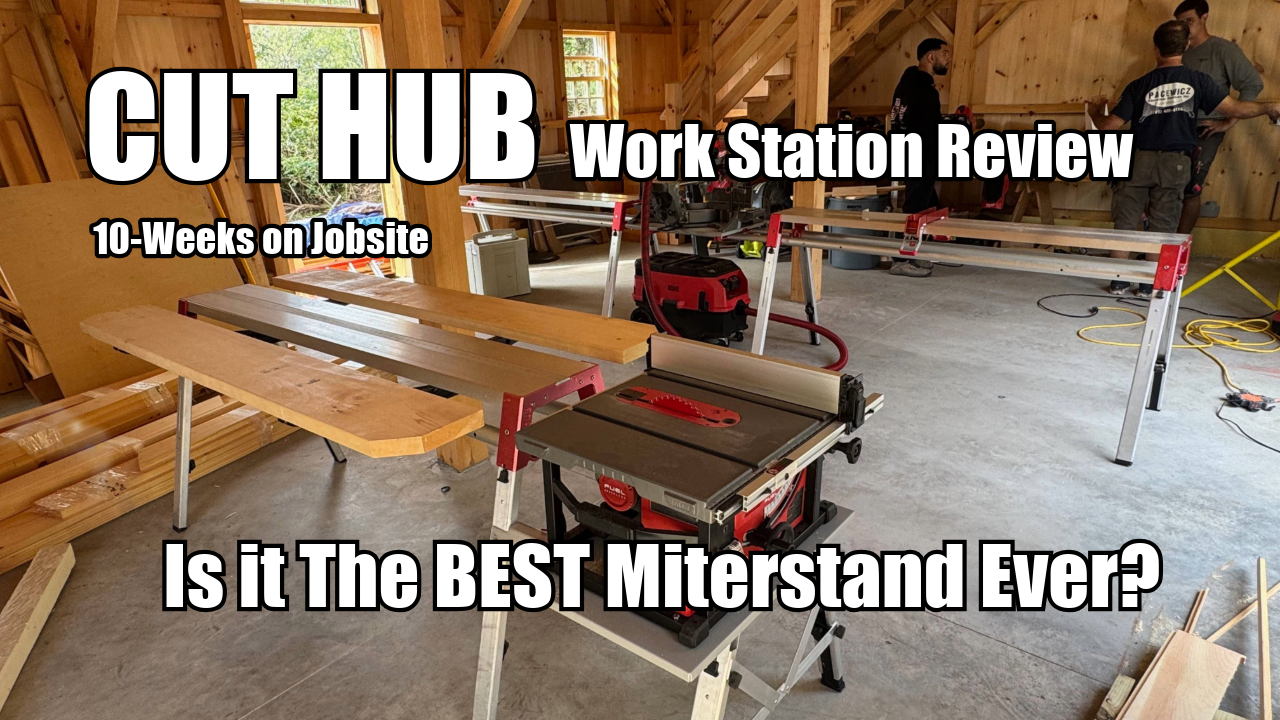
Cut Hub Portable and Modular Workstation
We ran the Cut Hub miter saw stand hard for six weeks on site. Here’s the straight truth—what I loved, what I didn’t, and whether it’s worth your money.
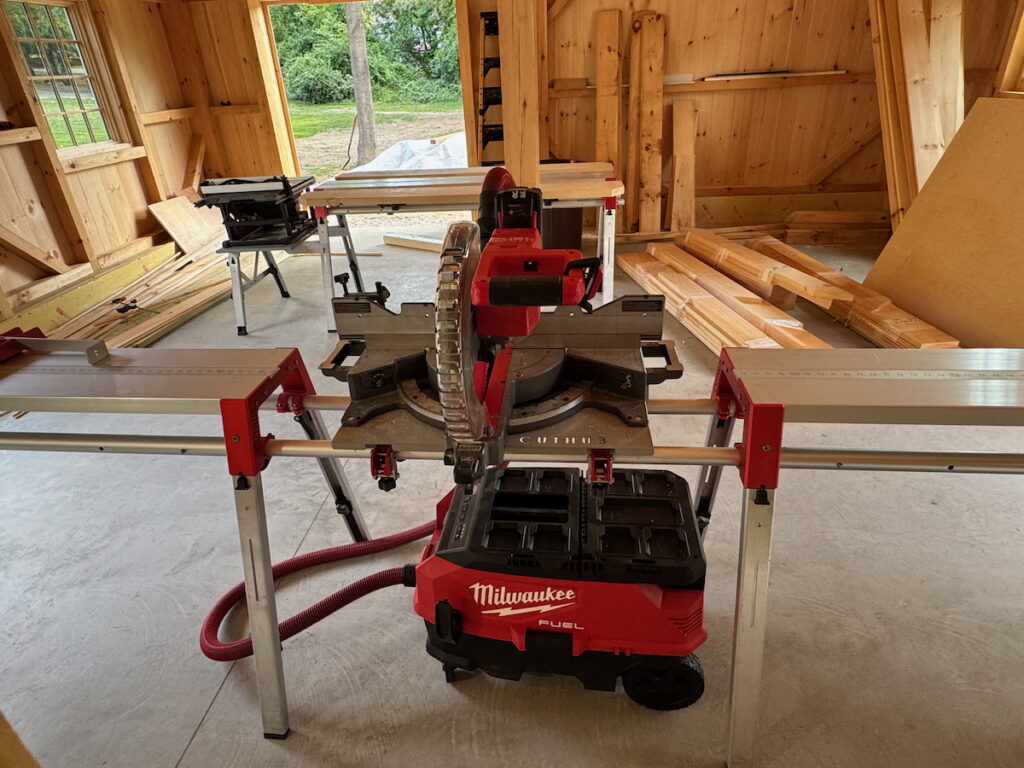
 Cut Hub Workstation
If you think the Cut Hub is just another miter saw stand, think again. This is a full-on, professional-grade workstation system designed for serious builders who want speed, accuracy, and efficiency on the job site. While most miter saw stands range from basic fold-out sawhorses to mid-tier setups with extension arms, the Cut Hub is in a category all its own.
At its core, Cut Hub is built for people who are tired of wrestling with homemade solutions or making do with gear that wasn’t built for the kind of precision or versatility that their work demands.
 Robust Build
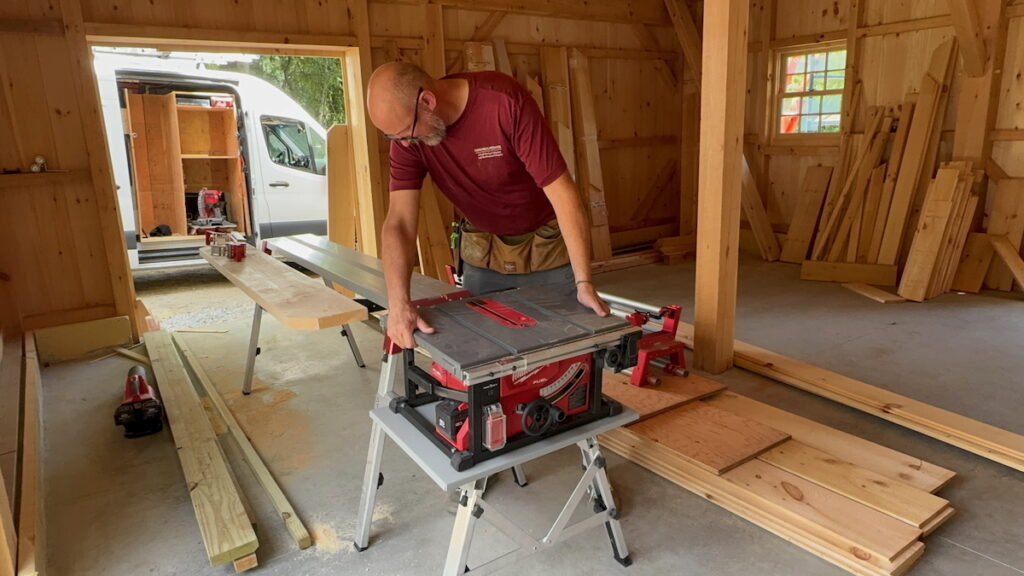
Each workstation table weighs about 40 pounds and is made from high-grade milled and extruded aluminum. It feels solid and rugged enough for rough framing but still refined enough for trim work.most contractor save about 5 hours a week on efficiency.
Cut Hub claims that their system saves contractors around 5 hours a week by improving time efficiency. They also offer an installation video on YouTube, eliminating the need to read through instructions.

One System, Many Saws
Cut Hub ships with a universal saw mounting kit that works with nearly any portable saw on the market. If your miter saw has a deck height of 4.25″ or less, you’re good to go — and that covers most brand-name models. The table saw mount is adjustable, and fits about 90% of all portable table saws, assuming they can fit on the 26 x 19-inch mounting plate.
Another option is to use your existing table saw and legs and then butt it up to the end of the Cut Hub system, adjusting the height to match.
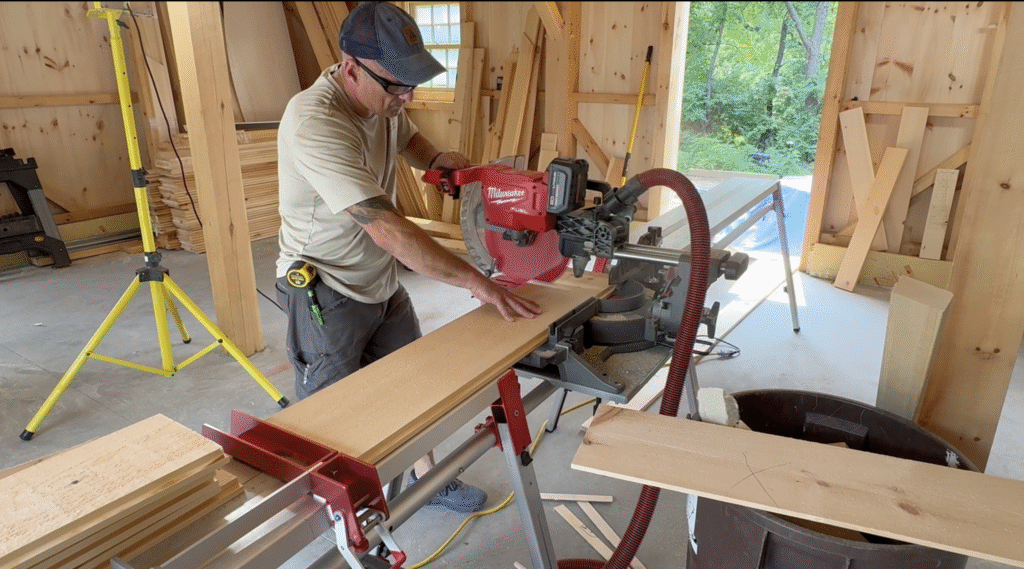
Fast Setup, Fast Breakdown
The Cut Hub surprised us with its incredibly fast setup, taking less than five minutes. It’s one of the most mobile systems we’ve worked with. It’s light enough to move and reconfigure quickly but doesn’t sacrifice any toughness.
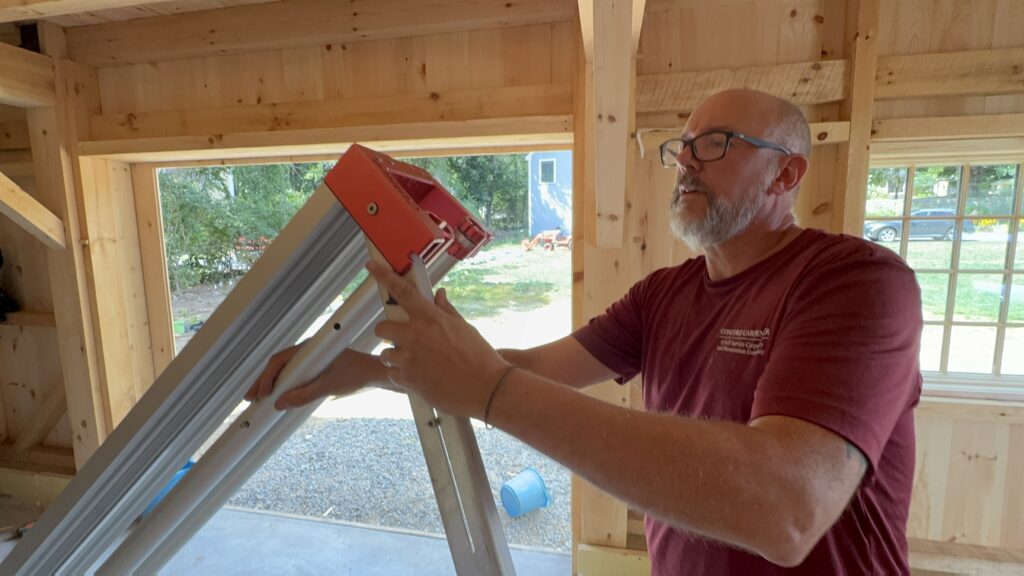
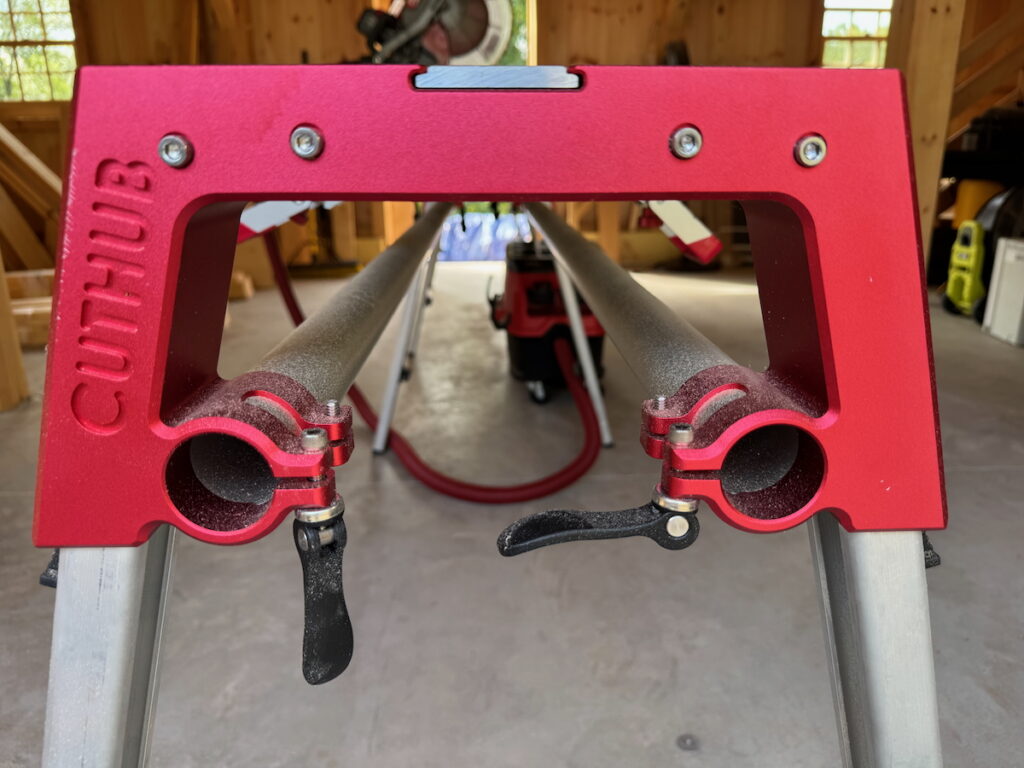
The legs fold out and lock into place with spring-loaded pins, and each is individually adjustable, allowing you to easily modify the height of your workstation and compensate for uneven terrain. The height can be adjusted between 32″ and 38″. Each leg on the Cut Hub is individually adjustable by 6–8 inches, ensuring a level cutting surface even on uneven ground and steep grades.
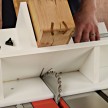
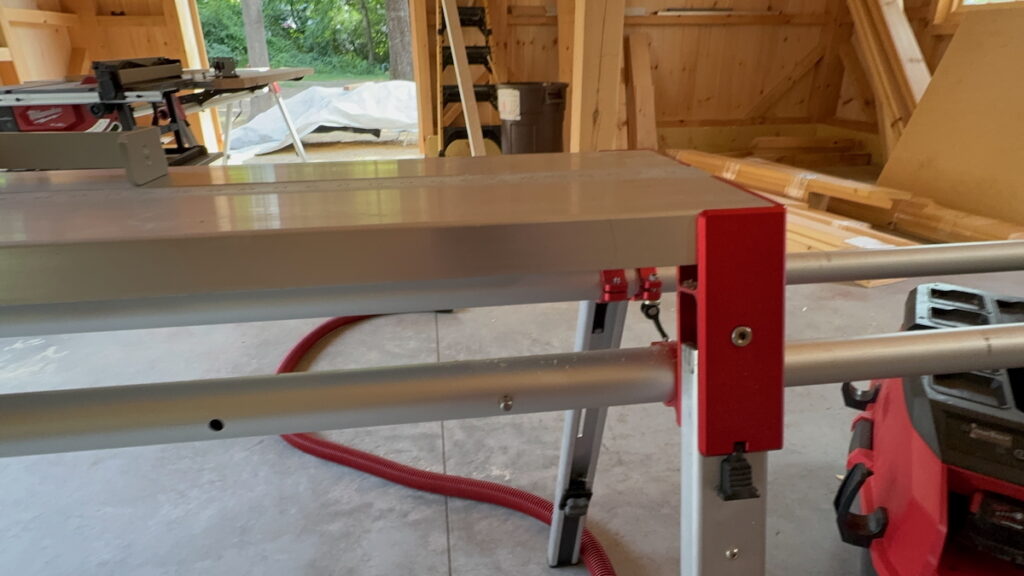 Connecting tables together is simple, using integrated telescoping poles and spring-loaded pins. The miter and table saws are mounted to “mounting plates.” The miter saw plate mounts onto the rails, between two tables and clamps in place. Table saw mounting, once set up and adjusted, is just as easy — it drops into slots on a set of legs that attach to the end of one of the tables.
Once set up you can place long heavy boards on the table and not worry about your outriggers folding or collapsing. Cutting stair stringers with the Cut Hub is going to be more accurate and a breeze.
One issue a fellow contractor experienced when breaking down the Cut Hub was that their miter saw was ‘back-heavy.’ When unclipped, they didn’t realize that the saw could flip over backward, and it ended up falling to the ground. It’s something to be mindful of if you’re using a rear-heavy saw.
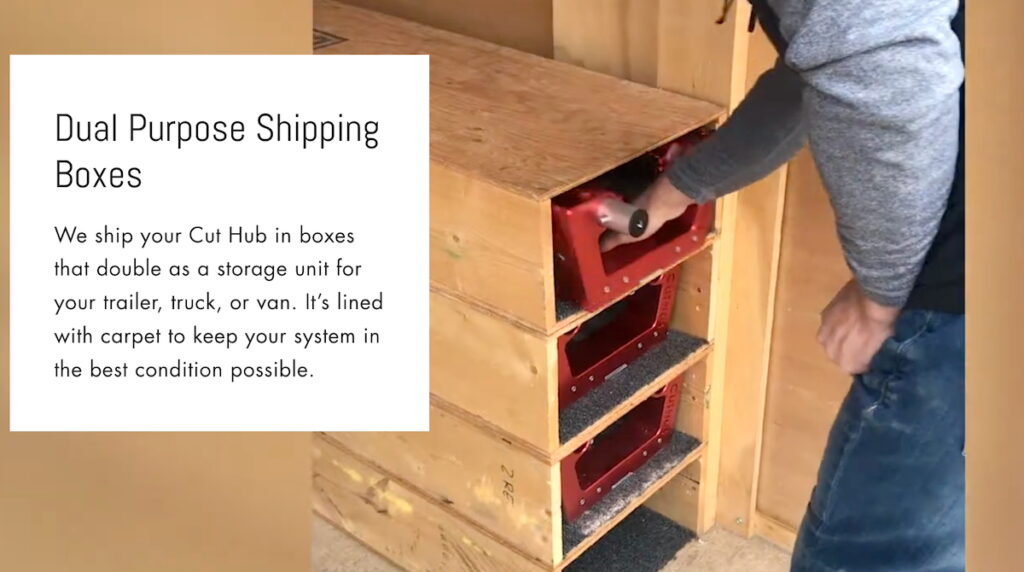
Cut Hub Shipping Boxes
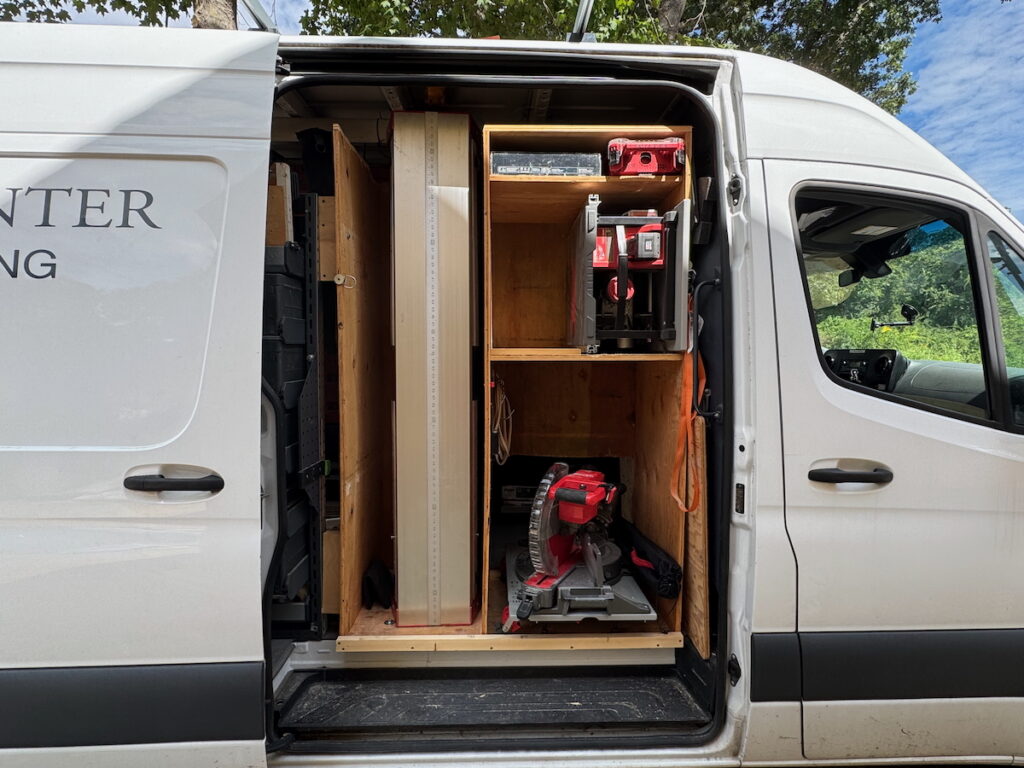
The shipping boxes double as storage — they’re carpet-lined and designed to be reused in your trailer or truck. That’s a nice touch that keeps everything protected and organized. Unfortunately, it doesn’t work in our vans with modular shelving, and we could not use the storage boxes, so we instead opted to mount the tables vertically inside our Sprinter vans side door.
Pros
- Built to last, rugged yet lightweight
- Fast, intuitive setup
- Highly modular
- Repeatable, precise cuts with the bump stop system
- Doubles as miter/table saw stand and workbench
- Outfeed support for long stock or sheet goods
- Operational was support is fantastic (Joe is super helpful)
- Storage boxes double as shipping containers
- Fully customizable to your budget and needs
- Tables are easy to carry and store in the shipping boxes or vertically
Cons
- Table saw mount lacks a locking pin or detent for left/right slide
- Could use colored indicators for push-button tube locks
- Bulky to store all components between jobs
- Cam locks not included at all ends — should be standard
- Racking can occur with long table setups on smooth flooring surfaces
- Allen nut height adjustment on table saw platform is finicky – like to see 1/8” detents.
Using the CUT HUB System
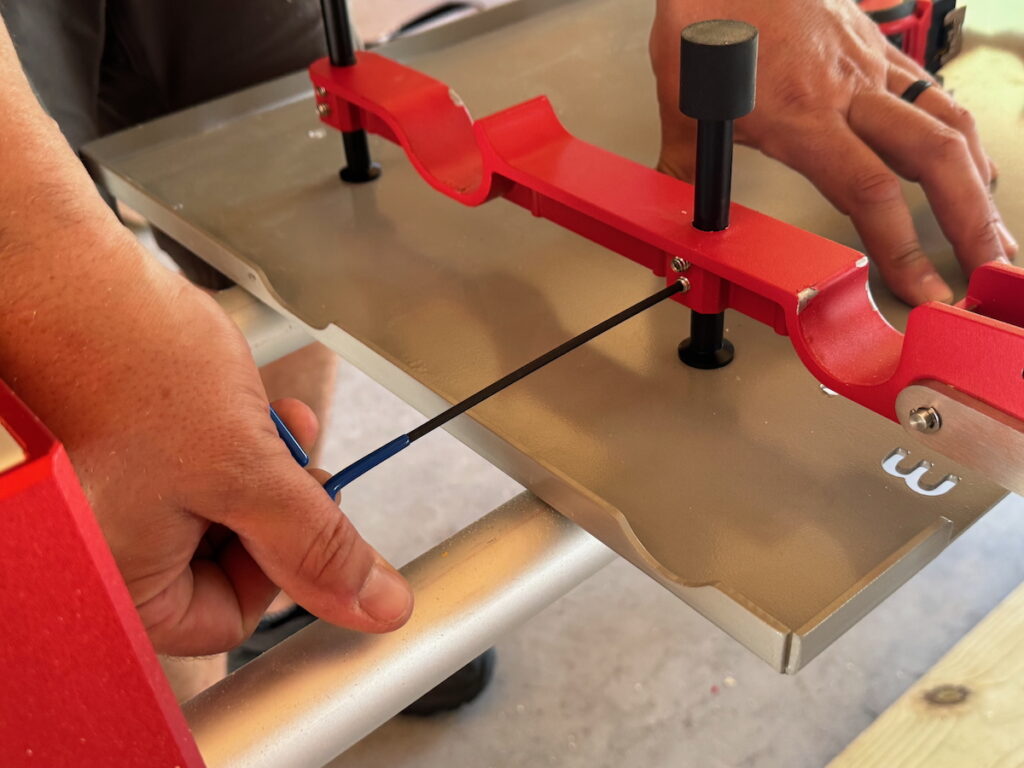
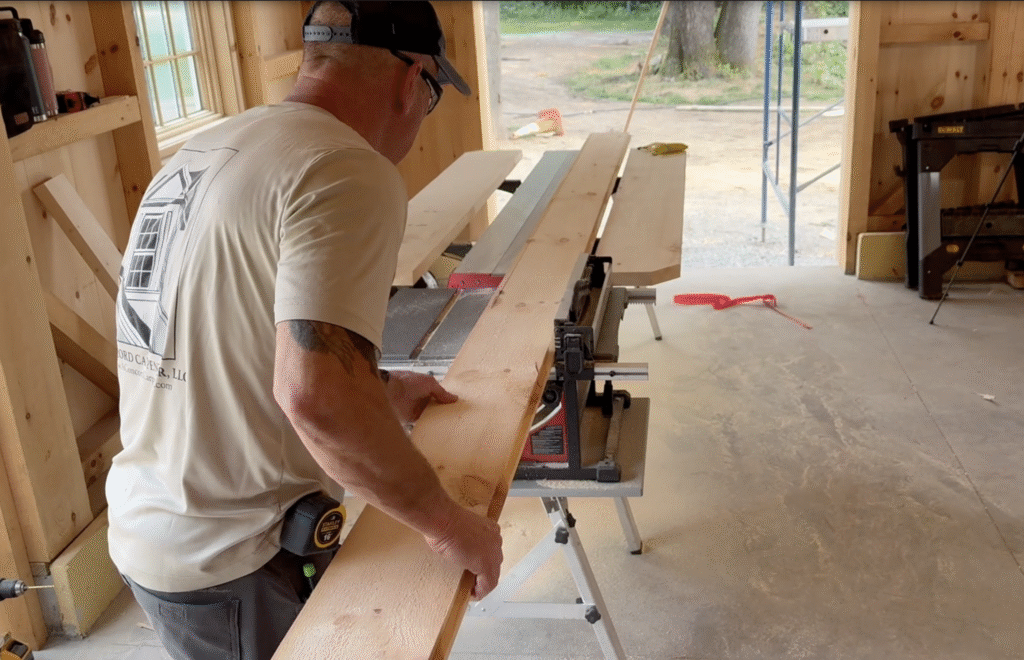
One of Cut Hub’s standout features is its integrated measuring system with a sliding “bump stop.” Once you’ve set it up, you can make repeatable cuts quickly and accurately, without touching a tape measure. The stop locks in with cam-style levers that feel secure and are easy to use. A large easy to read sight dial is in the center of the bump stop, allowing you to read the table tape measure.
The miter saw table mounts on two rails between the two tables and just needs a quick calibration or “zeroing out” to align the tables “built-in” measurement tape to the saw blade. To zero out the blade, the cam locks on the miter platform can be loosened and the table can be slid left or right. Using a piece of wood with a known length or even a tape measure, the platform can be slid left and right until the blade lines up exactly where you need it. For repeated setups, some users mark the rail where the miter saw attaches, making it easy to line up without repeating the zeroing process.
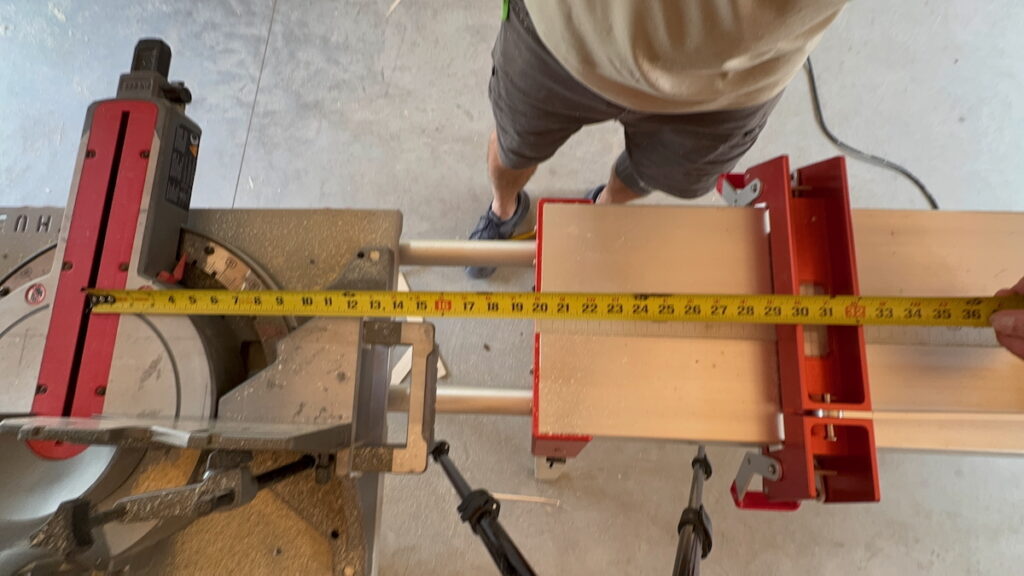
The bump stop includes an extension stop that is precisely 10 inches long. This allows for repeat cuts in the negative space between the table and the saw table, or between two tables if your setup for long table run. To use the extension, stop, just subtract 10” from the measurement in the sight glass on bump stop. Super simple!
While this may sound silly, the table tops also take pencil marks well, I found this out by using the top as a cut list. Cleaning off the pencil and sap from the Pine we were cutting was easy. We had good results using PVC cleaner, Goof-off or acetone.
If you’re the type to perform field-modifications to your gear, Cut Hub is built for that too. Drilling your own holes to create preferred table-spacing or mounting points is easy to do and something you may find necessary if you’re setting the tables up in a confined space.
Cutting Long Stock With CUT HUB
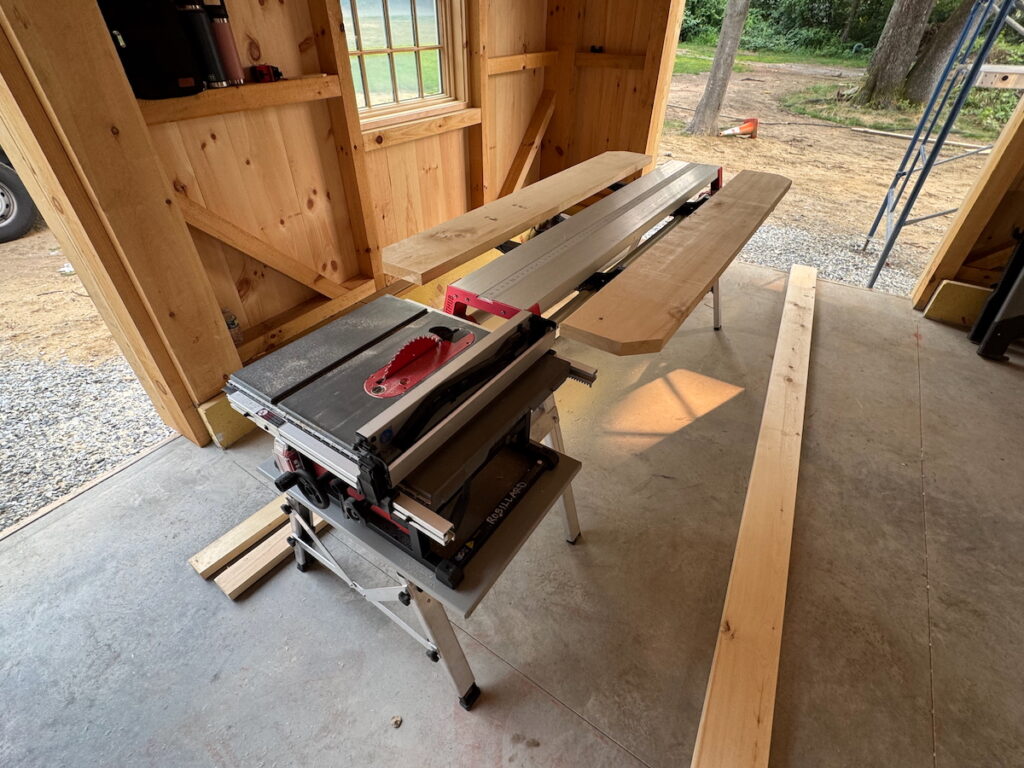
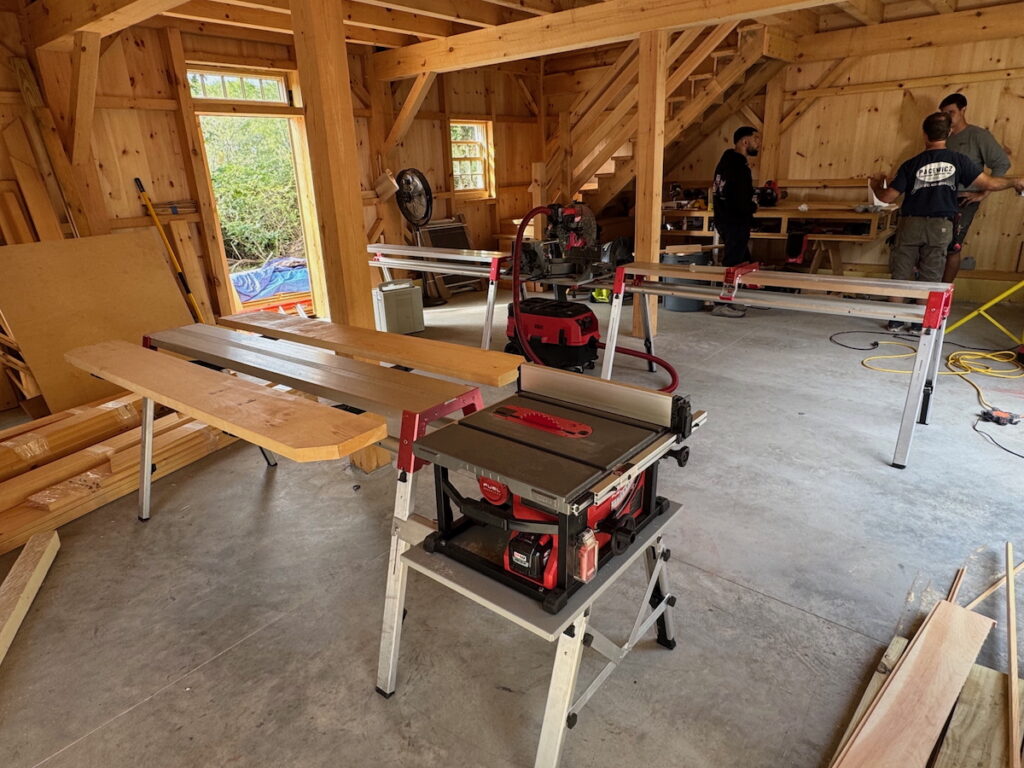
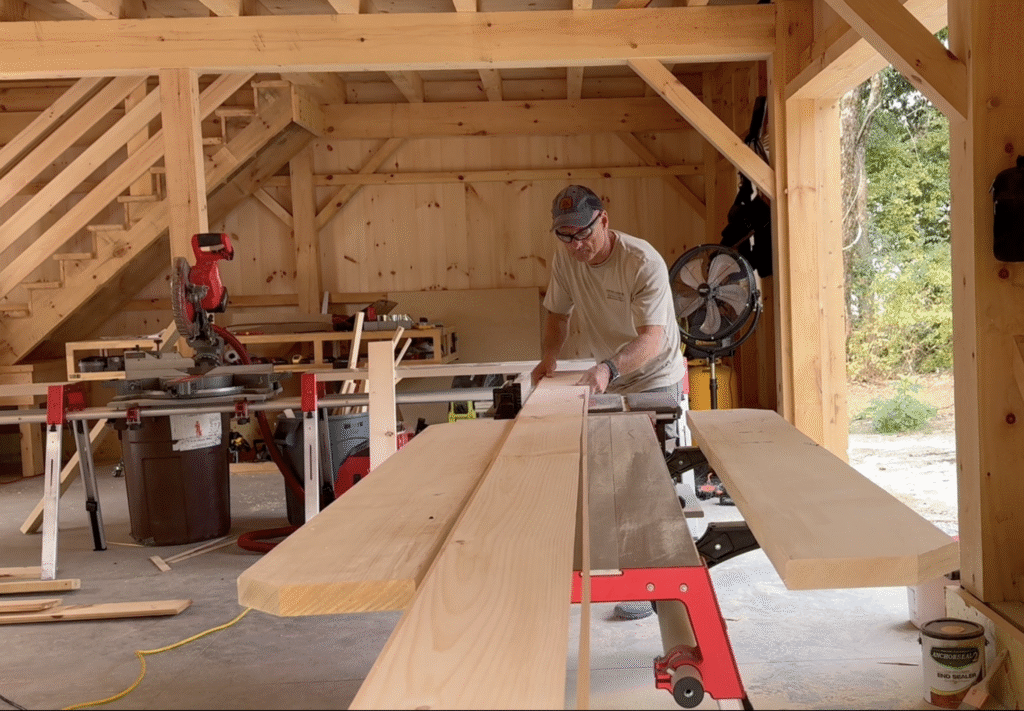
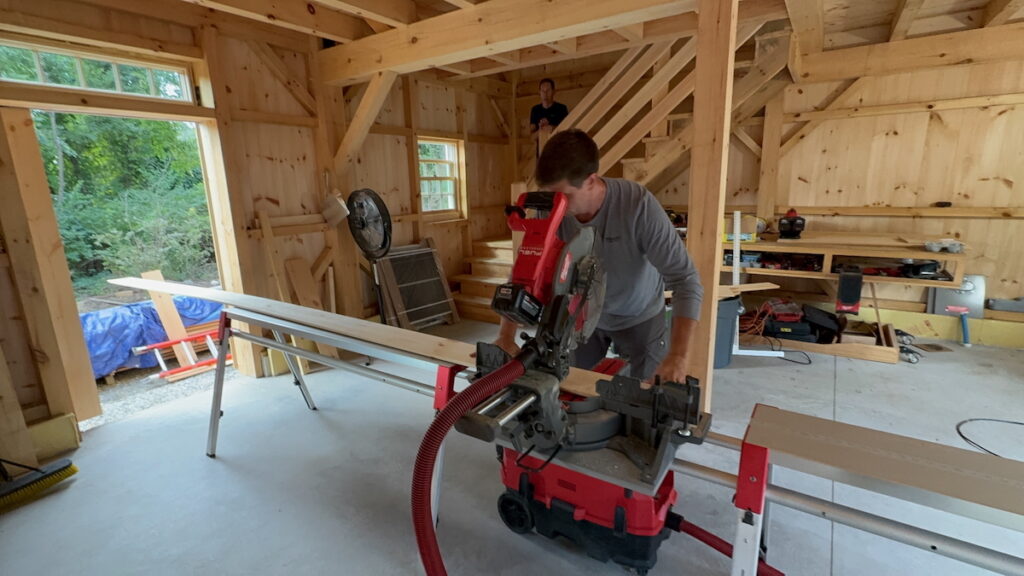
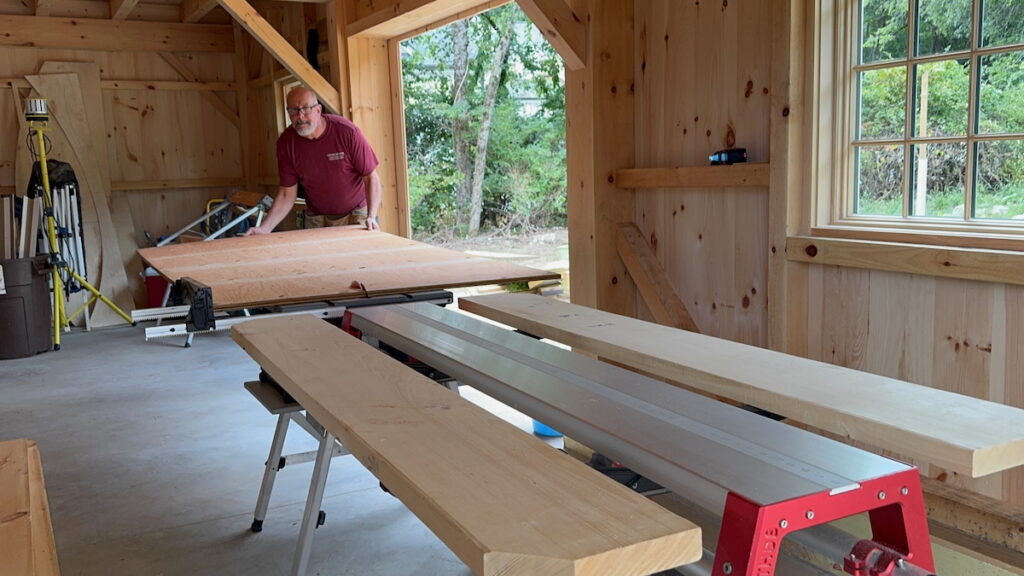
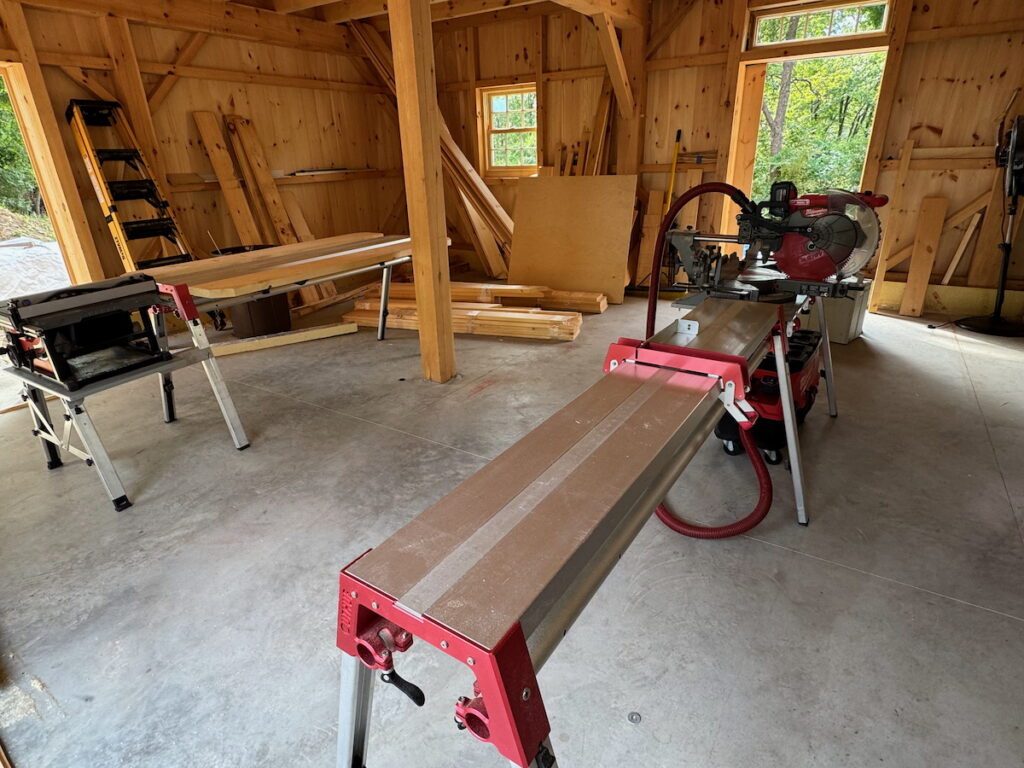
On our barn build jobsite we repeatedly handled and cut 16-foot stock, both floppy 3/4’ siding and heavy 2” dimensional framing boards. I liked how the sturdy table effortlessly supported long 16-foot stock. Once on the table, I could easily slide the board to the saw blade without any outrigger bowing or flexing—a common issue with other miter stands. There’s no rocking or swaying, just a rock-solid platform that keeps the stock perfectly stable.
We also tested the Cut Hub on a deck build cutting 20’ decking and PVC trim boards and were extremely pleased with the setup. After years of wrestling with roller stands and gravity-rise units tipping over, the Cut hub tables were a complete game changer.

CUT HUB Job-Site Testing
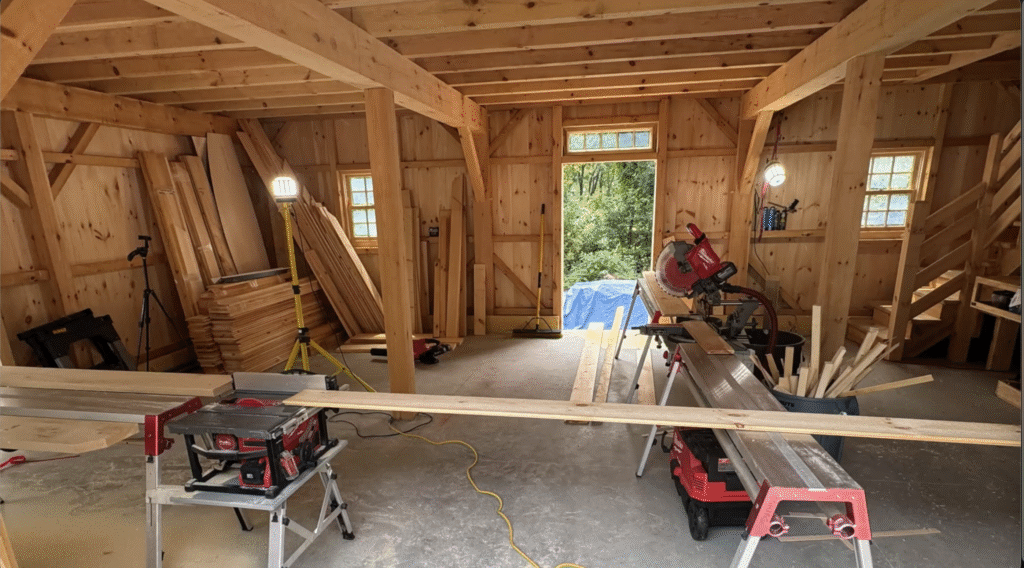
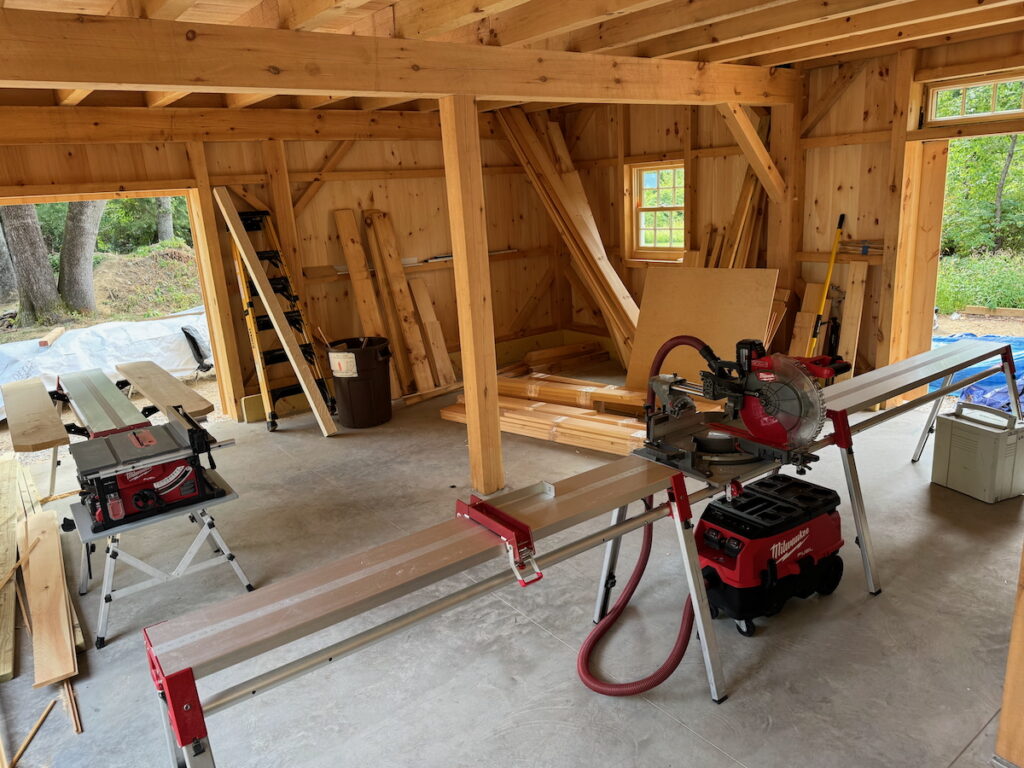
We first tested the Cut Hub using a linear layout—with two tables to the left of the miter saw and one to the right—and it handled 12- to 16-foot boards with ease.
However, we immediately encountered a securing issue with our initial setup. The tables are designed with indexed pop-out pins in the cross tubes to lock them in place, but due to limited floor space, we couldn’t secure the outermost tables using the pins.
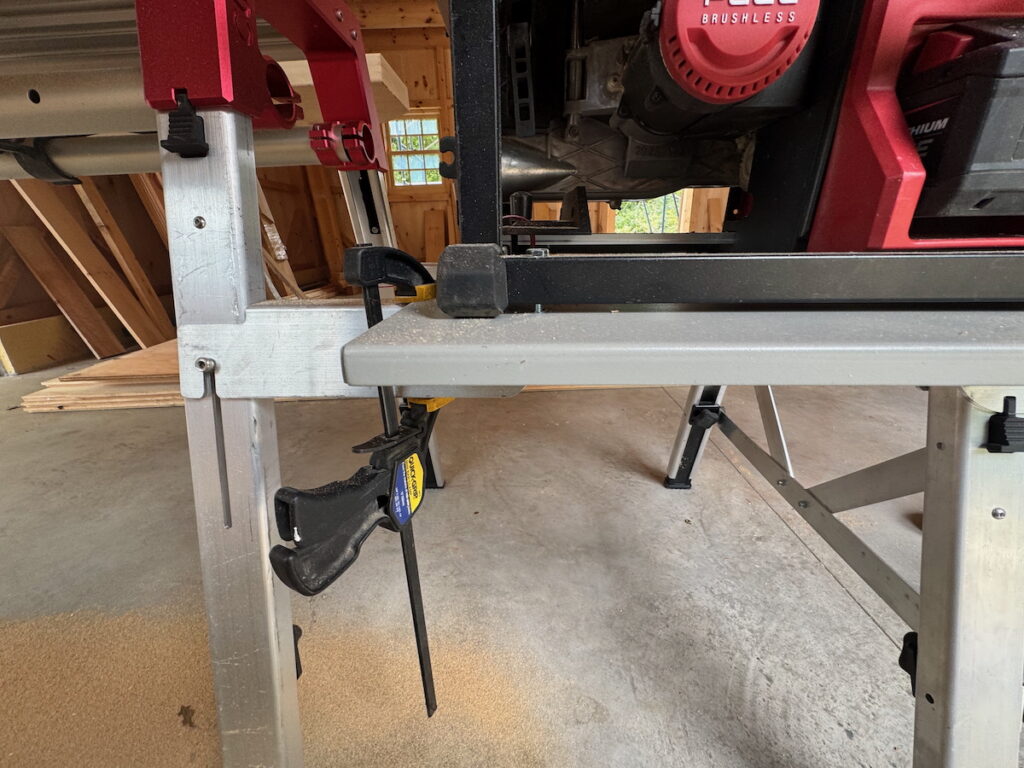
This led to a problem when using the bump stop on that outer table: the bump stop was more secure than the table it was mounted to. Each time a board bumped the stop, it caused the table to slowly slide outward. After just six cuts, the bump stop appeared unchanged, but the table had shifted down the tubes—resulting in increasingly inaccurate cuts.
To fix this, we added more cam levers, which Cut Hub uses to pinch the tubes in place. Strangely, not all tables come with cam levers at both ends. We ended up purchasing additional cam locks to secure every connection point and eliminate this issue going forward. We also could have drilled additional push pin holes.
Another challenge we noticed was slight racking of the system, particularly when multiple tables were extended in the same direction. If the tables were bumped during use—common on busy job sites with smooth floors—it could cause the miter saw’s back fence to fall out of square with the bump stop. The system is long and allows enough flex for the outer tables to shift several inches relative to the saw’s cutting plane. It’s something to be aware of when working in tight or high-traffic areas. Our Solution was to recheck alignment periodically, easy fix.
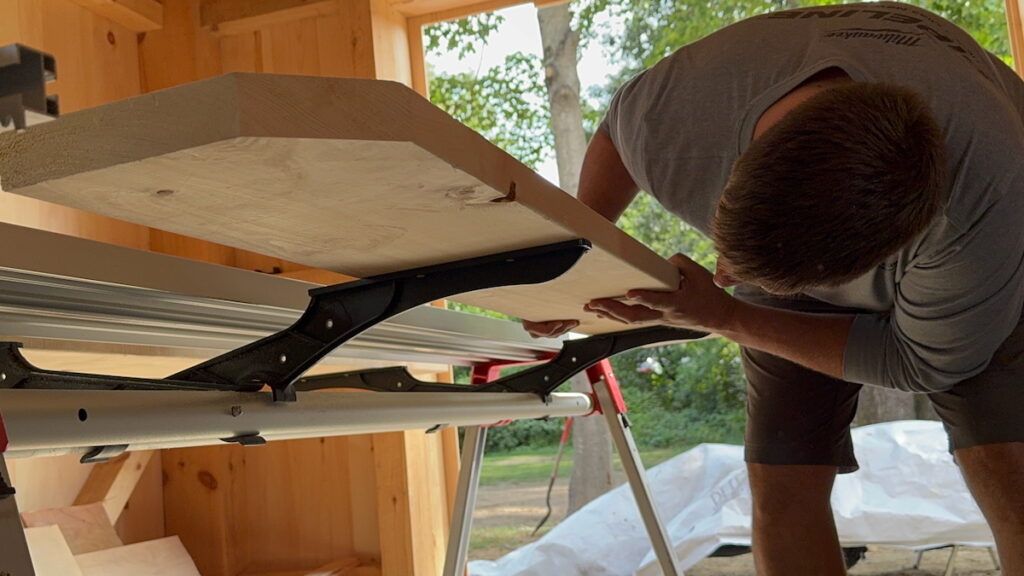
Cut Hub Side Extensions (Outriggers)
The included outriggers attach to the sides of tables and are excellent for supporting 2x10s, 2x12s, or plywood sheets for ripping.
You can transform the Cut Hub into a large worktable or assembly surface, which has been especially useful for:
- Ripping plywood solo – saving time on task.
- Keeping off-cuts visible and accessible
- Creating a clean, organized worktable
One note: you’ll either need to store the 2x material with outrigger arms attached or unscrew them each time—something to plan for if space is limited.
What Is The CUT HUB Cost?
Let’s be upfront — Cut Hub isn’t cheap. Packages start around $2,000 and can easily exceed $6,000 depending on how you customize it. But here’s the thing: this is an investment. If you’ve spent years piecing together makeshift workstations or constantly tweaking mid-range stands to “make it work,” this is the upgrade you’ve been waiting for. And the best part? You can purchase it in stages if needed.
I know two contractors who bought the Cut Hub, and both said they hesitated for a long time because of the cost. In hindsight, they both agreed they should have bought it sooner.
 So why aren’t prices listed upfront? There are two reasons. First, every Cut Hub order is custom — with so many variations, it’s impossible to provide a one-size-fits-all price. Second, the company prefers to speak with you directly. They want to help you find the perfect setup, answer questions, and build trust. It’s a refreshing approach, especially when you’re making a serious investment in your business.
Here’s how I see it: the Cut Hub system is designed to last 10 years or more. To simplify, let’s say you invest in a $5,000 system over 10 years — that’s just $42 a month. As business owners, we need to think like investors, putting our money toward tools that help us grow and succeed long term.
A Few Areas for Improvement
While the system is extremely well thought out, we’d love to see the cam levers pre-installed to save a bit of setup time.
Regarding the table saw height set up, we’d like to see the Allen nut height adjustment offered with 1/8” indexes, out of all the adjustments required to set up the cut station – this adjustment was the most finicky.
Table saw movement: The table saw platform slides left or right. We’d love to see Cut Hub add a clevis pin or some sort of clamp or pin to hold it in place.
Telescoping tube button visibility: The push-button for the connecting tubes can be hard to locate. Our Solution was to add black marker to mark the tube and help us quickly identify their position.
Bulky storage: Between the saw mounts, outrigger wings, and tables, the Cut Hub system can be bulky to store. We could not use the storage boxes because they took up valuable floor space and blocked shelving. Instead, we ended up mounting the tables vertically inside our Sprinter van for better access.
Lastly, I’m not sure if this is possible, but I’d also like to see an accessory that offers a backstop (fence) to better help index and align with the miter saw’s backstop fence. I’m not sure how they’d do it, but it’d be cool.

I reached out to Cut Hub with our feedback, and they said they found it funny how we hit all the things they’re already working on—like the cam levers, table saw height adjustment, and platform movement. They’ve received similar feedback and are actively looking for solutions.
They’re also considering ways to improve the visibility of the telescoping tube buttons and storage. One thing they hadn’t thought of was the color of the spring pins, and they’re now exploring making them more visible for ease of use. As a reviewer, it’s great to see a company that listens and actively works on feedback—it really shows they care about improving the product
We found Joe, Cut Hub’s operations and client interface manager, was great to work with—super responsive and answered all our questions thoroughly.
The Cut Hub isn’t for weekend warriors or casual DIYers. It’s for pros who are serious about working faster, cleaner, and more accurately. From daily setups to repeatable cuts, this system delivers. If you’re ready to stop fussing with gear that’s “almost good enough,” and you want something built to last — Cut Hub is absolutely worth a look and investment.