Building a FAUX Barn Door

 Installing PVC Trim To Look Like a Barn Door
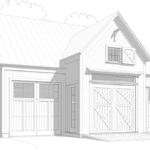
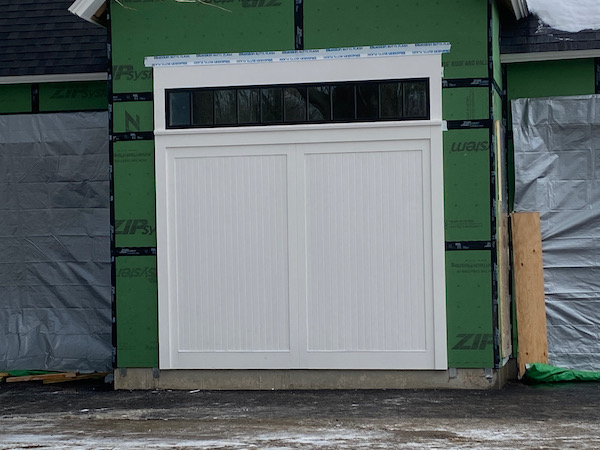
We recently were tasked with installing trim to create the center, faux barn door pictured in the architectural drawing above. Building a FAUX barn door seemed straightforward and our biggest challenge was to make it look real from the street. This faux door needed not only to look good, but look real, since it was a center piece to the new garage-barn build. Think #CurbAppeal.
Designing The Faux Door
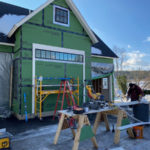
The first step was to come up with a plan for style and materials to use. We settled on using all pvc trim and similar sized trim that was to be used on the existing door and window trim. We would frame the exterior of the door [door trim] and then create a Style and Rail look [door frame] finally filling it in with tongue and groove boards. [door boards]
Creating Shadow Lines
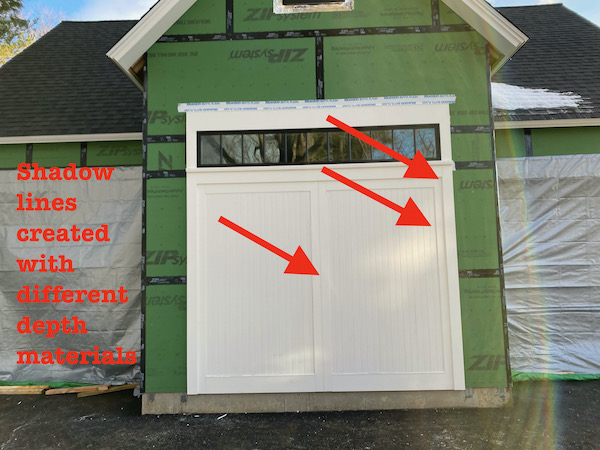
The devil is in the details and knowing which details top focus on is important. To us the most important detail was to create real door “shadow lines,” for authenticity. That meant that the door trim had to look separate from the door frame and panel.
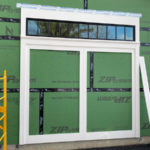
To create accurate looking shadow lines we doubled up our 1×6 door trim to a 1-1/2″ thickness. This projection of 3/4″ simulates how door trim applied to a real door would sit proud of the door. We applied double 1×6 trim side door and 1×10 trim to the top transom window.
 Apply the Window Sill
Under the transom window we applied a 1×8 trim board and then installed the thick pvc historic window sill over that, extending it onto the side vertical trim. To finish the transom sill off we then installed a trim board under the sill piece to hide that sills seam and increase that boards thickness to 1-1/2′”,
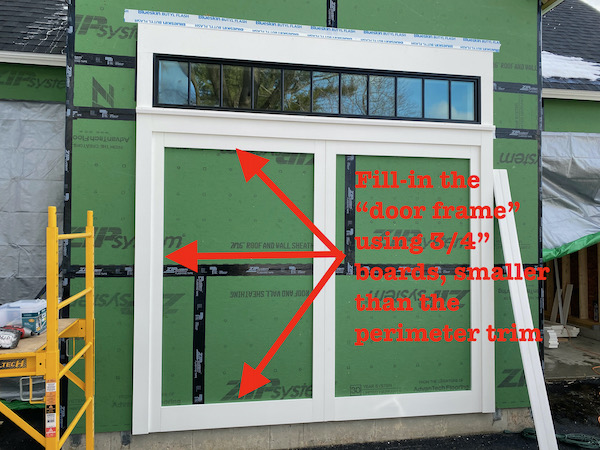
Framing The Faux Barn Door
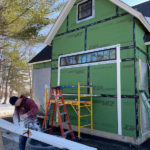
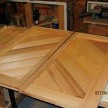
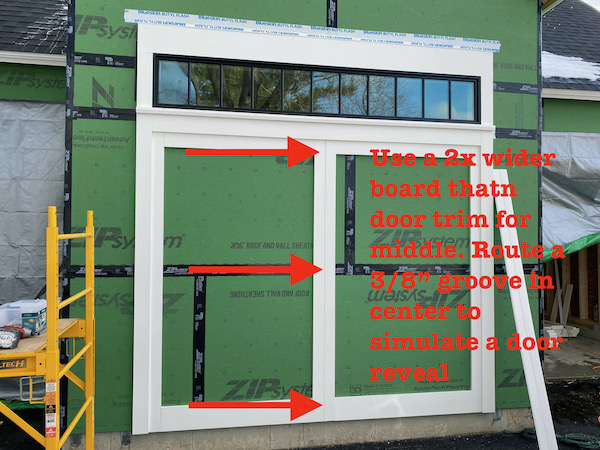
To create the barn door frame [style and rail] we stepped the trim down to 1×5 [1-inch smaller from what we used on the door trim.] To create a look of two separate barn doors we took a 1×10 pvc board and routed a 3/8″ x 1/2″ deep groove down the center.

The groove was designed to simulate the separation between the two faux doors. Once the groove was cut we centered the board and installed it vertically in the doorway. This board simulated two door frames. [photo below]
We then installed 1×5 trim on the door tops and sides, and then a 1×18 board on the bottom of the door frame to complete the doors style and rail look. We used Cortex screws and PVC plugs to install all of the pvc trim, and to hide our fasteners.
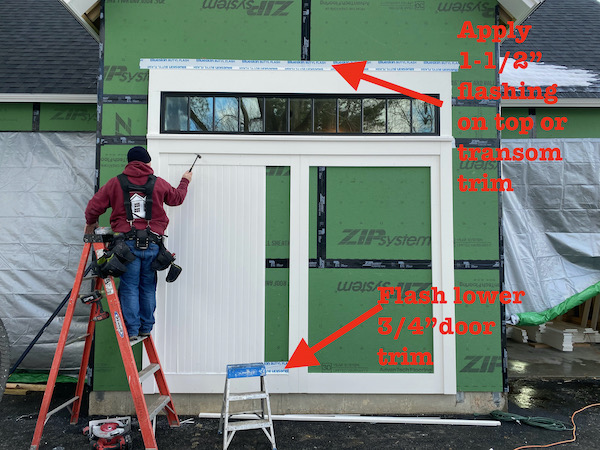
Once complete we flashed the bottom horizontal rail and started fitting the filler door boards.
If you look at the photo below you’ll see a good example of the shadow line that the different boards [door trim vs. door frame] create. The door frame material is set in 3/4″ of an inch and creates a pleasing distinction between the faux doors and faux door trim.
Install Door Boards – Center-Bead Trim
To fill in the two faux doors we used 1/2″ PVC center bead tongue and groove boards. The 1/2″ boards are slightly thinner then the door frame [1/4″ thinner] and create additional shadow lines.

The 1/2″ tongue and groove boards interlock for installation and weatherproofing. We face nailed the first and last board, all other boards were blind nailed through the board’s groove.
Building a FAUX Barn Door To Look Real
The result is a pleasing trim detail that looks real from the street. To finish this look we will be adding a small roof overhand and two bard door handles.