Building A Window Seat
How to Build A Window Seat
Window seats are and attractive way to decorate alcoves or add useful and attractive detail to a deep dog house dormer.

A window seat, in order to look right, should fit wall to wall and stop below the window trim which usually means customer work. Stopping at the window sill trim allows for a cushion to be added.
Because we are talking custom carpentry work this type of project is often expensive and time-consuming.
Getting Started:
The old idiom “the devil is in the details” applies to custom build cabinetryand window seats. The very first thing you need to do is take accurate measurements. I suggest that you make a sketch, take photos and MOST importantly make a story pole.

Using A Story Pole:
A story pole is a length of narrow board, often a 1×2, usually cut to the height of a floor height or a “story.” It is a layout tool for measuring, marking and transferring accurate measurements.
Early carpenters relied on story poles for building all sorts of things and used it to measure and mark heights from the floor platform of a building and up.
Measurements like window sill heights, window top heights (or headers), exterior door heights (or headers), interior door heights, etc., were all recorded on the story pole.
The story pole is a permanent way to mark and layout for an accurate quick and easy recall.
I was taught to use story poles when building custom bookcases and built ins. It eliminates the tape measure, is more accurate than paper and once marked can be used throughout the project to continually check your progress.
For the window seat I needed a short story pole to fit between the walls. In this situation its best to use two sticks pushed against the walls and then clamped tight.
Once clamped tight I install a screw or two to make the story pole one stick. I transfer all necessary markings to the story pole. Markings such as baseboard heights, window sill height, trim height, depth, etc.
Back in the shop I will use the story pole to construct my box carcase, face frames, lid and trim. The idea behind this is to ensure everything fits and all my measurements are accurate.
Building The Box:
To make the box I use 3/4″ furniture grade plywood for the sides, bottom and lid. The back side of the box is typically a 1/4″ plywood material.
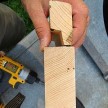
I make the boxes with a tongue and dado construction technique. See my article on tongue and dado joints.
To do this you will need a dado saw blade set. I prefer this method for two reasons; one it’s a super strong glue joint and two; assembling multiple parts is easier to do.
Prior to gluing and nailing the box together I dry assemble the box with clamps and use the story pole to check out the box dimensions. If I’m satisfied I glue the joints and nail off the box with 2″ finish nails, often times leaving the clamps in place for awhile. I then square the box and install the back panel directly to the plywood edge [no dado] and use glue and crown staples every 4 inches.
Making The Face Panel:
This particular face frame is a style and rail design. The designer specified a flat panel instead of a beveled, raised panel. Since the panel is flat I was able to use 3/8″ furniture grade plywood instead of gluing up poplar to make the panel.
The styles and rails of the face frame are milled on my shaper with a cope and stick shaper bit. This shaper bit cuts out the groove for the panel as well as the end grain to mate the opposing board. The end result is four boards fitting together with ease and a floating panel in the center.
Using this machine and making these cuts definitely has a small learning curve and its a good idea to make several practice cuts till you get it right. I highly suggest using toggle clamps and a sliding jig or table to safely hold the boards in place.

I measure for the panel when dry fitting the styles and rails. Using a folding wood ruler I measure groove to groove and then subtract 1/8″ on both sides for my final panel size.
The end result is a beautiful and nicely designed frame and panel front for the window seat.
Before gluing everything together I dry assemble every thing and check it to the story pole. Once satisfied I install the panel and glue and clamp the styles and rails
Making The Window Seat Top And Lid:
The top and lid are two separate parts joined together buy a continuous hing or a “piano” hinge. I use a piano hinge because it is a strong hinge throughout their entire length. Using a piano hing keeps your lid connection strong and rigid and will result in a lid that operates precisely. I also like the piano hinge because it is durable and easy to align.

To make the top for this project I took a piece of plywood that was slightly longer than the wallto wall dimension I was dealing with. I use the story pole to determine my length as well as depth.
NOTE – when using the story pole to determine depth of your window seat, don’t forget to include or draw in the molding that you will be using. I actually cut a small piece of the actual molding and trace it to my story pole. Don’t forget to include for a nosing detail and proper overhang of the lid. I usually allow 1/2″ to 3/4″ for an overhang.
Once I have my depth figured out I cut the plywood to size but leave an extra inch on the depth. I make my rip cuts on the table saw and cross cuts with a cut off sled.
NOTE – using a cut off sled on your table saw is way safer than making some of these cuts on the table saw or using a circular saw.
Applying Nosing To the Lid:
Nosing is then applied to the lid and frame top. On this project my nosing was made with 3/4″ x 1-1/2″ poplar with a routed 1/2 round detail on the end.
To apply this nose molding I use a biscuit joiner to cut slots in the nosing and the plywood. The biscuits allow me to properly align the two together as well as provide for a much stronger glue joint.
I apply the nosing with glue and clamp it. You can use finish nails or brad nails but you also can skip it as long as you leave the pieces clamped long enough. Skipping it saves the step of nail hole filling and sanding.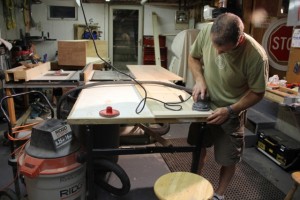
Time to fill Nail Holes And Sand:
Now it’s time to hook up your dust collection and give everything a thorough sanding, taking pains to ensure your nosing and other mating pieces are sanded flush. I sometimes use a belt sander to flush out proud boards.
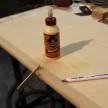
To fill nail holes and gouges I use a basic Elmers yellow wood filler to fill all of the nail holes flush as well.
Every inch of the project, including inside the box gets a quick sand. Sanding also helps remove scratches or smudges leaving the wood looking clean.
Cutting The Lid From The Top:
After confirming with the story pole I mark and cut the lid and top face frame on the cut off sled. Doing this leaves me with three pieces of wood.
The two smaller pieces of top frame then need to be attached to a new board to make up the top frame. This top frame will become permanently attached to the window seat box.
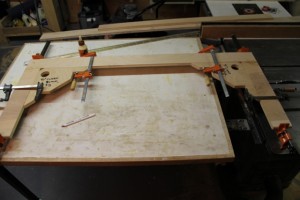
I use the biscuit joiner, biscuits and glue to make these three parts become one. [See photo on right depicting this frame drying in clamps.]
It is at this point that thepiano hing is cut to fit and dry fitted with the lid inside the face frame to determine the depth of the lid. The lid is then ripped on the table saw to fit between the top face frame.
Attaching Lid To The Top Frame:
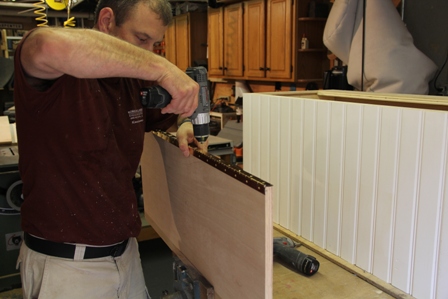
Once everything is dry and sanded I attache the lid to the top face frame with the piano hinge. to do this I usually use my vise to hold the face frame vertical and blocks of wood to hold the lid horizontal while I apply the piano hinge.
Transporting To The Job Site:
When complete I bring the box, face frame, and top to the job site and assemble all of them in place. Because the lid and top face frame are connected only by the piano hinge I temporarily brad nail a strip of wood to the two parts to keep them from moving and becoming damaged. I fill those holes on site along with the install nail holes.
Ready for installation!
RELATED POST:


