Milwaukee PACKOUT Charging Station

Milwaukee PACKOUT Charging Station
Being able to charge your batteries either on the job site or en route to the job site is important. We recognized after writing a recent article about the need for a 12v tool set and mobile storage that we wanted to try to build a mobile battery charging station so we could charge while on the job and en route to it. How are we going to do it? We figured we’d make a Milwaukee PACKOUT Charging Station for our M12 Tool Kit, and if that worked out, we’d make something bigger for our main set of cordless tools.
Charger Components
We decided to build a charger for our 12v tool kit. This was our first attempt at a mobile charging unit. Our charging station is made up of the following components.
- Milwaukee Deep Organizer – 48-22-8432
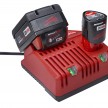
- Milwaukee M12 4 Bank Charger – 48-59-1204
- Self Built 6ft Cord w/ plastic conduit
– 6′ Power Tool Cord
– Female Cord Outlet
– Plastic NPT Conduit
Building The Cord
Cutting a hole in the side of the Packout organizer was the most nerve-wracking phase of the process. It made me feel uneasy to poke a hole in a perfectly nice container.

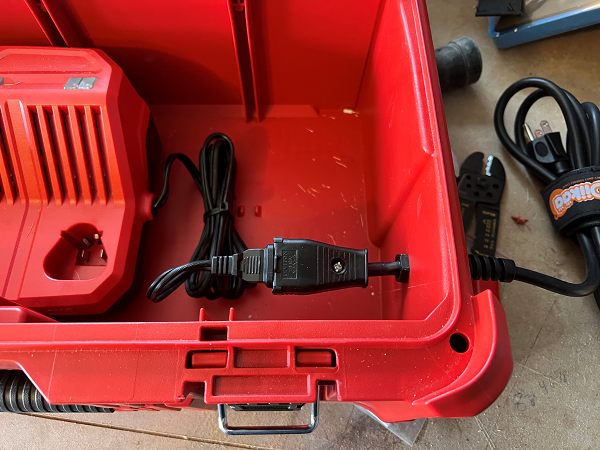
We installed a 3/8″ plastic NPT conduit connector after determining the suitable size hole and cutting it out. There was no choice but to make our own cord because we wanted the plug on the outside yet it had to go through the conduit. We needed something with no female end to slide in because the charger’s regular plug was too wide.
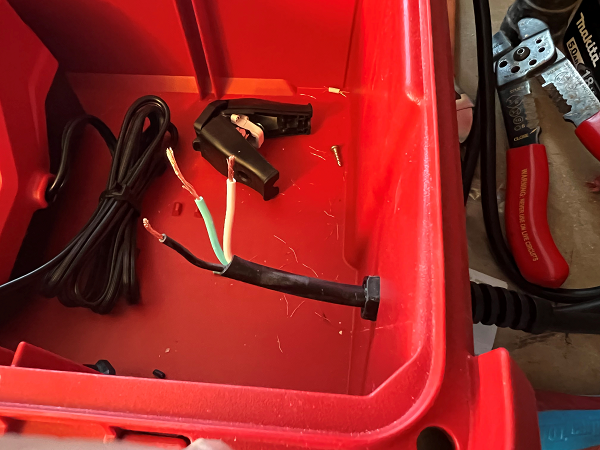
The Leviton female connection was a three-wire hinged connector. Gold, Silver, and Green. This was very simple to connect once the wire was fed through the conduit. The NPT coupling is watertight and there was some silicone sealant added around the edge to ensure it stayed that way.
Milwaukee PACKOUT Station | Layout
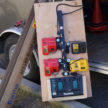
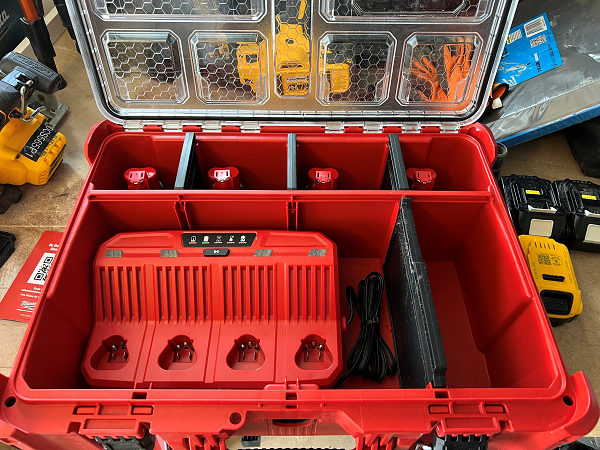
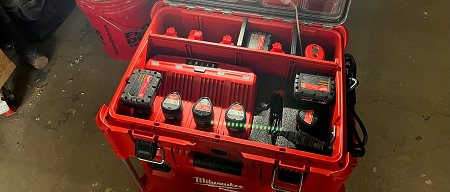
The Milwaukee Deep Organizer was a no-brainer for us. The layout in this organizer best fits the M12 charger and the spare batteries we keep. The front of the organizer is more than big enough for the 4 bank charging station. We used the back section with dividers for storage space for the spare batteries.
Foam Insert for Safe Keeping
The foam was inserted in the front area of the organizer to keep the bank charger in place. The rear of the charger has two little screw slots, however, because the Packout is so thin, there is no way to secure it.

We traced the charger after cutting off the foam to fit the part. Using the Kaizen Cut out kit, cutting out the space for the charger was a breeze!
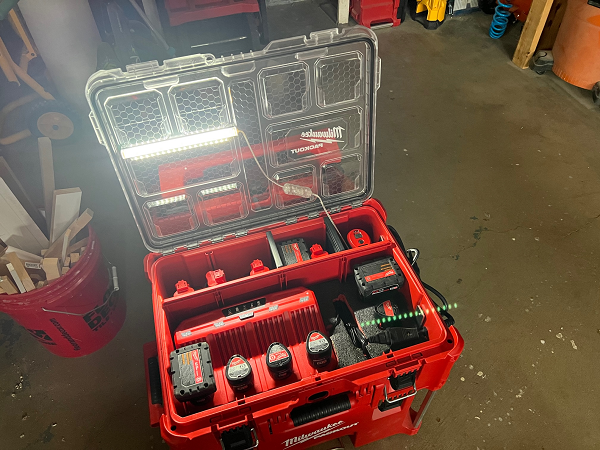
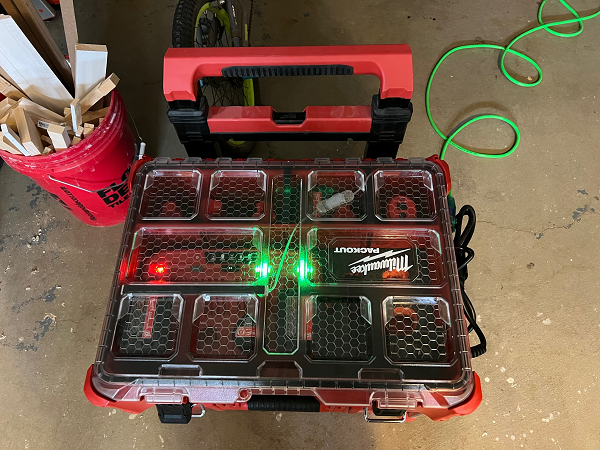
LED Lighting
A LED strip light was added to assist with low-lit situations. Darkness from early mornings, late evenings, or even nighttime work will not be an issue. This LED strip light attaches to the Milwaukee 48-59-1201 Charging / Power source. This means always needed a fully charged battery ready to go. I really wish Milwaukee would incorporate a built-in USB port into the bank charge. A small dab of super strength glue to hold the switch in place and boom, let there be light!
On the Go – Plug, and Drive
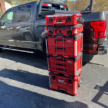
Whether you are working from a van, trailer, or in our case a pickup truck charging batteries on the go is an achievable goal. A lot easier in the van and trailer, but we’ve found a way to do it in the pick-up as well. My Ford F150 has two 110v plugs, one on the front dashboard and one on the center console in the rear.
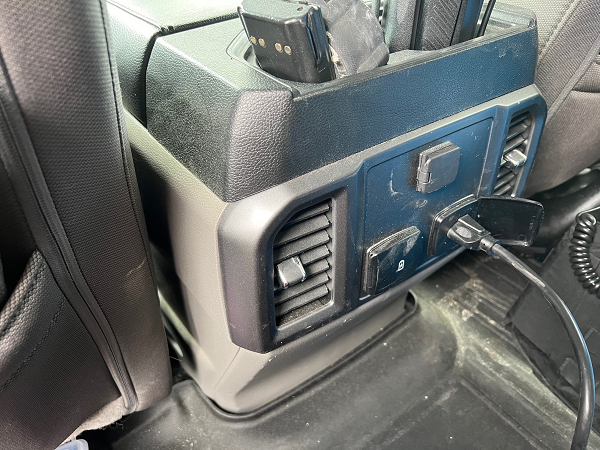
Time is a valuable commodity. Less time spent waiting for batteries to charge means more time spent on the task. Now, as you’re driving to the job location, you’re recharging your batteries.
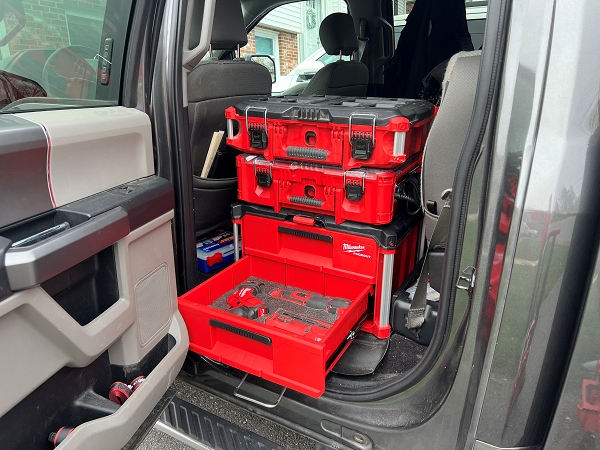
The Milwaukee Deep Organizer Packout was the perfect depth for this charger. You can have the batteries inserted into the changer and the lid closed. This allows your packout to stay in the stack without having to remove it. You can simply plug in and drive.
PAKStraps To Secure the Cord
We installed the PAKStrap (another brilliant Kaizen solution) to the side of the Packout so we could secure our 6′ power cord.

Using a velcro strap we can securely fasten the cord out of the way but quickly deploy it if needed.

Closing Thoughts
Because there are so many mobile batteries charging choices on the market, we decided to design our own. Making this charging station taught us a lot, and if we decide to add another larger station for our 20v tool line in the future, we might adjust a few things. Having the ability to charge on the move will allow us to stay more focused on our tasks and spend less time waiting for batteries to charge.
Buy Now
Take a stab at building your own!
- Milwaukee Deep Organizer – 48-22-8432
- Milwaukee M12 4 Bank Charger – 48-59-1204
- Self Built 6ft Cord w/ plastic conduit
– 6′ Power Tool Cord
– Female Cord Outlet
– Plastic NPT Conduit