Building a Firewood Shed

Steps On Building A Wood Storage Shed:
Keeping firewood dry is critical to a successful fire. There is nothing worse than wanting a warm fire in your fireplace or wood stove and finding out that your firewood is wet or damp. What’s even worse is having to shovel a foot of snow off a blue-tarp to get to your woodpile. This article is about building a firewood shed.

A wood storage shed is necessary if you want a wood burning fire during the cold months. It keeps your firewood stacked, dry and ready to use.
A customer recently asked me if I would build them a wood storage shed that would be able to hold one cord of firewood. After speaking with them they also asked if I could build this shed attached to the rear of their garage.
Scoping Out The Site:

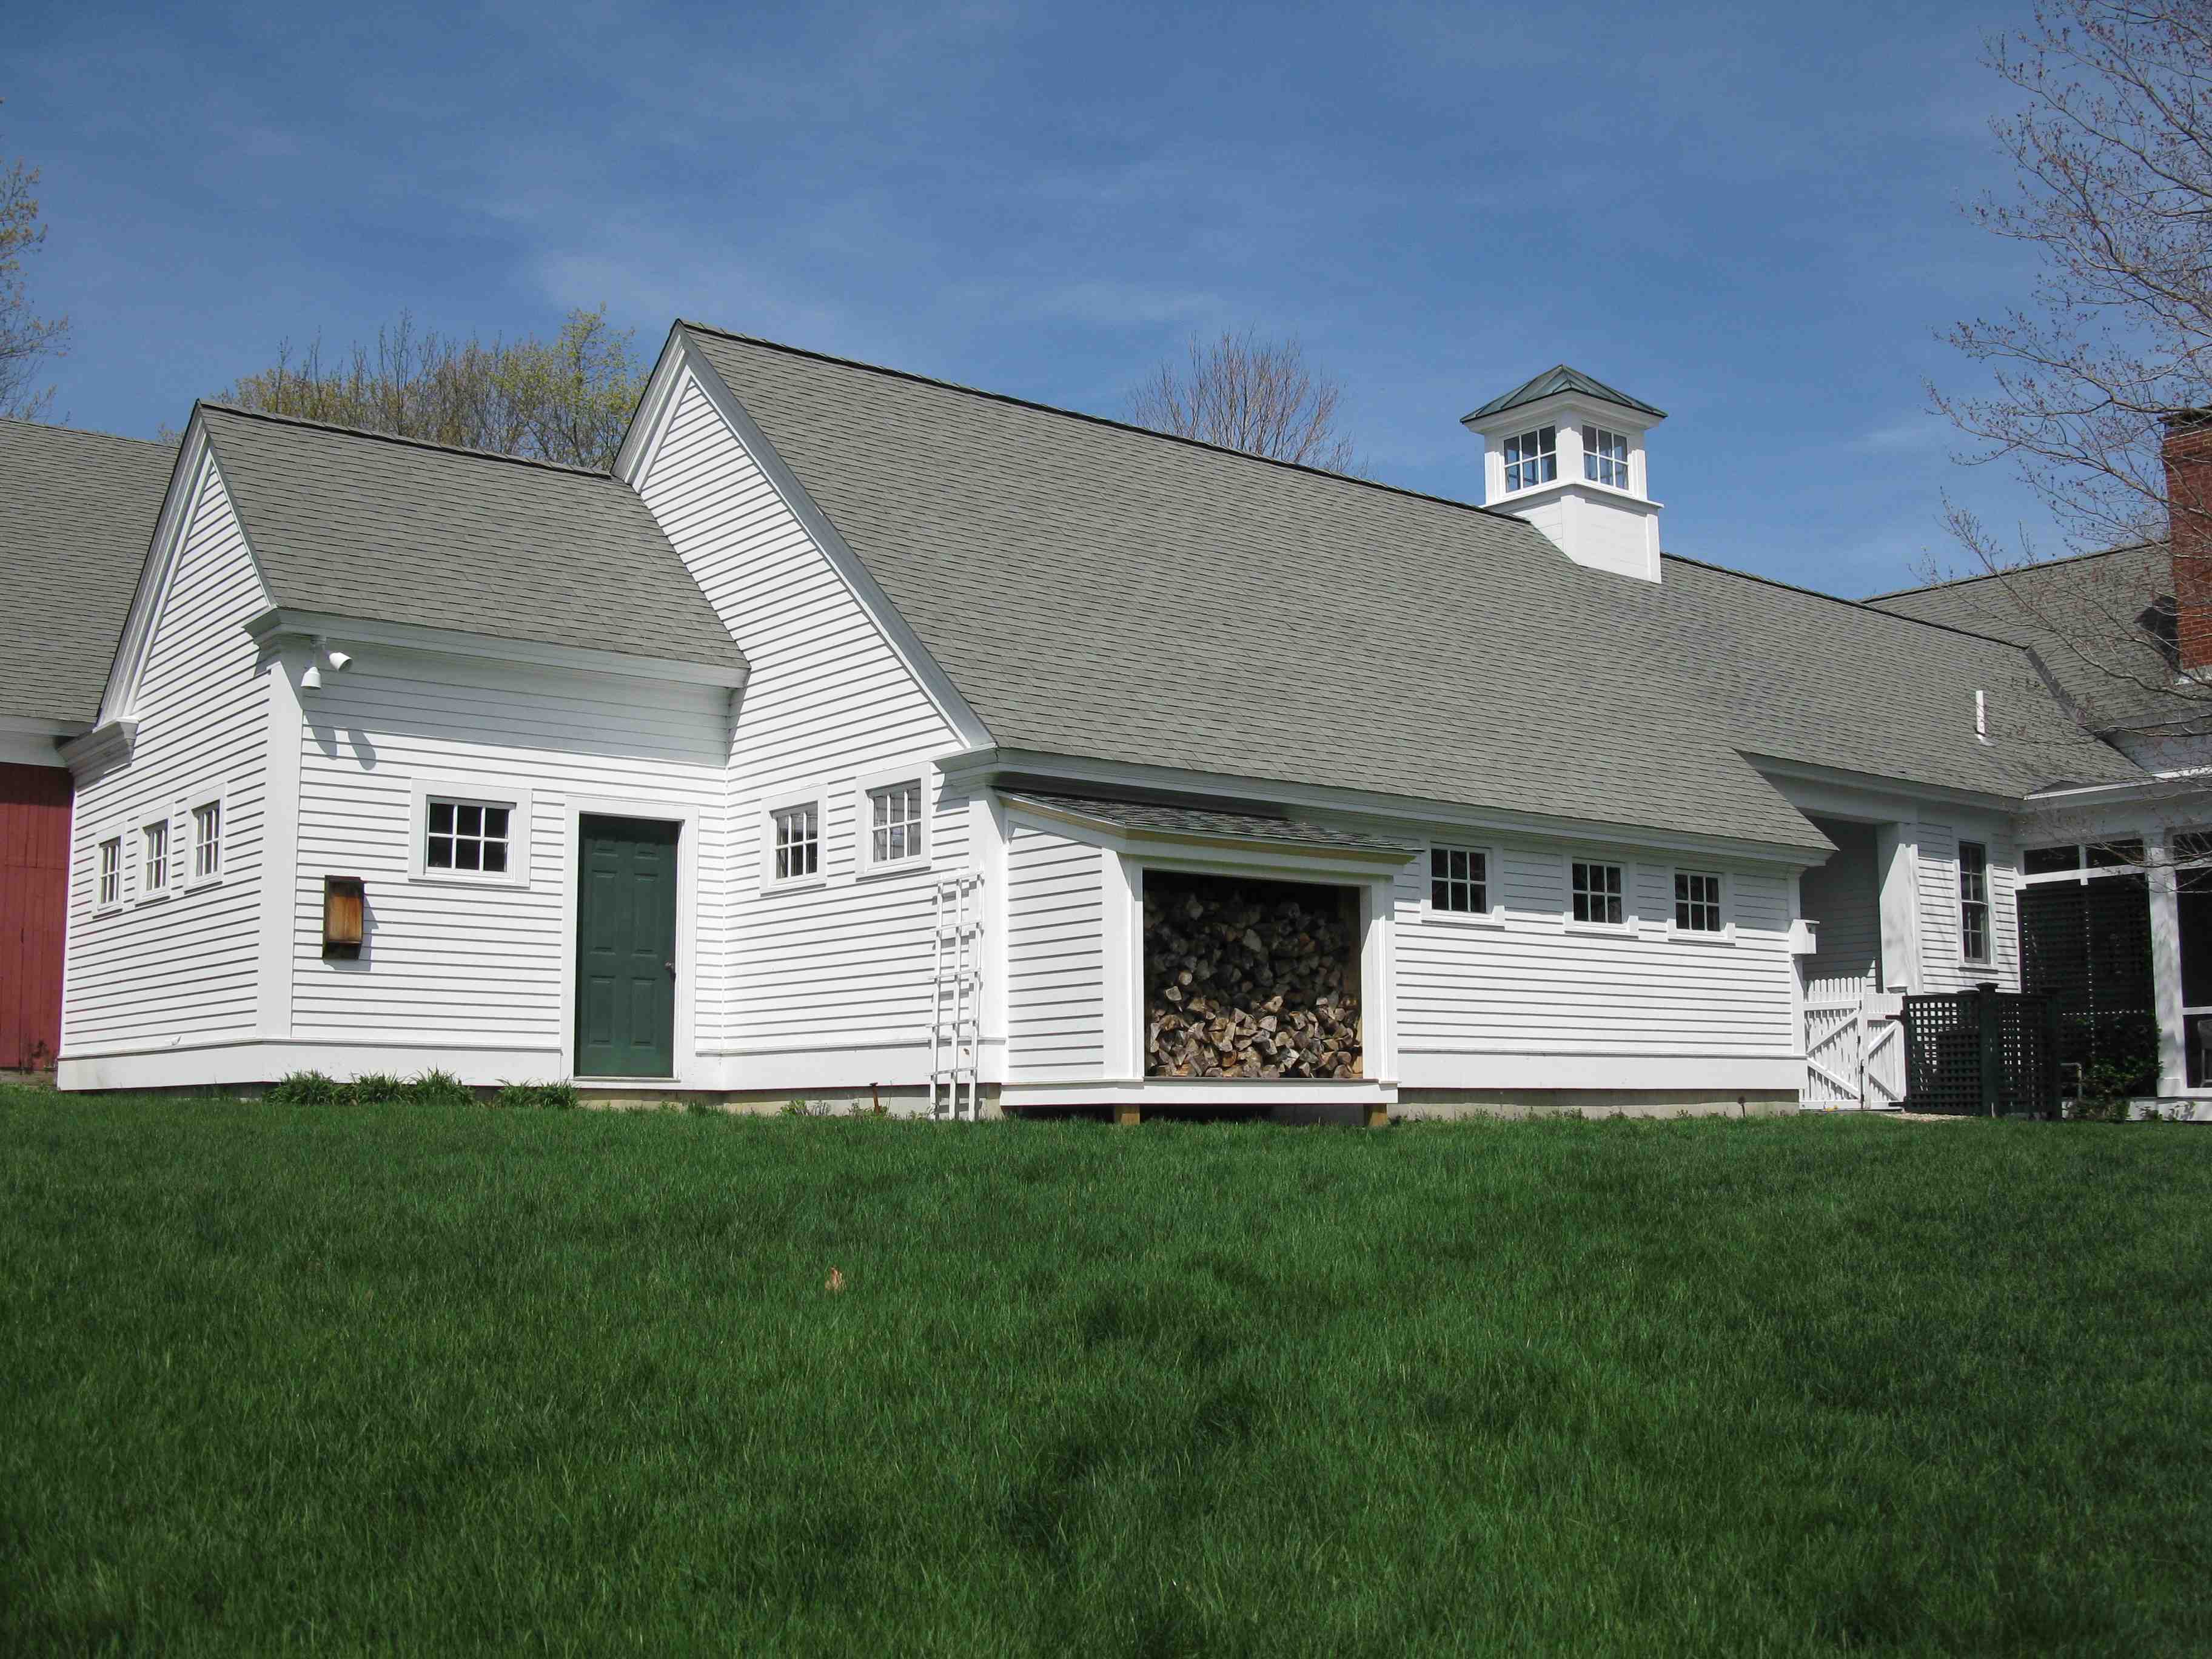
The rear of their garage faces South East and gets a lot of sun exposure, which I knew was going to be helpful for drying out the wood. There were three windows on the right side and no windows on the left. The left side seemed like the perfect spot for our woodshed and also meant that we were not taking any light away from inside the garage by removing or blocking windows
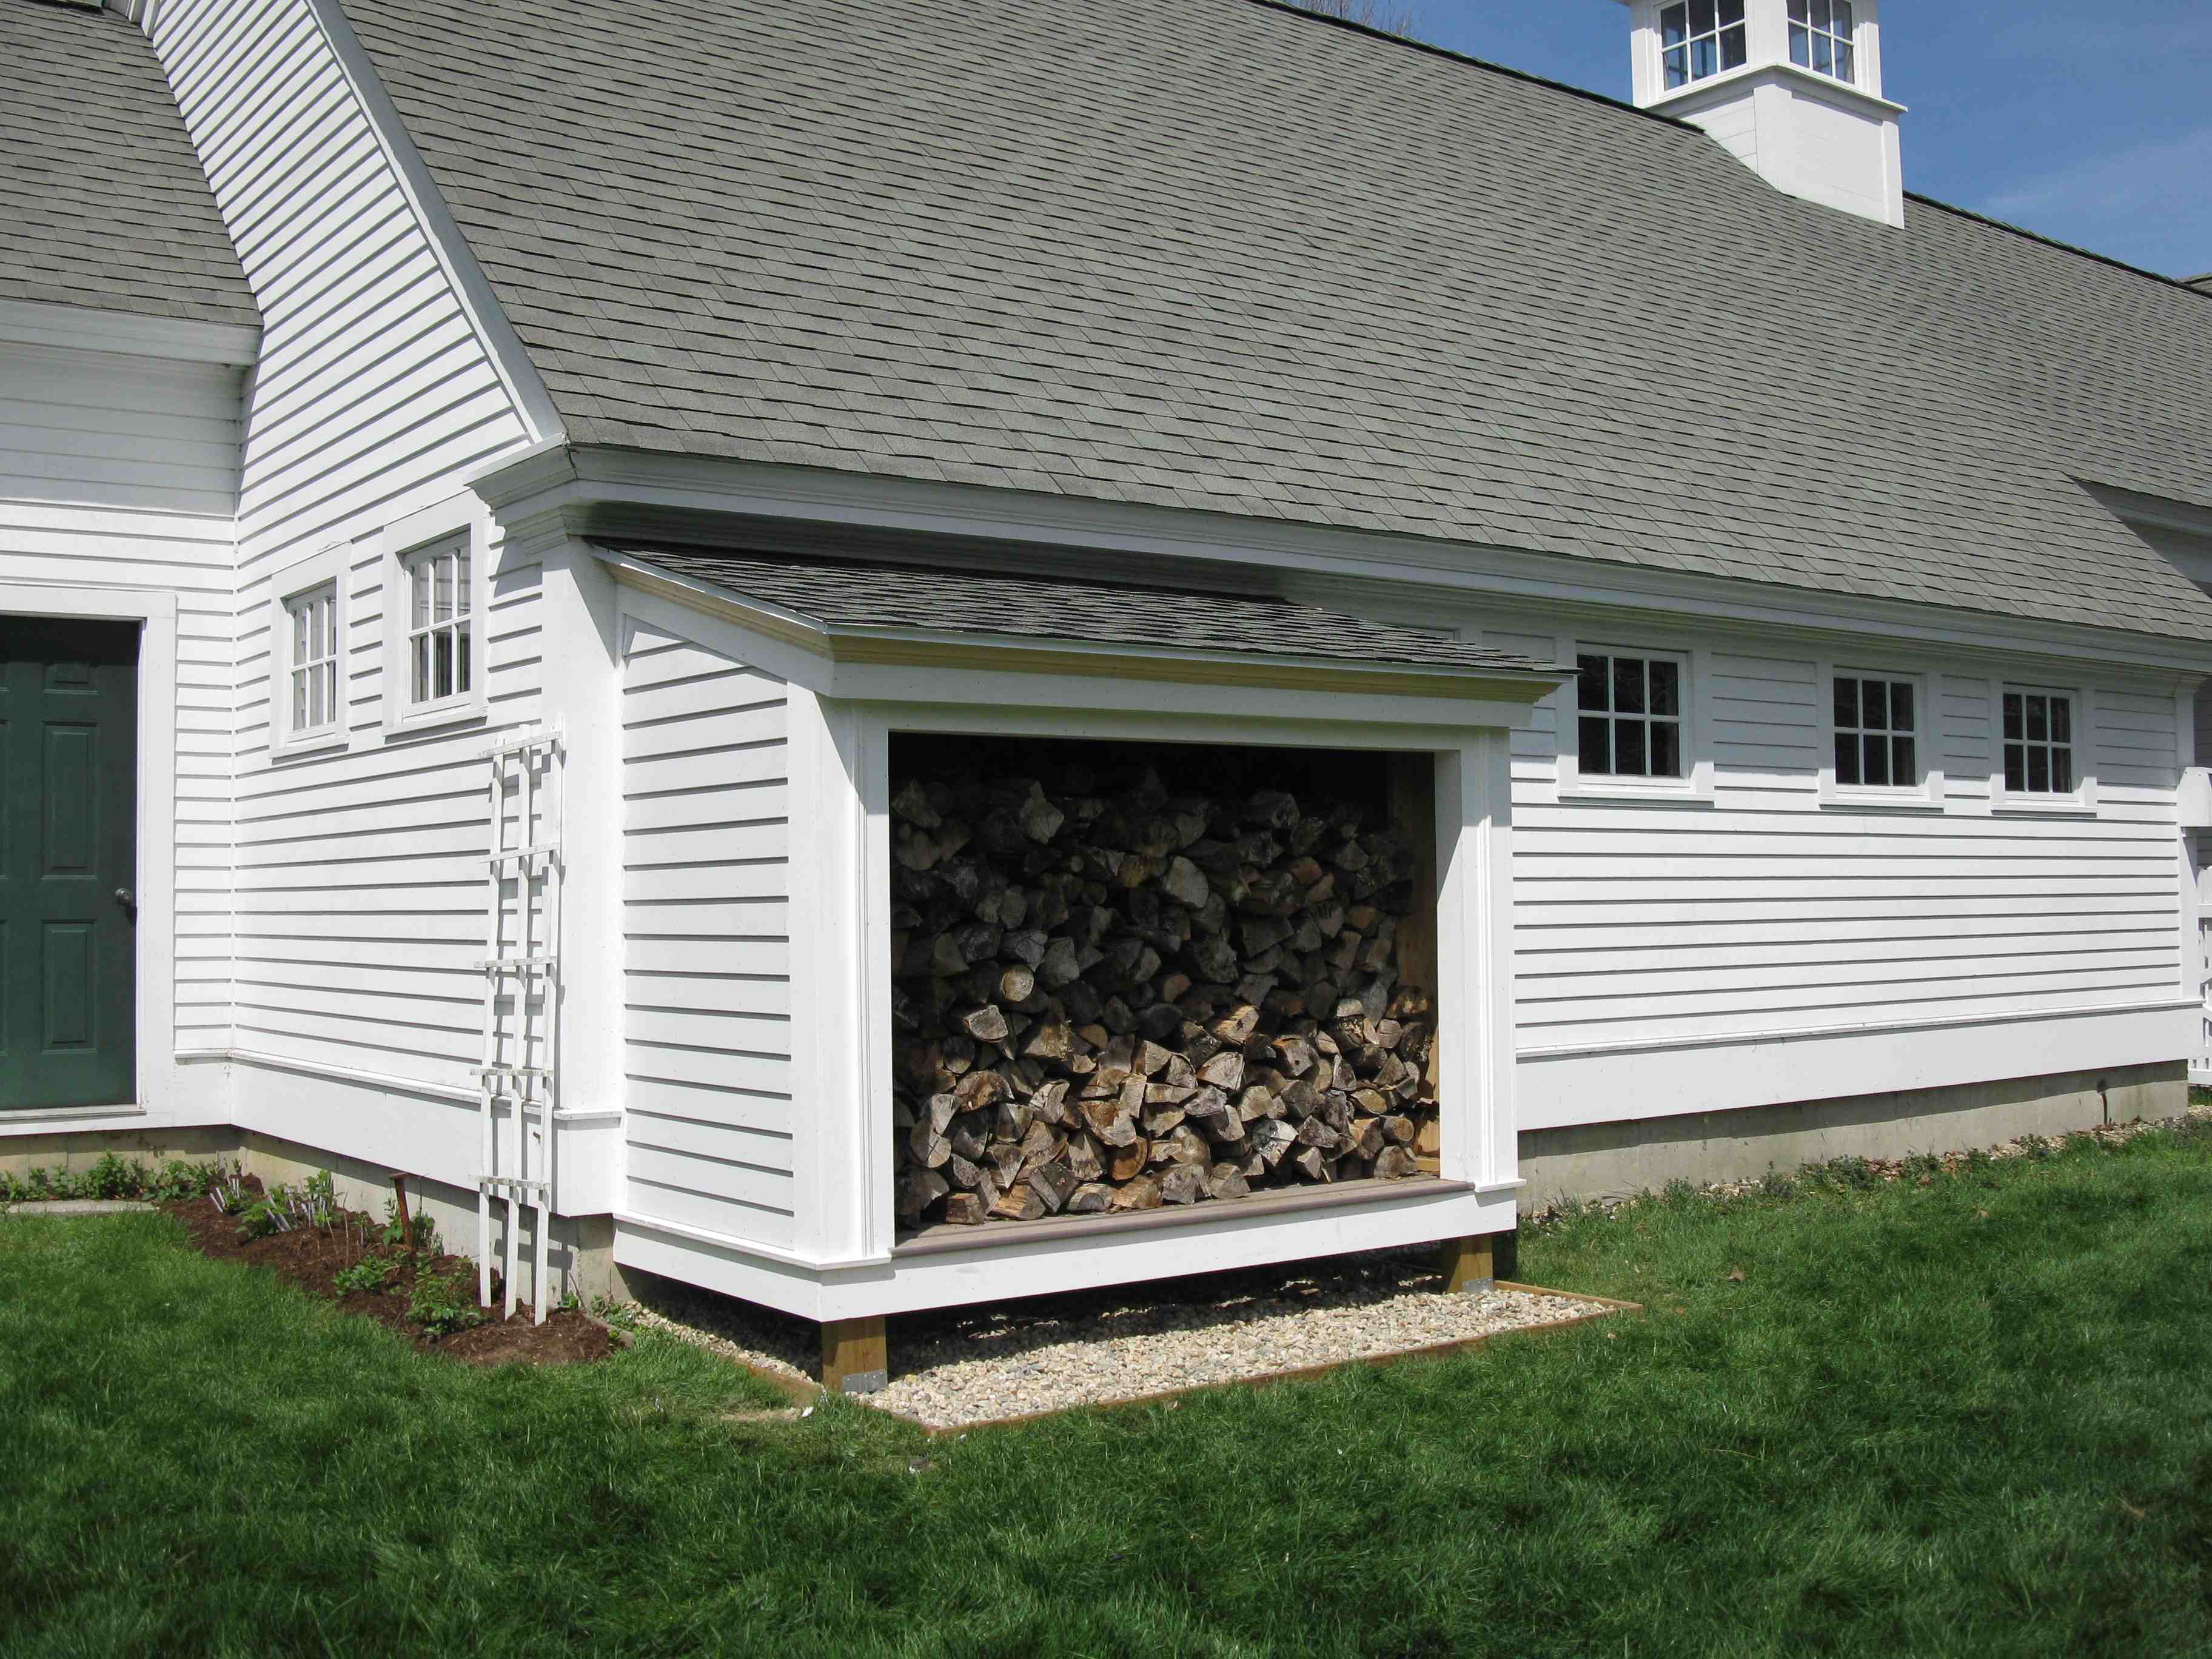
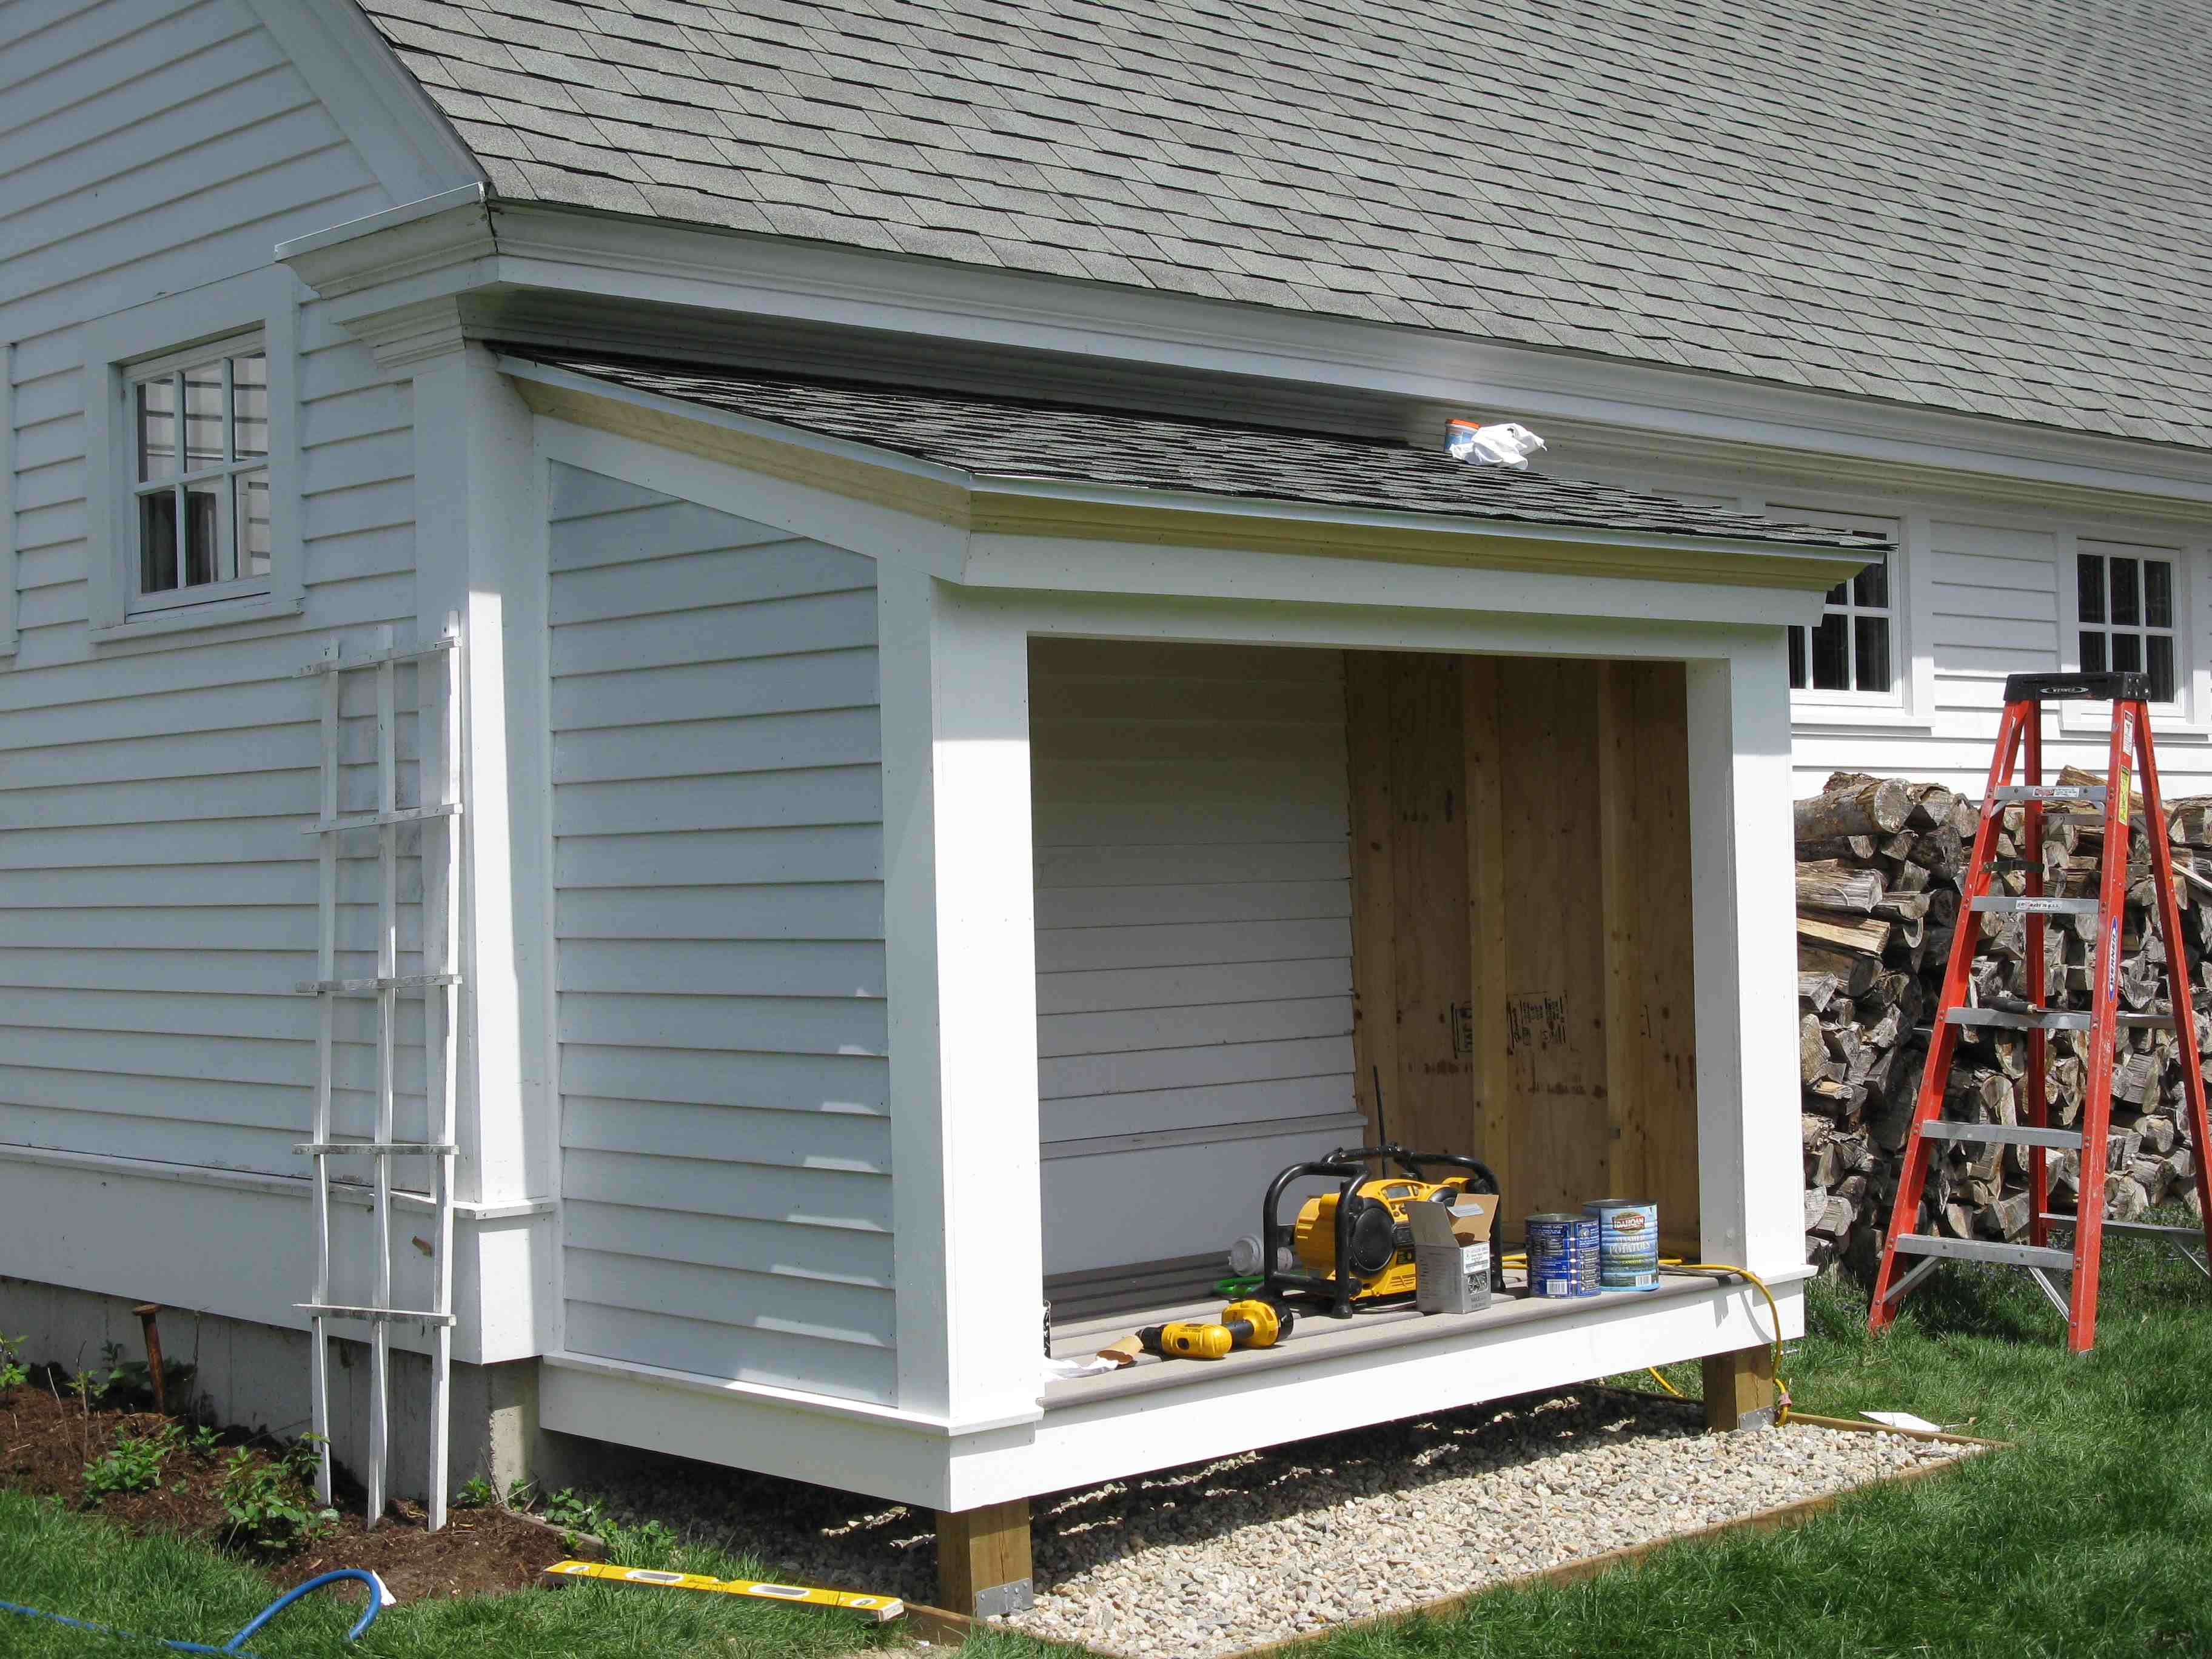
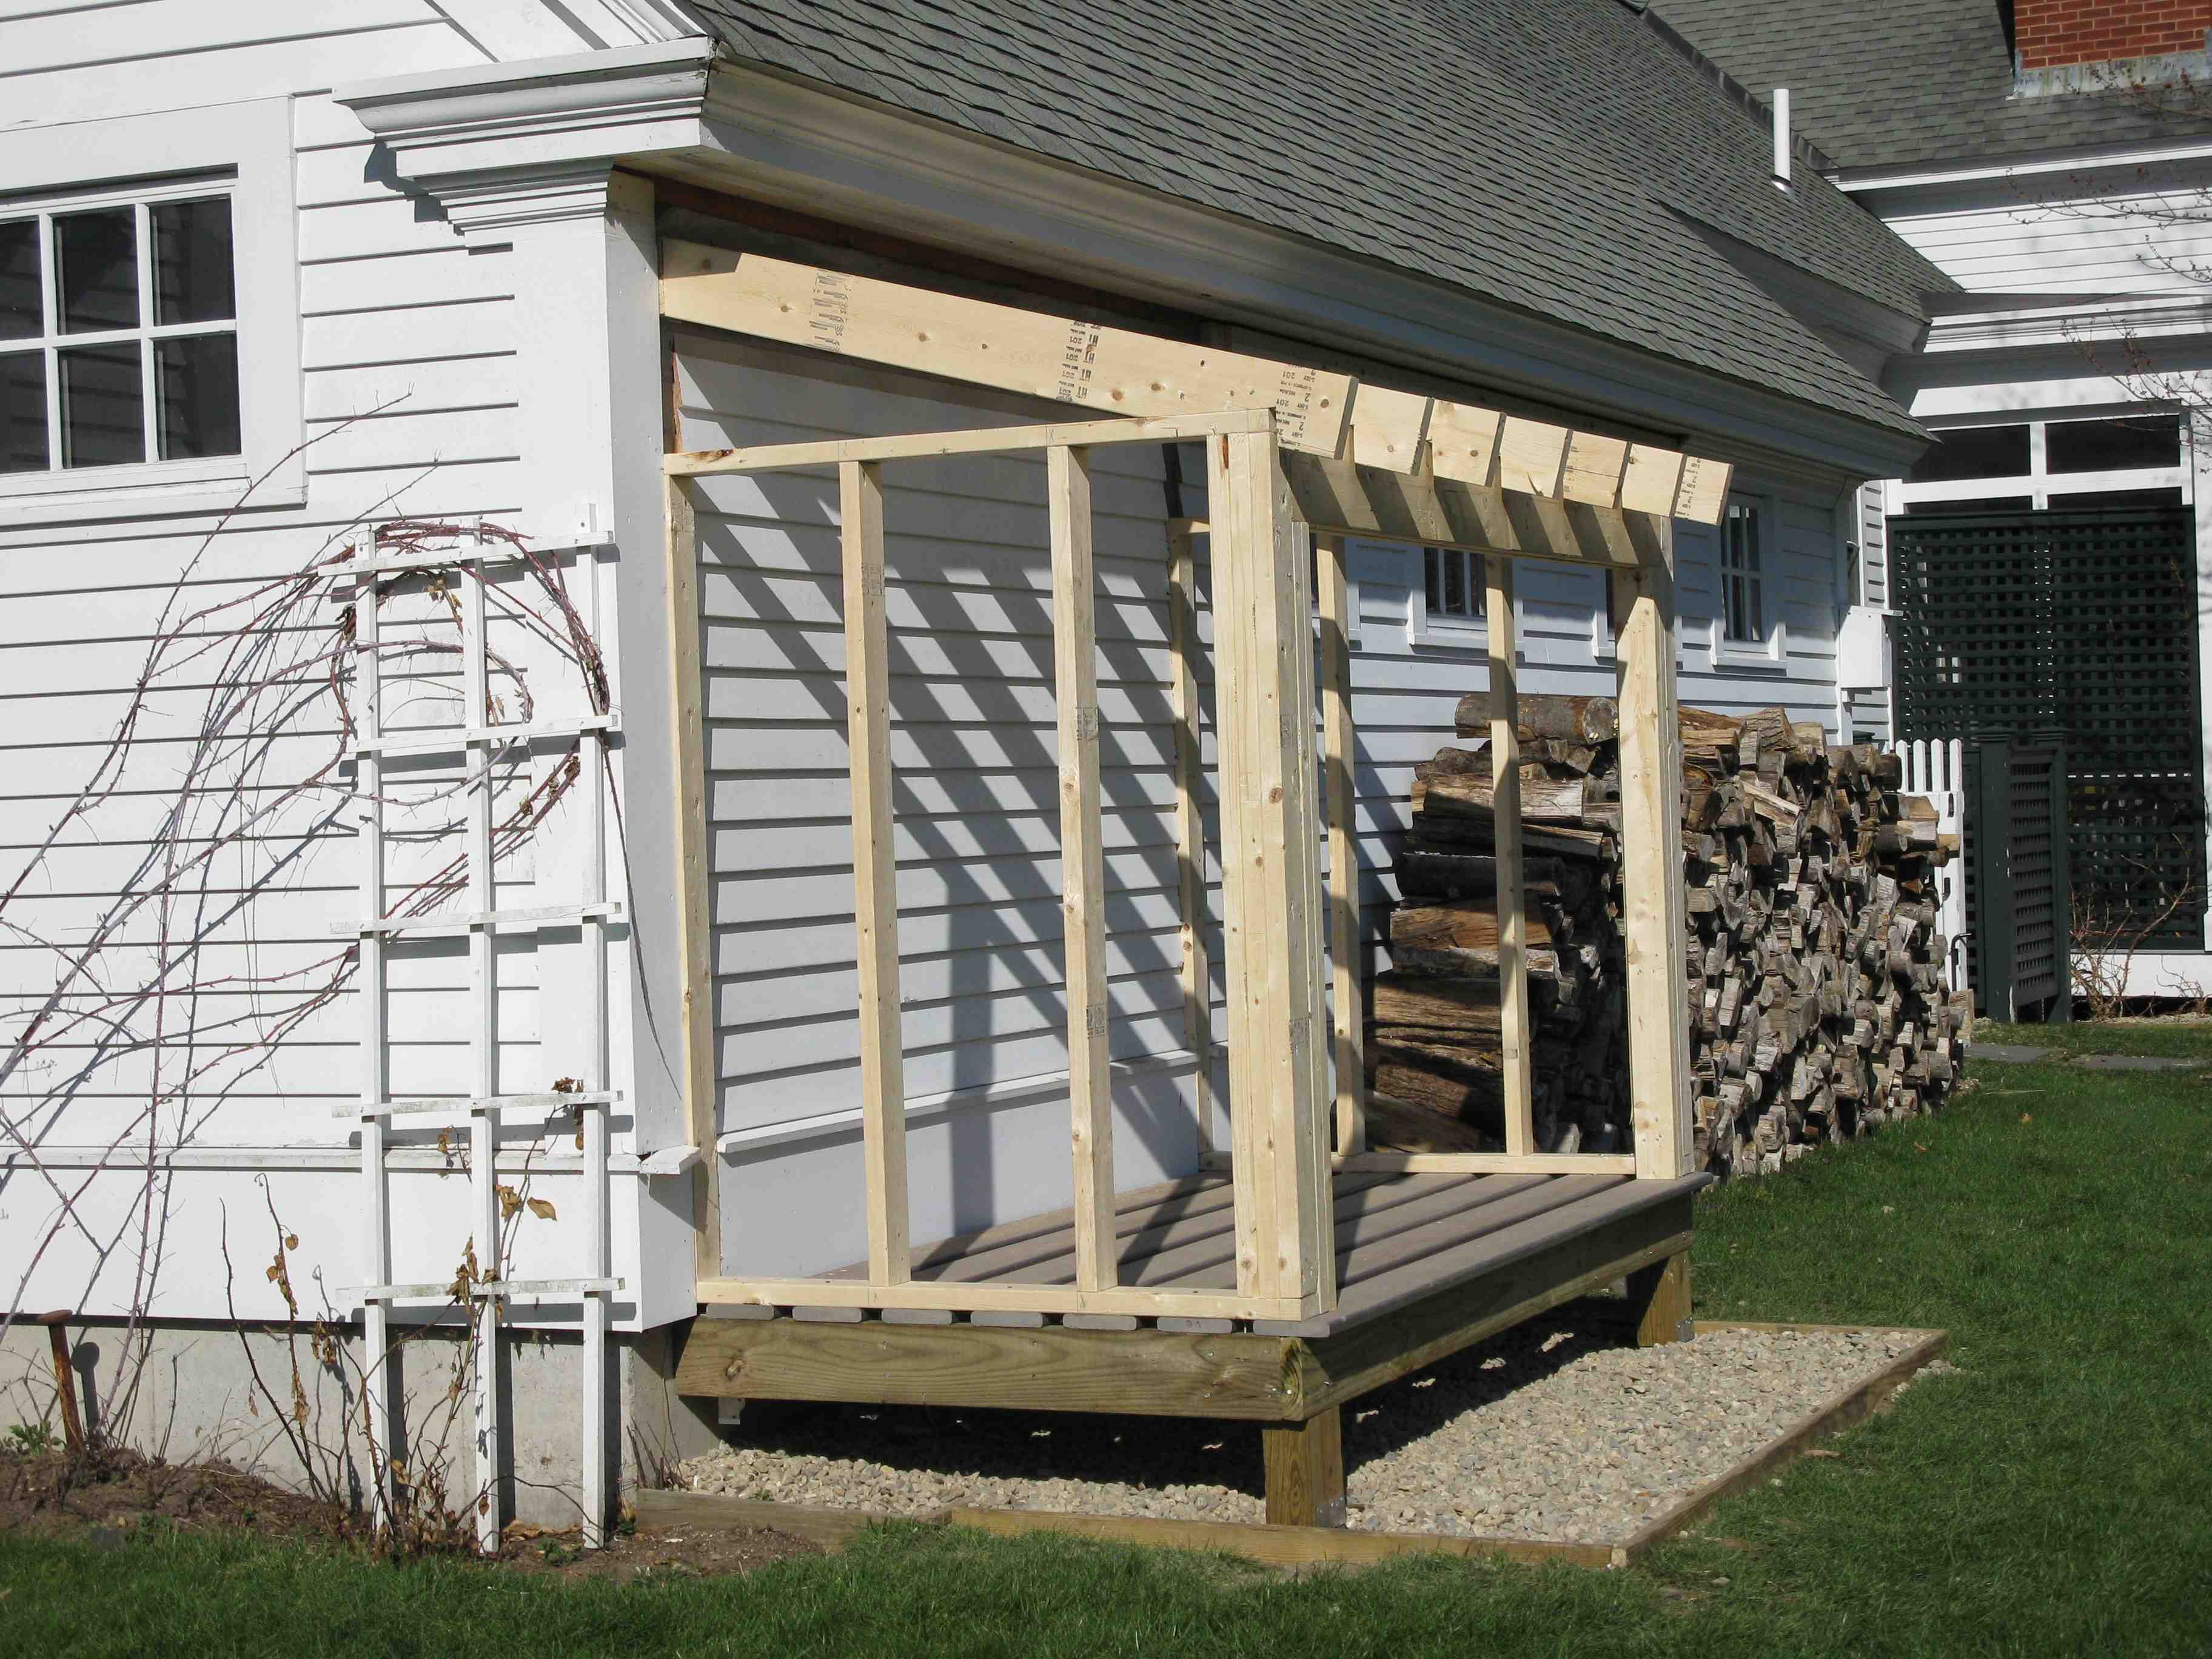
My customer gave me free reign on the design and I choose to build a simple open faced, shed roof structure with clapboard siding and trim details that mimic the details on the Colonial farm style house and garage. For the roof detail we discussed coming off the upper garage roof with gable roof, the woodshed roof having the same pitch as the garage, but decided that was too costly. They were looking for simplicity, something clean and simple.
I measured a pile of wood that they told me was the equivalent of a cord and sized their new wood storage shed accordingly. The final dimensions were approximately 5 x 10 feet.
Every Building Begins with a Secure Foundation:
Attaching the wood storage shed to the rear garage wall actually made my job easier. This meant that I could attach a ledger board off the garage wall hang my floor joists from it, built two walls and a roof and call it a day. The floor joists were to run perpendicular to the garage wall and sit on a double outside rim joist that would attach to two 4×6 pressure treated posts with both attached atop of two 10” x 48” deep concrete footings.
Installing the Ledger Board:
Once I determined exactly where the wood shed was going I cut my 2×6 pressure treated ledger-board to size and secured it to the garage concrete foundation wall with 8-10 concrete wedge anchor bolts. Because the ledger-board was only 8 feet long I pre drilled my holes in the ledger-board with a wood drill bit an then used a ½” SDS hammer drill bit to drill the  holes in the concrete wall.
The concrete wedge anchors secure the ledger to the wall. With these expandable bolts – once the wedge anchor bolts are tightened wings inside the concrete anchor expand and compress against the walls of the concrete hole securing the anchor in place and providing sheer strength.
Laying Out and Digging the Footings:
With the ledger-board installed level onto the garage I measured out a rectangle on the grass that was slightly larger than the woodshed. Using a combination of 3-4-5 triangle measurements to determine the footing locations as well as the rectangular space.
DIY Tip: In order to get corners square and as close to 90 degrees as possible I use the 3-4-5 rule to build square corners. This rule is based on basic geometry A2 xB2=C2. This means that the square of the hypotenuse of a right triangle is equal to the sum of the square of both legs.
 3-4-5 Rule:

1. Measure 3 feet out from a corner or point of reference and make a mark
2. Measure 4 feet from the corner or point of reference in the other direction and make a mark
3. Measure the distance between your marks. If your corner is square the distance will be 5 feet.
4. A measurement lees that 5 feet means your corners is less than 90 degree, and if over 5 feet your corner is more than 90 degrees.
5. Adjust as needed to achieve your 90 degree corner.
The purpose the rectangular space was to create a gravel covered ground base and drip edge to match the existing garage roof drainage gravel.
 To create this drip edge I first removed all of the sod and organic soil, installed 2×6 pressure treated boards as border strips and then we installed landscape fabric and filled the space with ¾” river stone. Note – This was done after I poured my footings.
Pouring The Footings:
A footing helps support the structure by spreading out the loads created by each support post over a wider area.
Concrete footings need to be installed below the frost line for your region. The front line is not consistent around the country and there are often dramatic differences from state to state. For example in Florida the frost line is less than one foot and in Minnesota it is closer to six feet. The best resource to check your frost level and depth of footing is to check with your local building department.
In my area the building inspector wants to see footings dug to 48 inches deep. Because the wood shed was only eight feet wide I was able to span that distance with a double rim joist and needed only two footings, one at each corner.
I used a spade shovel and a post hole digger to get to the proper footing depth. Once there I used 8 inch round Sonotube forms cut at 48 inches.
DIY Tip – To avoid having to keep pulling out a tape measure I measure 48 inches on my spade shovel and post hole digger and mark this measurement with a permanent marker. This saves time and effort while digging.
I use premixed 80-pound bags of concrete mix from “Quickcrete” for my footings. I pour the contents into a wheel barrel and mix it with water a little at a time to get the perfect consistency. If a hose is not readily available, or nearby I use a five gallon bucket with water.
Once mixed, I pour the concrete into the Sonotube with the wheel barrel and use my shovel to get and add the droppings. No matter how careful I am there is always a tone of concrete outside the edge of the Sonotube.
Often times I will pour about of foot of concrete and then lift my tube out of the hole a few inches, typically 4 to 6 inches. I do this to keep my 4×4 or 4×6 pressure treated posts away from the ground. This uses a bit more concrete but I like the look and feel it is better for the longevity of the posts.
Once I have both footings poured I insert galvanized “J-bolts” into the footing center. These J-bolts will be used later to secure my post base connectors. Post bases connectors are galvanized hardware designed to permanently attach the support posts to the concrete footing.
Post bases have an elevated bottom compartment with an opening that is designed to lock into a concrete anchor, which is embedded in the top of the concrete pier. The top of the post base straddles the wood support post and provides nail holes which I used galvanized 16 D nails to add a strong connection. The post is also connected to the double rim joist with a similar port to beam connector. All of the connectors were purchased locally and made by Simpson Strong-Tie.
DIY TIP: If your deck has two wood support posts and a ledger bo ard that is bolted to the house, each of the two deck post holds up approximately 25 percent of the total weight. In this situation, the soil under each deck footing may be called upon to support 3,000 plus pounds.
Depending on the wood shed load, the diameter of the hole will probably range between 8 and 24 inches in diameter. Larger diameter holes spread the weight out over more soil area. I used 10” diameter footings.
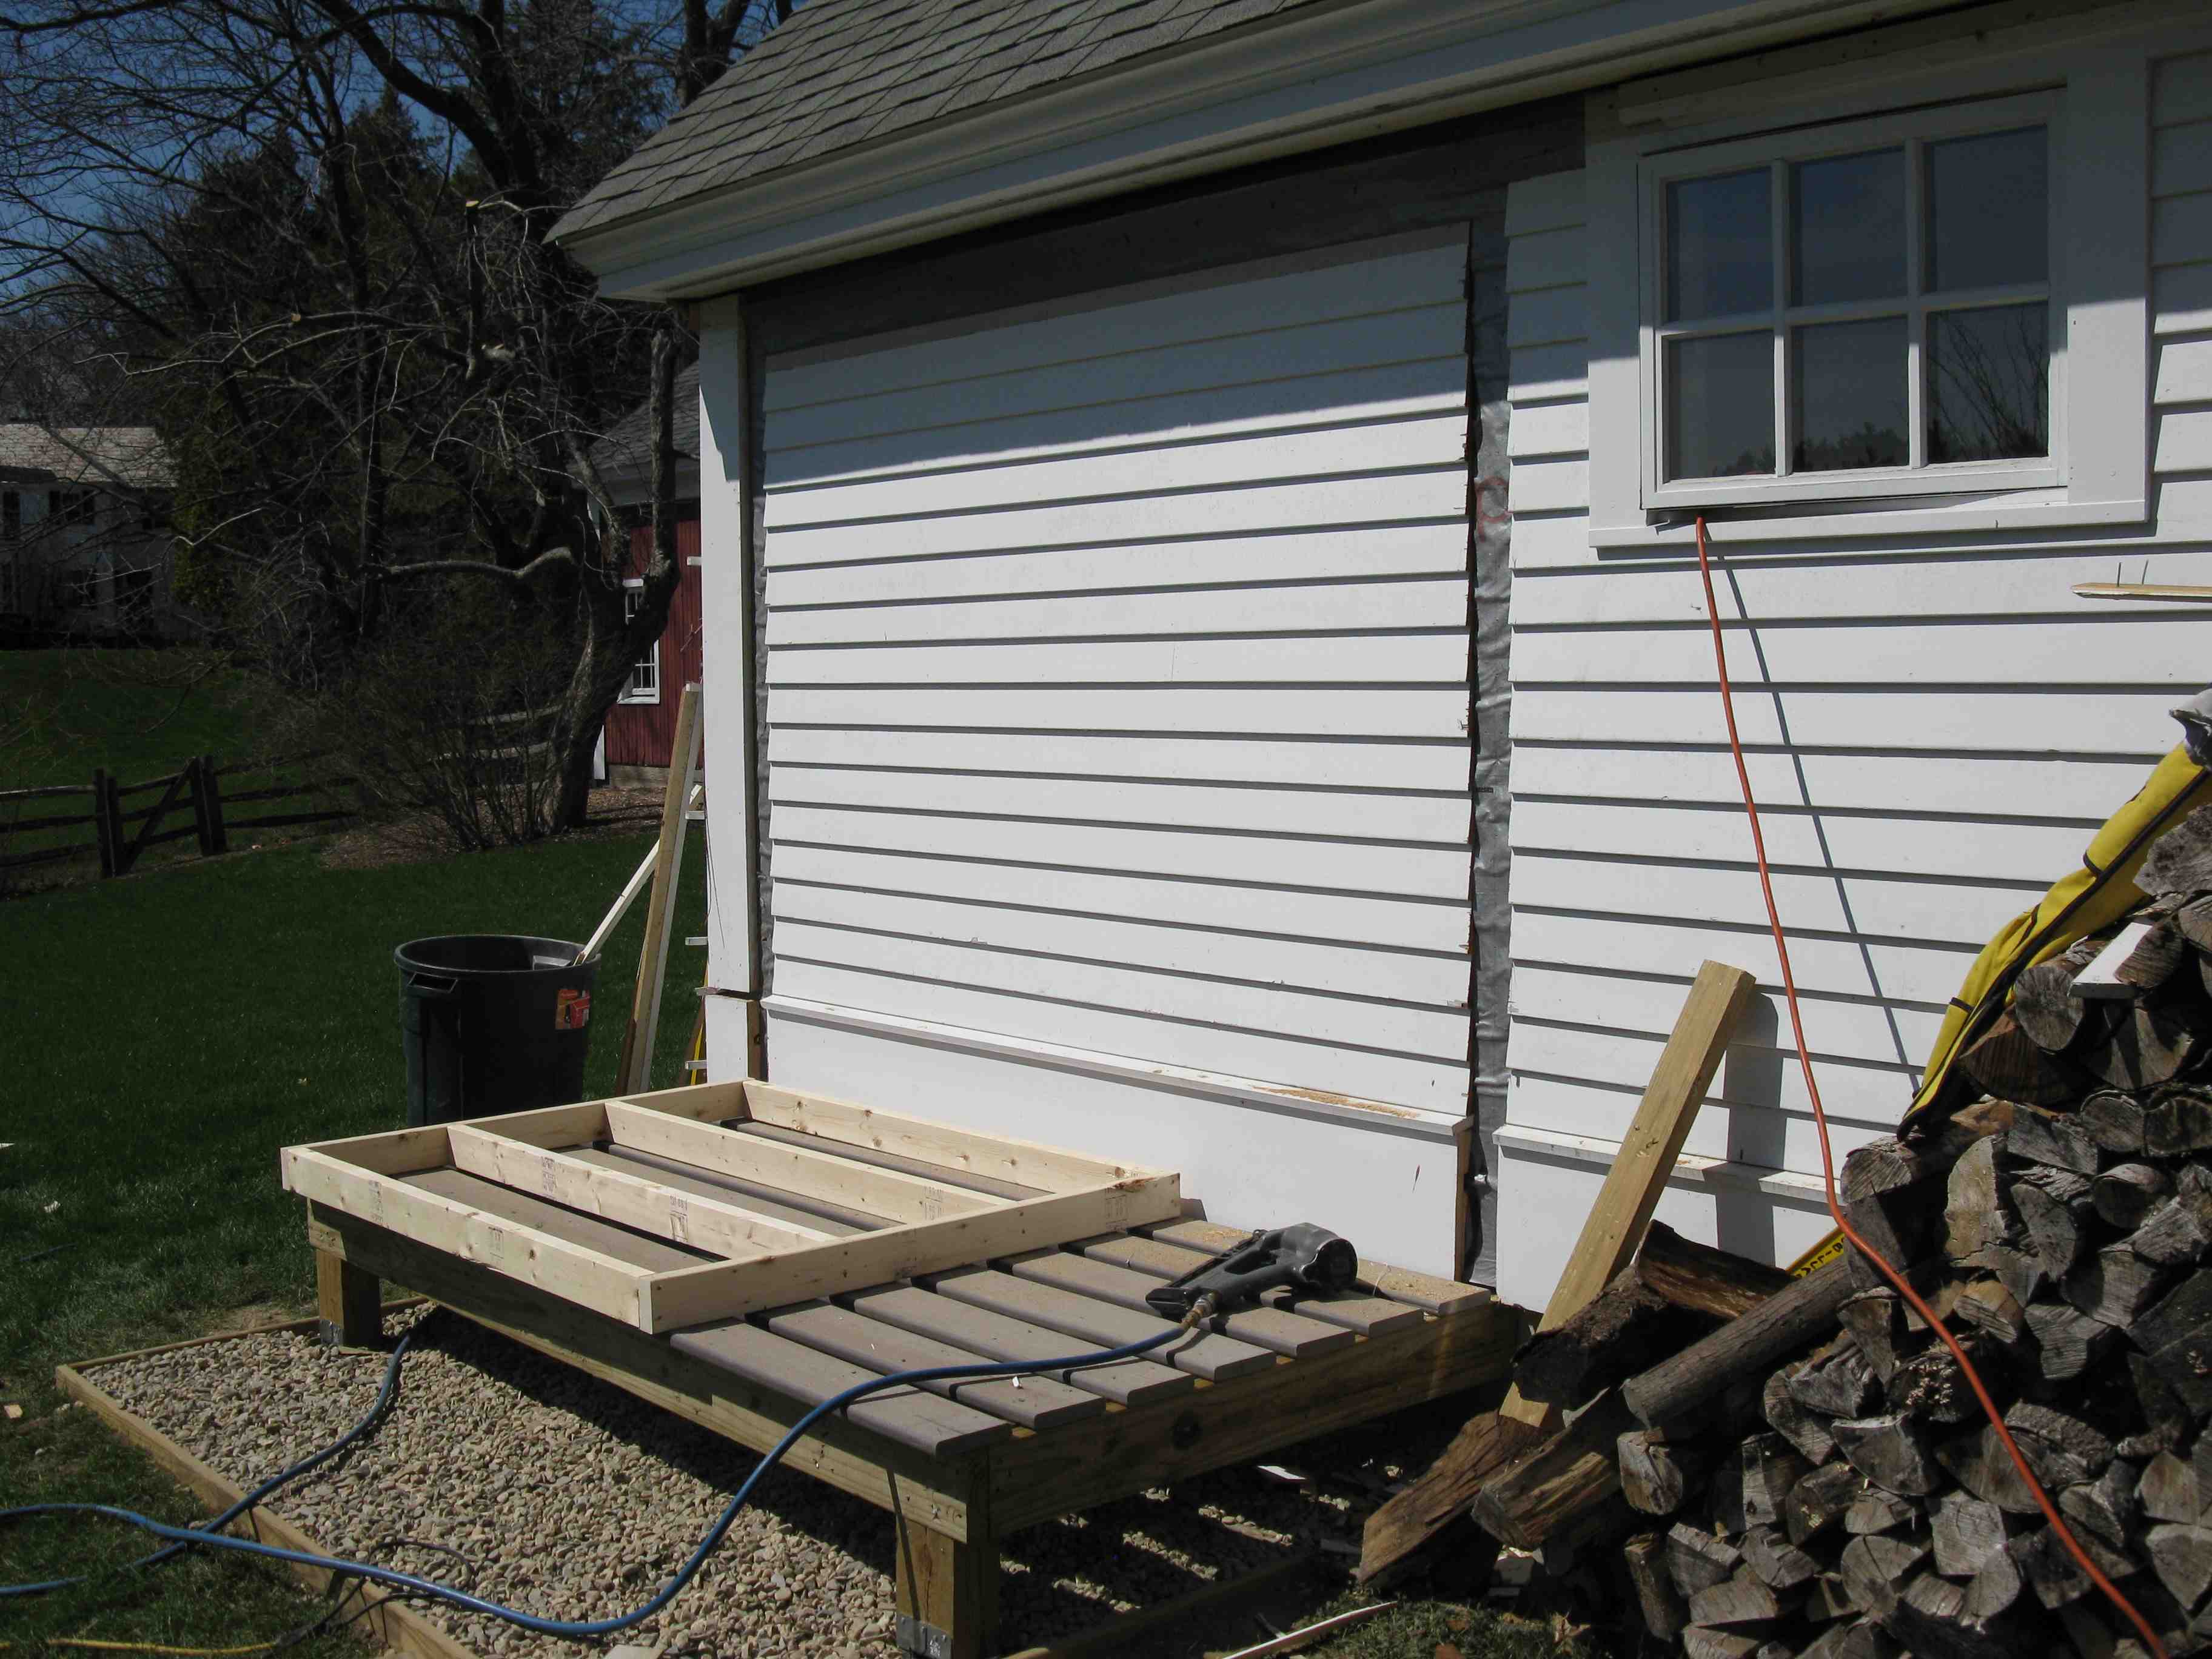
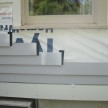
Constructing the Floor Frame:
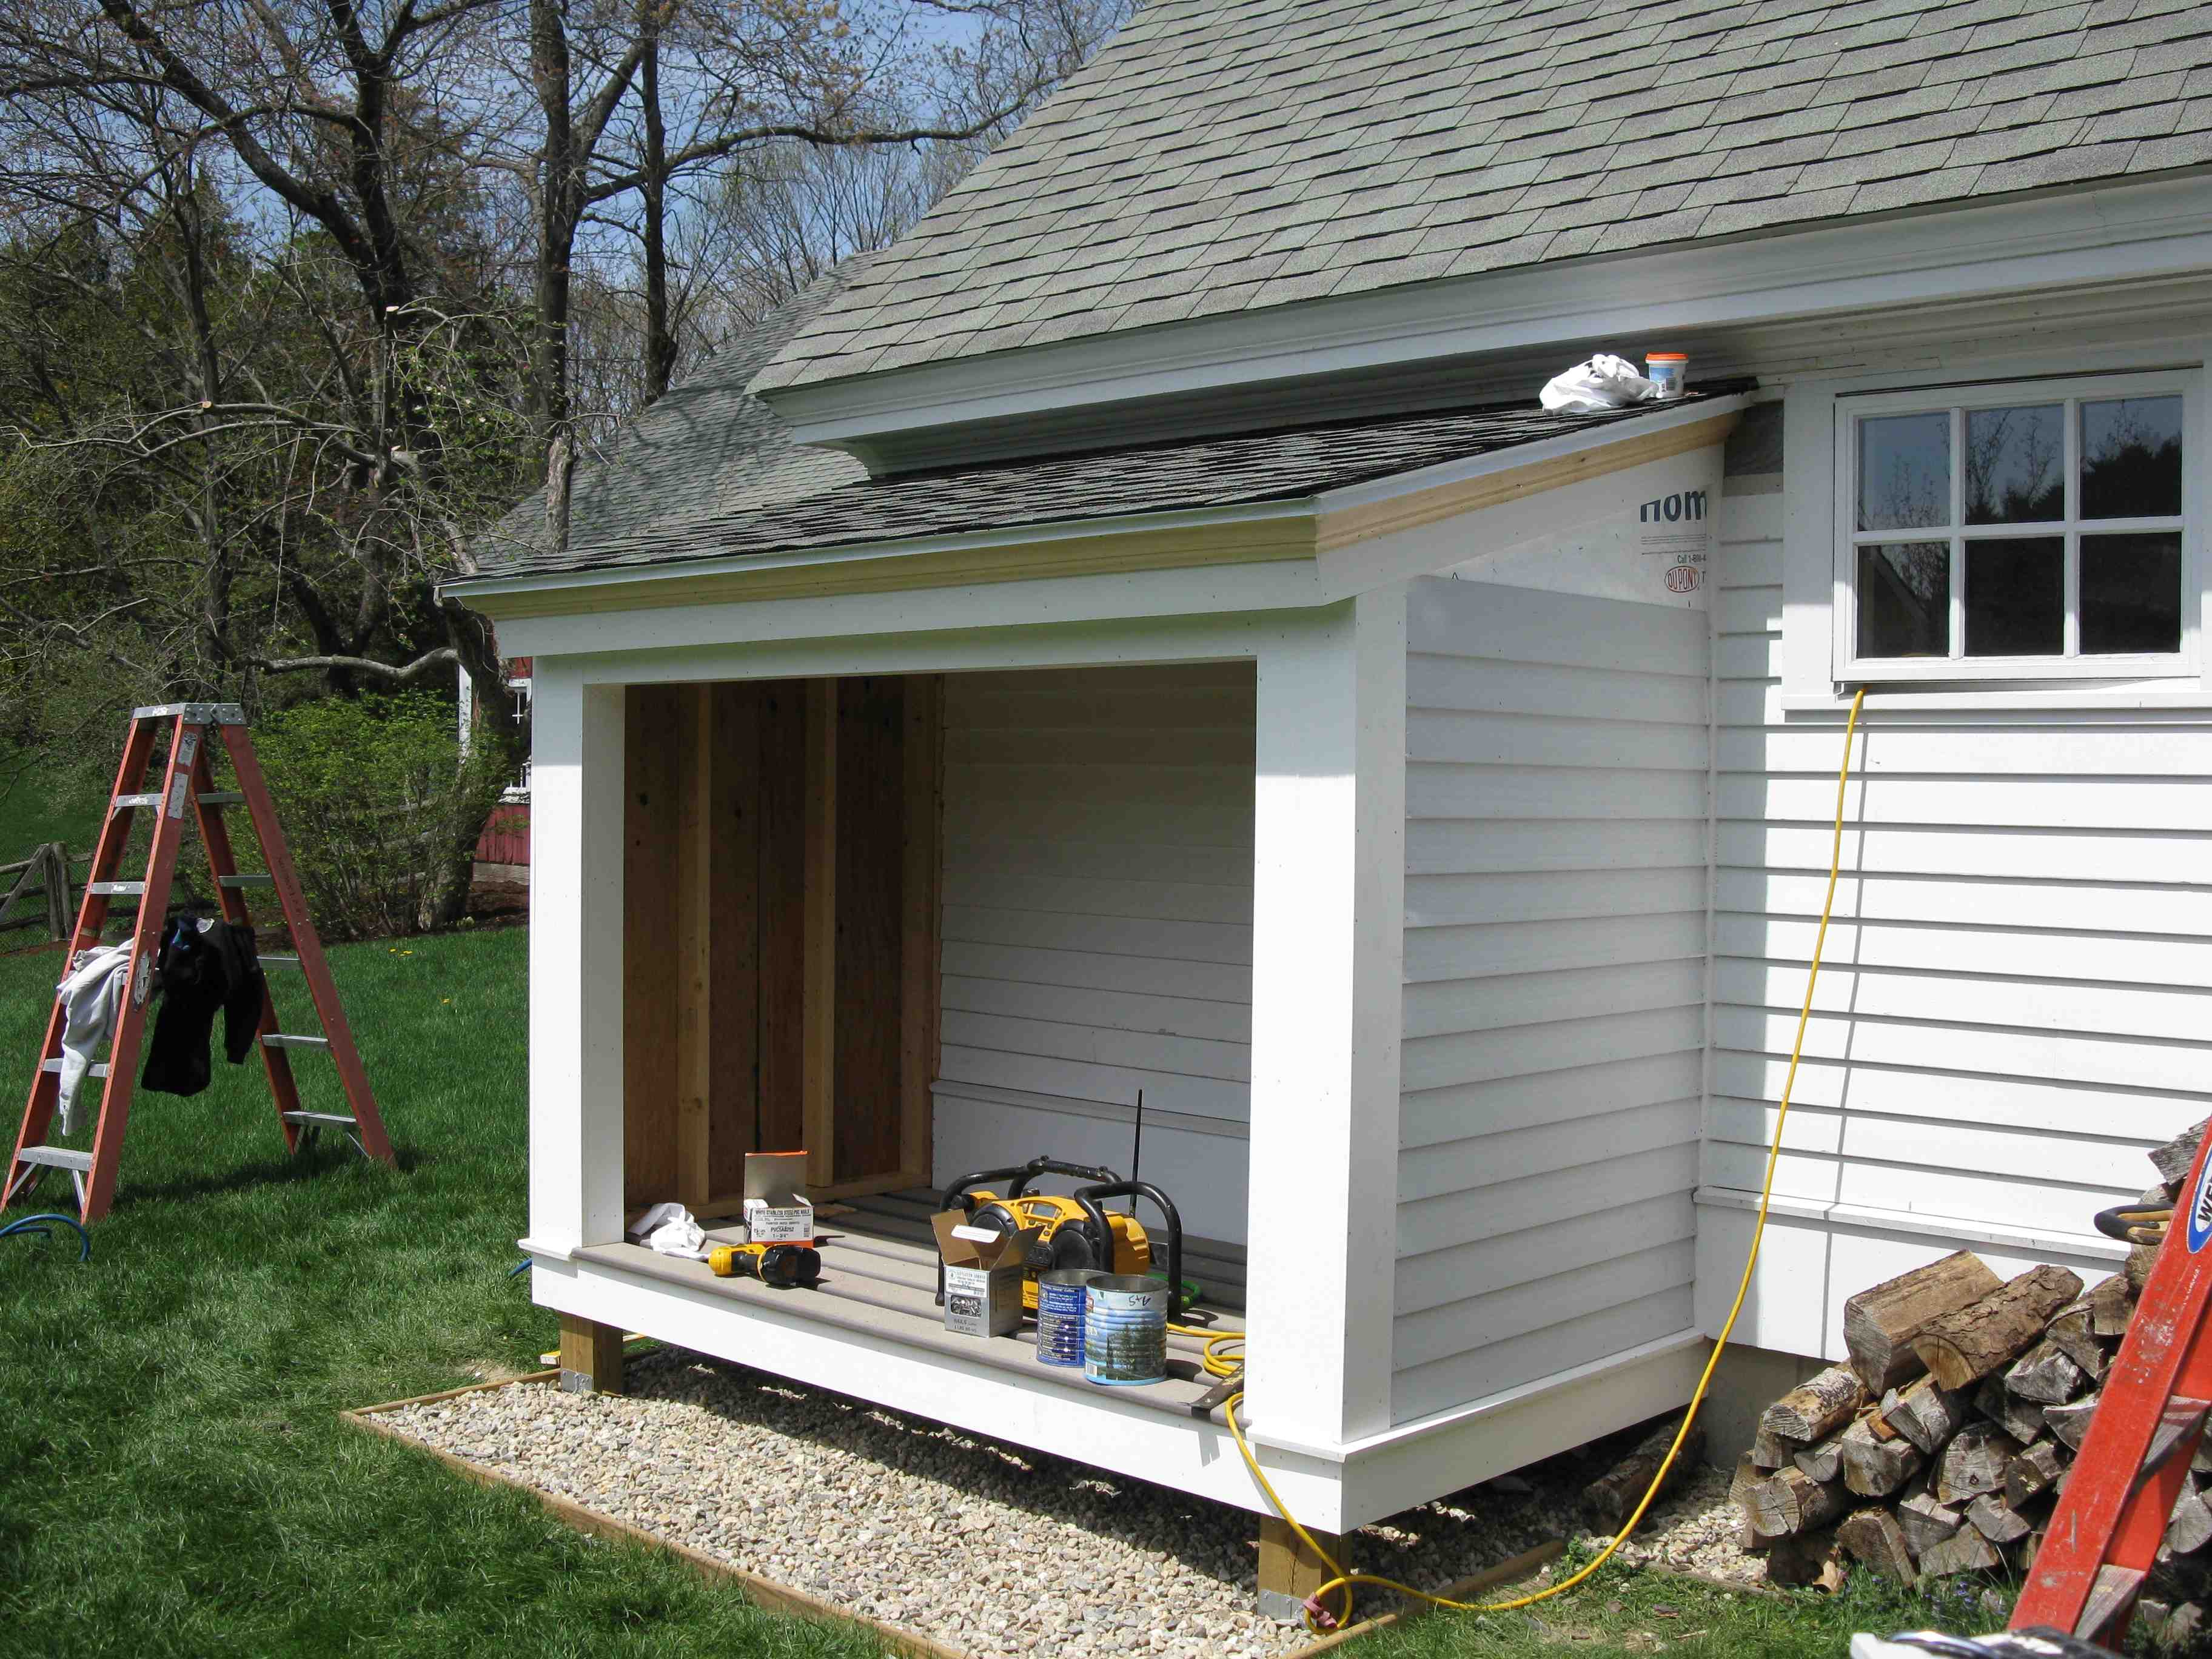
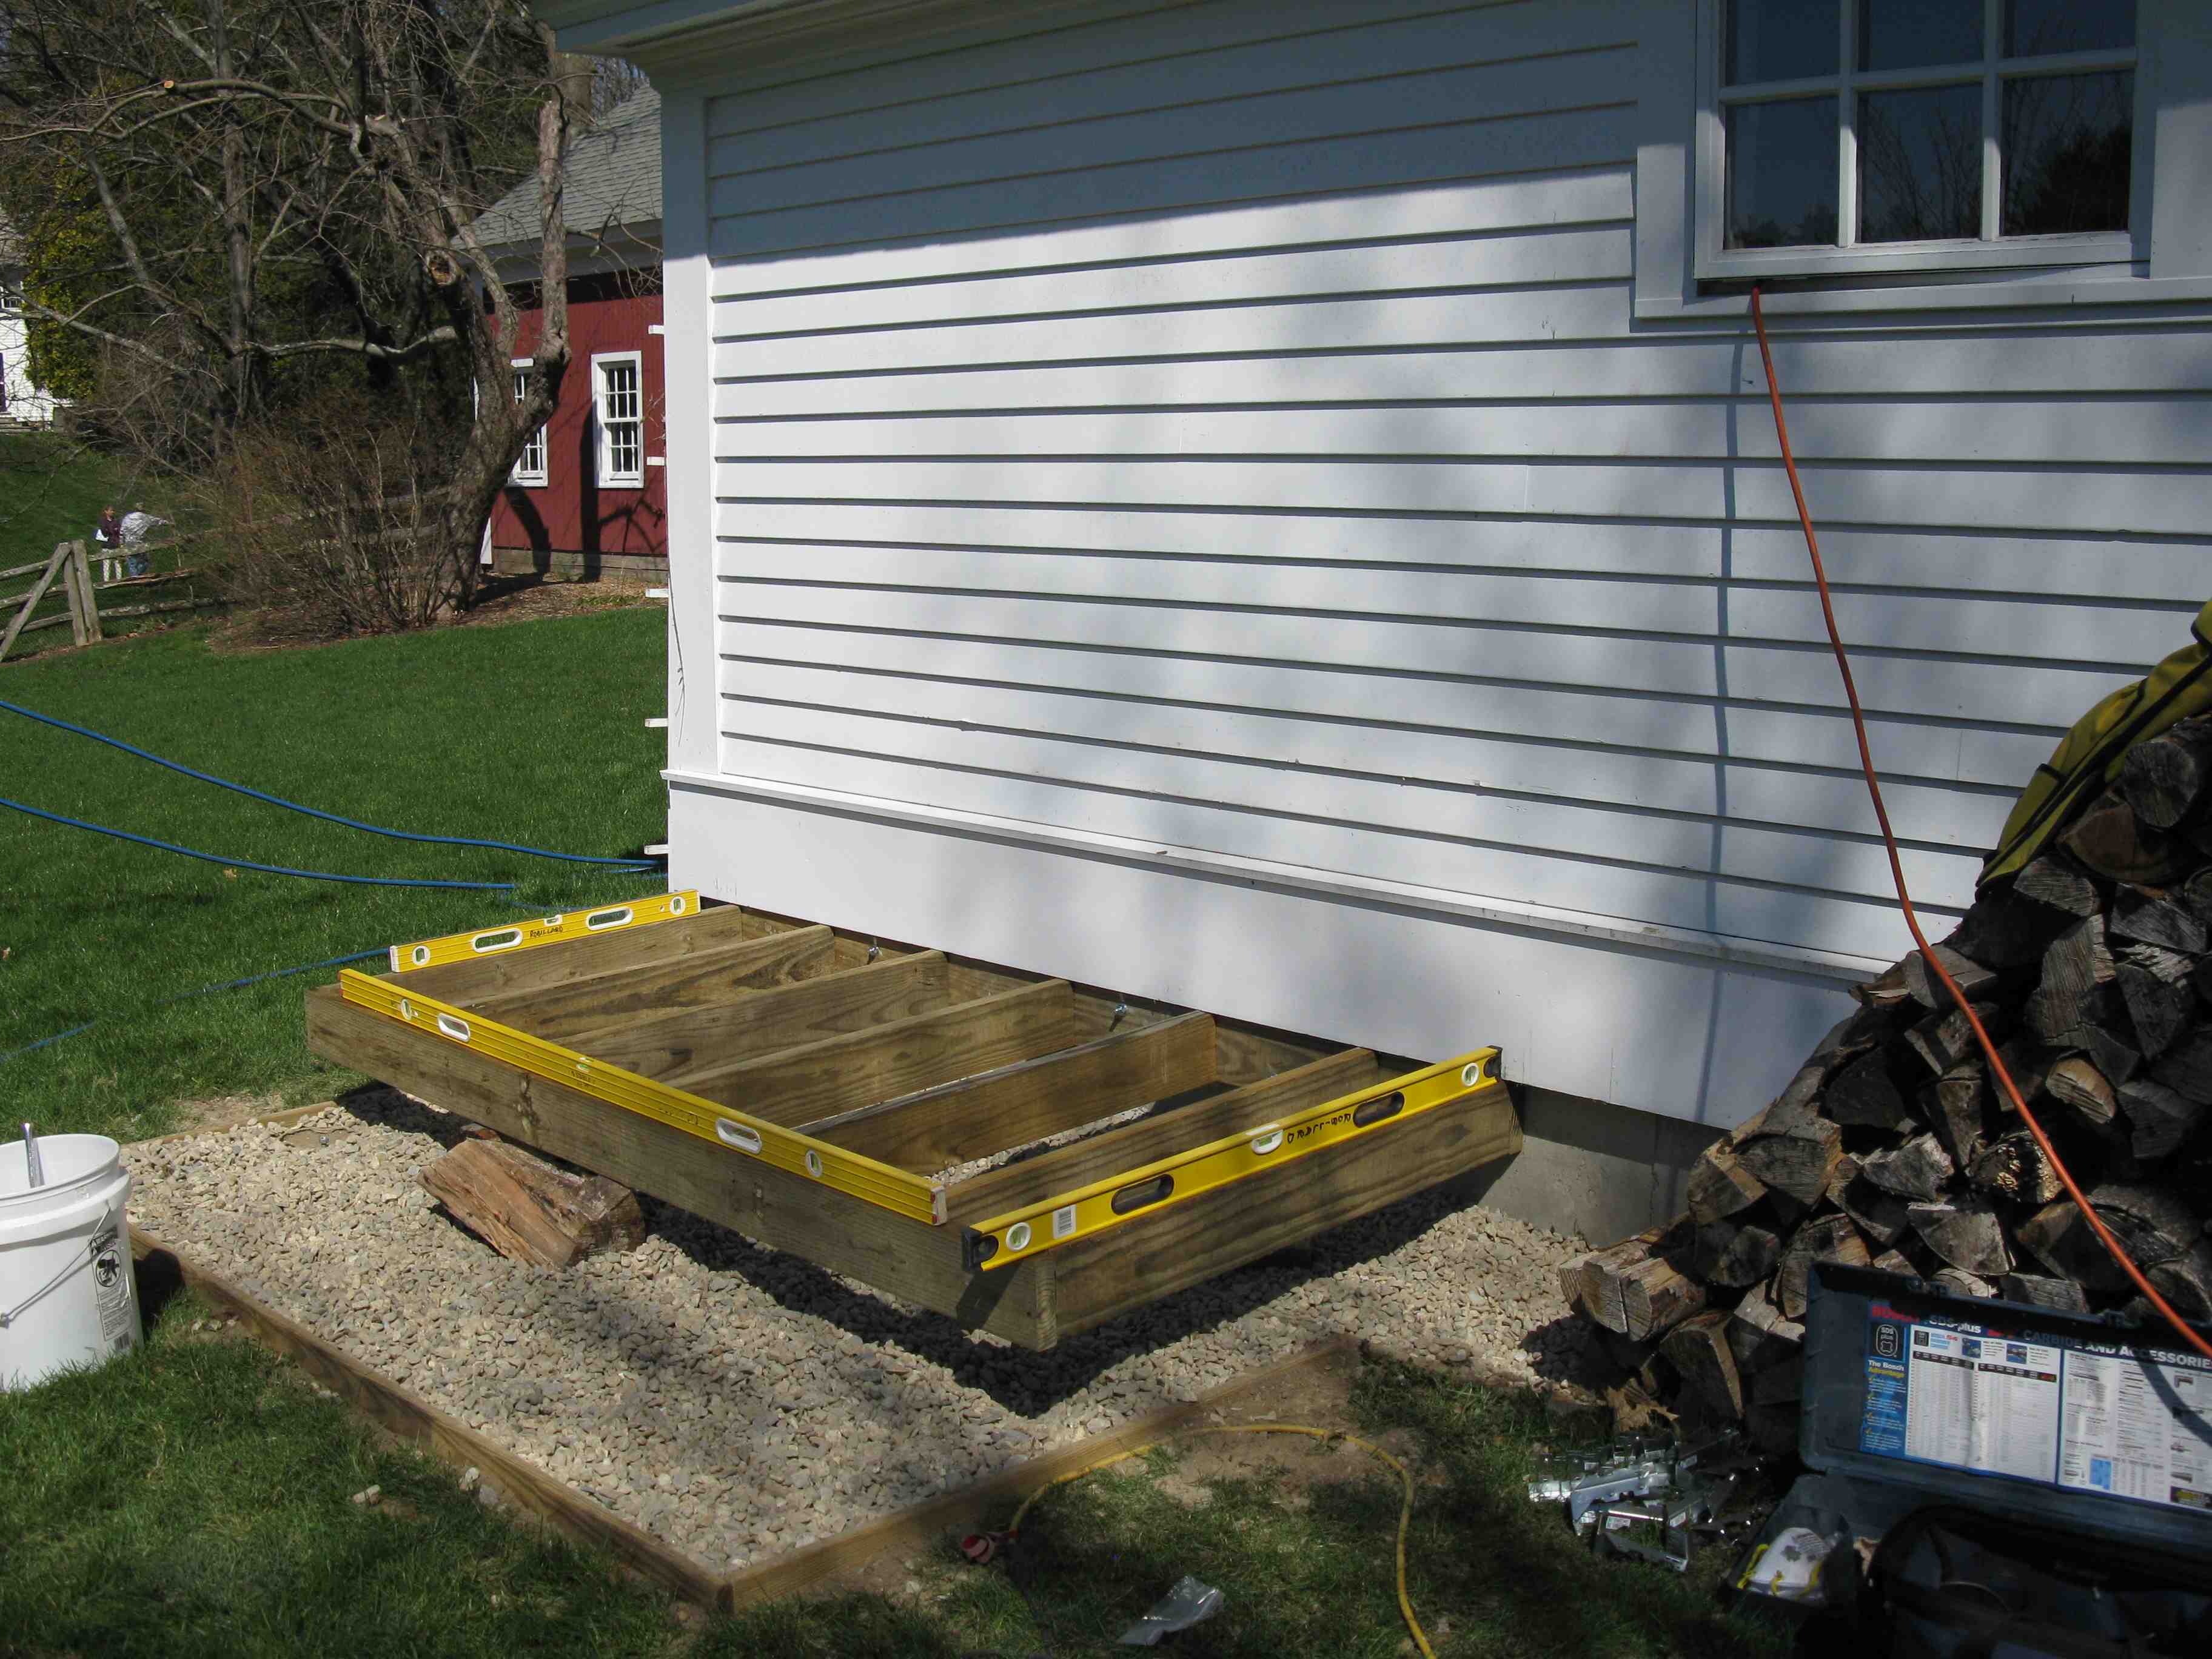
On small structures I like to build my floor frame, square it and then dig my footings and install my support legs. In this case the frame was too low to the ground to dig the footings so we installed the footings but not the support posts.
 It is far easier to build your floor system first and use temporary stilts [or in our case a block of firewood] to hold it up, square and level it and then get an exact measurement for your support posts.
We build our floor system out of 2×6 pressure treated joists 16 inches on center. For strength we doubled our outside rim and side joists.
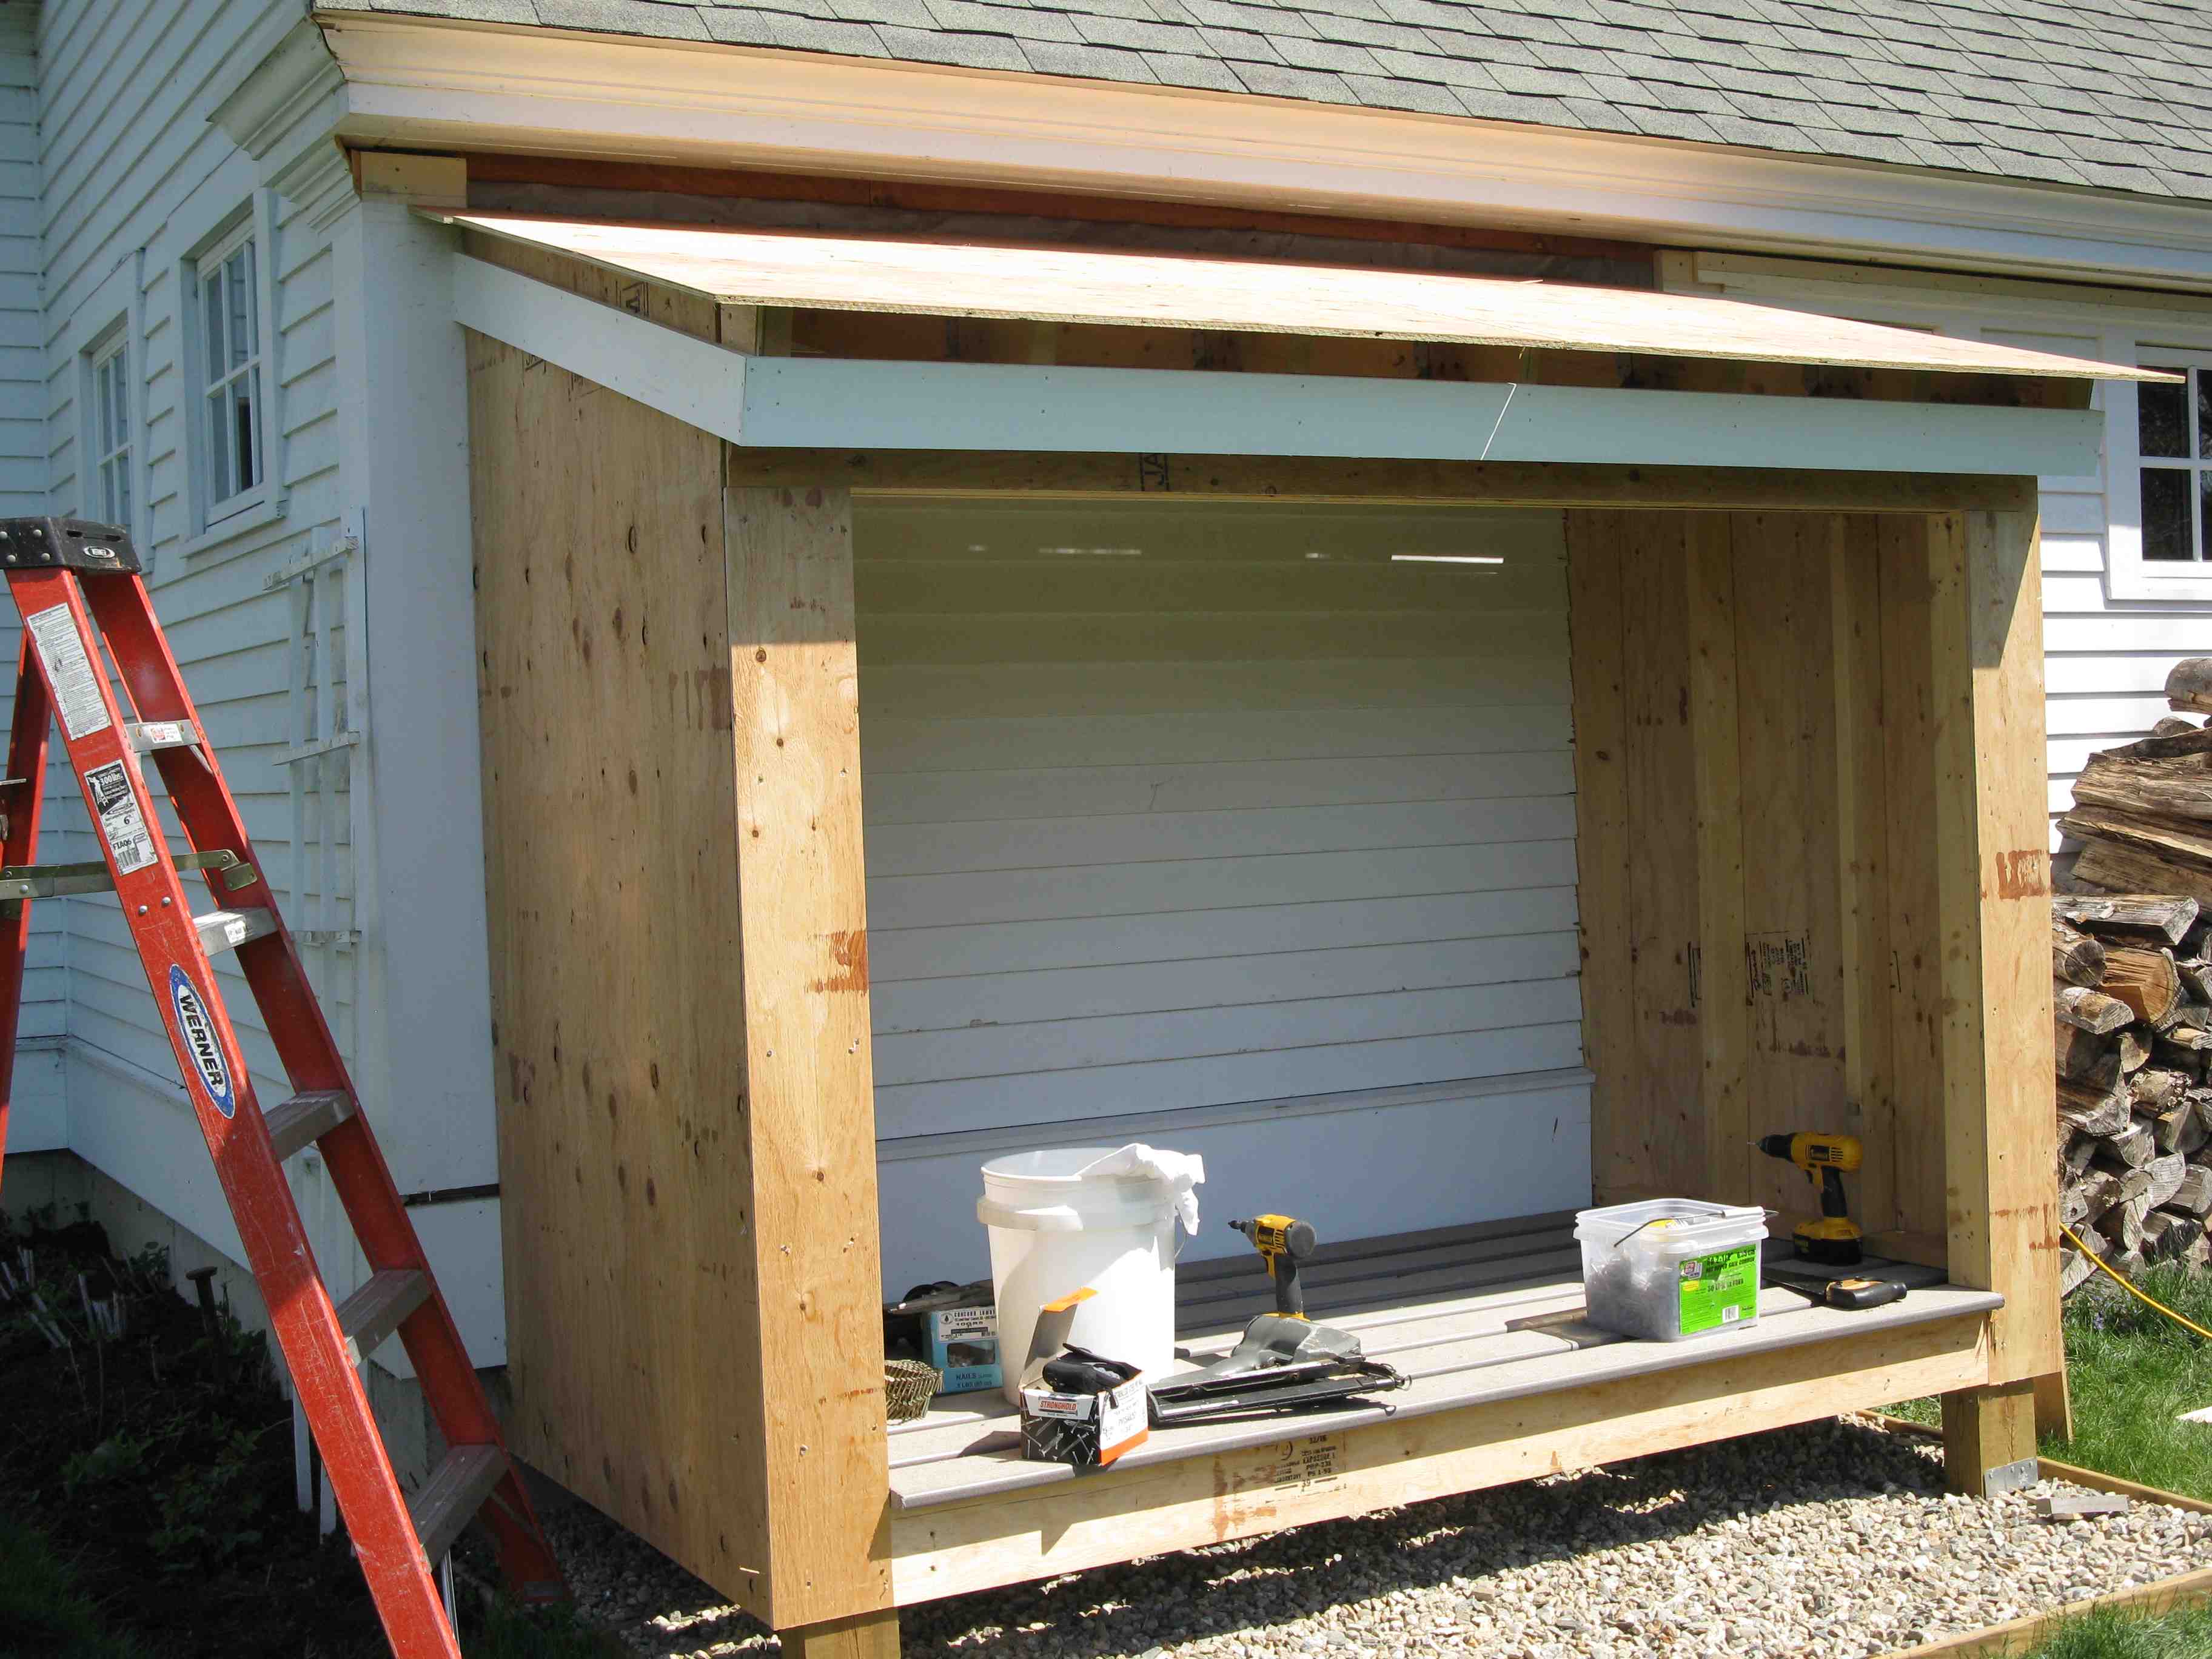
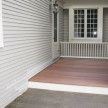
Open Flooring Provides Airflow and Facilitates Drying:
We used left over synthetic deck boards from a prior job and spaced the floorboards 2-inches apart to facilitate airflow, rain drainage and drying of the firewood. The floorboards were secured with screws and run under the walls to the edge of the shed.
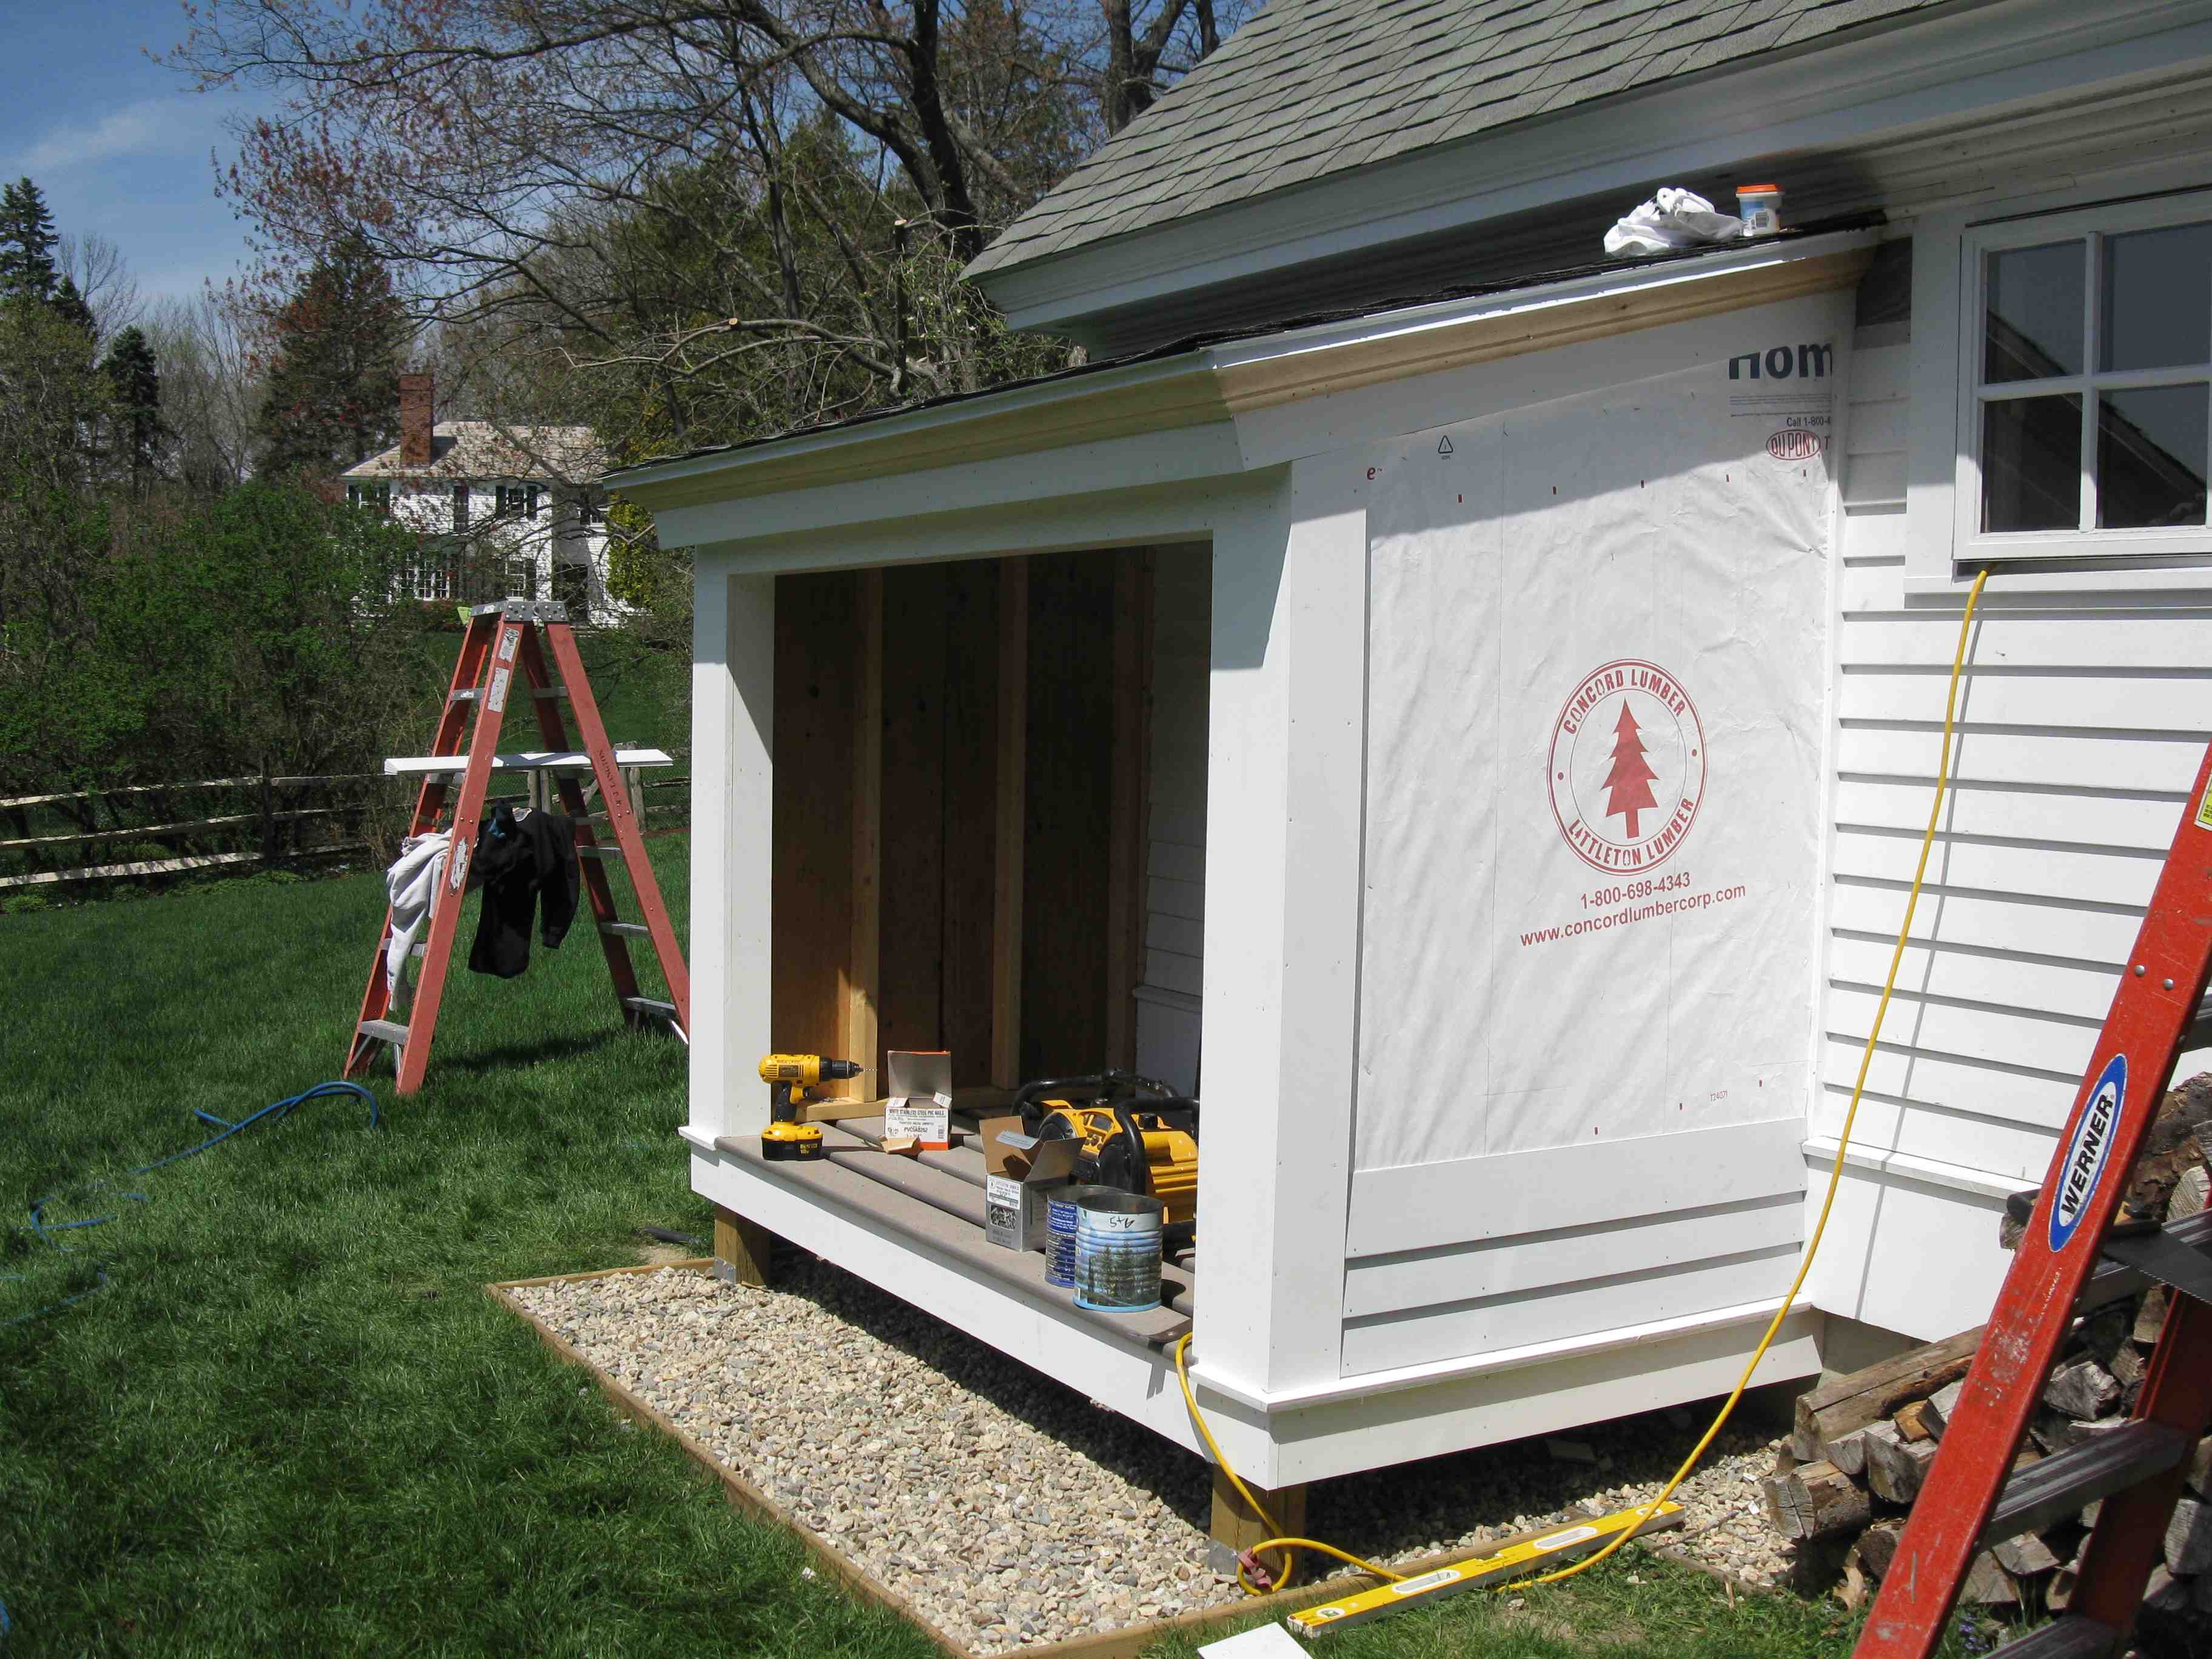
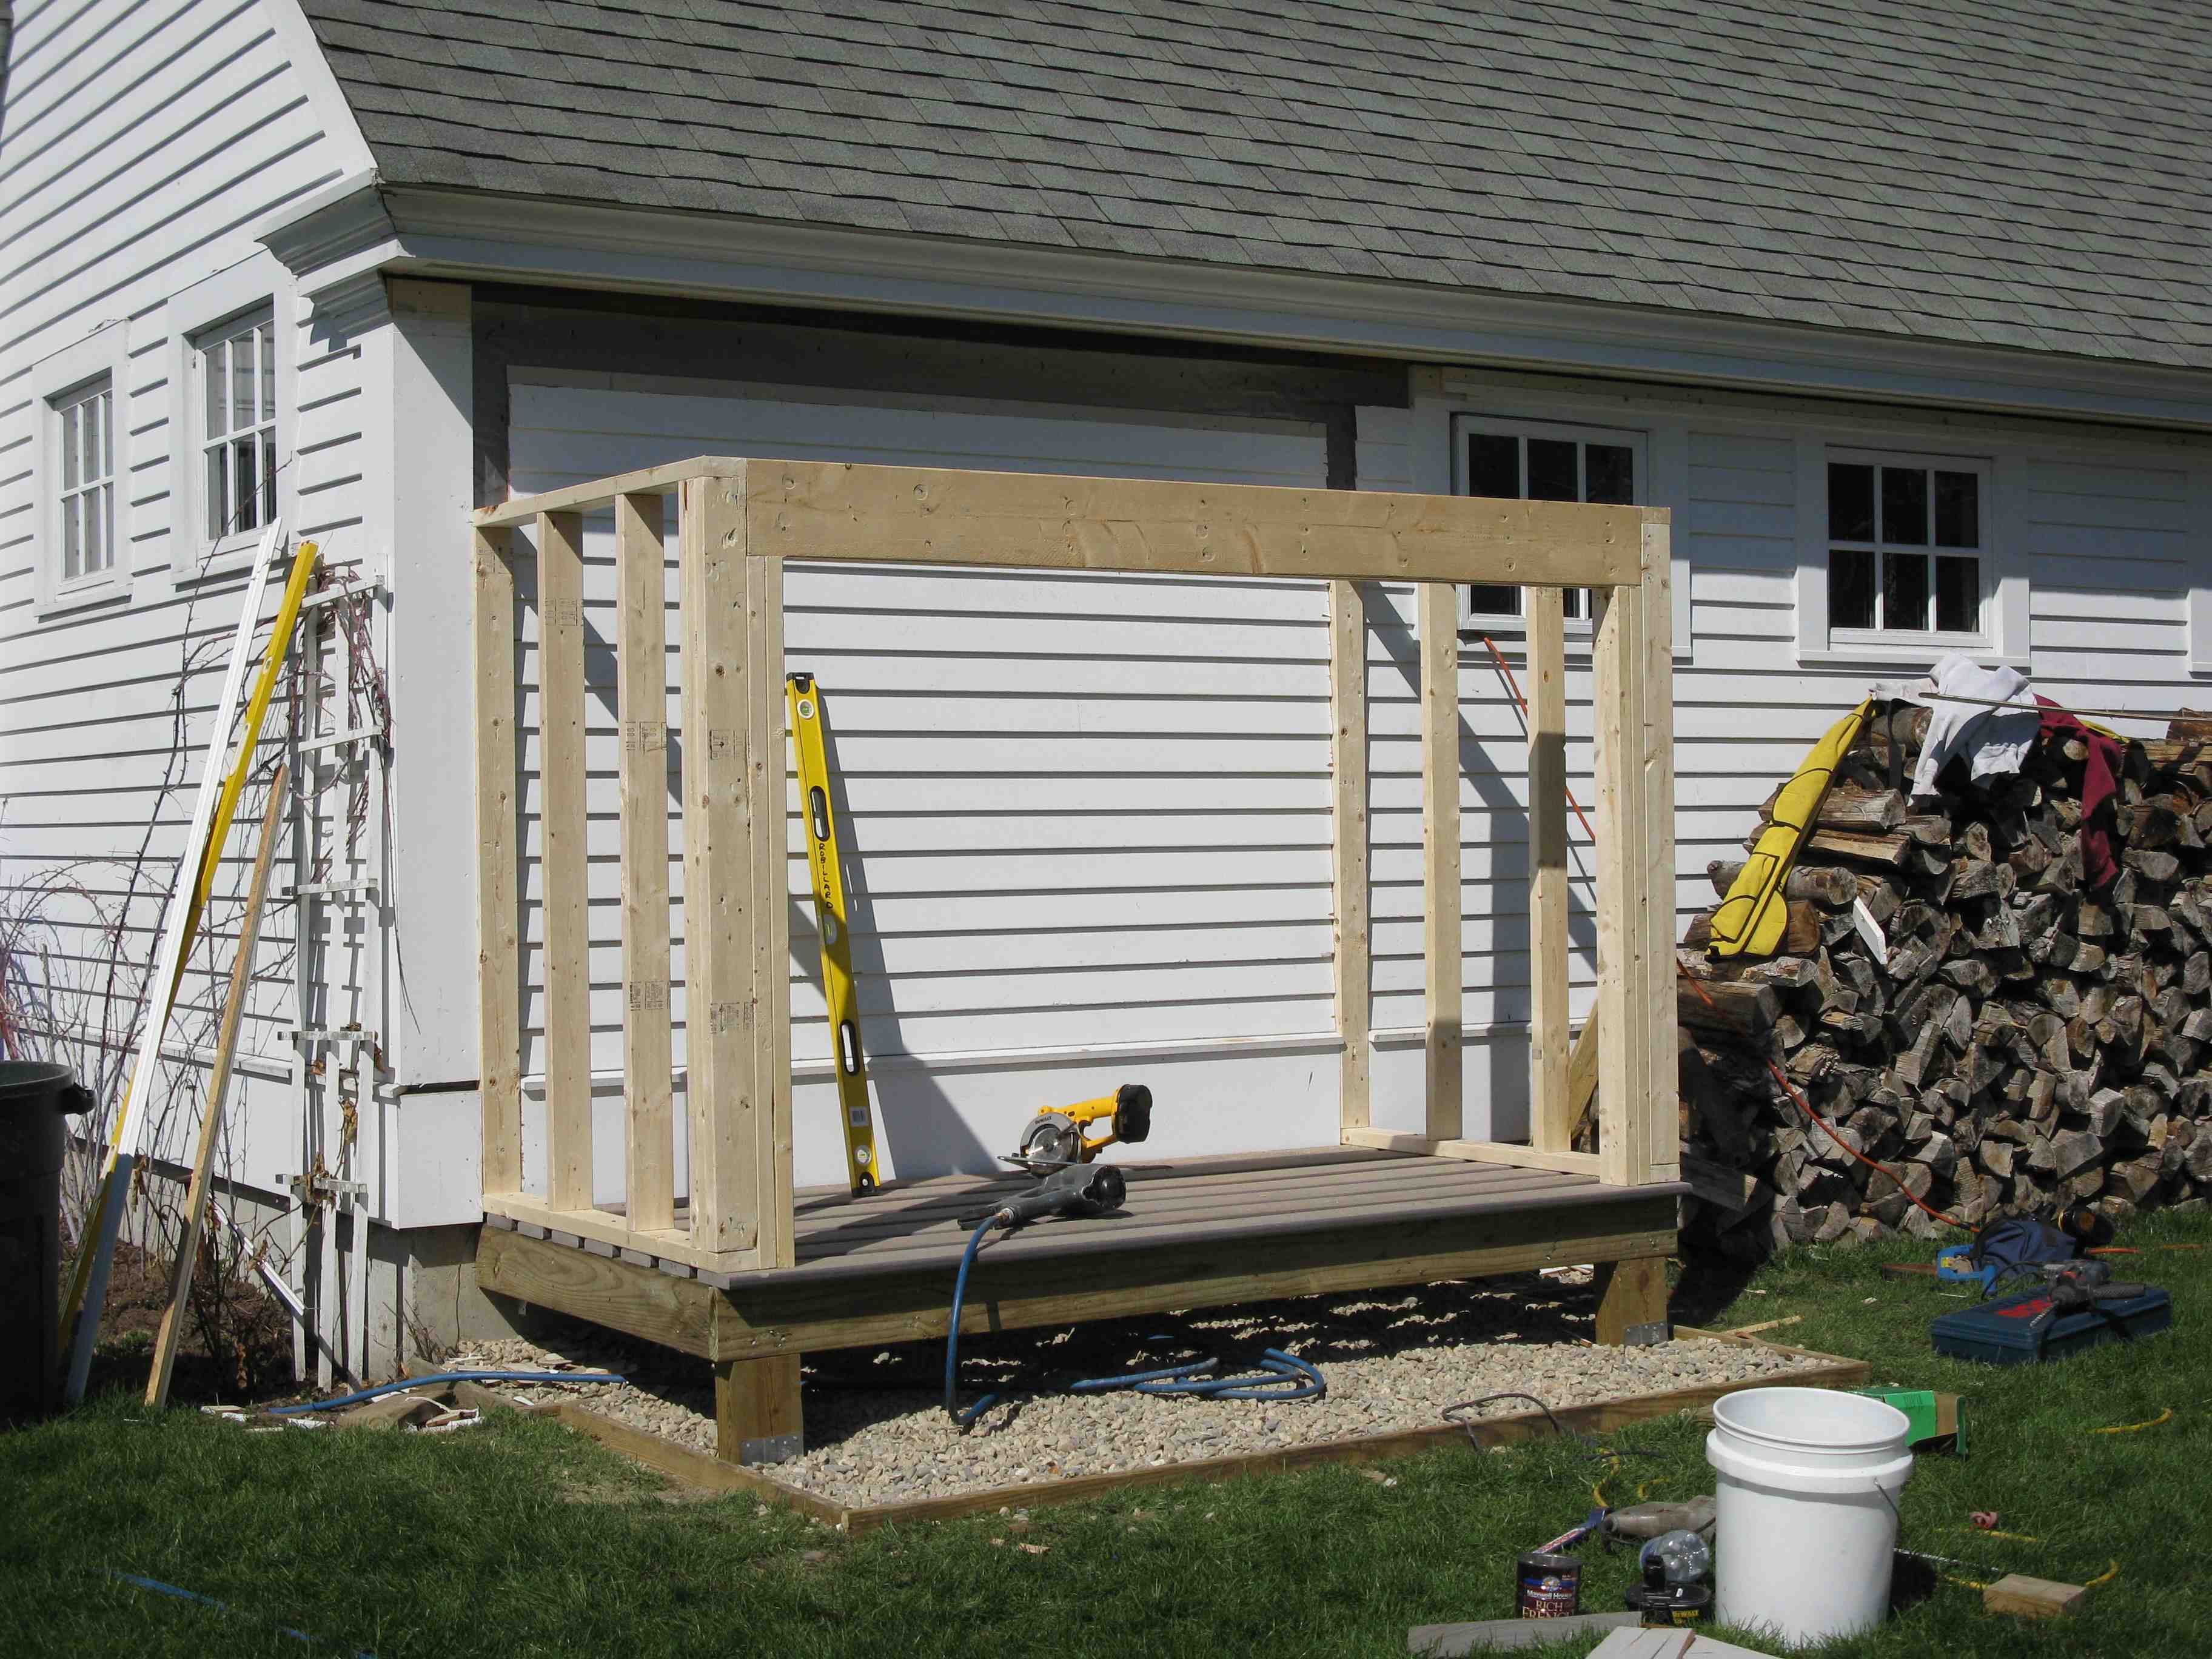
Building the Walls:

Prior to building the walls we measured and leveled up mark, cut and remove only the garage wall siding that was in the way of the 2×4 wall and sheathing. We also removed an additional ¾ – inch to accommodate a corner ground for the wall and garage siding to butt into. We used a skill saw for the majority of this cut and later finished it with a multi-tool.
Slowing down and taking these steps saved us ripping a ton of garage wall siding off and later having to replace it on the inside and sides of the new wood storage shed.
The owner disliked pressure treated splinters and specified that she did not want pressure treated 2×4’s used inside this structure. We used regular 2×4 Douglas fir studs, 16-inches on center for the wall framing. And build the walls tall enough to accommodate a 3-4 pitch roof.
A 2×10 double header carries the roof load over the wood shed opening and is carried by double 2×4 king structural studs. Tyvek house wrap covers the sheathing.
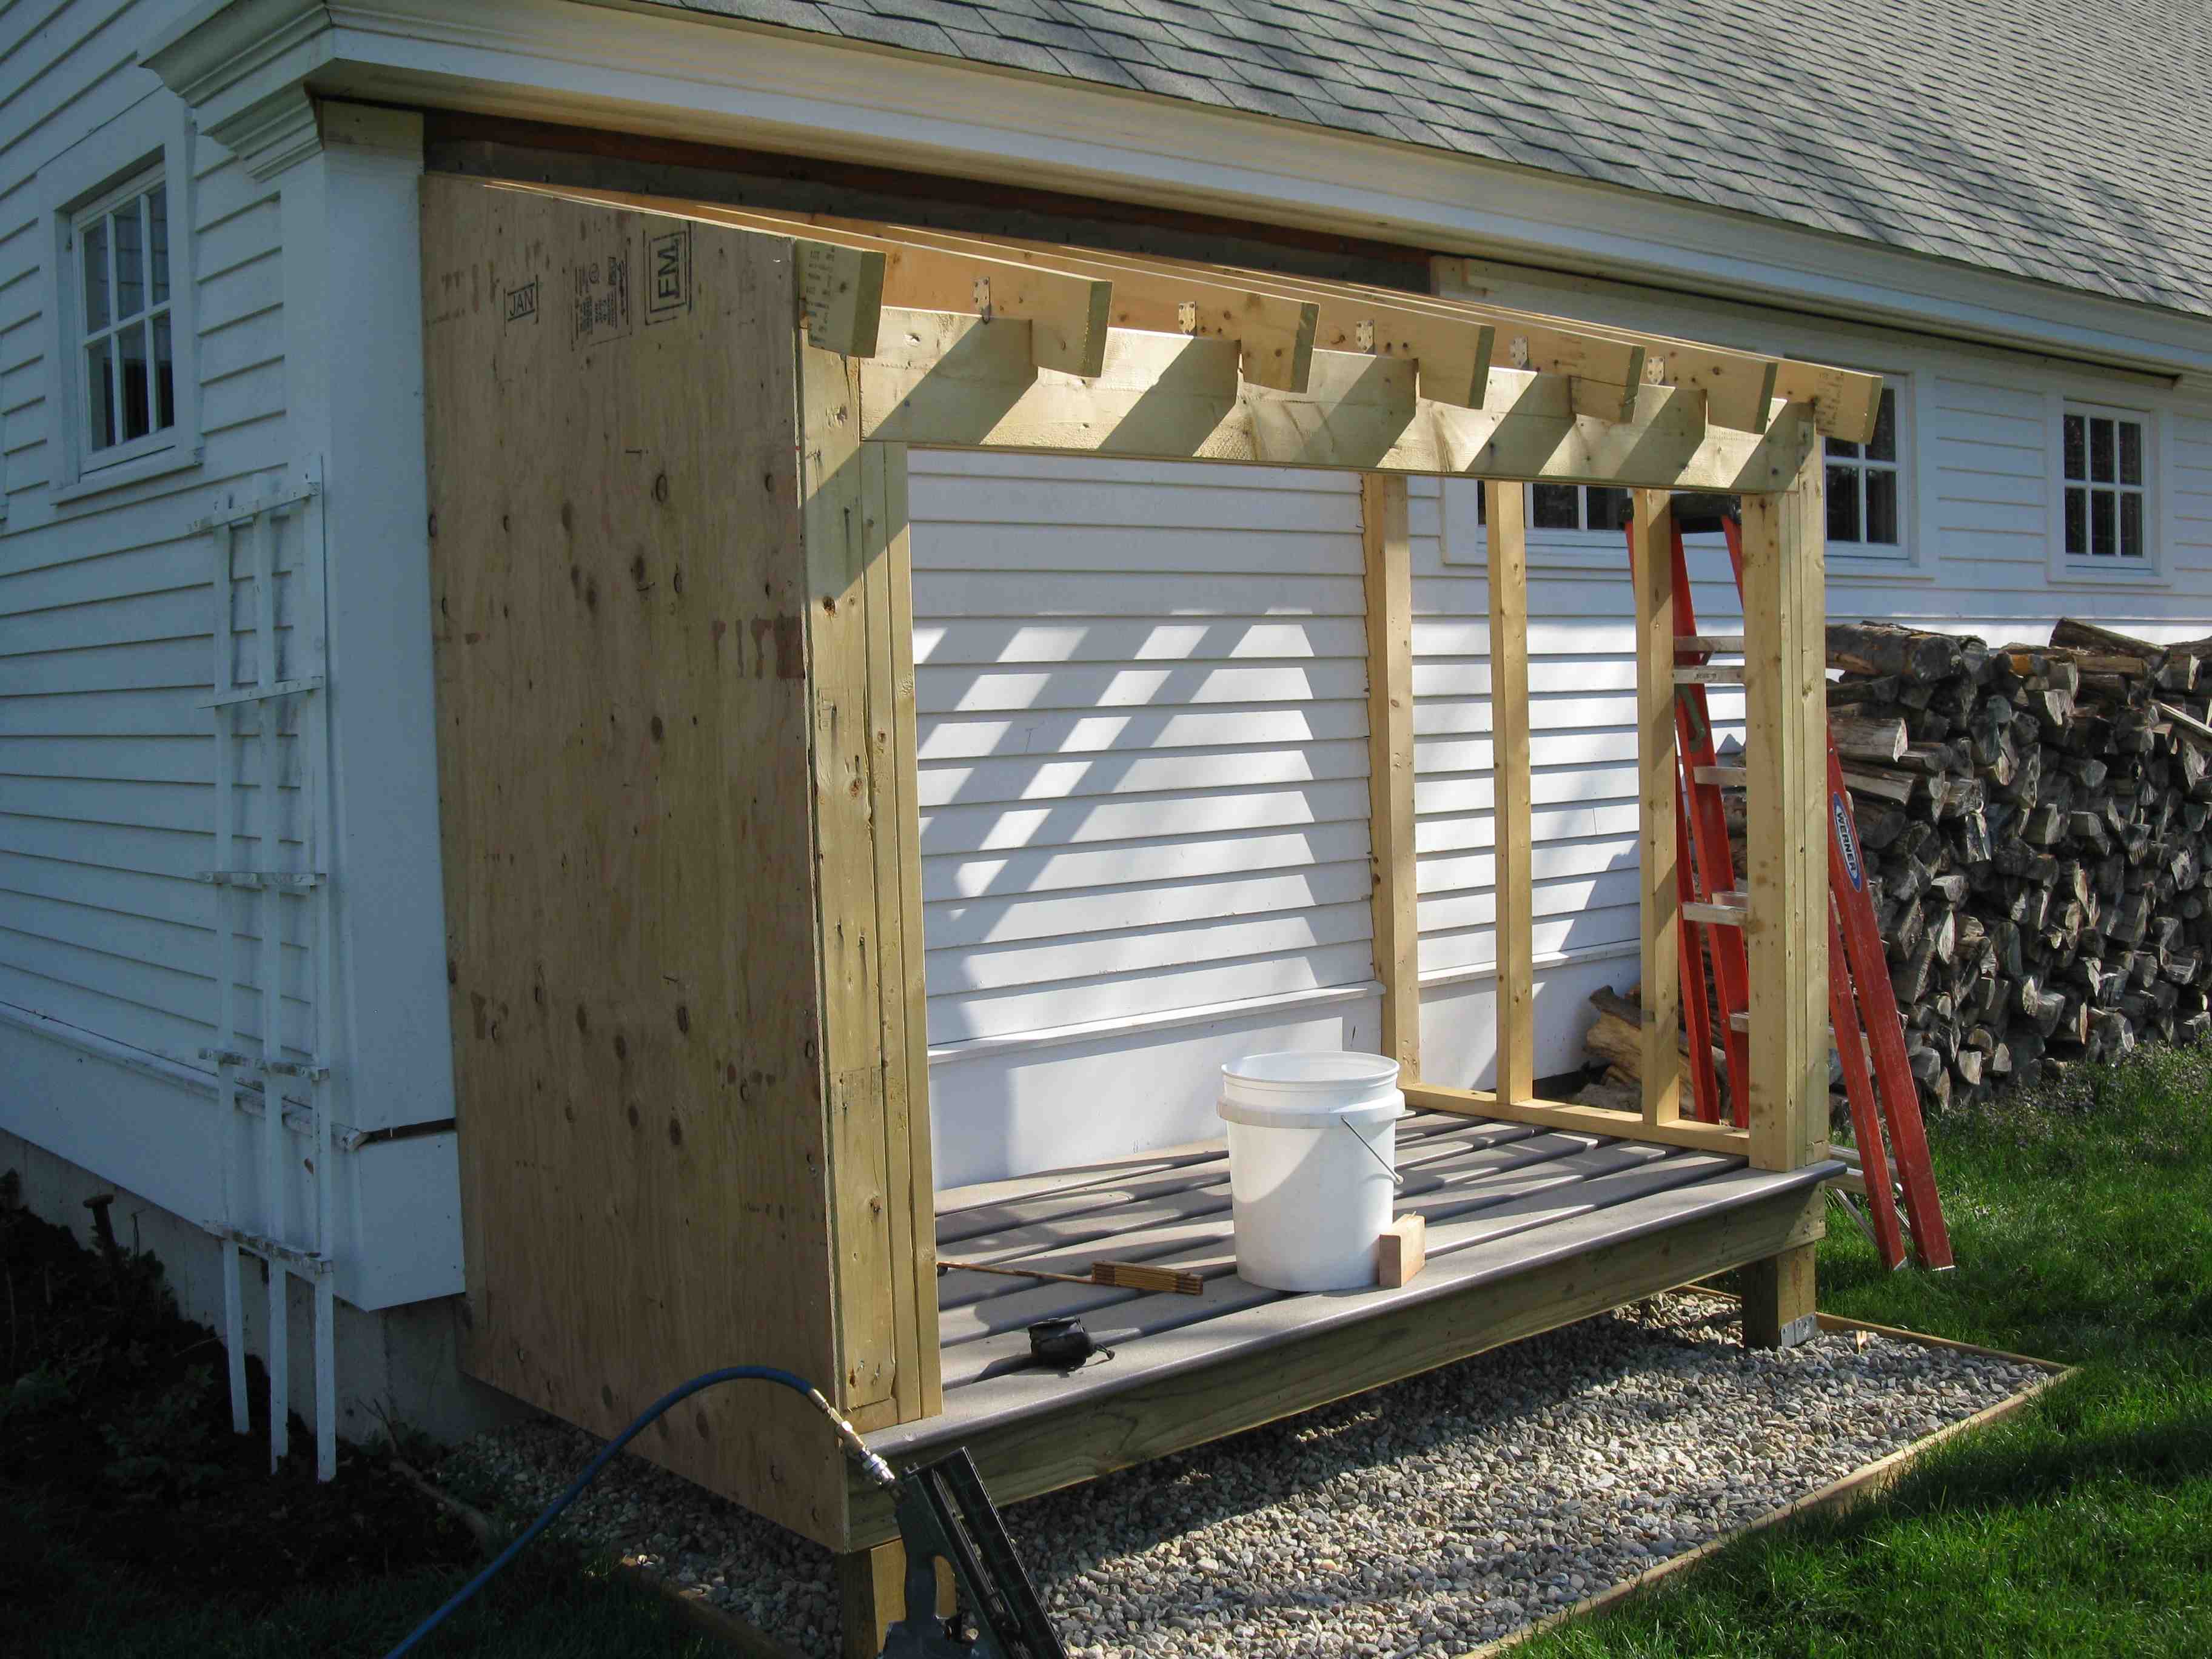
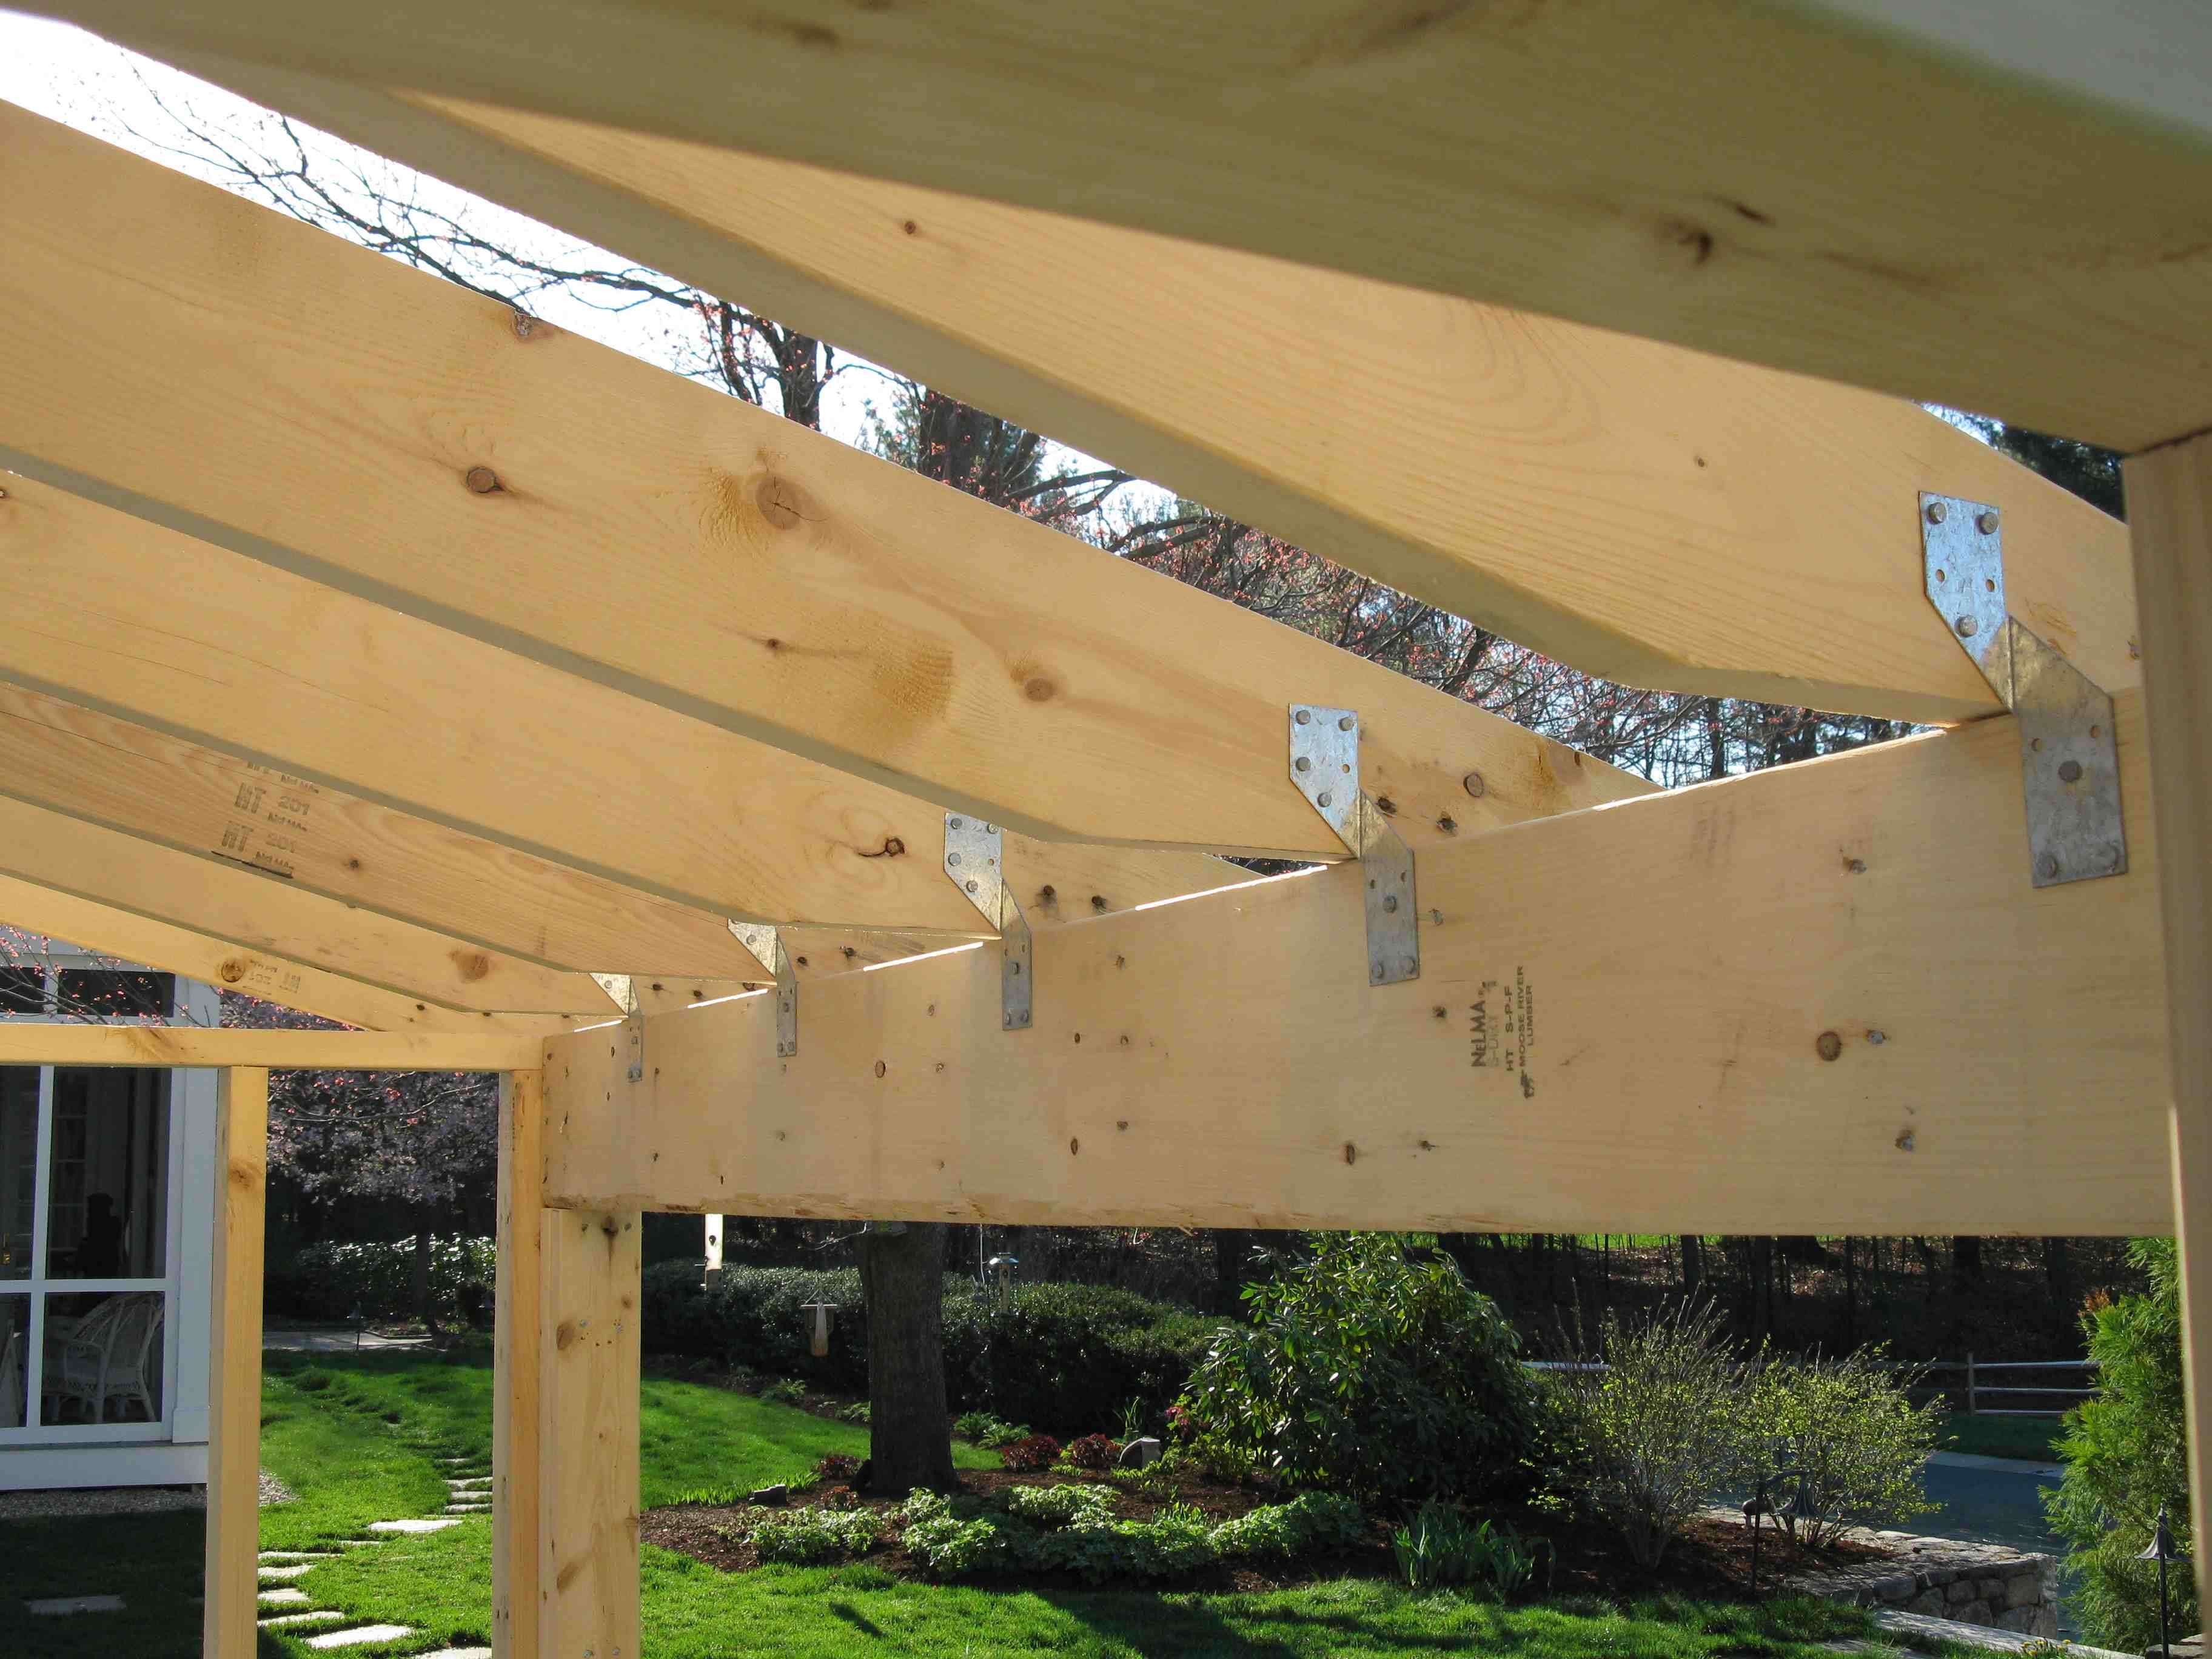
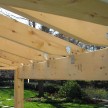
 Building the Roof:

We laid out a 3-4 pitch roof and installed a header on the side wall of the garage. 2×6 rafters were installed and additionally supported with rafter clips. Being an open structure the outer edge of this roof is susceptible to uplifting winds.
To further support the roof rafter from wind uplifting we ran out 1/2 –inch CDX plywood wall sheathing all the way up the sides of the two outer rafters and installed a pair of nails every six inches. We then cinched the nails over on the inside of the rafter to prevent nail pokes.
The walls as well as the roof received 1/2 –inch CDX plywood sheathing.
Note – We secured wall and roof sheathing with 8 penny ring shank nails every 10 inches in the field and every 6 inches at seams and edges.
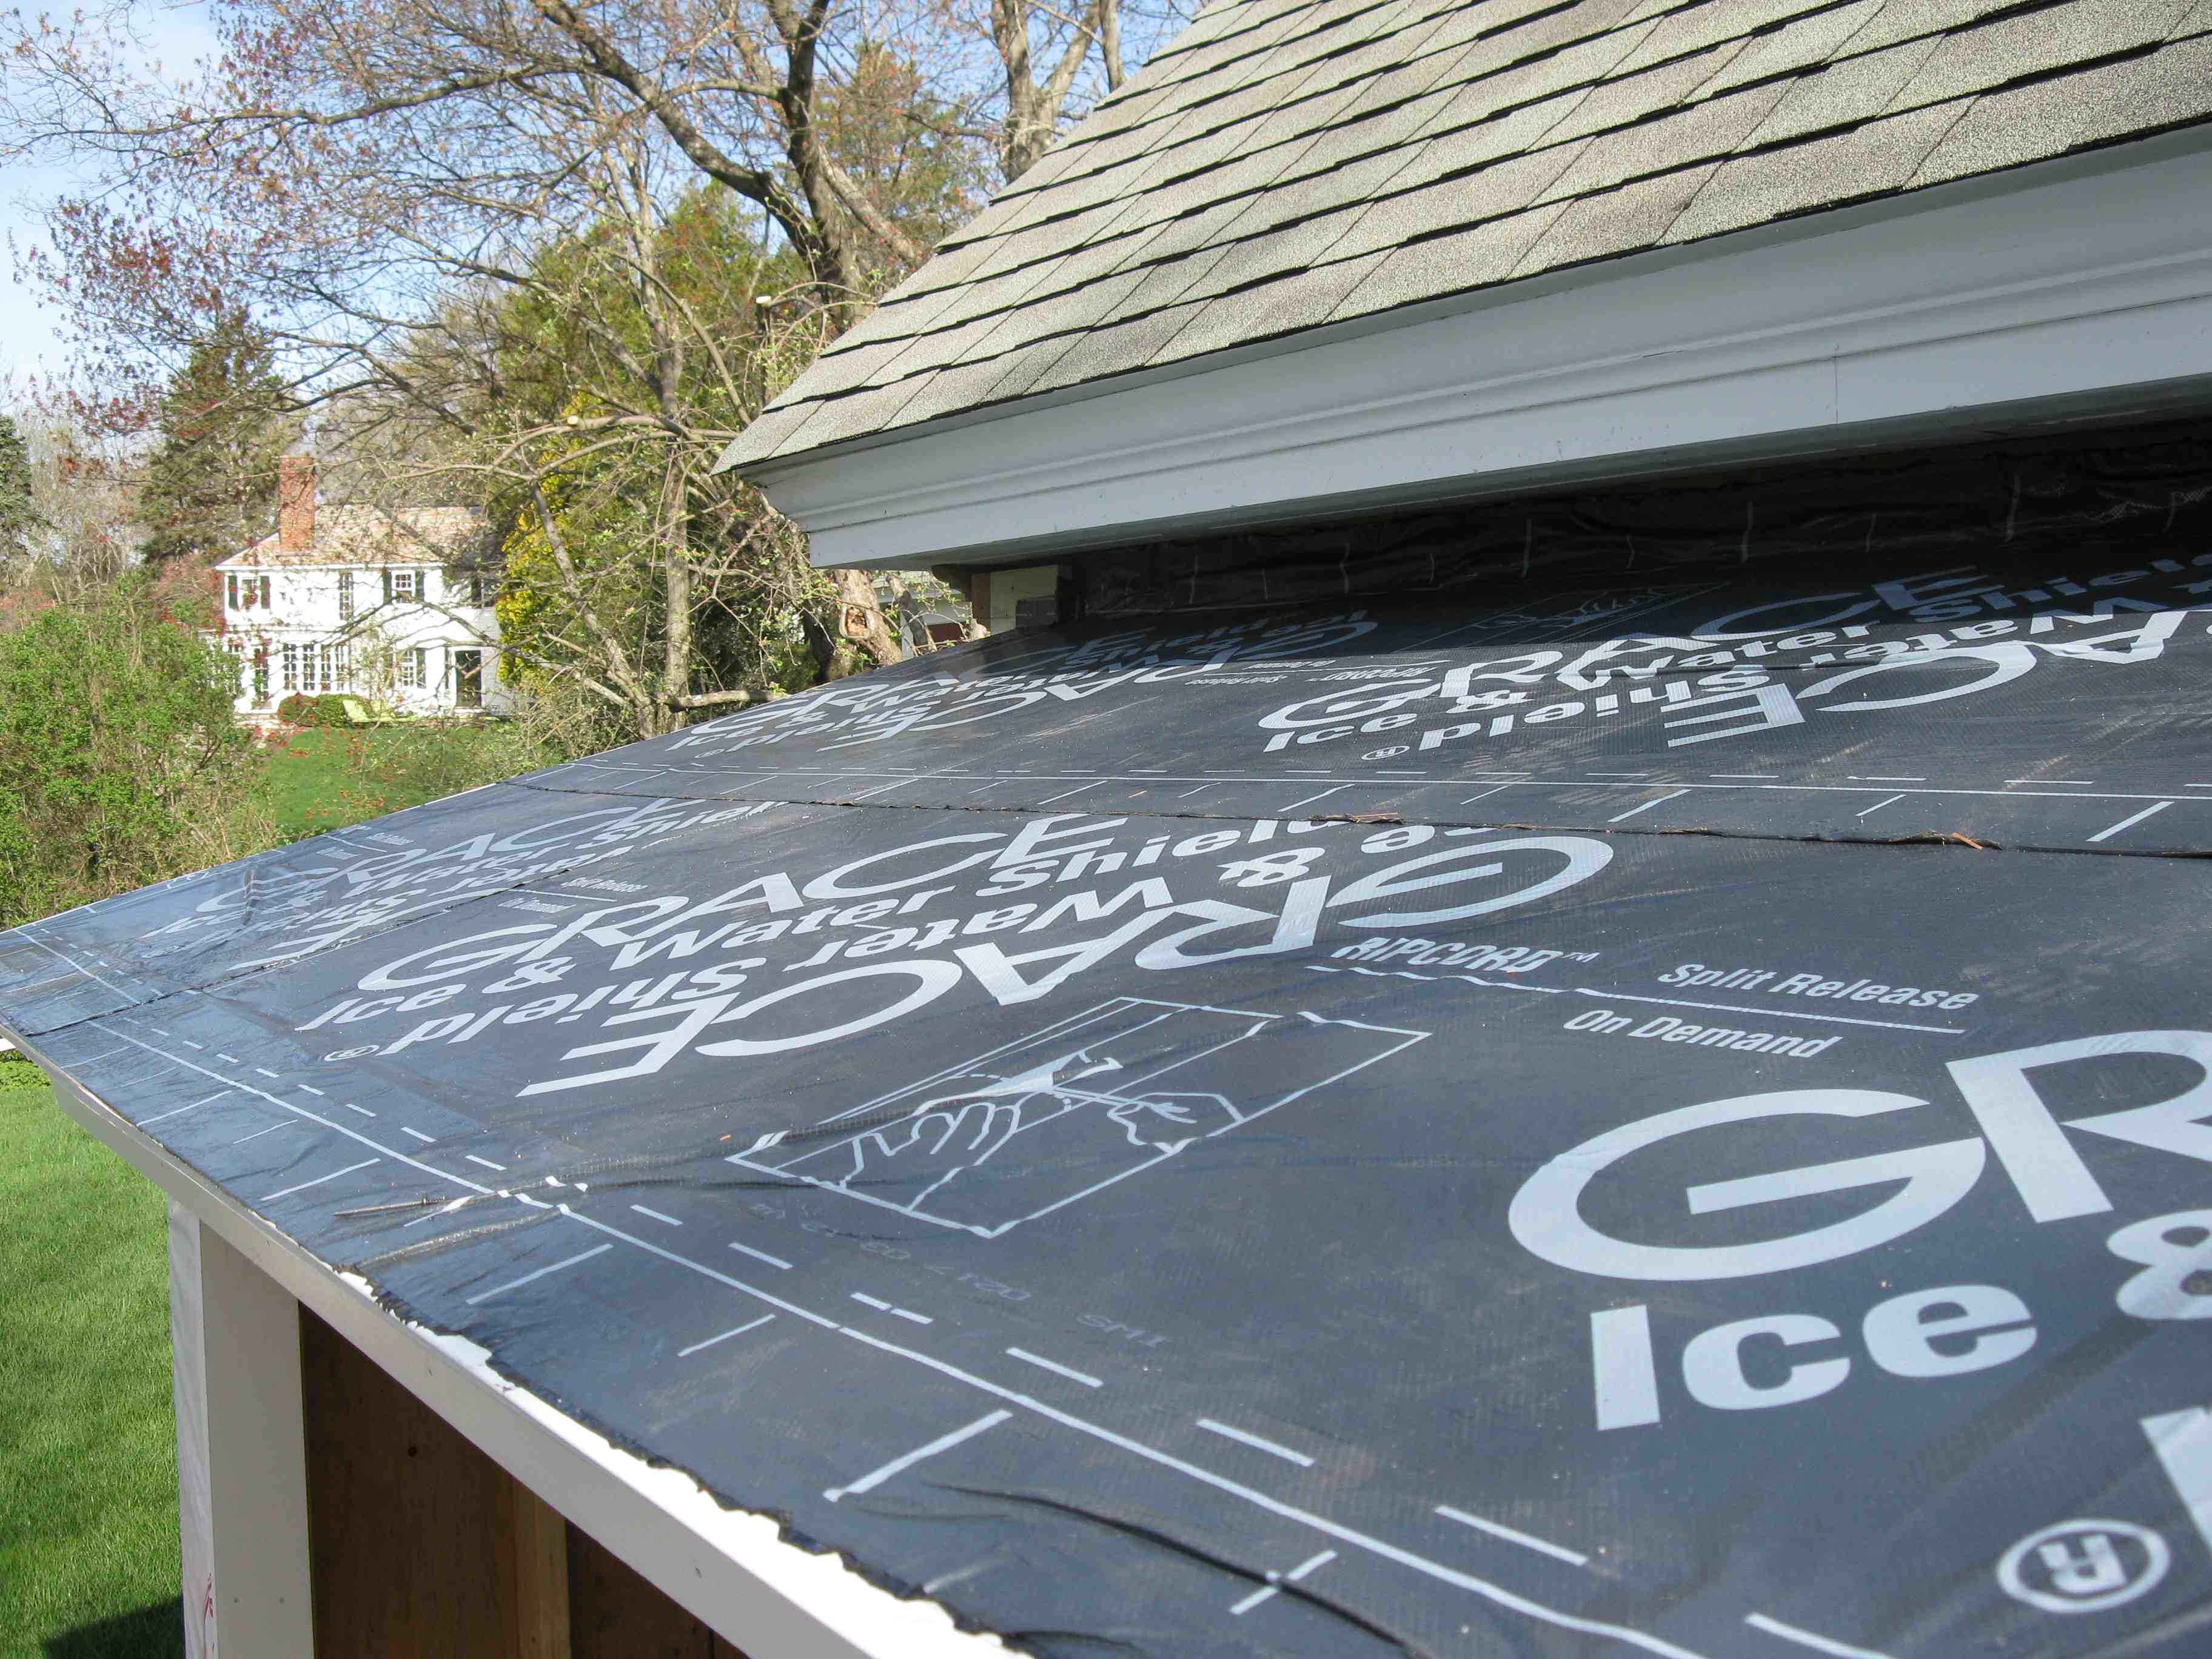
 Do the Roof First:

After sheathing the roof we covered every square inch with ice and water shield and ran it up the sidewall of the garage. This is an unheated structure but I look at the rubber membrane as cheap insurance to water leaks.
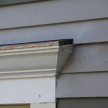
We wrapped the roof in drip edge and installed the same shingles that were in the existing garage. At the garage wall we installed lead flashing as a counter flashing and replaced the trim / siding.
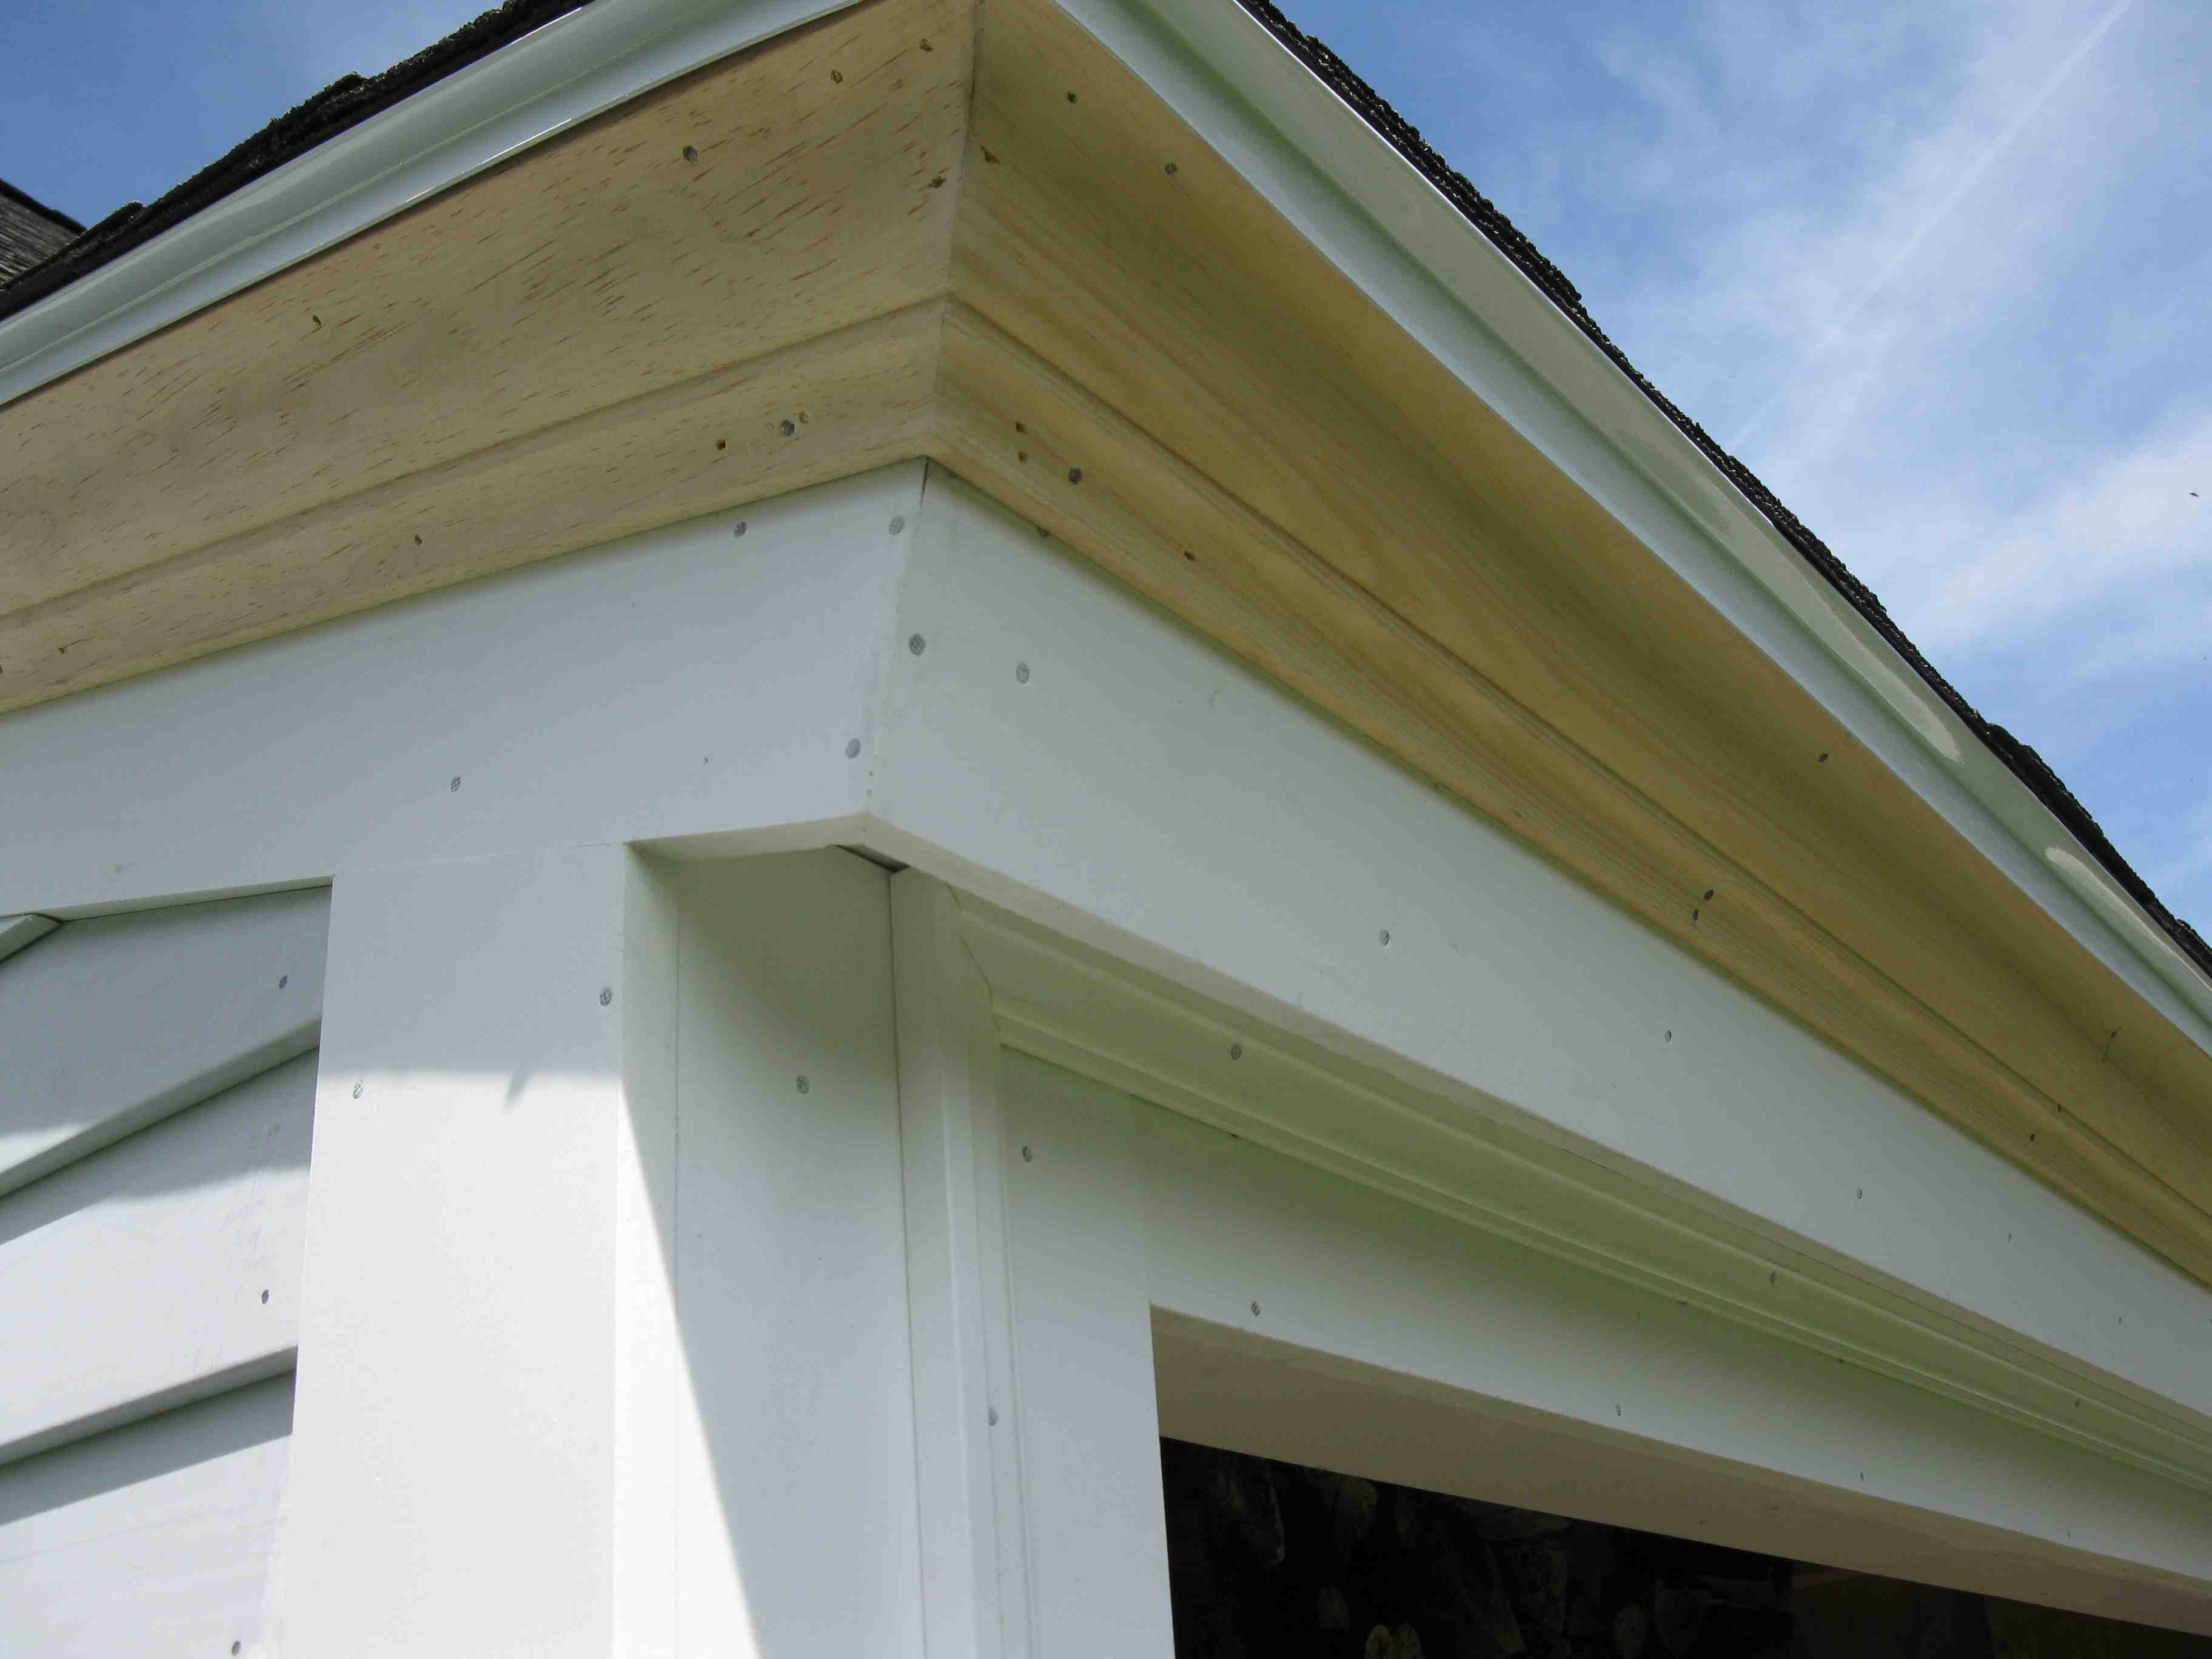
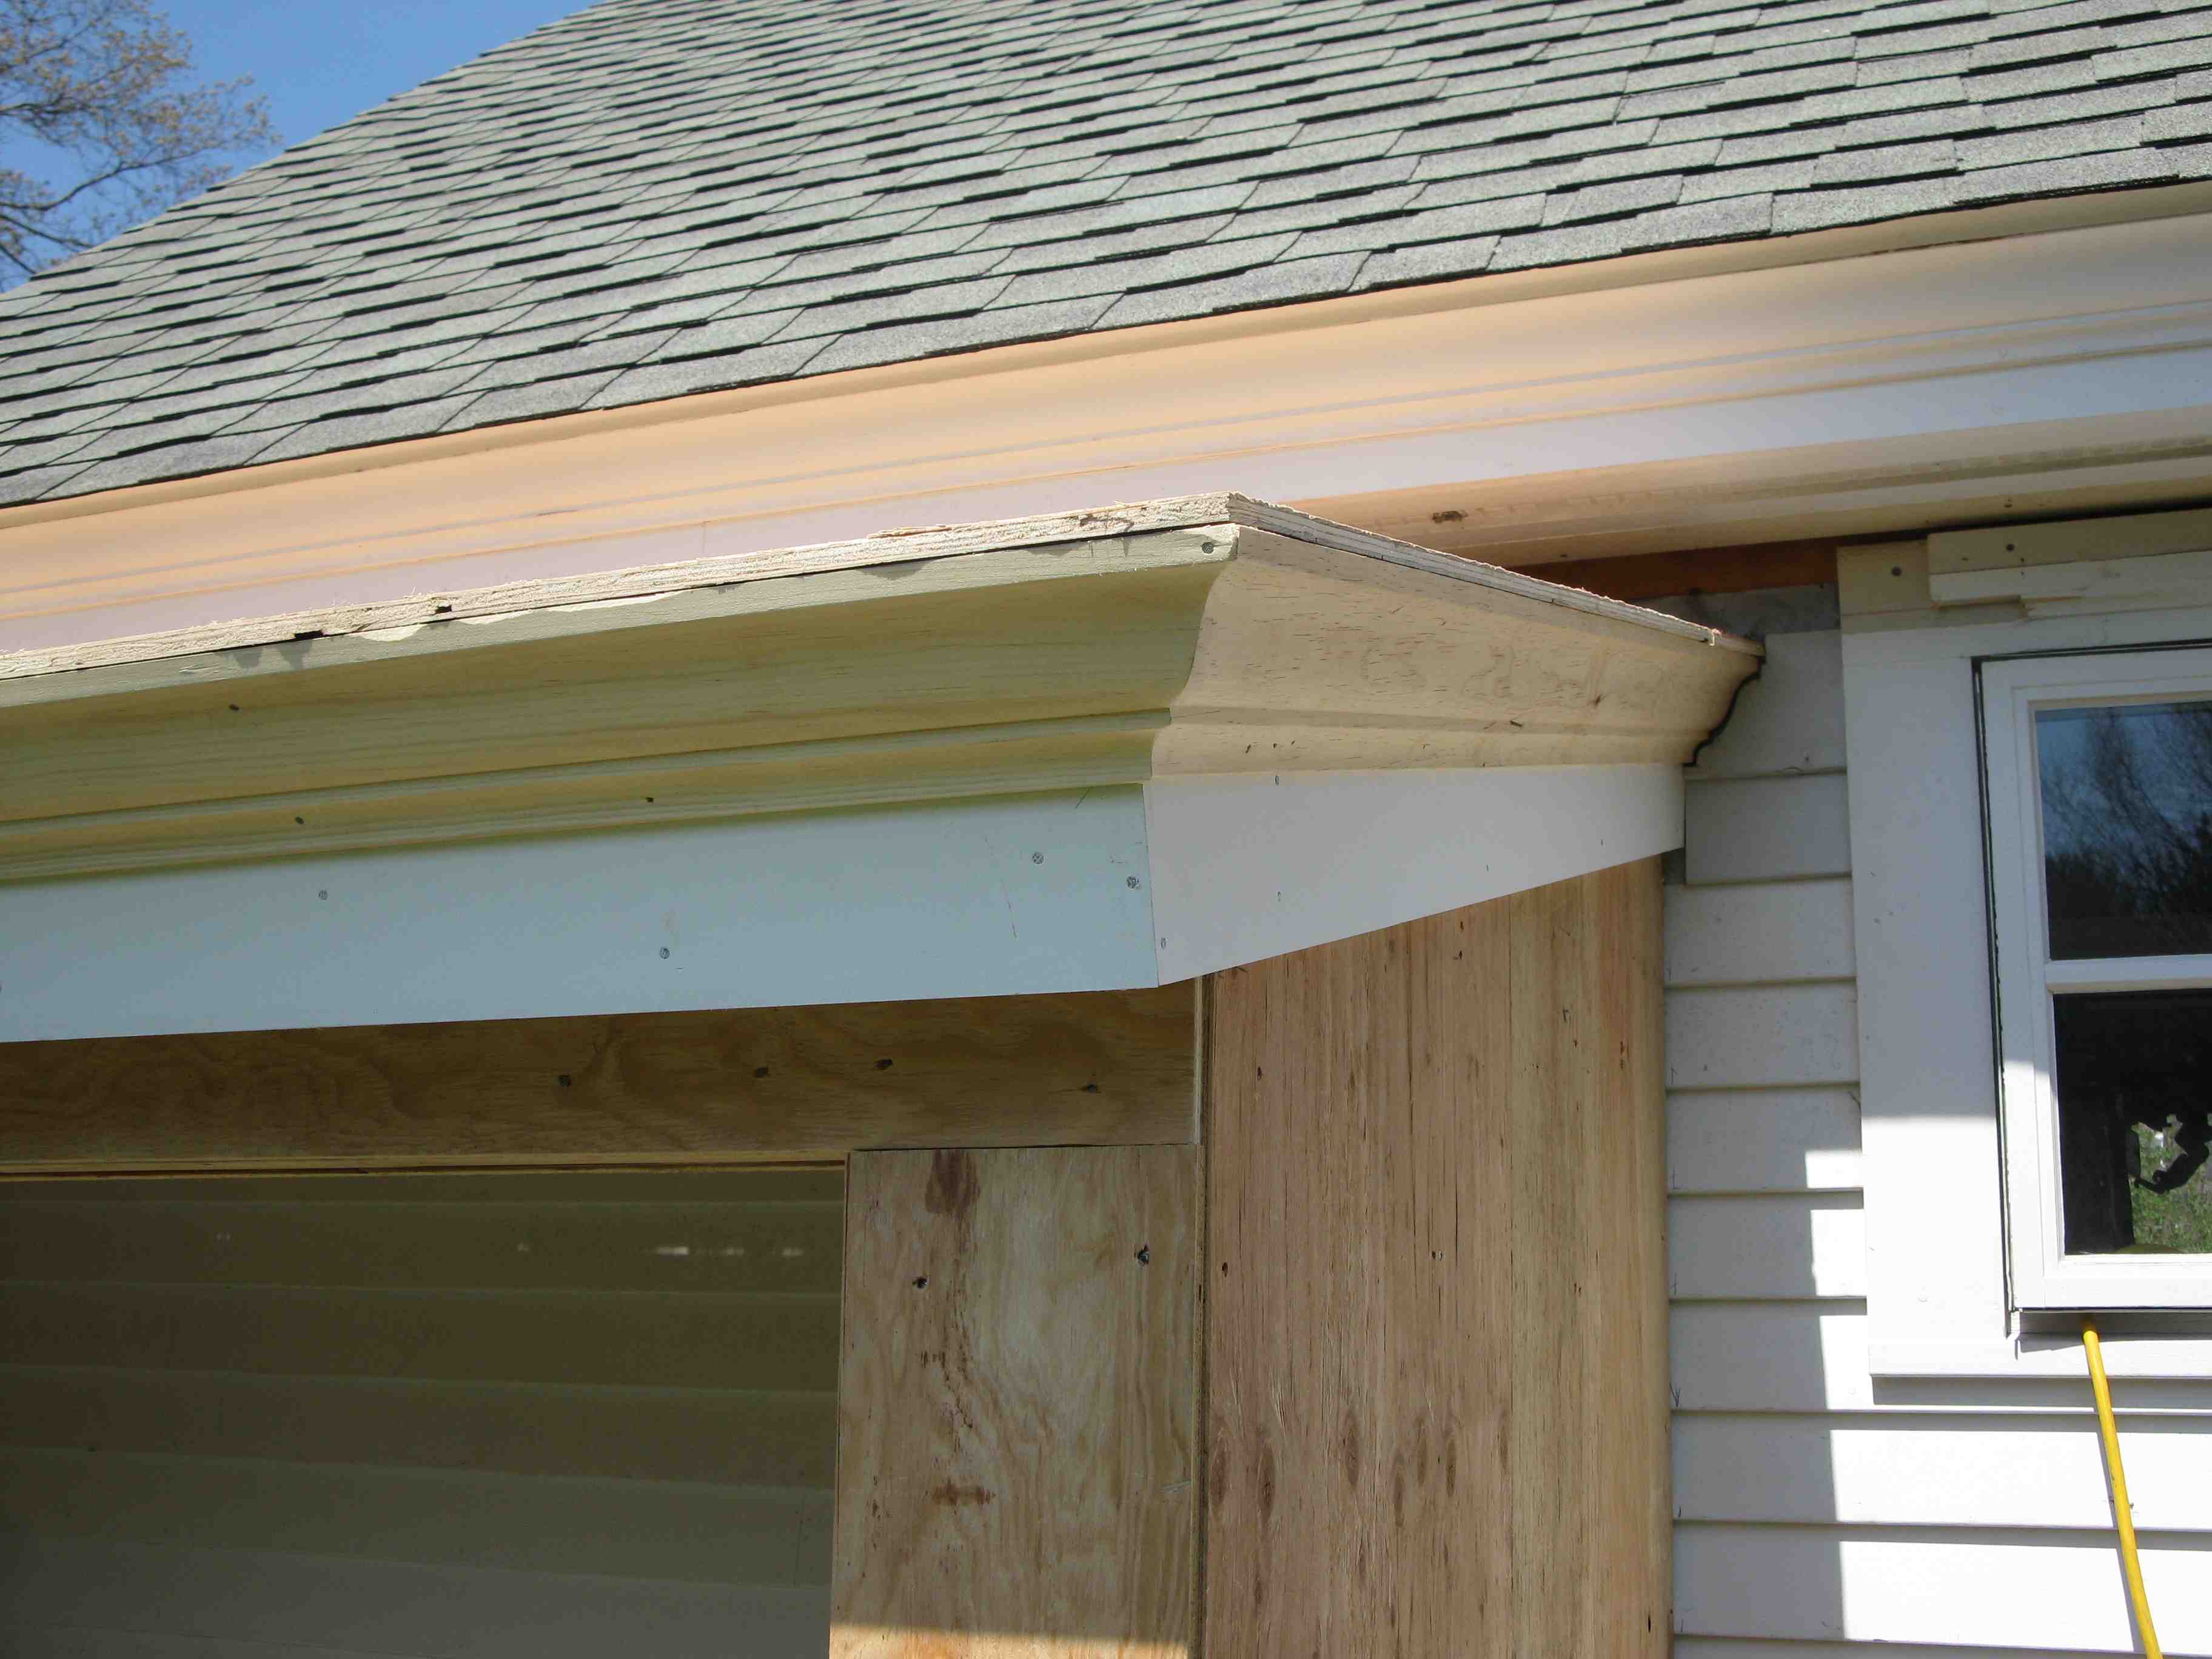
DIY TIP: We installed our rake and fascia trim and then used scrap pieces of our crown molding to figure out the size of the roof sheathing. This allowed me to run my roof sheathing out to cover the top of my crown molding and provide a place for it to rest as well as a secure nailer.
Finishing the Exterior:
The exterior of the woodshed was trimmed out similar in detail but in a smaller scale to the garage. We used all pvc trim and pre-primed cedar clapboards and stainless steel nails.
We used pre-primed Western Red cedar clapboards for this project. Cedar clapboards contain natural oils and resins that protect the wood from insects and rot. Cedar is known for its durability and ability to withstand weather.
Problems that arise on homes is not usually attributed to the type of siding but to the installation and lack of proper flashing and drainage planes.
Tips For Installing Cedar Siding:
 1. Purchase good quality Western Red Cedar clapboards and prime and back prime them or purchase quality primed clapboards. Avoid finger-jointed clapboards for a high quality job.
2. Prime all curt ends and edges of the clapboards. The end grain of all wood products absorbs liquids up to 250 times more rapidly than other wood surfaces.
DIY TIP: I use Cover-Stain spray primer to coat all end grain an cut edges. Cover-Stain is an all-purpose oil-base stain-killing primer-sealer. Ideal for interior and exterior applications, dries quick, applies quick and is perfect for preventing cedar bleed.
3. Properly prepare the home exterior walls: Install building paper or a vapor barrier. Seal doors, windows and other joints with rubber flashing, sill pans and special tapes.
4. Use the proper nails: Stainless steel nails are the best quality nail you can use. Use No. 304  stainless for general siding applications and No. 316 for seacoast exposures. Hand nailing is better than using a pneumatic nailer. Hand nailing allows you to determine if your nailing into the studs and is easier to control the depth of the fastener
5. Spacing for the siding should be laid out beforehand. Many people install 5-1/2″ with a 4″ exposure to the weather. Spacing can be changed or tweaked in order to get the siding to land on top of doors and windows.
6. Install clapboards by face nailing them to the house studs with 1-1/4 in. penetration into solid wood using one ring shank nail per stud spaced at a maximum of 24 in. on center. Place nail just above the overlap. Take care not to nail through the overlap of two pieces. Keep nails in 1″ from edges.
7. Clapboards are installed with butt joints. I suggest using tar paper roll tape to flash behind all vertical butt joints. Ma

ke sure your tar paper overlaps the clapboard installed below so water or moisture can drain out and on top on the lower clapboard.
8. Butt joints between boards should be staggered and made on studs. Fit siding snugly to other pieces and to trim. Install clapboards level.

9. Flashing: Before installing siding, make sure that flashing’s are installed to prevent moisture from entering wall and roof.
spaces. Flashing are an important in controlling moisture in wall assemblies. Flashing intercepts and directs the flow of water away from the building to designed drainage paths.
Areas that receive flashing are: doors, wind ows, skirt / water table boards, fascia, sidewalls meeting roofs.
10. Caulking: Use high-performance acrylic-latex caulk to seal gaps around windows, doors, corners, and other exterior joints that are exposed to potential water intrusion. Caulking will eventually fail and need maintenance. Caulking can never replace proper flashing.
11. Roof and ground clearance: Keep siding a minimum of 6″ or more off the ground and 3/4 to 2″ off roofs to prevent moisture from wicking into the end grain.
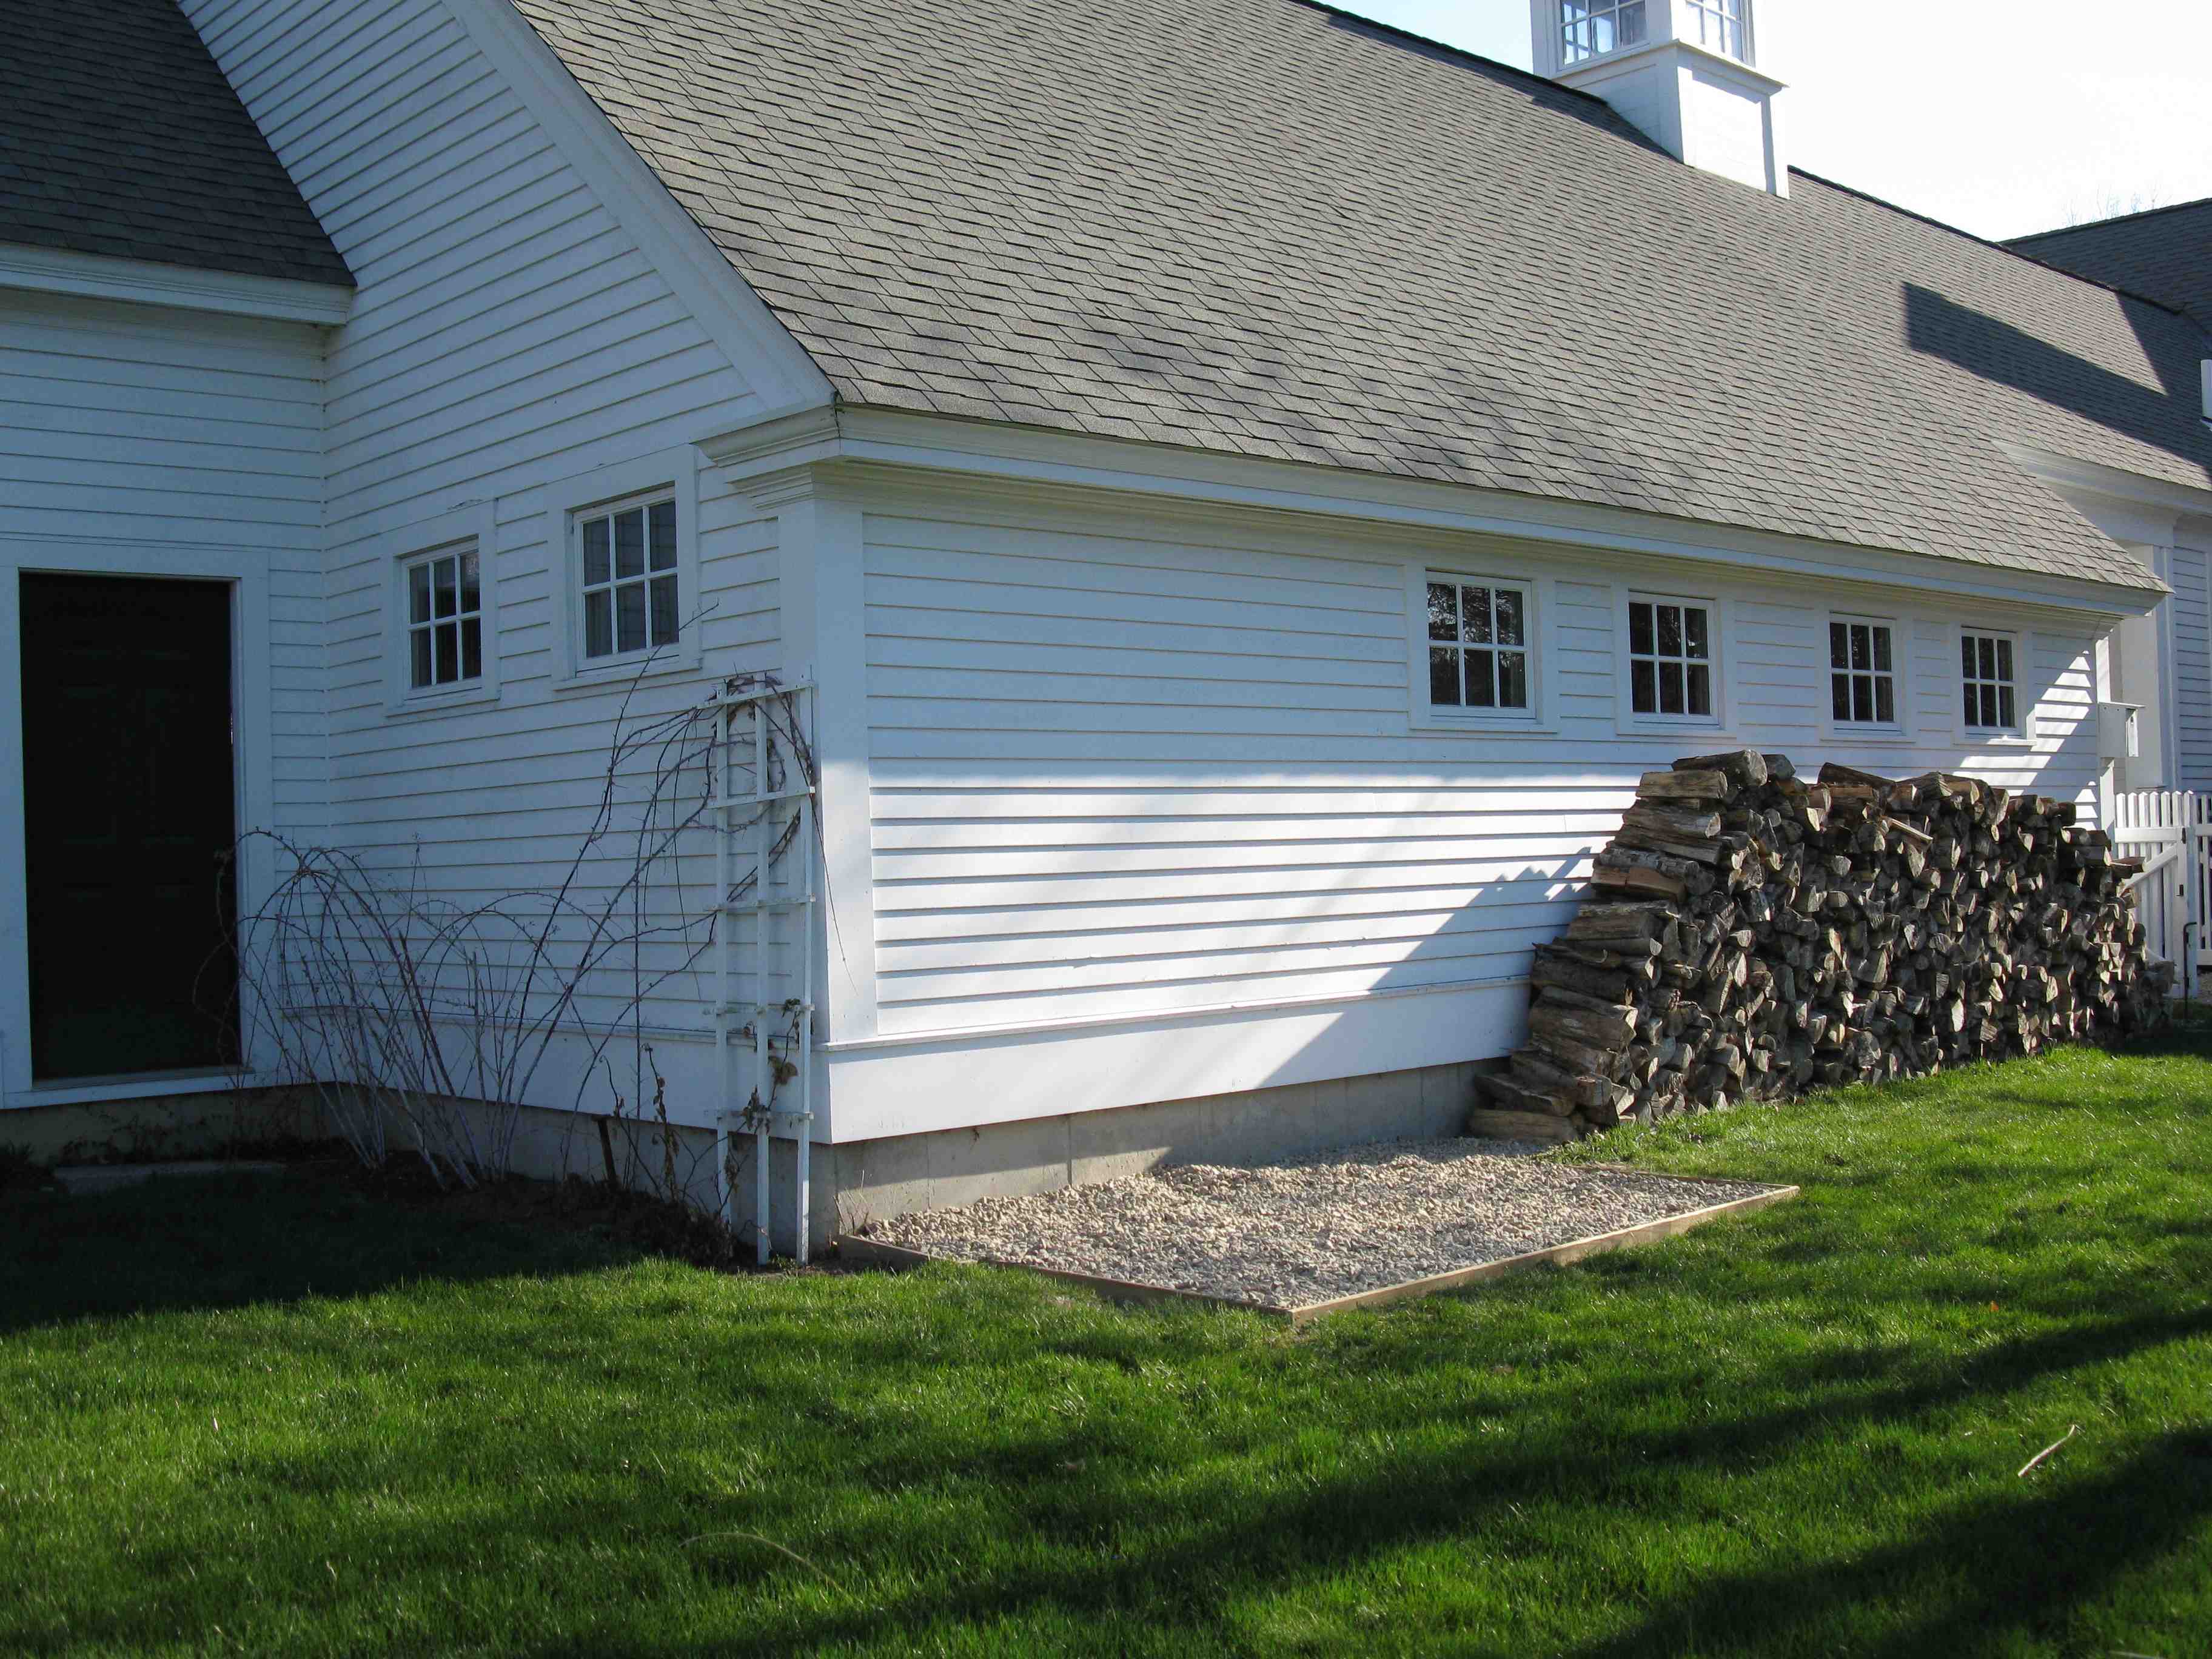
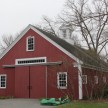
The Final Product:

This project took two carpenters 1.5 days to complete. The half day, Day 1, was the concrete footing digging and pouting and material run. Day 2 was a full day of construction from frame to finish.
The cost of the materials was approximately $1200.00.
The result was a simple and effective open wood storage shed that is easily accessible and keeps all but the wind driven rain out. The open floor flan and the fact that these folks do not lean the wood against the back wall allow 360 air flow to keep their firewood dry and ready to use at a minutes notice ~ and no blue tarp is needed.