Using a Cable to Hang String Lights

Freestanding Solution for Hanging String Lights
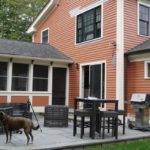
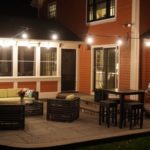
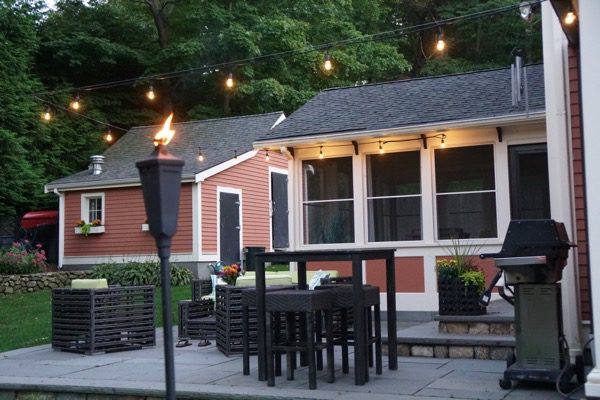
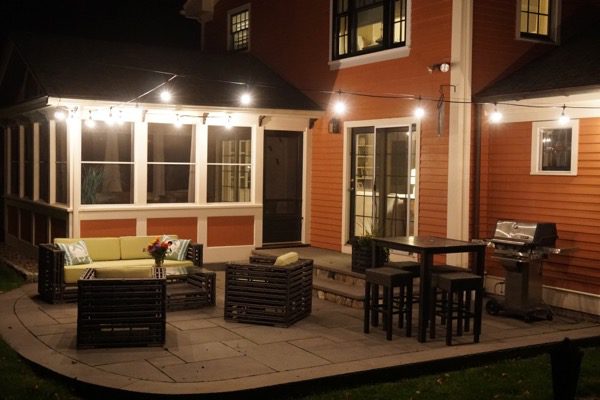
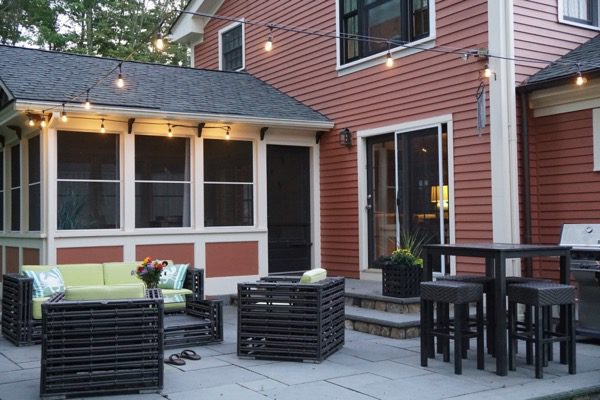
If you’re looking for a great way to illuminate your outdoor living areas, string lights are great option. String lights can enhance a patio or outdoor space by adding a warm glow and dispersed light, but they can be tricky to hang if you don’t have trees or other tall objects to string them from.
We recently had a similar issue where we needed to utilize a freestanding cable solution in order to run string lights around the outer edge of our patio.
Electrical Power
Prior to designing your string light pattern plan out how you will power you lights.
- Is there an outside outlet nearby?
- Do you need to add one?
- Can you reach the area with an exterior grade electrical cord?
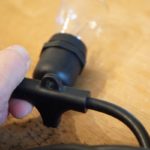
For my project, I started my string lights near an outdoor, weatherproof outlet. I connected the string lights to this outlet with a 12-guage, weatherproof 10-foot extension cord.
Cable Suspension for hanging lights
In order to create a freestanding solution for your string lights you first need to think about how you will hang the lights.
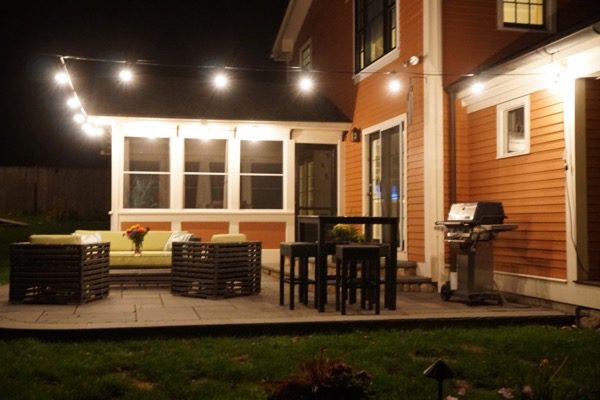
I’m my situation, I have two house walls with a patio in between. I wanted to basically follow the outer perimeter of the patio with lights, which was approximately 45 feet. In order to do this properly I needed a cable running from one wall of the house to a tree 60 plus feet away.
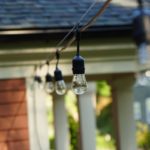
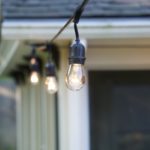
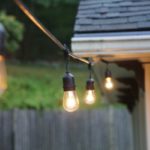
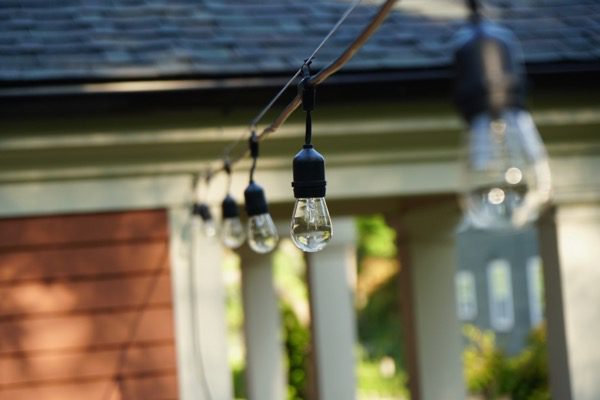
The Brightech Ambience Pro Commercial Grade Outdoor Light Strand that I purchased spaces out their light-bulbs 36” apart. This is useful information when designing light coverage.
I decided I would install 15-feet of string light on a fixed cable, and then return the lights back to the other wall of the house. I would then attach the string lights to the suspension cable using plastic zip ties. [also known cable ties]

The cable would run from one wall of the house, past the patio, to a tree and provide string light support out to the corner of the patio, where it could then turn 90-degrees and run back to a fixed eye-bolt at the other house wall.
The first step in doing this project is to determine the length cable you’ll need. Once that has been determined, you need to decide what structures you’re going to use to support your cable, so you can install any needed hardware.
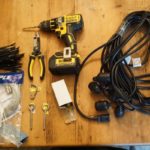
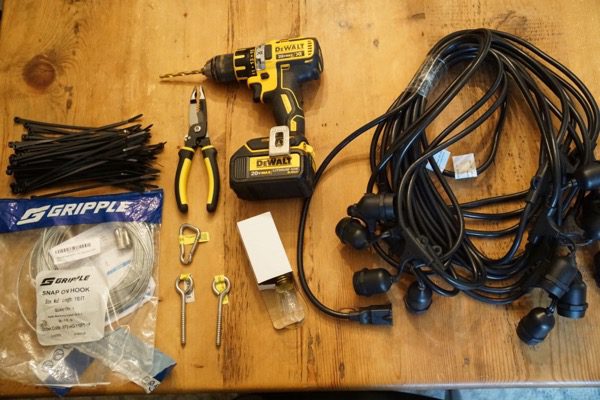
Tools and Materials Needed for Hanging String Lights
- Globe Light Suspension Kit, Galvanized Steel Cable, 110 ft. $45.99
- Brightech Ambience Pro LED Outdoor Weatherproof Commercial Grade Lights with Hanging Sockets – 48 Ft string w/bulbs. $54.99hooks [Lag type]
- Zip Ties
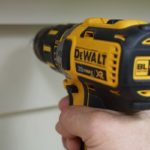
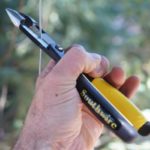
- Multi-tool Plier / wire cutter
- Rubber washing machine water hose if wrapping around a tree or branch.
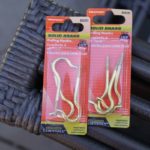
- Stainless Steel carabiner [optional]
- Brass eye hooks [option]
String Light Cable Mounting
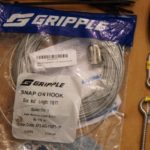
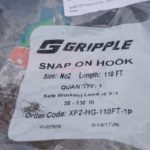
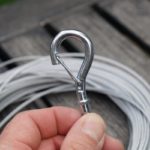
The Globe Light Suspension Kit, Galvanized Steel Cable I used features:
- Galvanized steel cable for hanging commercial grade string lights
- 110 feet long; 1/16 inch in diameter
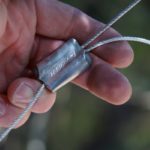
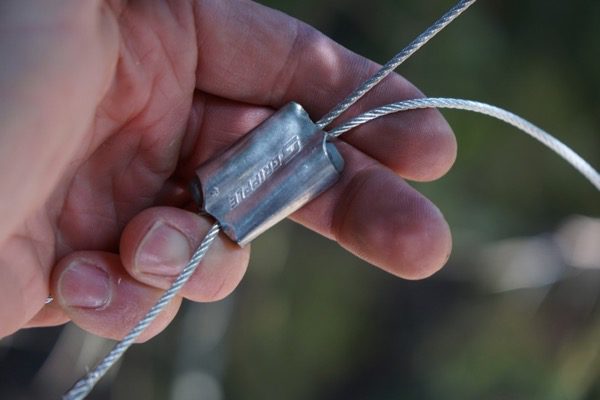
- Comes with one attached snap hook and one loose cable end and a Gripple Fastener clip
- Cable can be trimmed to any desired length
- Weather resistant; Working load limit of 100 lbs.
The cable is 110 feet in length and 1/16 of an inch in diameter. With an attached snap hook and a loose clip that allows you to feed the cable through one side of the clip, loop it around posts and other fixed objects.
It’s a perfect solution for large open areas, and to prevent sagging string lights.
Purchasing Outdoor String Lights
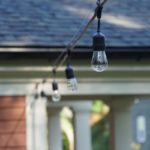
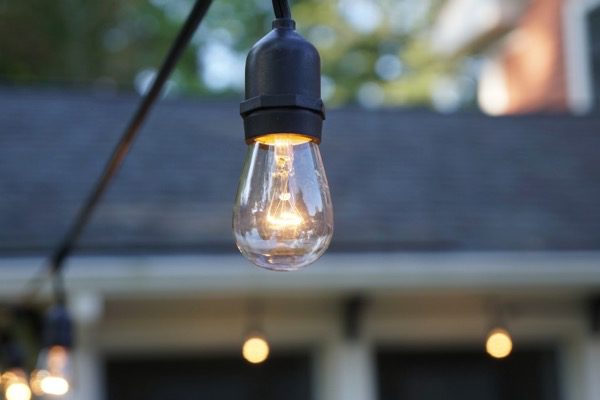
I purchased BrightTech Ambience Pro Outdoor String Lights. This string comes in a 45-foot string and uses vintage Edison bulbs with exposed filaments give off a warm, nostalgic glow. The Ambiance Pro light string is all black, has a hanger mounting hole and is a heavy duty cord, that is thicker than any other cords I’ve seen. This string light is also dimmer compatible.
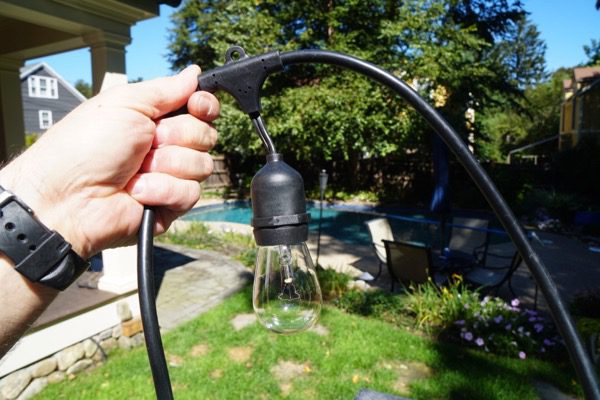
The lights have 3 feet of spacing between each bulb and you can connect up to 8 strands end to end.
Attaching Cable To House
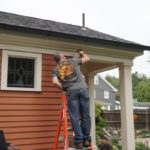
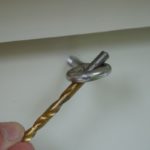
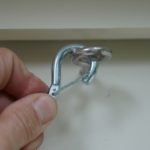
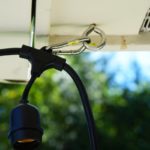
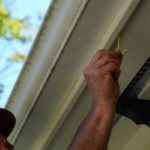
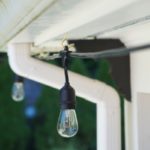
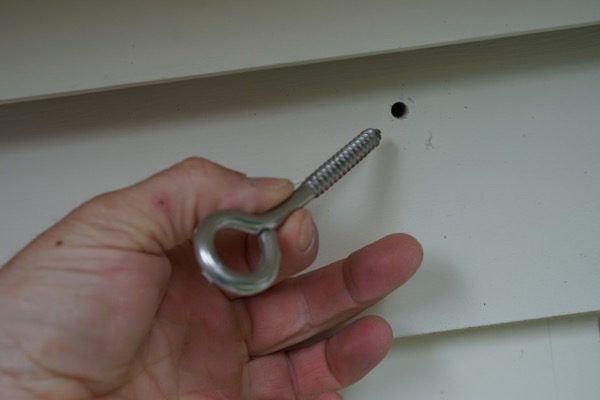
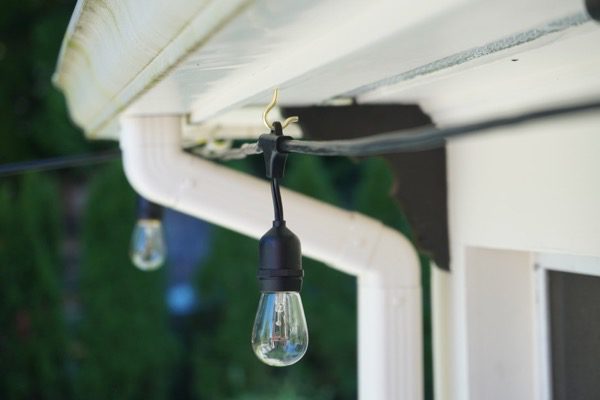
The easiest way to attach the cable is to attach the snap hook on the cable to an eye bolt, installed into the fascia area of the house.
Install the eye-bolt into solid framing, if possible. When looking at the house fascia, I looked for the trim nails indicating the location of a rafter tail. [solid framing to install into] I visually verified this rafter tail location by peeking up through the sofit vent.

I used a drill bit to drill a pilot hole through the fascia and into the rafter tail. The drill bit, pilot hole should be approximately 75% of the total diameter of the eye-bolt threads. TIP: A good rule of thumb is to choose a drill bit that is the same diameter as the solid part of the eye-bolt minus the threads.
Attaching Cable to a Fixed Object
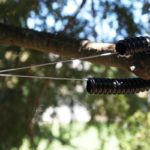
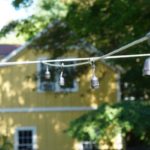
The cable can also be wrapped around fixed objects, such as, poles, beams or tree branches.
The Globe Light Suspension Kit cable comes with a snap hook on one end and a “Gripple Fastener.” The Gripple Fastener allows the cable to be inserted the fastener, looped around an object and then returned and looped through again for a secure attachment. This Gripple fastener acts as a tensioning and allows you to make tightening adjustments. I chose a sturdy branch to wrap the cable around. In order to protect the tree branch from being damaged I used a flexible rubber hose I had left over from a another project to act as a protective sleeve.
TIP: An old garden hose, or a rubber washing machine hose is inexpensive and works great as a protective sleeve. I left plenty of room in the cable loop for the branch to increase in size. Be aware that even using a protective hose, as I mentioned, will damage the tree long term.
Note – Excess cable can then be trimmed from the end if the full length isn’t needed.

Do NOT Attach a Cable Around a Tree Trunk
It is important to understand that tree trunks ad branches increase in diameter as they grow. Cables installed around a tree trunk will cause damage to the tree as the bark grow is causes a strangulation effect to the tree. A cable around the truck causes a restriction that keeps the sap from flowing through the tree, eventually killing the tree.
Hanging String Lights
Once the cable is taut, it’s time to install the string lights. Some commercial grade string lights come with built in holes for hanging. To allow for easy string light cord replacement, I chose to use zip ties for cable attachment, as opposed to feeding the cable directly through the string light mounting holes. Make sure to start your string light with the power plug in the proper location, in order to plug the string in.
TIP: I used a zip tie to secure the first bulb to the snap ring at the house eyebolt. This would later allow me to pull the string light taut as I worked.
I wanted the string lights run out 15-feet, on the cable, before turning 90-degrees back to the other wall of the house. I then attached 5 bulbs to the cable with zip ties and then pulled the attached bulbs down the cable until they reached the 15-foot mark. Once I reached my return point I attached two zip ties to the string light cord at the point I was turning 90-degres.
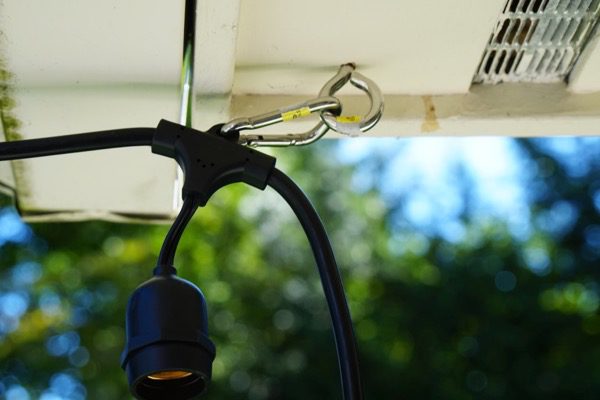
I then ran the string lights back to the other house wall and attached a bulb to an eye-hook with a stainless steel carabiner.
Note – In order to get the bulb, carabiner and eye-hook to meet I had to pull the sting line tight. This pulling action, pulled my cable out of my straight line a bit. I was OK with this, as it also kept my 2nd run of string light tighter. If you want to avoid this, you will need to use zip ties, or a different connection the house.
String Light Nirvana
String lights create a rustic, warm, and inviting atmosphere. Don’t let the fact that you do not have freestanding objects to attach you deter you from moving forward.