Save Energy With A Programmable Thermostats

By Robert Robillard on Energy Saving

Programmable Thermostats

Learn how to install a programmable thermostat in 7 easy steps:

Save Energy With A Programmable Thermostats

Reduce your home’s heating and cooling costs by about 15 percent by installing a programmable thermostat. This is an easy do-it-yourself project, their cost ranges from $ 30 to $100.

Programmable thermostats automatically raise and lower the heat to an when you’re home, away or asleep.

Programmable thermostats will work with most gas or oil furnaces, and central air conditioners.

Here’s how to do it in 7 steps:

1. Turn off power to the heating and cooling systems at the main panel. Mark the wires with a tape and the letter that represents the terminal and unscrew them. Remove and discard the old thermostat.

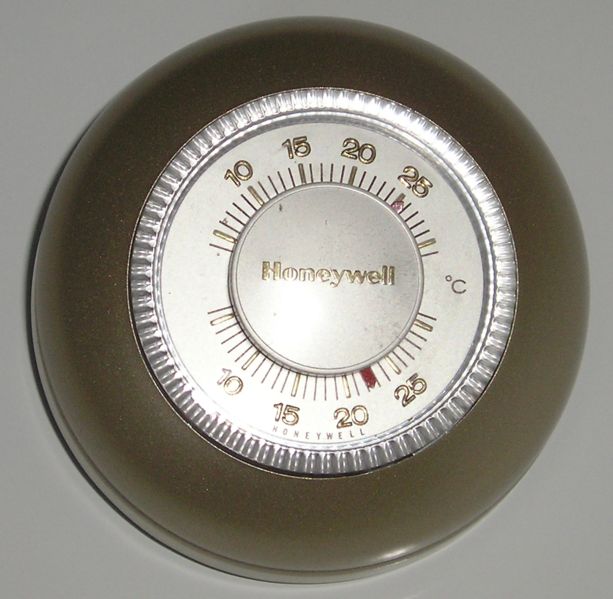
If your old thermostat contains mercury, you’ll see a small glass tube with a shiny silver ball inside. Mercury is toxic. Take this type of thermostat to a hazardous waste disposal site.

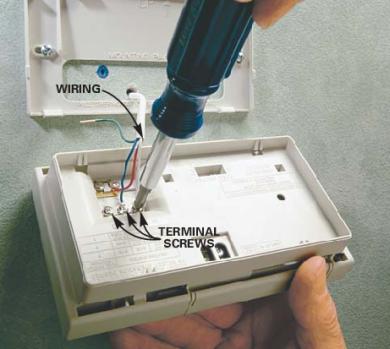
2. There will be anywhere from two to five wires hooked up to the old thermostat. Label the thermostat wiring with masking tape using the letters on the old terminal screw letters as reference.

3. Use care or masking tape to prevent the thermostat wire from slipping back into the wall.

4. The thermostat may need to be configured to your heating system. Consult the instructions that come with the thermostat for system adjustments and programming. You won’t save energy if the thermostat isn’t programmed correctly.

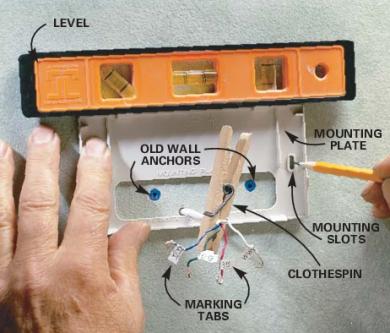
5. Level the new mounting plate in position and mark the mounting screw holes. Drill 3/16-in. holes, insert drywall anchors and screw the plate to the wall.

Save Energy With A Programmable Thermostats
Photos: rd.com

6. Screw the system wiring to the screw terminals on the new thermostat using the letter labels as reference (strip the wires back if necessary). These letters are standard; hook them up to the same terminals on the new thermostat.

Save Energy With A Programmable Thermostats

7. Snap the thermostat to the mounting plate and program.

SEE MY POST ON: How to Install a Programmable Thermostadt 

If you enjoyed this post, please consider commenting or subscribing to receive my future posts via email

If you enjoyed this post, make sure you subscribe to my RSS feed!

About the author

Robert Robillard

Carpenter / Remodeler / Editor

Rob Robillard is “The Concord Carpenter” Rob is a builder, general contractor, carpenter, woodworker, and editor of Concord Carpenter and ToolBoxBuzz As a General Contractor and carpenter, Rob owns and operates Concord Carpenter LLC. A full-service remodeling and construction company. Rob is a recognized leader in home building best practices and a source for how-to information for building professionals. On this website, Rob covers all aspects of home construction, building science, home improvement, woodworking, remodeling, and some of the best product and tool reviews. Rob is in charge of our Tool and Product Review series - Concord Carpenter Videos where we post all of our tool reviews and video tutorials. Rob approaches remodeling and building construction with a pragmatic and problem-solving approach. He enjoys using his knowledge and experience to help and educate building professionals as well as DIYers on best practices in the construction and remodeling industry. He's a strong advocate for "raising the bar" in the construction trades and promoting the trades to youth. #BeAMentor #Green2Great Craftsmanship, quality, and pride guide his journey on this channel The Concord Carpenter's motto: "Well done is better than well said!" : Read more about Rob

All posts by Robert »

Not what you're looking for?

Search for more articles here. Enter keywords like roof leak, bookcase, deck, etc to find your topic.

© Copyright 2019 A Concord Carpenter · All Rights Reserved