Preventing Ice Dams

Heat Loss Seen on Condo On Left. Condo on Right Has Spray Foam
How To Prevent Ice Dams
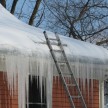
What is an ice dam?
An ice dam is a ridge of ice that forms at the edge of a roof and prevents melting snow (water) from draining off the roof. The water that backs up behind the dam can leak into a home and cause damage to walls, ceilings, insulation, and other areas. A roof leak is often the first indication that you may have ice dams. Here are some tips on preventing ice dams in your home.
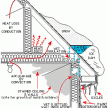
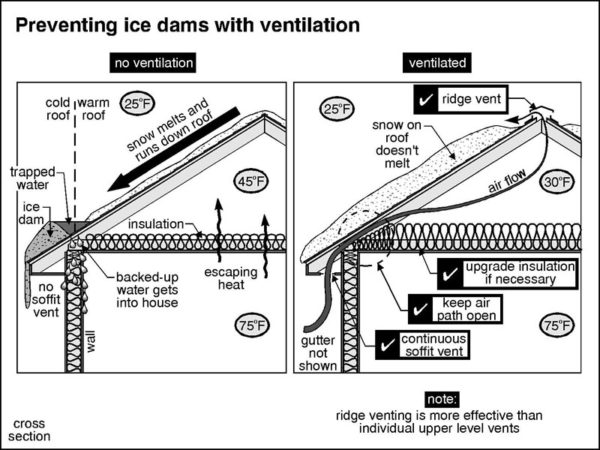
Figure 1 shows a cross section of a home with an ice dam.
Image: extension.umn.edu
Where Do Ice Dams Form?
Ice dams form when there is snow on the roof and freezing temperatures.
Ice dams usually occur after a heavy snowfall and several days of freezing temperatures. Warm air inside your home leaks into the attic and will warm the underside of the roof causing snow and ice on the roof to melt. The melted water will drain along the roof, under the snow, until it reaches the cold overhang. The overhang tends to be at the same temperature [below 32 degrees] as the outdoors and the melted water will refreeze and form an ice dam and icicles. The ice dam can cause damage to the roof, which will result in water leaks to the inside. The water back ups and finds cracks and openings in the roofing and then flows into the house. The result is water spots or dripping water on the ceiling under the roof damage.
Ice Dam Causes
The most likely causes of ice dams are due to heat loss, air leakage and the general warming of the house structure due to conduction from the heated building. So preventing ice dams will focus on improving heat loss and air leakage.

IceDam
Preventing Ice Dams
Ice dams are not a rood shingle issue, there an air leak sealing problem and usually a combination of lack of insulation and ventilation. There are four sure-fire steps you can take to prevent ice dams. These steps are best done in order of priority listed below:
- Seal Air Leaks
- Increase Insulation
- Improve Ventilation
- Install Waterproofing Membrane Under Shingles
 Seal Air Leaks
Warm air flow from the house leaks into the attic space and for this reason, insulation alone will not stop air leaks or ice dams. It is extremely important to get your attic air leaks sealed if you want your insulation to really work well.
We use a combination of expanding foam and ridged insulation to seal all gaps, cracks and joints where air may escape.
Common Air Leak Areas
- Recessed can lights [Ridged insulation boxes between the joist and on top of the lights work well]
- Ceiling mounted electrical boxes
- Bath exhaust fans
- Plumbing vent pipes
- Wall partition top plate seams
- Plumbing and electrical penetrations
- Chimney chase-ways. [Cut 24 gauge or thinner sheet metal to fit tightly to the chimney and the framing. (IMPORTANT: This is a draft stop only. Do not put insulation on top of it. Insulation must still be kept at least two inches away from the chimney.)
- Plumbing chases
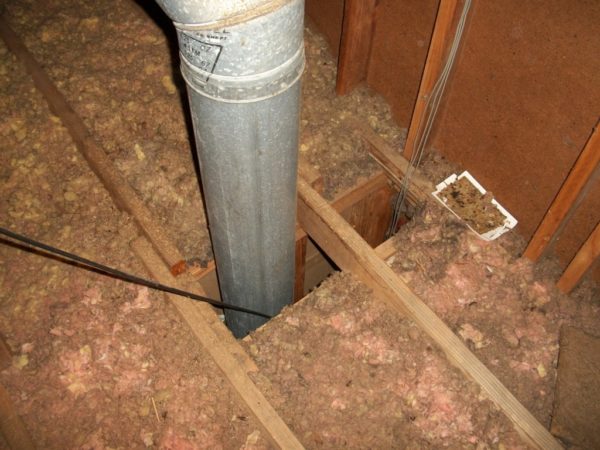
Example of massive air leak
Add Insulation
Cellulose or fiberglass insulation can be added on top of existing insulation, undersized or poorly installed batt insulation. If additional insulation depth is required install over and on top of joist bays. Make sure to install ridged foam or Styrofoam baffles between the roof sheathing and the insulation below, to create a 1-2″ air gap and to prevent insulation from blocking the soffit vents.
In many instances it may make sense to install closed-cell spray foam insulation to the underside of the roof. Achieving R40 in an attic will cut down on heat loss by conduction. Many state codes require an R-value of 30-49 above the ceiling for new homes. Building Science Corp recommends an R-60 roof, however, we’ve seen great success with R-values as low as R-40 (when properly installed.)
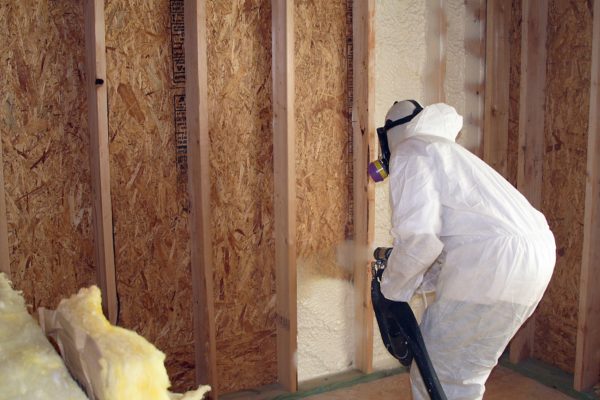
Contractor blowing foam insulation
Improve Ventilation
Increasing ventilation will help keep the roof cool but only after you’ve air leak sealed and added insulation. If you fail to do the first two steps, adding ventilation will actually work against you by pulling more heat out of the house and against the rood surface.
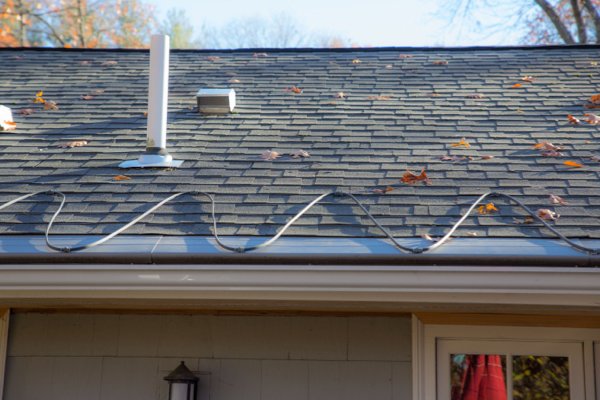
Install A Waterproof Membrane
There’s a reason when rubber roofs don’t worry about ice dams! While not a solution, adding a minimum of 6-feet [or more] of self-adhering ice and water shield membrane under your shingles, and along your roof edges, eves and valleys can help prevent pooled water from ice dams from getting into your house.
Sawtooth Pattern