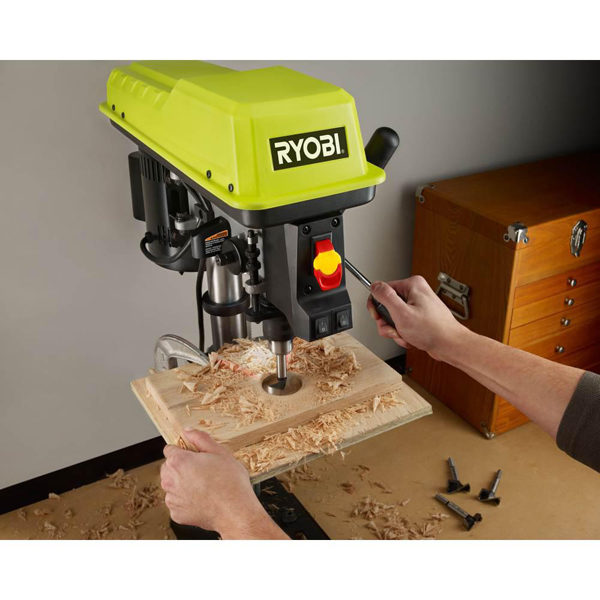
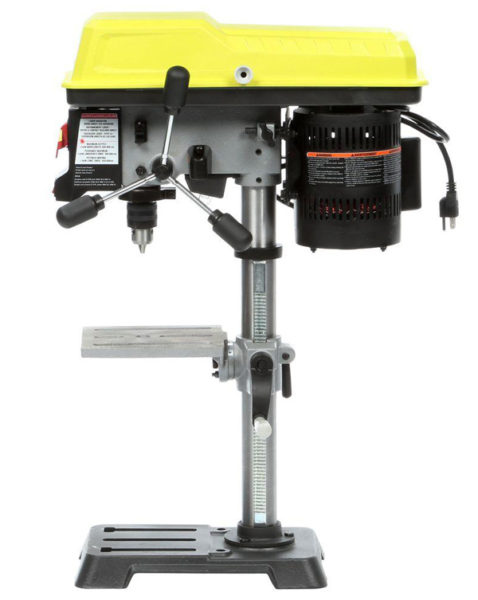
RYOBI 10-inch Benchtop Drill Press

Every Contractor and DIYer Needs One
The RYOBI 10-inch Benchtop Drill Press with EXACTLINE Laser Alignment System (model DP103L) is a solution to a common problem. Every contractor and DIYer has to occasionally drill holes at a precise angle, and doing so by hand is all but impossible. By hand, you have to hold the drill at a precise angle in two planes, yet you can only sight down one of them. To truly hold a precise angle you need a drill press. True, you can make jigs that will help you do the job, and there are hacks that can sometimes be employed, but neither of these work all the time and neither works as well as a drill press. That’s why every contractor has a drill press and every serious DIYer needs one.

Now free-standing drill presses are expensive, large and heavy (thus not transportable to a jobsite), and take up floor space in a shop. If your need for precise holes is not a production need, then a smaller bench-top drill press is a likely candidate for the role.
A Compact Go-To Tool
The RYOBI 10-Inch Benchtop Drill Pressdrill press features:
- Heavy duty 1/4 HP induction motor
- Five speed selections from 620-3100 no-load RPM
- Locking depth stop
- On-board chuck key storage
- EXACTLINE Laser Alignment System that marks the target area
- Integrated work light
- A 7-5/8 in. x 6-1/2 inch steel table that swivels 360°, tilts up to 45°, and is height-adjustable
- Steel base
- Two-inch spindle travel (drill depth)
- Three year manufacturer’s warranty
The heavy steel base makes for a stable unit. The foot print of this drill press (measuring the widest parts along the entire height) is approximately 19 x 8 inches, and the height of the tool is 30-inches. It fits comfortably on a bench, pick-up bed, or set of sawhorses. This drill press is compact enough to be stowed out of the way if space is at a premium, and it’s easily transportable.
(Almost) All-Metal Construction
The RYOBI 10-inch Benchtop Drill Press has a few non-metal parts, just like any modern tool. The pulley gear box cover is polymer (it’s the part of the tool that’s RYOBI green), and the pulleys themselves are composite. Now before you go complaining that the pulleys should be metal because “metal is stronger and tougher than plastic”, I’ve got one word for you: Glock. When Glock hit the market in the early 80s everyone laughed at the “plastic gun”. Well, that “plastic” proved to be tough as nails and Glock totally dominated the law enforcement and military handgun markets…until competitors came out with their own incredibly tough “plastic” pistols.

Between the steel table and base, the construction of the rest of the unit, and the expected long-term performance of the pulleys, the build quality of this drill press is very good.
Straightforward Operation
This RYOBI 10-Inch Benchtop Drill Press has a 10-inch swing. “Swing” is twice the distance from the center of the spindle to the edge of the column, or what we might think of as the “throat” of any other machine. So this drill press can drill a hole in the center of a 10-inch circle, or up to five inches from the edge of a work piece. That’s enough clearance for most residential work-piece operations requiring a drill press.
The rack and pinion table height adjustment is easy and reliable to use. The table swivels a full 360-degrees in the horizontal plane and locks in place with an expedient handle-screw. The tilting table is extremely handy for drilling non-90-degree holes, and it’s usually much easier to use it than to rig up a jig to hold your workpiece at the right angle on a flat table.
The locking depth-stop is a traditional screw-type with a clear depth indicator. The spindle speed is changed by loosening a T-handle screw to release the motor, and moving the V-belt to the appropriate set of pulleys. The motor is spring-tensioned, but a little judicious levering of the motor to re-apply the correct belt tension may be called for, and is simple to do. Even so, changing speeds is a less than a minute operation. Looking up the speed you’ll want to use for the material you’re about to drill will take longer than that!

The traditional three feed handles operate smoothly, and the laser and work light have independent switches. Both of these features, by the way, are extremely useful. Being able to position your workpiece correctly with the laser without several iterative spindle up-and-downs is a time- and frustration-saver. Being able to turn the laser off is a nice touch too, since it can be distracting once you’re set up. A good work light is always welcome, since you never can be sure of your ambient lighting, especially at a job site.
The power switch has one of those integral keys which you simply remove to prevent unauthorized power access. I really like this system in that disabling the tool is so fast and easy. My own work seldom requires this feature, but if it did I’d buy a number of replacement keys since once removed they aren’t attached to anything and can get lost.
Squaring-up and Runout
Squaring the table to the spindle is something that you always want to do. I chucked a precision-machined 3/8-inch rod that I borrowed from a machinist friend (you could use a new or known-straight bit too), and a small combination square. I determined that the table was square in the back-to-front direction. That was good because the table isn’t adjustable in that direction. If a table is out of square in that plane enough for you to care about you’d have to adjust for it with a drill press table, which many users make anyway to extend the support surface of the table. My table was a skoosh out of square left-to-right, and this was easily adjustable on this drill press.
When we talk of precision in a drill press we’re usually talking about runout. Excessive runout can be caused by any number of slightly faulty parts, including the chuck, spindle, quill and bearings. An entry-level drill press that used for contracting, remodeling, and DIY projects isn’t making precision critical parts for the space shuttle. We don’t expect sub-thousandth tolerances. On a drill press used for these applications five-thousandths or less is good.
Usually the culprit regarding excessive runout is a chuck that doesn’t grip the drill bit evenly. Now this is an entry-level drill press and I don’t think that even RYOBI would claim that it had a world-class chuck. A good one, yes, but certainly there are extremely precise chucks available that, of course, cost more than this whole drill press. I’ll also note that I wasn’t as careful as I should have been when installing the friction-fit chuck to its spindle; I just kinda whacked it a few times with a rubber mallet. So when I went to check the runout with a dial indicator I was expecting the worst. But it measured less than two-thousandths (measuring that precision-machined 3/8-inch rod one inch from the chuck jaws)! That’s astonishing accuracy from this low-cost RYOBI tool, and it brought to mind the similar astonishing accuracy that I measured on an out-of-the-box RYOBI dual-bevel sliding miter saw last year.
Use the Right Bit and Speed
A drill of any kind is only as good as the bits it drives. So long as you have reasonably sufficient power, the bit is the main determinant of performance. Of course choosing the right type of bit is critical, too.
For general-purpose contractor-type work drilling wood and not ridiculously hard steel there are four main bit types: high speed steel (HSS), black oxide coated, titanium coated, and cobalt (carbide is used mostly for masonry and tile (ceramic)). Any of these will drill wood just fine, but for metal you’ll generally do better with titanium or cobalt, and titanium bits are less expensive than cobalt ones. Also, if you’re drilling metal—particularly steel—make sure you use cutting oil.
You also have to use the right drill speed. Going too fast or too slow can actually take longer to drill the hole, or ruin your bit, or both. There are lots of charts and table available on the web detailing the right speed and bit type of all manner of materials; a good one is here. Rob also has some good hints here.
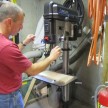
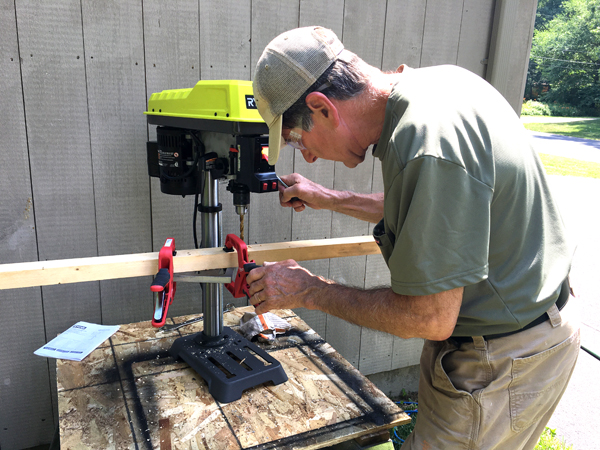
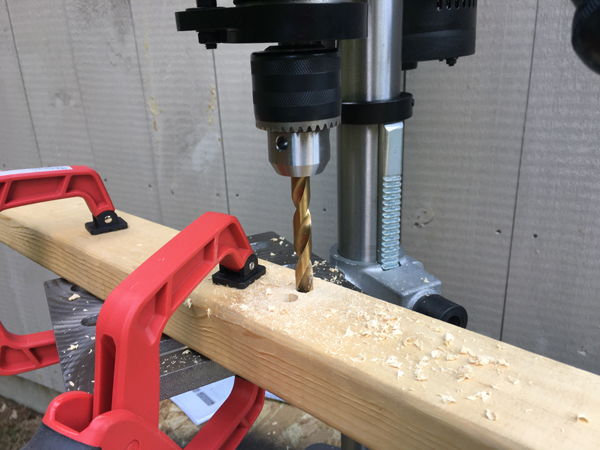
Drill Time
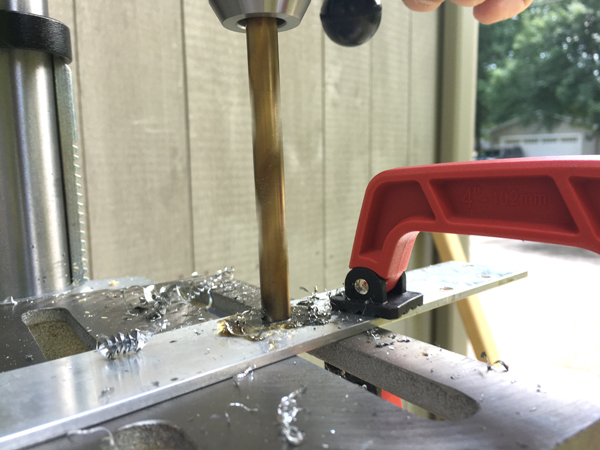
I had a reasonably new set of RYOBI titanium coated drill bits on hand, and I drilled three materials with the 3/8-inch bit from that set. It made a hole in 2X KD as fast as I could work the feed handles, with the spindle running at 2200 RPM. Moving on to 1/8-inch thick aluminum (and using cutting oil) it took a bit less than a minute to drill through it at 1575 RPM. I then grabbed a 1/8-inch thick steel bracket from the shop—of unknown composition and hardness—and it took me a couple minutes to get a hole at 630 RPM. In both the aluminum and steel I could stall the motor if I applied too much pressure to the feed handles, but it took a lot of pressure to do so.
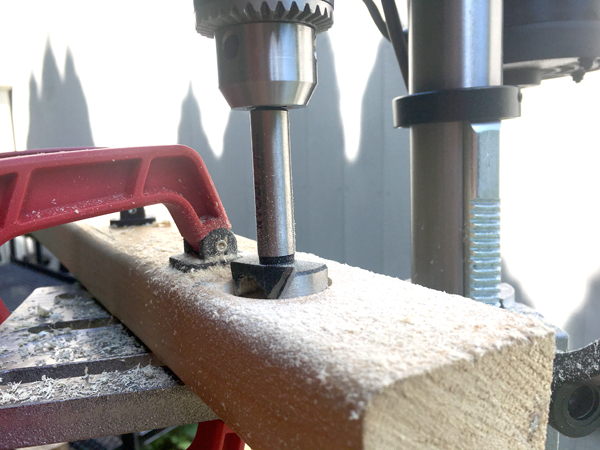
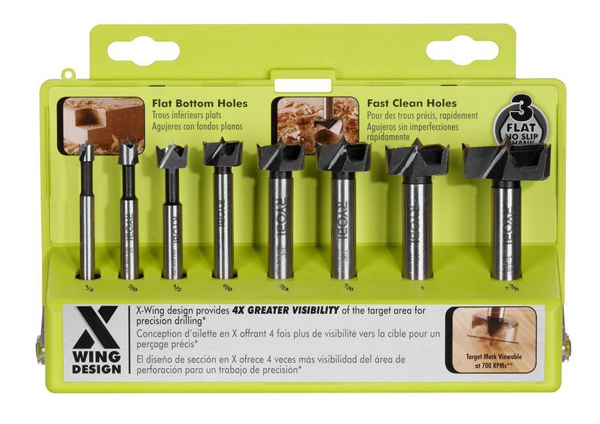
Drilling flat-bottomed holes with Forstner bits is often a job that requires using a drill press. RYOBI makes a nice 8-bit set and I used the largest of the included bits—at 1 3/8-inches—to drill through 2X KD stock. At 1575 RPM it chewed through it almost as fast as I could run the feed handles, which was one heck of a lot faster that I thought it would! If you don’t already have a set of Forstners, you’d do well to pick up this one—it’s reasonably priced at $25 and you’ll be prepared on a jobsite when the need for one comes up.
My own work is almost entirely in wood; if I have to work metal it’s usually only as an incidental task to something involving wood. For the times when I have to drill a perfectly straight hole, or when a drill press is otherwise the right tool, the RYOBI DP103L is a great, compact unit that will do the job well, and is easily transported to where ever I’m working. $169 at The Home Depot.