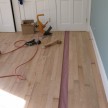
Prefinished Bamboo Flooring
 Pre-finished Bamboo Flooring Tips
I was wondering, do you have any helpful hints on installing pre-finished, solid, bamboo flooring? It’s the first time I’ll be laying down a floor so any comments that might save me from ripping it up later would be helpful…
Bamboo Flooring
Where oak takes 120 years to grow to maturity, bamboo can be harvested in three. It is recognized as a green material under LEED and as they said in Environmental Building News, “Environmentally, it’s hard to argue with a wood substitute that matures in three years, regenerates without need for replanting, and requires minimal fertilization or pesticides.”
The problem with bamboo is that its growth is not managed in a sustainable fashion. Natural forests are being cleared to make room for the more profitable bamboo. Growers don’t need to but are still using fertilizers to increase their bamboo yield.
Durability
Many people think that bamboo is a very hard flooring option – it is not. Check the finish quality of a sample by scraping the surface with a coin. If it flakes off, the product will not perform for more than a few years and complete refinishing may be needed. Also, dig your fingernail into the sample to check its hardness – there are different types or hardness out there.
Installing Bamboo Flooring
Solid bamboo floors are installed the same way solid oak strip flooring is. This is not a DIY project as it takes considerable skill to lay out the flooring and to cut around door trim [old school] properly. I would use a pneumatic flooring staple nailer with a rubber flooring mallet.
Here are a Few Flooring Installation Tips:
- Provide time for the floor to acclimate to the job site.
- Prepare the sub floor by removing all nails, and fixing any defects. Re-nail the sub-floor is needed. Lack of floor preparation is one of the leading reasons for failure.
- Overlap layers of resin paper. – Helps prevent squeaks.
- If you have a wood sub floor the direct fastening method works well. I would use 1-1/2” or 2” staples because they provide better holding capability and help reduce squeaks.
- Staple schedule: Fasten every 6-8″ and approximately 2″ away from each end joint.
- Use three or four cartons of flooring at the same time when installing to get a better distribution of color.
- If the room is seriously out of square, position the tongue of the first row parallel to the center line and rip the groove side at an angle parallel to the wall. Choose the longest boards for the first row and face nail.
- During installation, you’ll find it’s helpful to lay out several rows of boards, staggering them so no end joint is closer than 6 inches to an end joint in the next row.


