Milescraft Sign Making Jig ~ Tool Review

Milescraft Sign PRO Jig = Just follow the signs!!!!
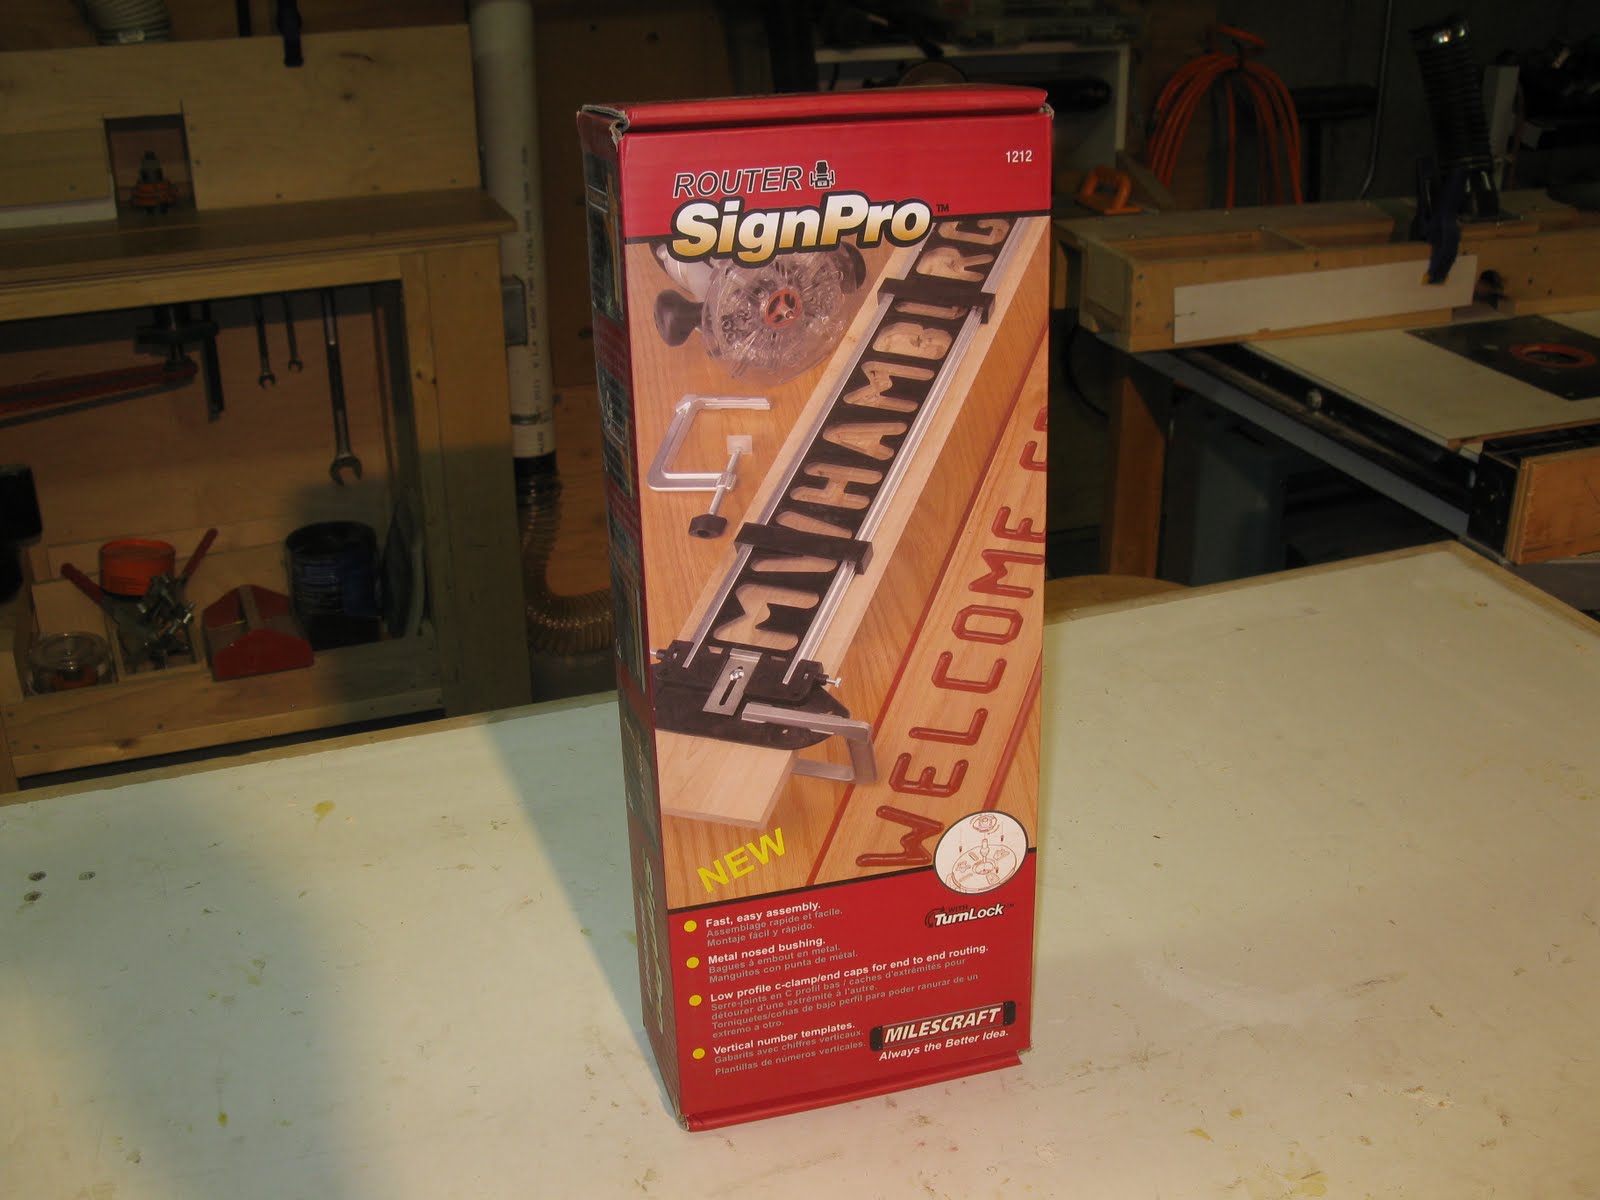
I recently reviewed the Sign Pro #1212 sign making jig from MILESCRAFT tools .

The Milescraft Sign Making Jig is designed to make wood signs and can rout up to 18 characters. It uses a guide and clamp system to secure the letters in the sign jig which attaches to a piece of wood. [the sign blank]
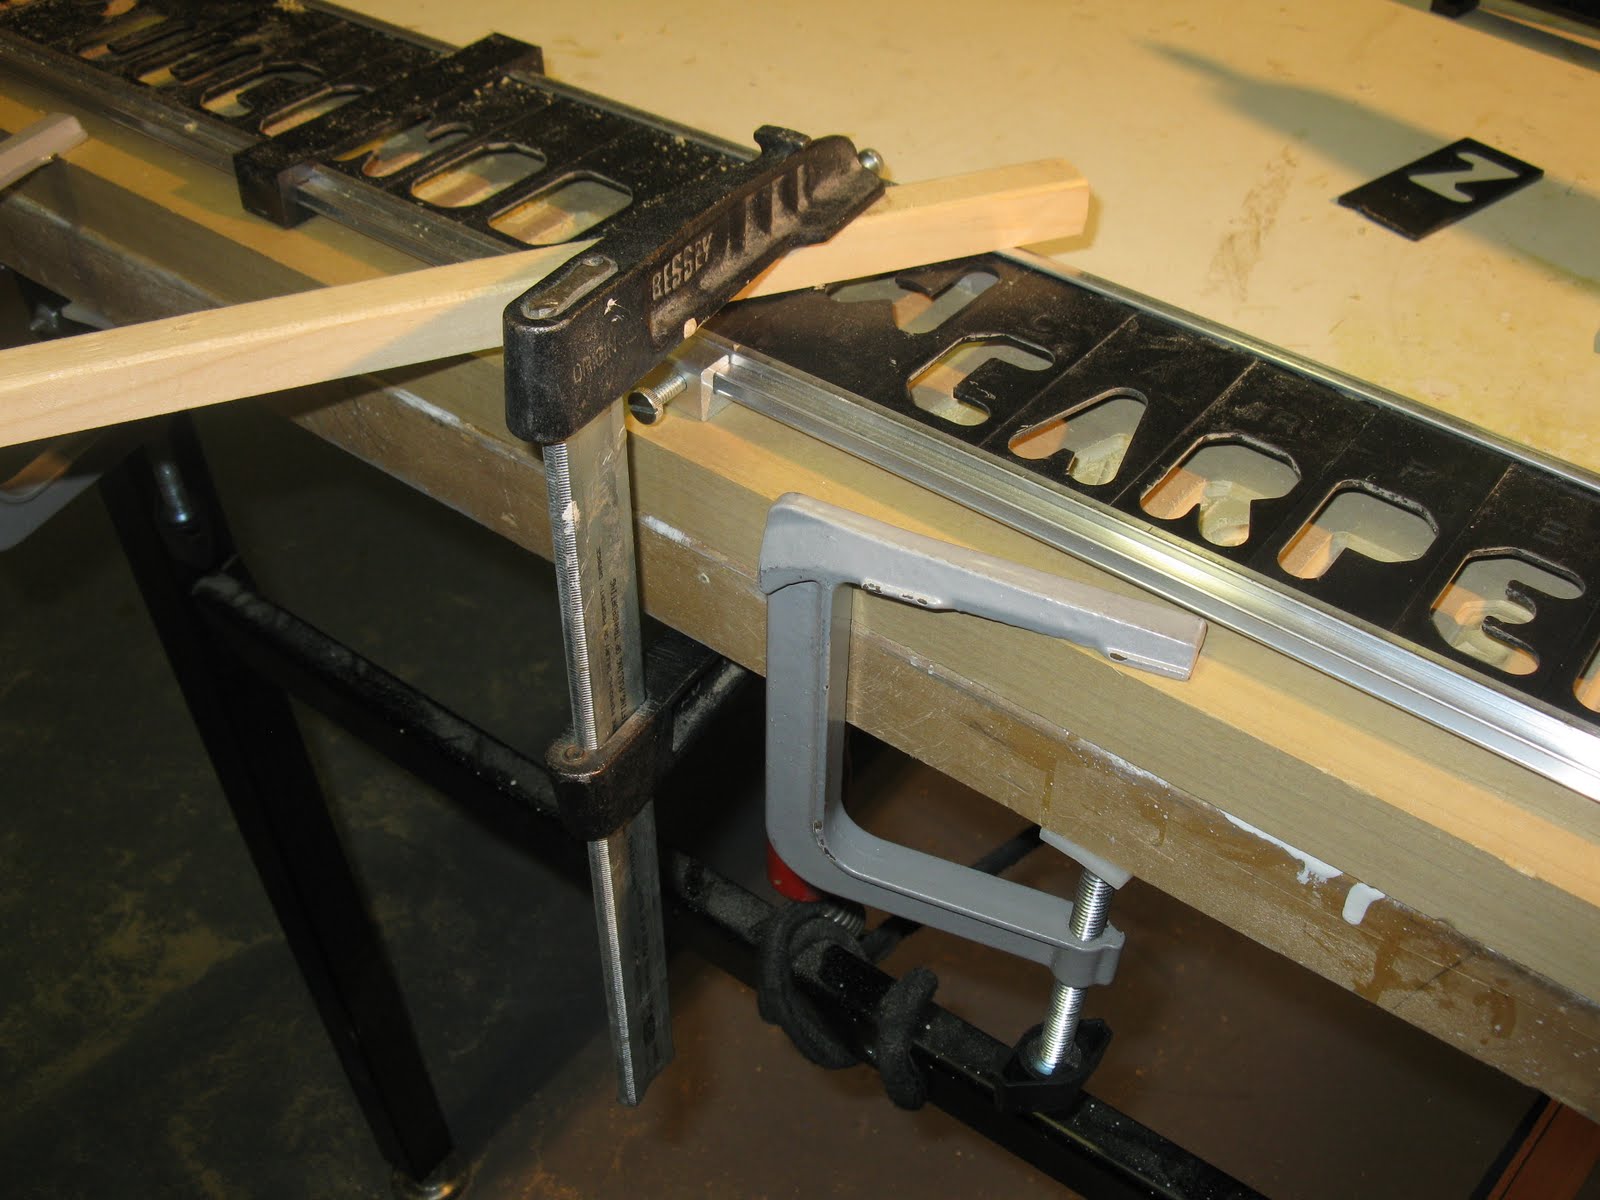
One real nice feature is that two low-profile C-clamps are provided. They allow you to clamp the edges of the jig which allows the router to pass over unobstructed.

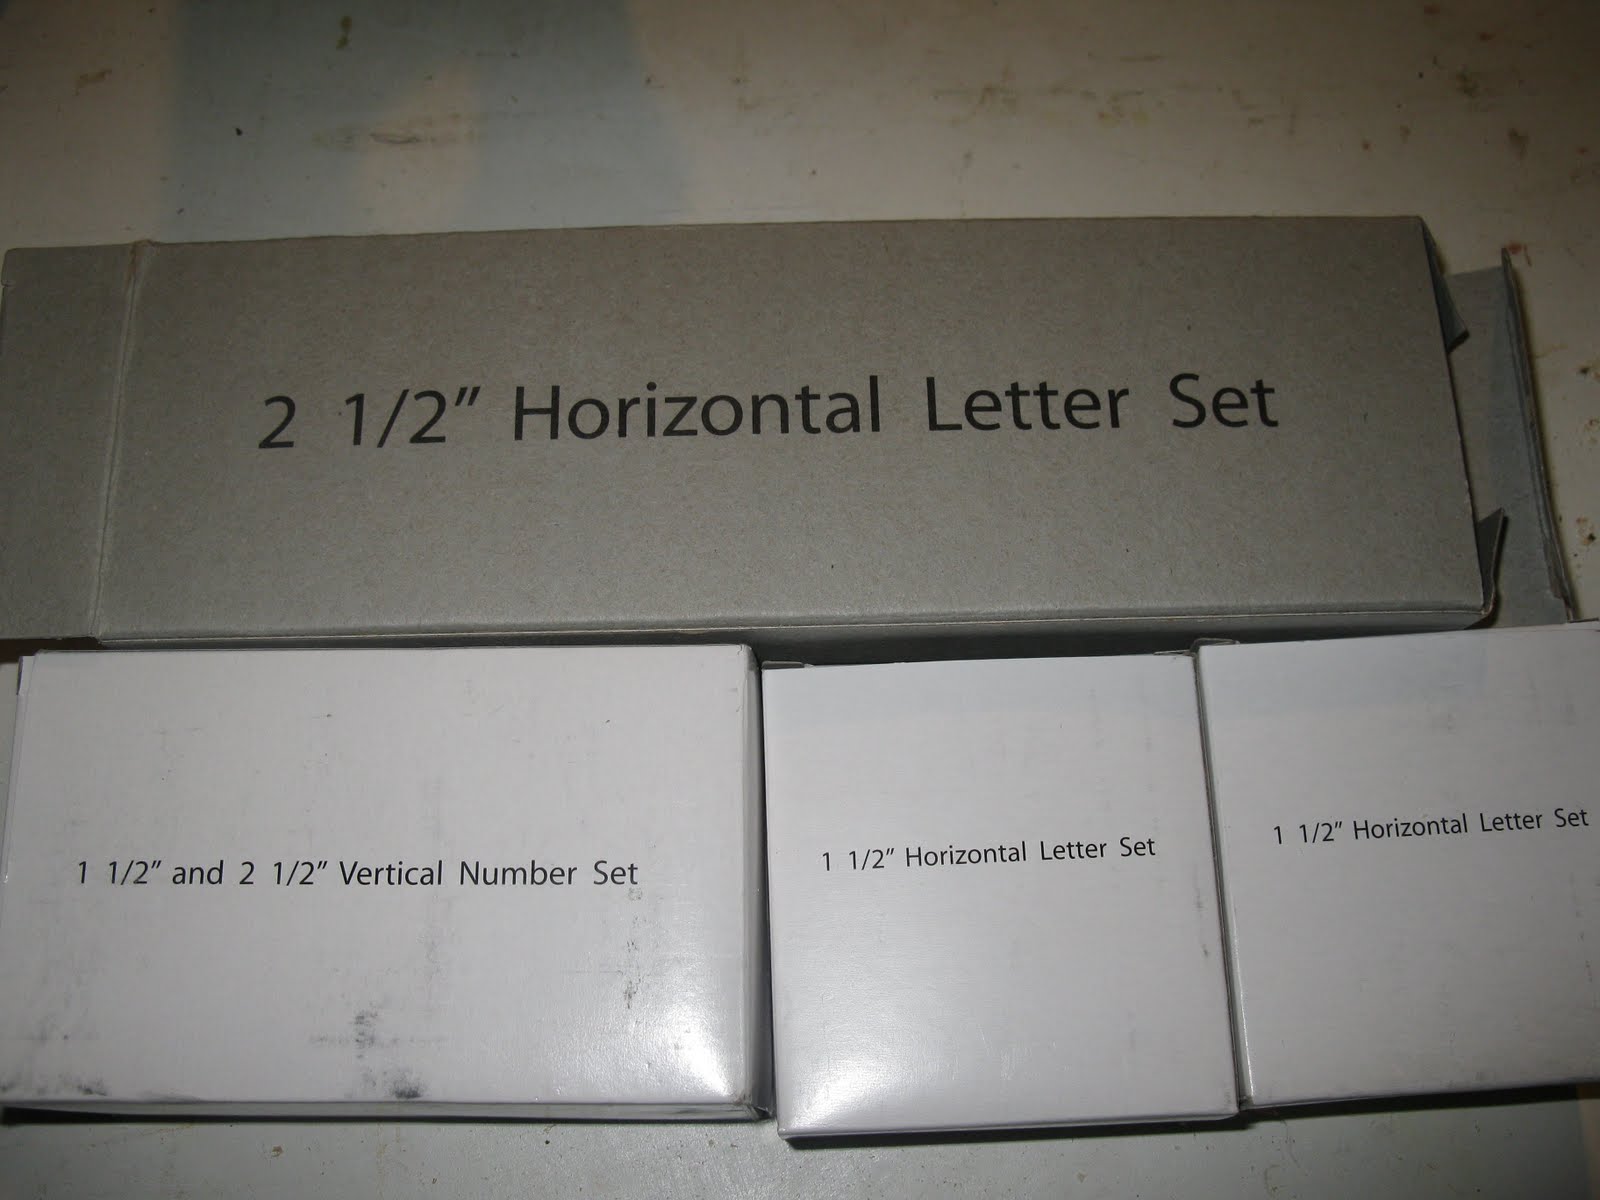
The SignPro Set includes two sets of self-spacing letter templates, one 1-1/2″ high, the other 2-1/2″. Each letter set has all letters of the alphabet, multiples of commonly used letters, numbers 0-9 and several decorative symbols, totaling 164 letters and numbers.
Milescraft Sign Making Jig Templates included:
41 Pc. Characters: Including all letters of the alphabet, two sets of commonly used letters, numbers 0-9, and some punctuation symbols.
20 Pc. Vertical Number Sets: (Vertical characters for numbering). Includes 2 sets of 0-9
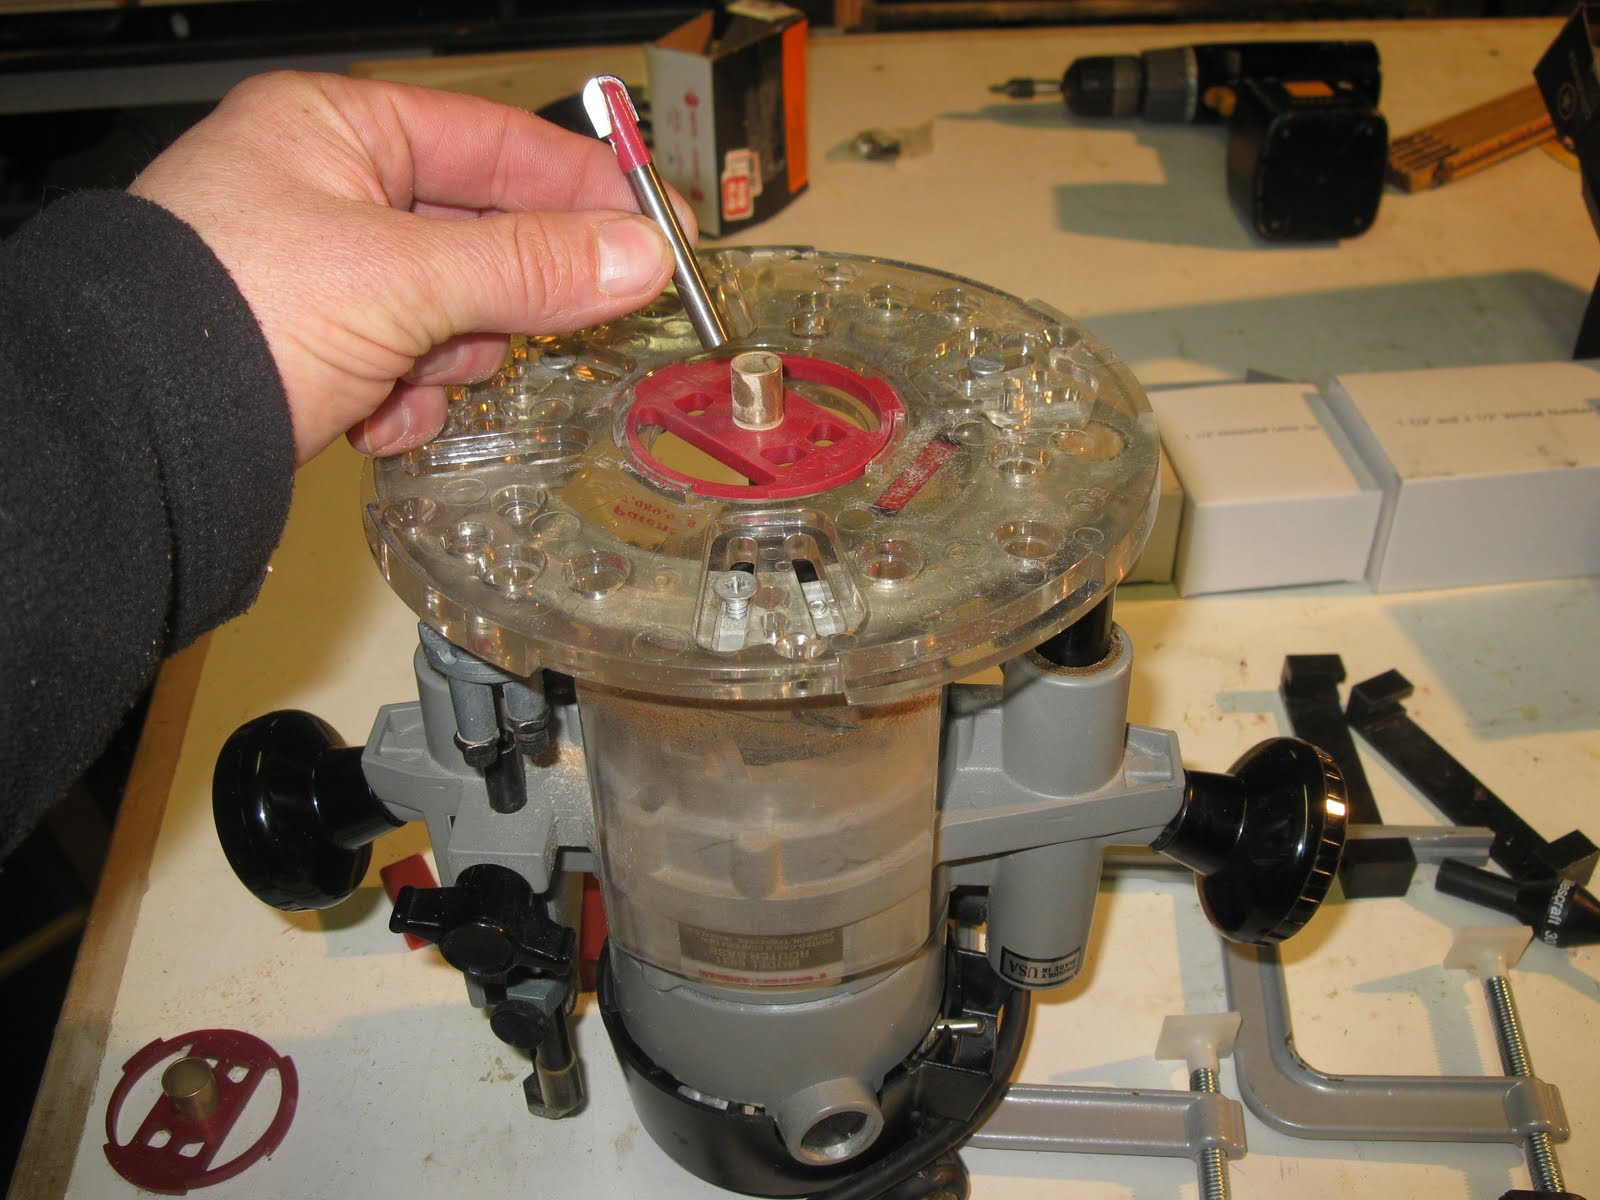
Two turn-lock bushings [red pieces below] and two carbide tipped router bits, 1/4″ and 3/8″ are included.
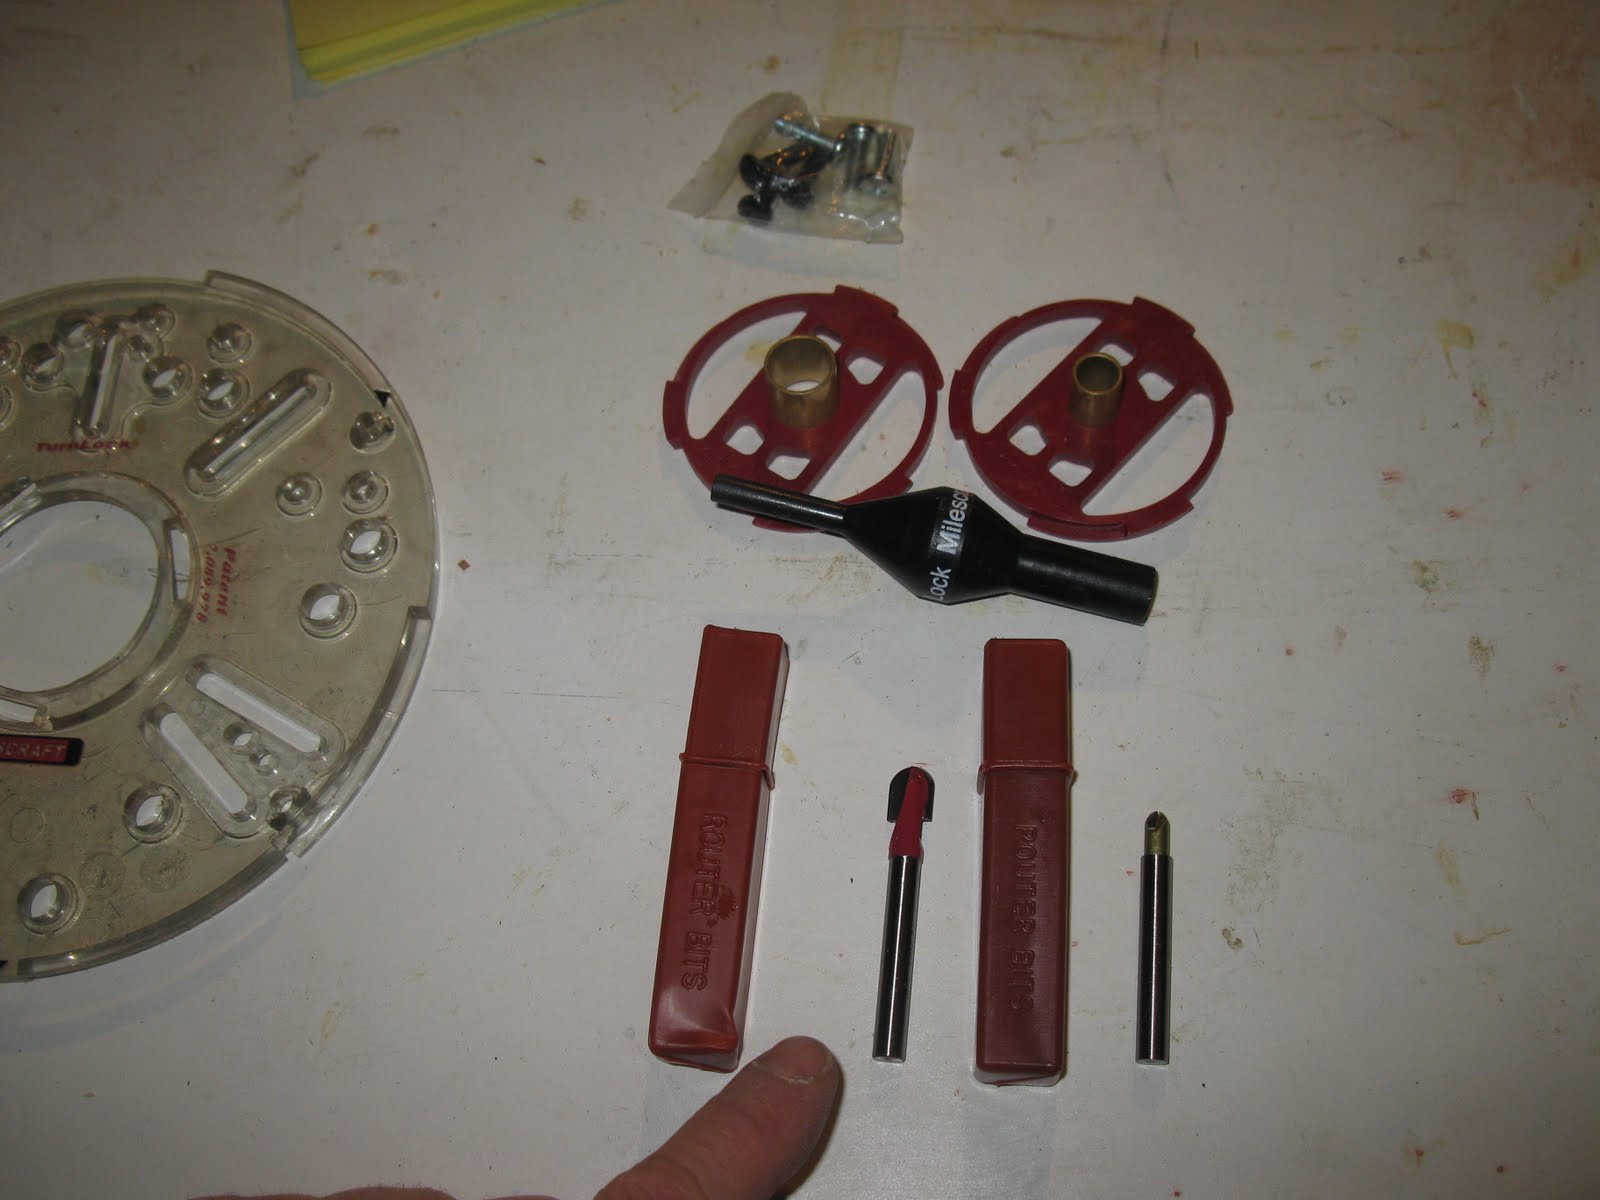
The clear plastic router base [upper left in photo] is designed with a slew of slots to easily mount to most routers. It easily mounted to the base of my Porter Cable plunge router. The turn-lock bushing [red] inserted easily as did the router bit.
Two easily applied rail extension clamps [photo below] allow the jig to be extended to allow for longer signs.

Letter and number templates are inserted into the rail slots to create the sign wording. No measuring is required. The templates are made out of a fairly a rigid plastic.
One nice feature is that this jig can be set up not only for traditional horizontal signs, but also vertical signage. Having a vertical option can be useful when routing numbers for mailbox posts and house address applications.
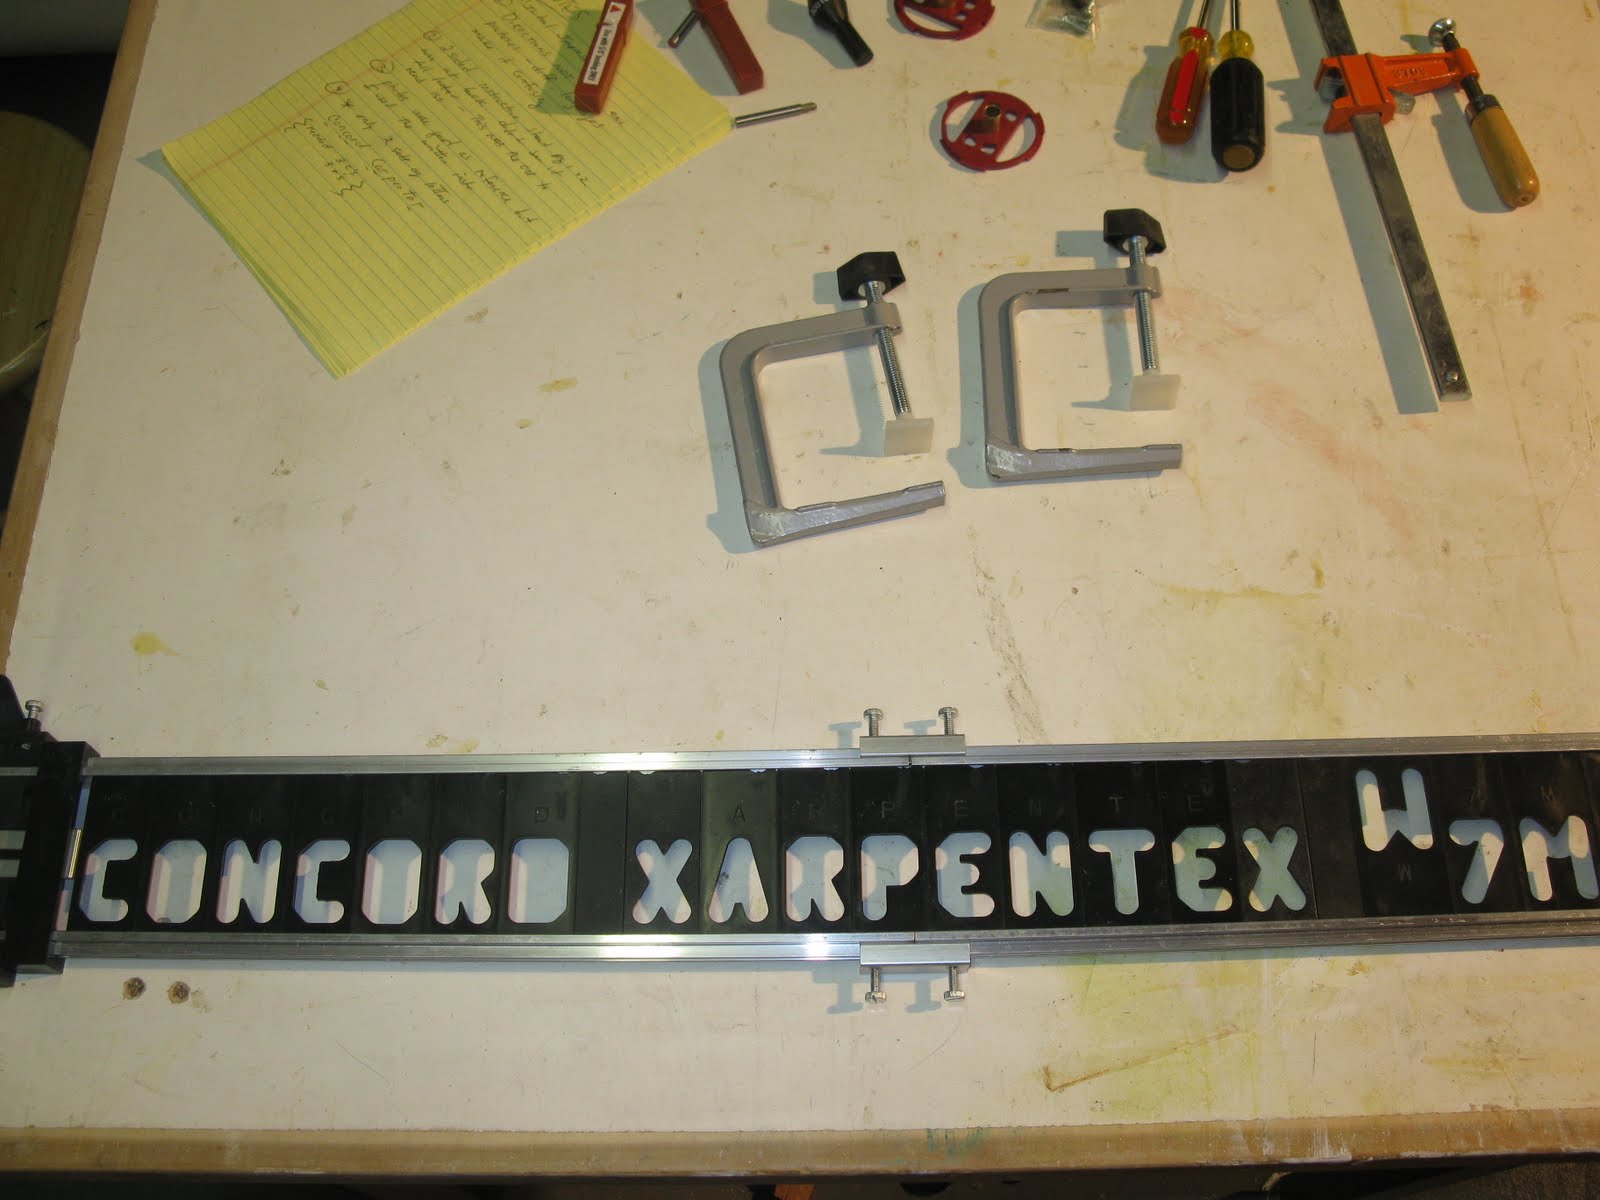
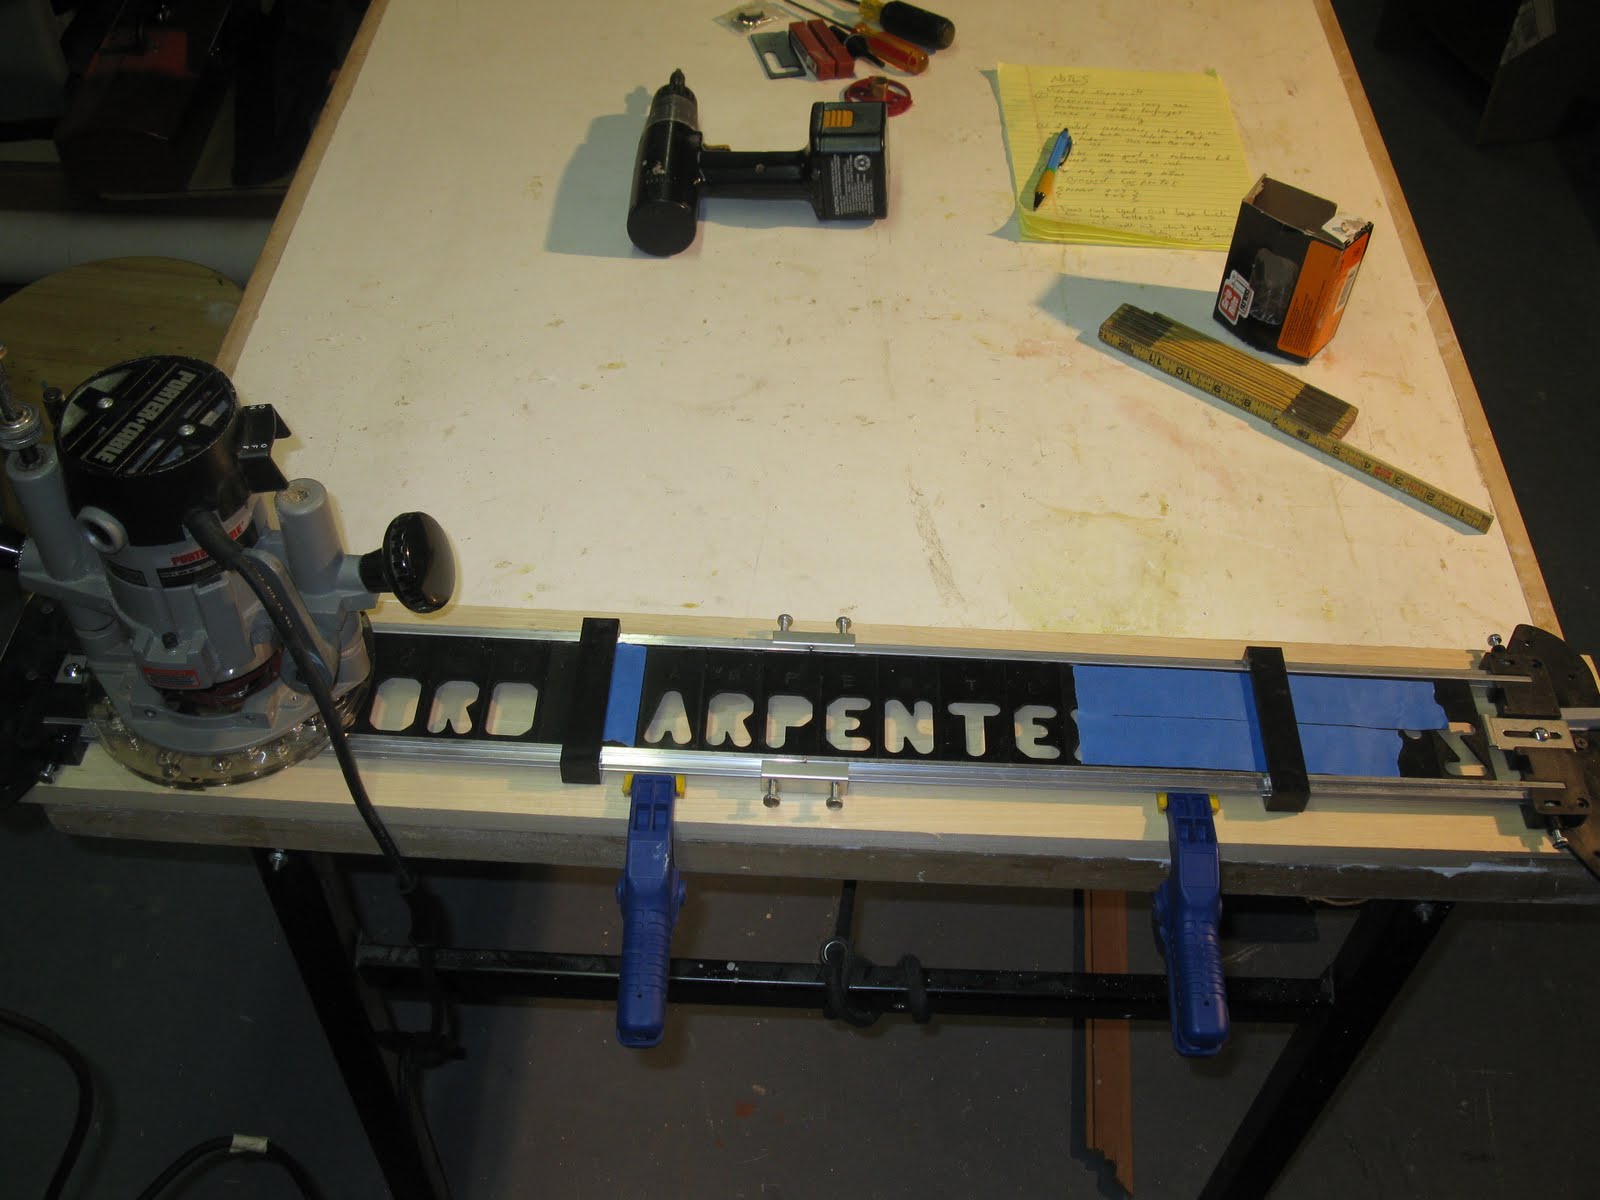
On my first sign I chose to rout “Concord Carpenter.” Milescraft offers additional accessories and letters on their website. The standard kit only has two sets of each letter so I had to use “X’s” to fill in for the third “C” and “R” in Concord Carpenter.
The “X’s” acted as spacers until I freed up (routed) one of the letters I needed in the template. [See photo below]
You will need to use extra letters to fill in such space on the jig – but it was not as big of a hassle as I thought it would be. [See “W7M” on the right photo, below]
The different size letters are shown below. The plastic letter templates are durable and seem strong enough to get many years of use.
The black plastic jigs end pieces easily adjust and allow the letters to fit snug and secure for routing in the jig.
I used blue tape to “remind myself” not to rout the “X’s” and filler letters. The blue tape also held the letters together when I slid them out to reach the “C” and “R” that were needed to replace the “X” in my sign.
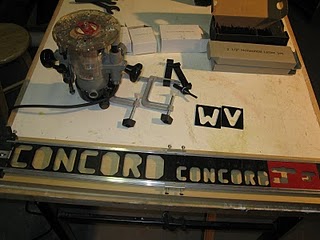
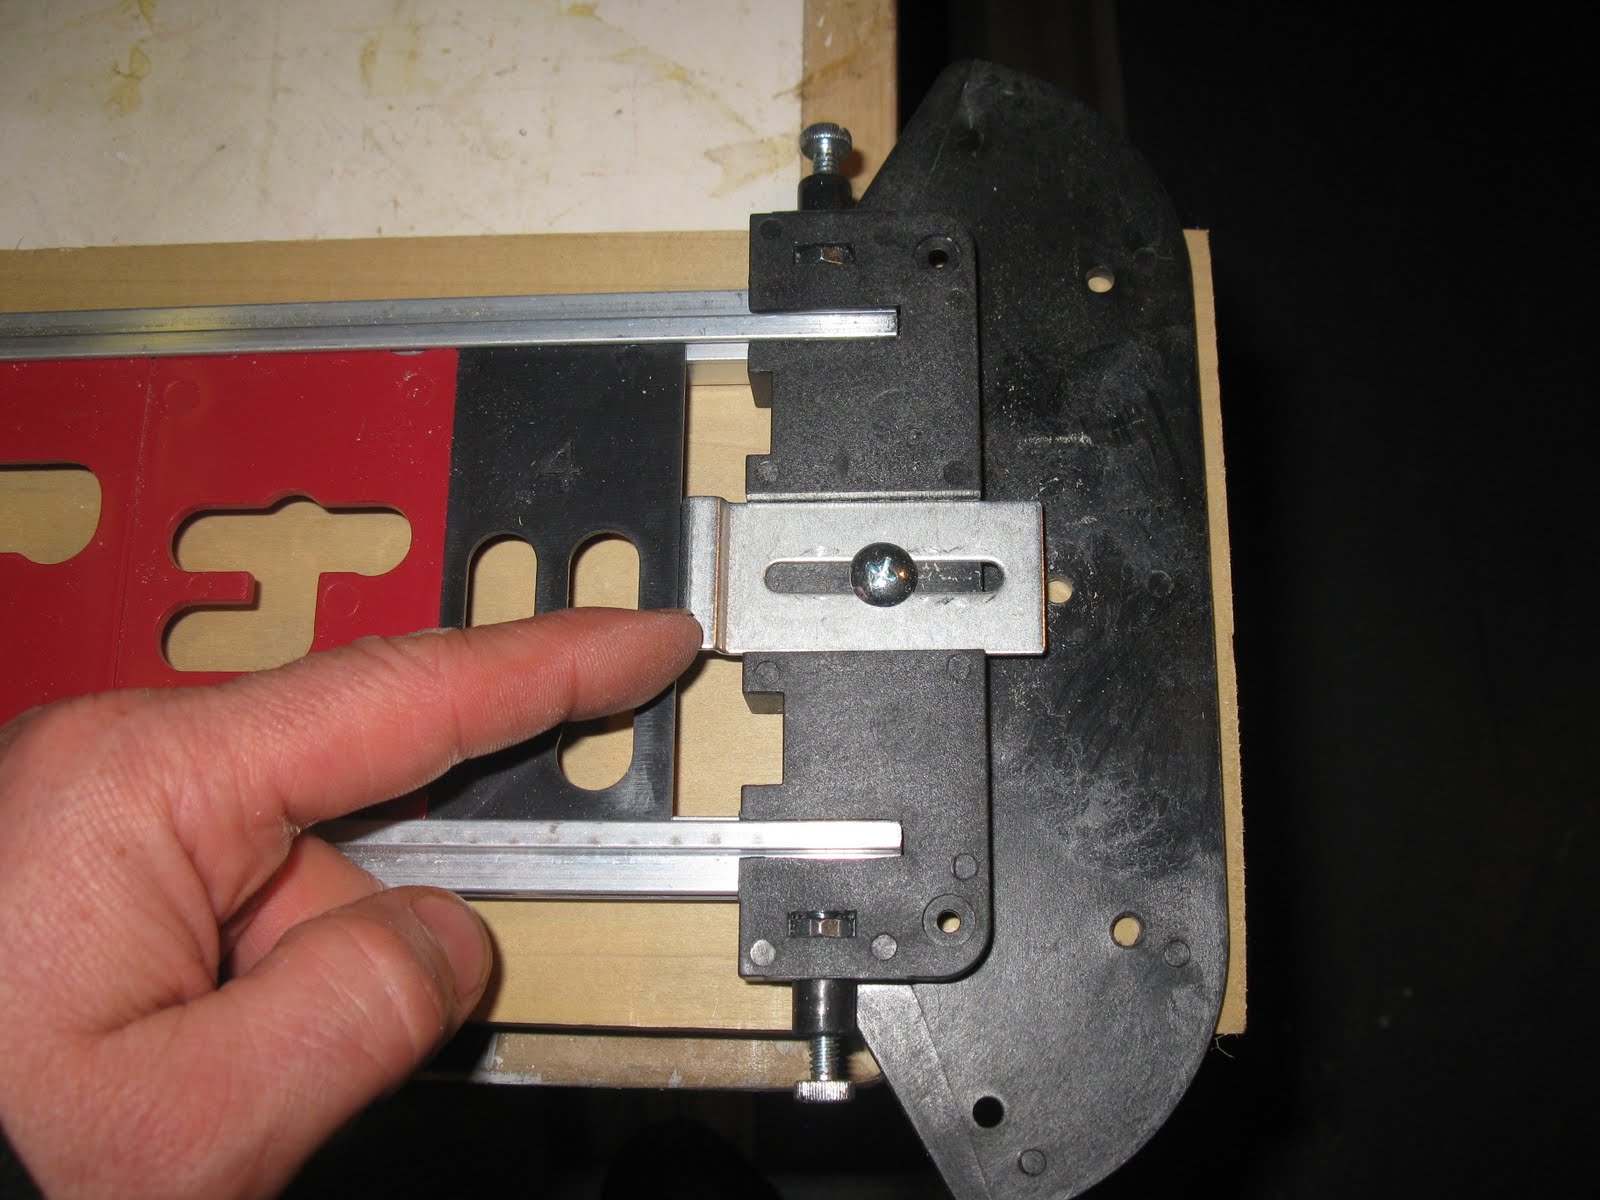
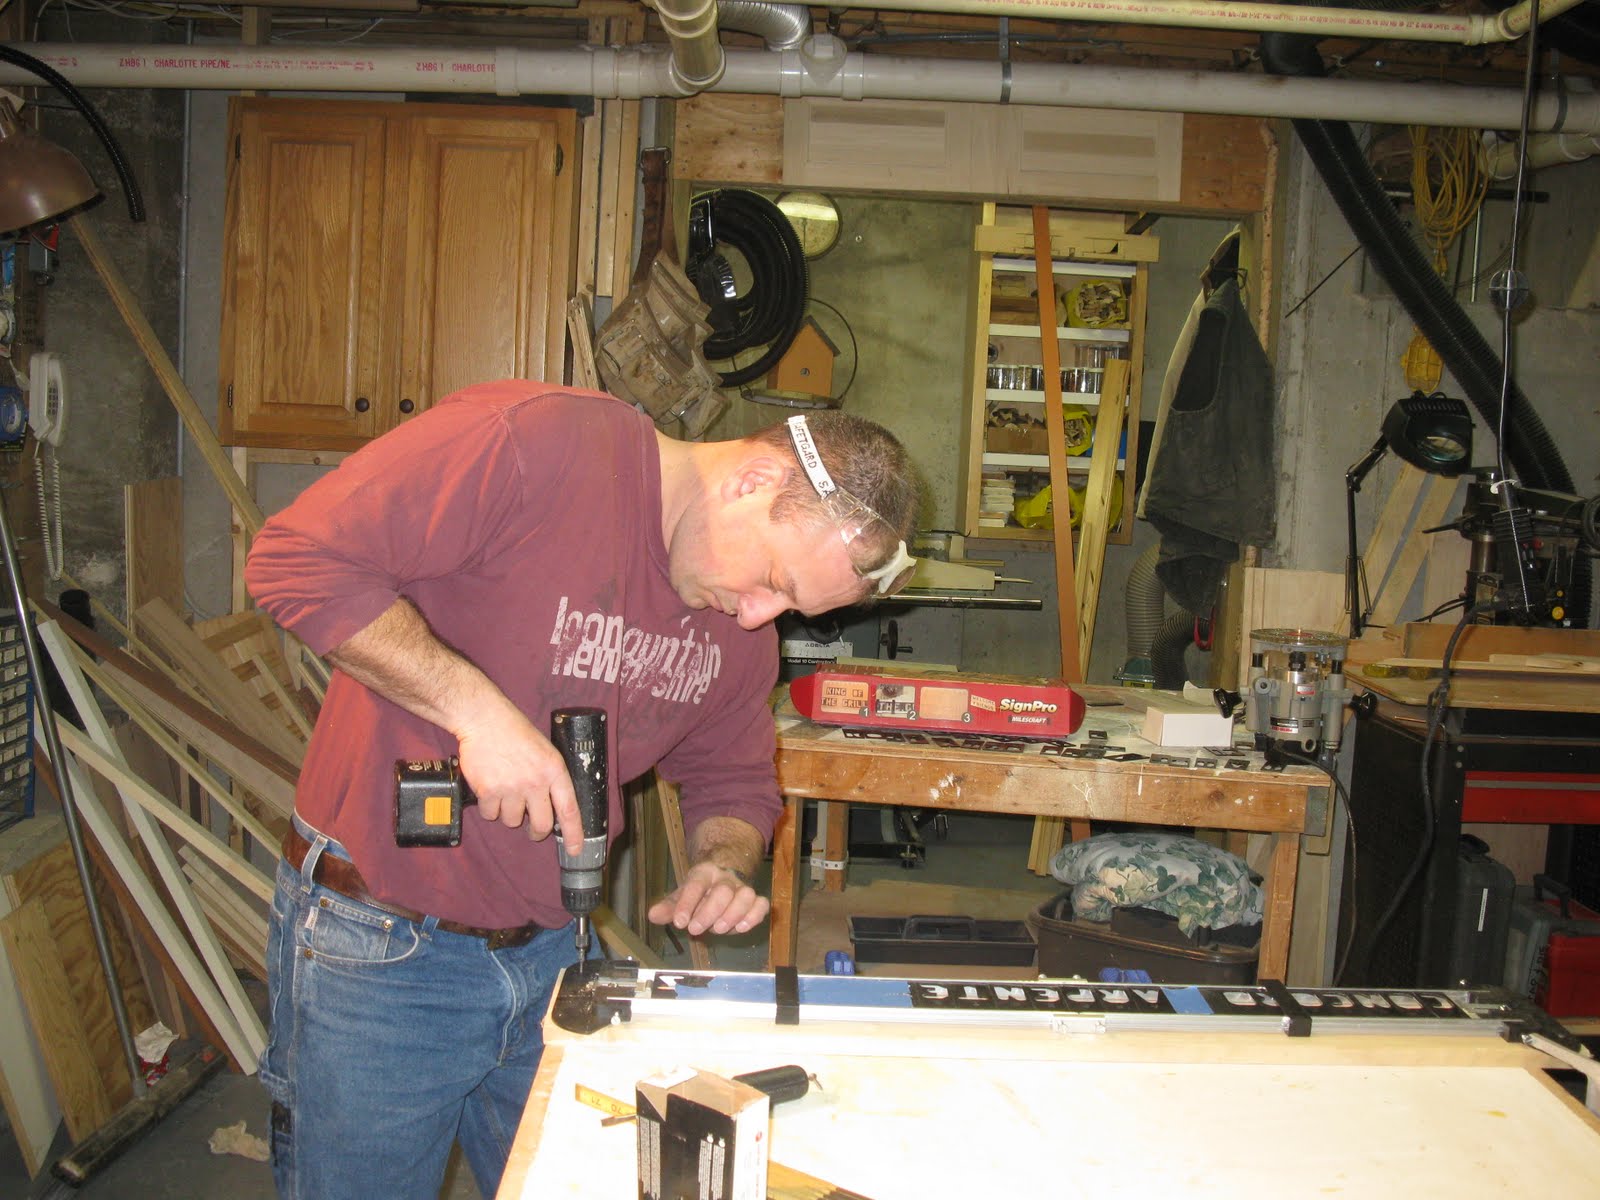
One minor issue I experienced with the Milescraft Sign Making Jig was trying to figure out what the two “support bridges” were for. [shown in photo below after the “D” in “Concord” and over the blue tape to the right].
The instructions didn’t mention what these two guides were supposed to do. But this issue was quickly resolved with a quick phone call to “Rita” at Milescraft customer service.
She explained that these bridges are used to help keep the aluminum letter rails from pulling apart and also can be used for clamping the middle section. Rita was pleasant, helpful and knowledgeable. The call to customer service was quick, worthwhile and easy.
I will say that these plastic bridges work “OK” but what I learned on my first sign, and recommend that you use an additional clamp in the middle of the jig – especially when using the extended rails for a longer sign.
What happened to me was that one of the letters in the center of the jig moved a bit and a routed letter was a bit distorted. [ I later learned from Milescraft that the plastic bridges can also be used to clamp the middle of the jig].
Ready to rout!
Although the jig comes with two nice low profile clamps it also has holes for screws. I chose to hold my jig down with two screws on each side. I chose a larger piece of wood to rout and will cut it down to size after routing. The screw holes will be cut off.
The instructions the kit comes with can be a bit confusing so I decided to “wing it.” Most users do this anyway.
It took me about fifteen to twenty minutes to figure out how to assemble and operate the jig. I routed my first sign in five minutes….. this could become addicting!
Later, I learned that Milescraft has an excellent video on Youtube. I’m a visual and hands on learner and had I viewed this video FIRST everything would have been much clearer and would have gone faster.
I highly recommend watching this video prior to using the jig, it’s an absolute must before putting the jig together.
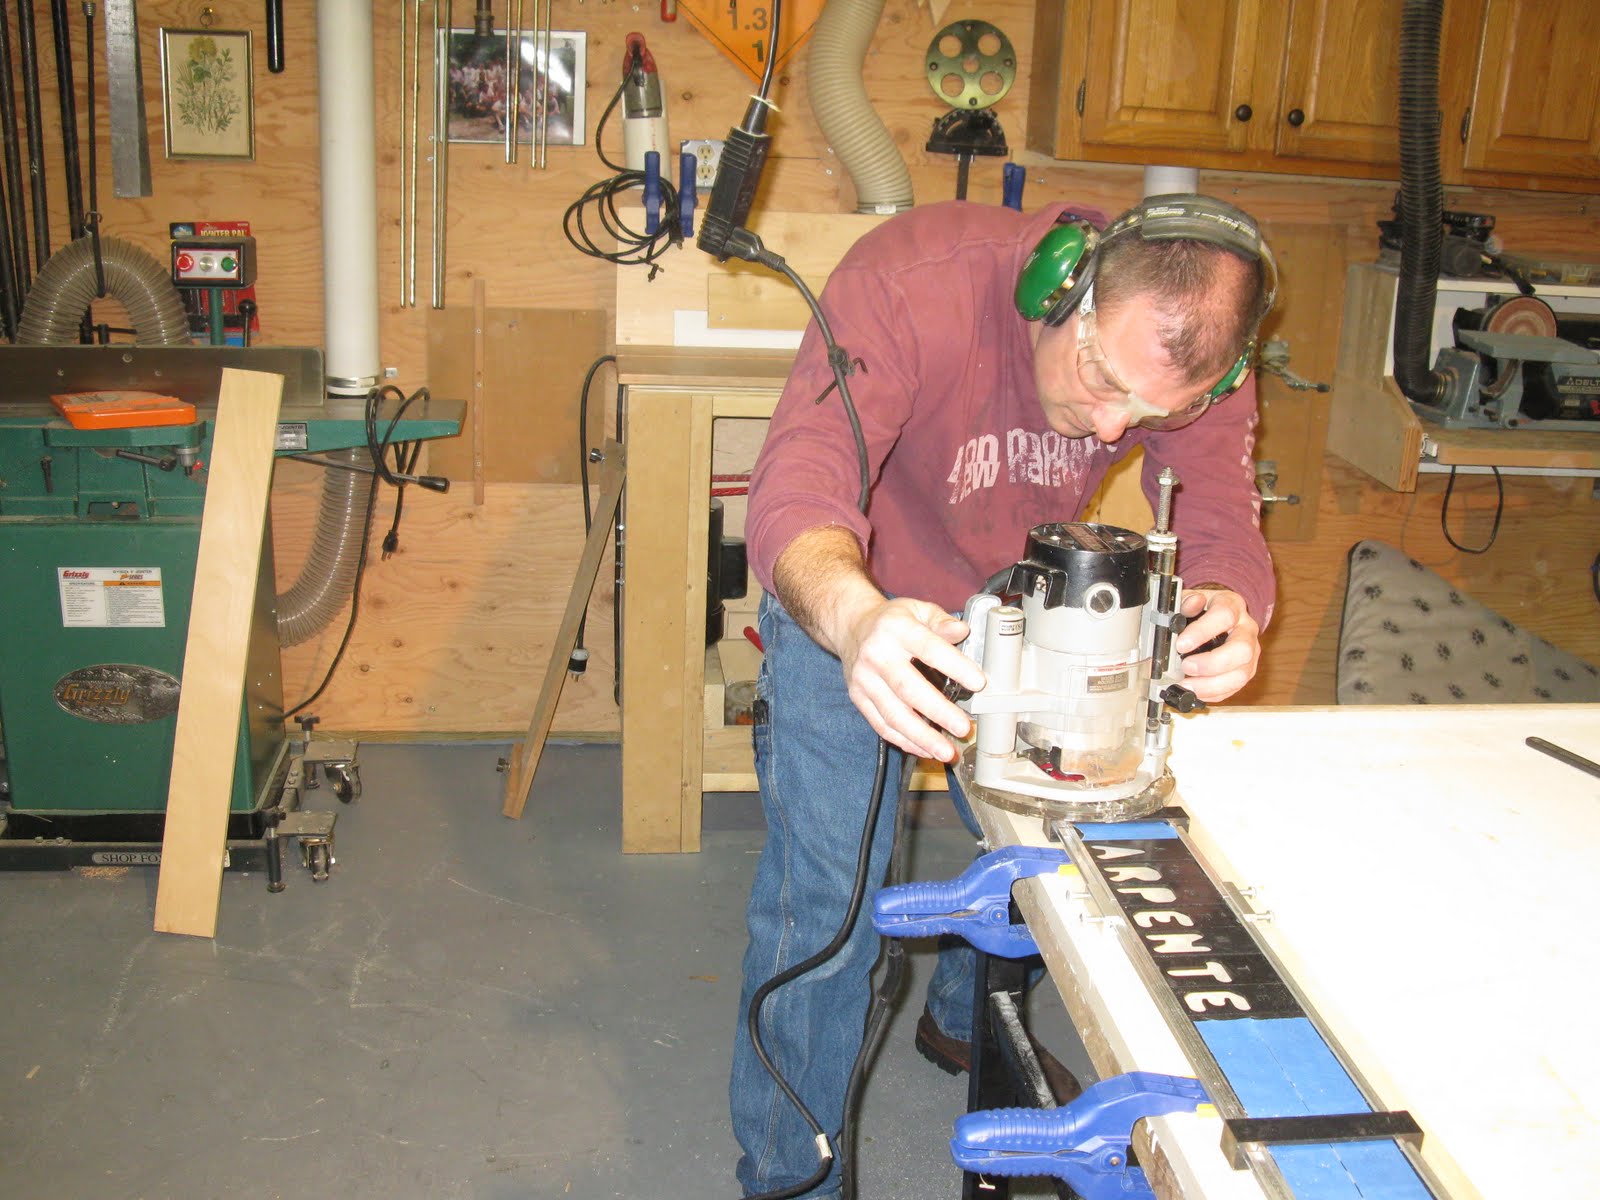
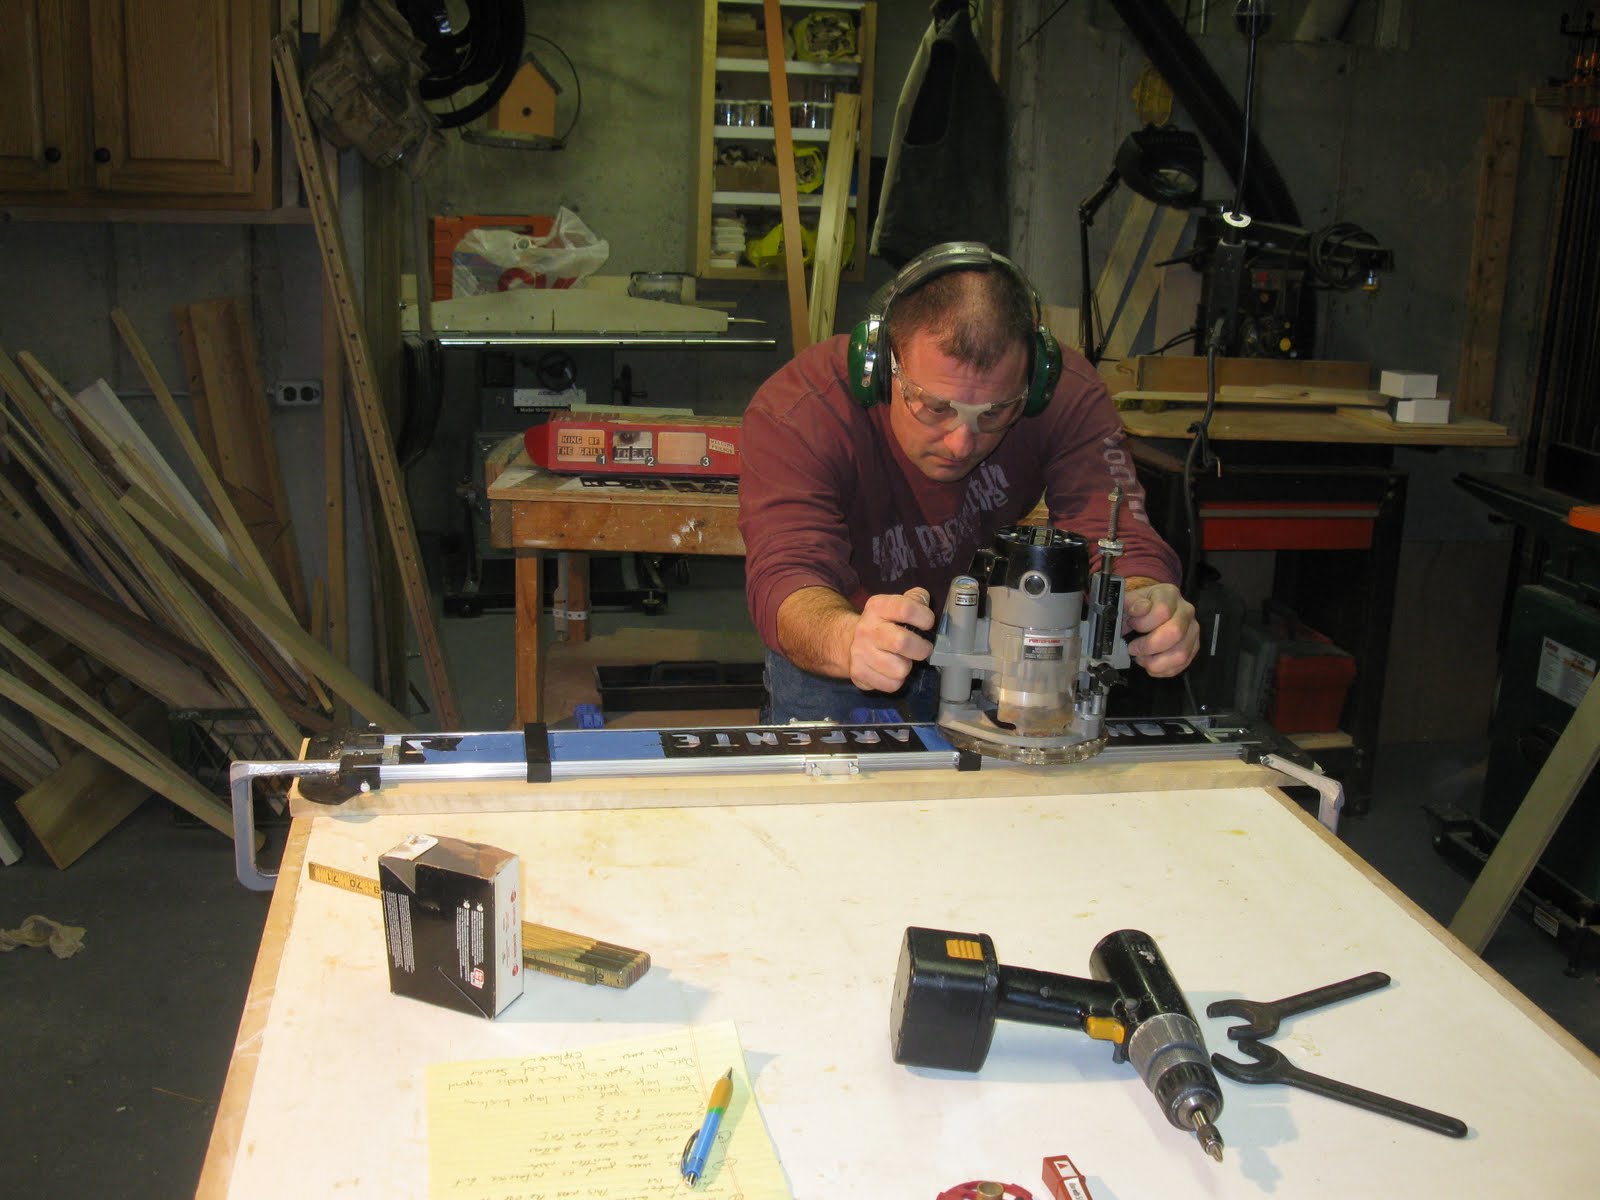
The router bushing easily followed the letter opening in the jig template. Super easy! Below is my first sign.
I mistakenly routed out the entire “O, A and R” out. This did not look right so I redid the sign.
This forced me to slow down and pay attention on the curves but I was soon making proper looking letters.

My second sign. The jig moved on me in the middle section of the jig, causing the “C” in Carpenter to be distorted.
This is how I discovered it is necessary to add a middle clamp. I remedied this by unscrewing the jig, sliding it over and re-routing the word “Carpenter.” Later I cut out the distorted “C.”
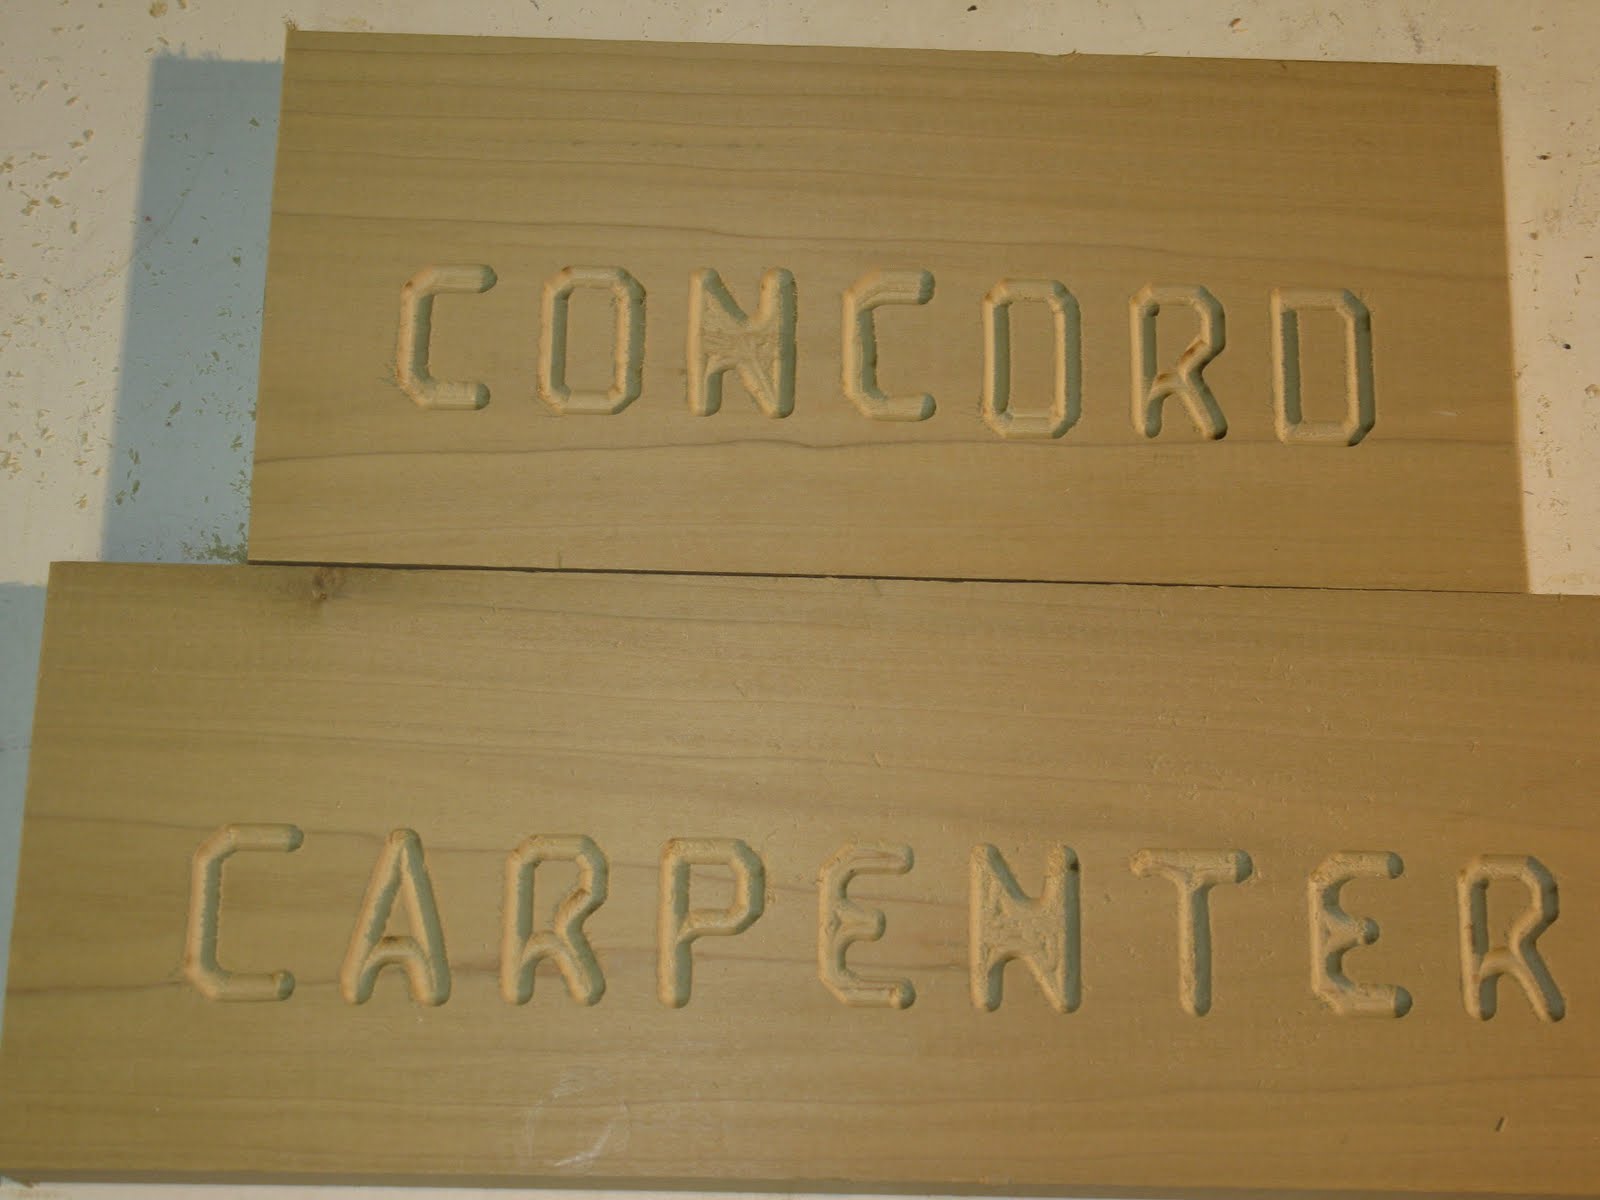
If this had been a sign I needed to make full length, I would have had to get a new wood blank and start over. Clamp the middle – lesson learned!
I used a small chisel to clean one spot I missed, I could have used the router but did not notice it until I had removed the jig.

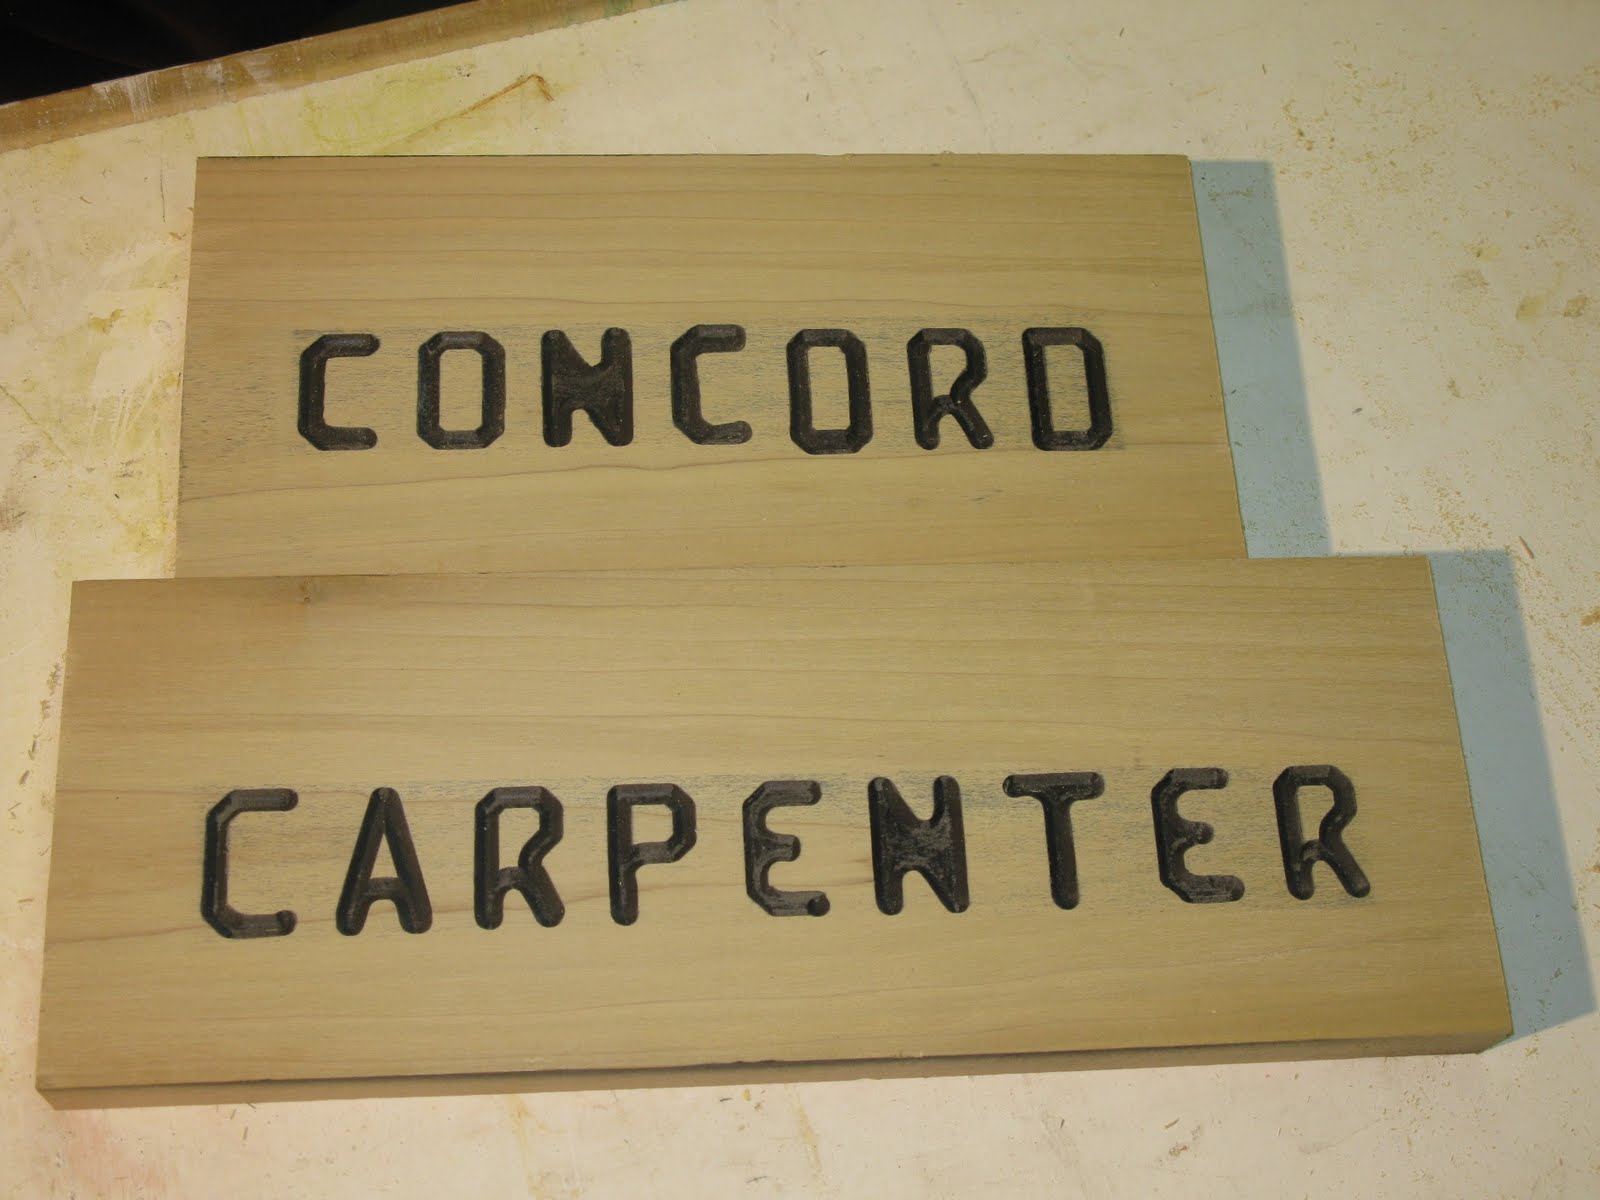
MILESCRAFT recommends sealing the sign and then painting the face of the sign. Sealing is important because once it’s dry belt sanding the sign face is recommended so that the letters stand out.
If you do not seal the wood your sanding is harder since the paint will be absorbed into the wood grain. Sign painted below! (I did not seal this sign face since it was only for the review).
I did use blue tape to cover the non-routed sections of the board. If you click to enlarge this photo you will see paint in the wood grain around the letters.
Once the sign is complete you can detail the sign edge’s by routing a decorative Roman Ogee or other nice edge detail, see below.
Routing the edges of the sign blank creates a nice finished look. My sign now hangs in the shop!

Bottom Line: From the construction of this tool to the attention to detail and ease of use, this jig performed wonderfully. It was easy to set up, adjust and use.
Personally I like it and can see anyone interested in making basic signs, numbering mailbox posts or making novelty gifts getting a lot of use from this jig.
You do need a router and I recommend using a 1-1/2 hp router.
If you’re a DIYer, hobbyist or just someone with a little common sense and basic ability to use tools this sign jig is a blast! I can see this jig being a huge hit with my kids for making gifts.
I now have a small back order from friends requesting signs for naming camps and cottages and labeling “DO NOT PARK” areas.
This MILESCRAFT Sign Pro Jig #1212 sells for less than $60.00 and can be purchased at a Amazon.com or other locations .

![]()