Installing Chair Rail Trim Question

Chair Rail Molding Installation:

Dear Concord Carpenter,
I have a question on installing chair rail trim.
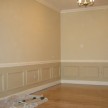
We have a formal dining room that I would like to install chair rail trim to the walls. I’ve been looking at molding styles and decided on a two piece, painted, chair rail. the top will be a 3/4″ x 1-2/2″ half round and the bottom a decorative flat window casing molding profile.
I have two questions:
1. How can I get my corners to stay tight?
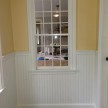
2. My molding will stop at the dining room entrance which has no casing. Its a plastered opening. Should I cut ends of the existing chair rail back at a 45° bevel with exposed end grain? I’m not sure how to end the chair rail here.
thanks Tom R, Concord, MA
Installing Chair Rail Trim
The get your corners tight you need to cope them. I always start with a piece of molding longer than I need. To cope inside corners I use a miter to back bevel [inside 45 degree cut] a piece of baseboard on the chop saw. Then I use a pencil to trace a dark line down the sharp edge of the cut. I do this so my old eyes can see where I’m cutting.
Using a coping saw, I carefully cut along the traced line, angling the saw back from the line and cutting in a 45 degree back angle. Doing this removes the molding material that will be in the way for the coped end to completely cover another piece of intersecting molding.
When installing chair rail trim make sure to dry fit your cut against the same profile molding and tweak the cut as needed by shaving material off with a utility knife or wood file or rasp.
Which piece gets the cope cut? I always choose the one that isn’t visually prominent. For example, their copes should follow the way someones eyes look into the room.
If your running a room full of trim its also just as easy to butt, cope, butt cope. until you get to an outside corner or terminate the molding.
When terminating the molding at the room entrance, you have three options:
1. Back bevel it like you mentioned:
This shows end grain and is sometimes needed to ease a sharp corner of a molding if it sticks too far into a room.
2. Cope the molding end:
In this case, you bevel the molding in the same fashion as an inside cope but don’t back cut it. Instead you make a square cut that follows the profile of the trim. This also shows end grain.
3. Miter the molding and return it to the wall:
In my opinion this is the best looking option when installing chair rail trim. Cut the chair rail molding to length, mitering the end at 45° outside corner miter. Miter the end of another piece of molding or scrap, then cut off only the mitered point on a miter saw.
Glue the mitered end of the chair rail to the longer end and nail through the molding close to the miter. Usually nailing this close to the miter is all you need to hold it in place until the glue dries. Occasionally you need to use a brad nailer or pin nailer to also fasten the mitered piece to the longer molding.
Try to install your chair rail in full lengths to prevent joints. If you must insert a joint use a scarf joint: which is a mitered end lapped with another mitered end. Cut the pieces so that you’re laying the second piece over the first, not tucking it behind the first, to make fitting the second piece easier. Fasten, glue and sand these joints well.
Hope this helps.
RELATED POSTS:
How To Install And Layout Wall Molding
Installing Molding To A Curved Wall