How To Install Wood Plugs

How to install wood plugs in railings
When I see a project where the carpenter took the time and effort to install wood plugs I automatically thing “quality.” This article will show you how to install wood plugs in railings and anything else for that matter.
Wood Railings and Plugs
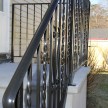
As a carpenter I’ve seen wood railings installed with screws and nails. Typically the railing is fastened to the post by toe-nailing or installing screws at an angle.
When nails are 16-penny nails are installed in a toe-nailing fashion it is usually easy to fill the nail holes, but not so easy with screws. Adding to this dilemma is natural or stain grade material and using a wood filler to hide you faster is not an option. That’s where wood plugs come in.
Wood Plugs
Simply put a wood plug is a slightly tapered round peg that is installed in a slightly in a pre-drilled hole. The plug is installed with glue and care is used to orient the wood grain of the plug in the same direction as the railing or material being plugged. The plug is then trimmed and sanded flush.
Wood plugs scream quality and allow you to hide fasteners without the need for fillers or the worry of the filler not matching your work. Sometimes carpenters use a darker wood to accentuate the plugs adding an interesting contrasting look to their installation.
Wood plugs an be used anywhere screws are installed in wood. As a remodeling carpenter I typically use them in wood floor threshold, railings, bookcase, cabinetry installations and more recently in pvc decking and trim applications.
How To Install Wood Plugs
In order to make your own wood plugs you will need the following tools:
- Material to make wood plugs out of
- Countersink
- Wood Plug cutter [same size as countersink]
- Drill bit sized for fastener
- Fastener and bit
- Drill and driver
- Glue
- Flush saw, block plane or sharp chisel
- Sand paper
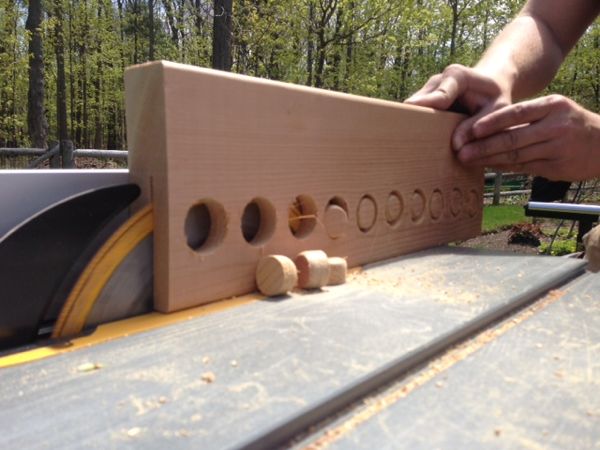
Cut Plugs
The first step is to cut your plugs. Cutting the plugs involves using a plug cutter sized to the application you need. You can us a drill or a drill press to cut your plugs. A drill press gives you more accuracy and control but if you are on a job-site a drill works fine too.
Drill a series of plugs in the materials you have chosen. I typically cut several more plugs than needed.
After cutting the plugs you can use a small chisel or flat head screw driver and break them off and out of their hole or if you have access to a table saw cut them out for more uniform plug [See photo]
TIP: If you break the plug out manually orient the screwdriver in line with the grain of the wood.
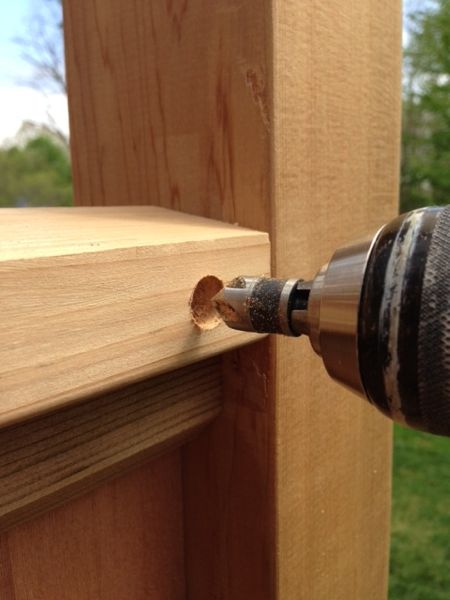
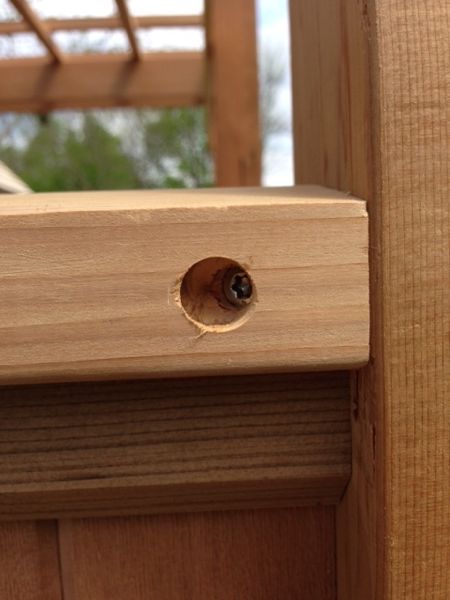
Drill Plug Hole
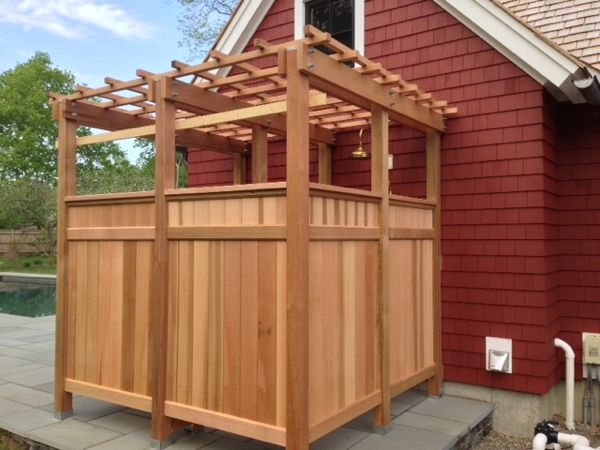
Use your counter sink bit to drill a ½ inch deep hole in the material to be plugged. Drill straight in, keeping the drill bit perpendicular to the material.
If you are installing railings I suggest drilling this hole 1-inch or more away from the railing end. The plug does not get installed at an angle – only the fastener.
Pre-Drill and Install Fastener
Using a drill bit the same size as your fastener shaft [not the screw threads] diameter drill a hole in your material to be fastened.
With a railing this pre-drilled hole must be at an angle in order to install your screw through the railing and into the post. Use care not to touch the countersink hole rim with your drill cuck. This could damage the rim and be visible after the plug is installed.
TIP: for a railing installation, install plug on both sides of the railing at the post.
Install the fastener into pre-drilled hole and secure in place.
Install Plug
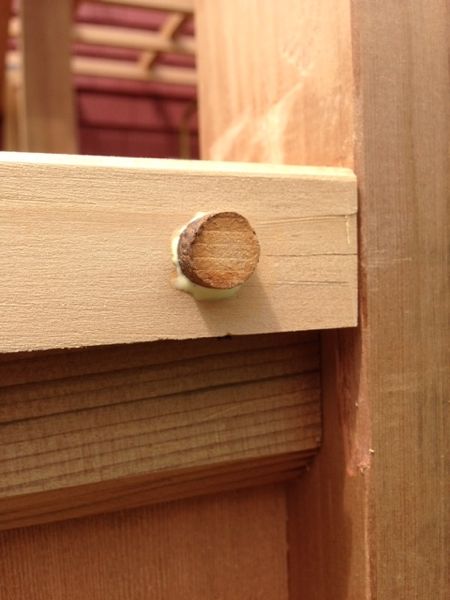
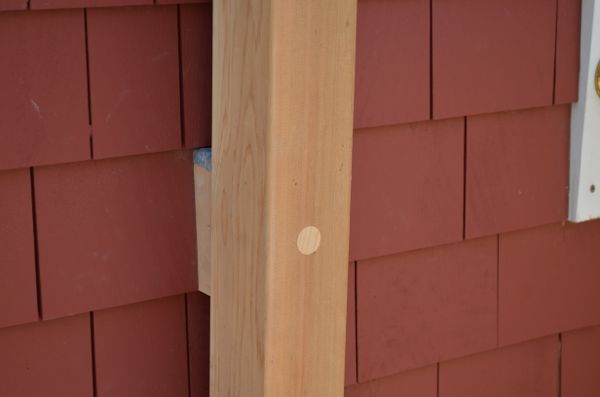
Place some wood glue around the plug edge and install into your counter sunk hole. And align your plug grain with the wood grain in the material being plugged.
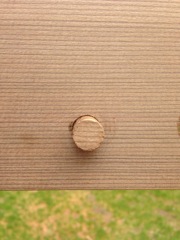
Use a hammer and lightly tap the plug into the hole until it bottoms out. Allow glue to dry. You plug should be protruding from the surface of the material plugged.
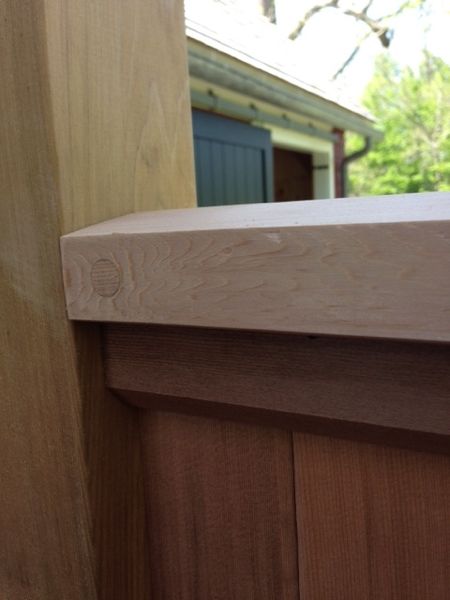
Trim Plug
There are several ways to trim the plug. They are:
• Use a flush cutting saw and then finish it off with a sharp chisel
• Use a block plane and shave plug flush
• Use a chisel to pare down the plug and flush it off, sanding afterward. Tap chisel gently with a hammer or mallet.
Whichever method you choose you take care not to gouge material plugged. Block plane or chisel the plug in line with the grain lines.
Sand Plug Flush
Use a block of wood and some sand paper to flush the plug.
If done properly you will have a complete and finished looking installation that screams quality and thoughtful installation.