How To Install A Decorative Cupola

 Installing A Cupola
I love Cupolas, this article will show you how to How to install a decorative cupola. In my neck of the woods all barns worthy of their salt have a functional cupola an most of them.
I had the opportunity to rebuild an 80 to 100 year old cupola in historic Concord, Ma center and have since repairs a several other cupolas.
 What Is A Cupola?
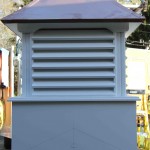
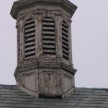
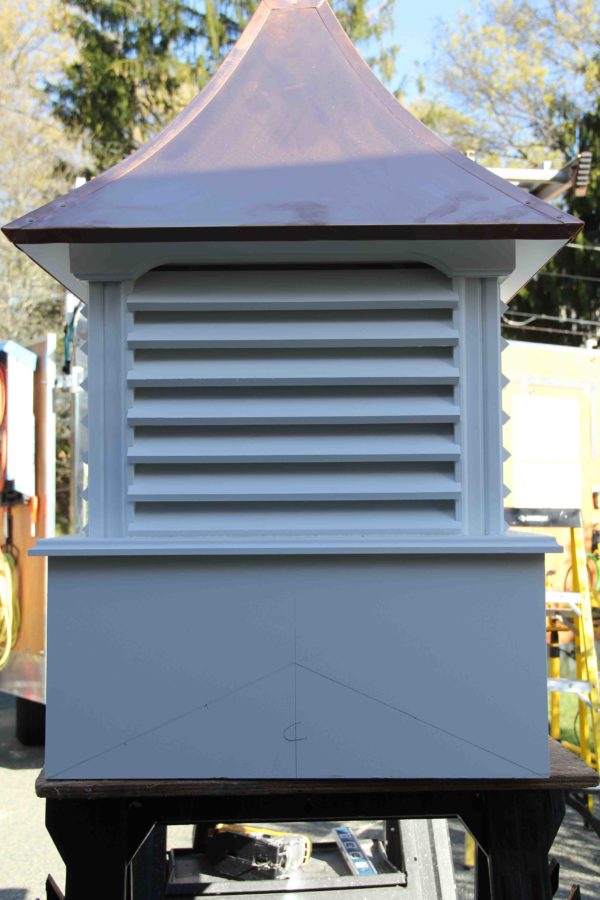
A cupola can be decorative or functional architectural structures mounted on top of homes and barns and usually centered along the roof ridge line. When functional a cupola is used to ventilate a building or roof area and they are often made from wood, copper or composite materials. They often come in one piece or if larger two or three pieces.
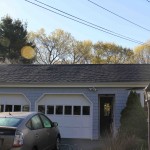
The cupola in this installation is from a company called Walpole Woodworkers.
Cupolas have three sections:
- base
- louver vents or windows
- finial or weather vane
How To Install A Decorative Cupola
A decorative cupola differs from a functional cupola in that the roofing material and roof sheathing does not need to be cut away to create a vent hole. these types of cupolas should be installed with step flashing to prevent leaks.
Cupola Install Materials Needed:
- Pencil
- 30 foot Tape measure
- Utility knife
- Level
- Jig saw or hand saw
- Drill with 1/8″ pilot bit
- Drill driver or screw driver
- 2-1/2″ stainless screws and 4″ structural screws.
- Two 24″ pieces of pine or strapping and a screw to make a roof angle finder
- Exterior wood putty or plugs
- Silicone caulking and caulking gun
- Touch up paint
- Roofing nails and roofing caulk
- 2×4 material for mounting to roof sheathing
- Cupola and weather vane if applicable
 Decorative Cupola Installation Steps
Locate the Cupola location:
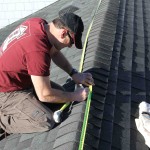
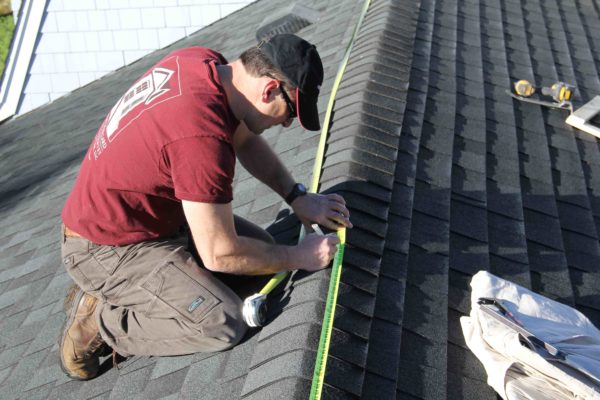
Measure and mark the center of where the cupola will be installed. If the roof is longer than your tape measure pull two tape measures from opposite ends and determine where the center of the two opposing tapes meet. Measure left and right to determine the outer sides of the cupola. Remove only the roof ridge shines. I cut the center shingle out and then use a nail puller [cat’s paw] or a flat bar to remove the roofing nails and ridge cap shingles. The goal is to try to remove them in one piece so you can use them later for patching, if needed.
Cut and remove ONLY the ridge shingles and / or ridge vent up to the outer edge of where the cupola will sit. You may need to use the utility knife to trim the shingles back. Use care not to expose the roof sheathing. If you do you will need to patch this spot with Vycor rubber flashing tape or flashing and shingles to prevent water intrusion.

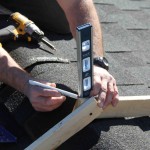
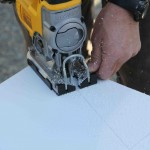
Determine the Roof Pitch:
On the ground insert one screw into the ends of the two 24 inch pieces of wood to make a hinge tool to copy the roof pitch.
Bring this bevel up on the roof and lay it over the area where you removed the ridge shingles. Insure that the angle finder is pressed tightly to the shingles and then insert a second screw to lock in and hold the angle in place. Once this is complete use a level to mark a plumb line in the center of your ridge and onto your angle finder. This plumb line will be your top reference line when tracing the cupola. Bring your angle finder off the roof to the cupola to be installed.
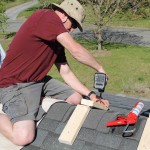
Mark The Cupola Base:
Determine which sides will be the front and back of your cupola. Measure and draw a center-line on the two opposing bases on your cupola. This is the two sides that will straddle the roof ridge. Using your angle finder line up your plumb line on the center line and ensure that the bottom legs of your angle finder line up at the lower corners of the cupola. Doing this will ensure an accurate and symmetrical cutout. Mark both sides of the cupola the same way and use a saw to cut out the angle along your marked lines. If you have a steep roof, greater than 9-12 pitch you may need to install an extended base.
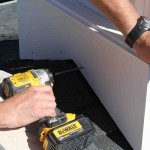
 Install Mounting Boards:
Mount four sections of 2×4 blocks on in from your outside exposed edge of your cupola. Pre drill your holes in the block and apply silicone to the bottom of the block prior to attaching it to your roofing. Mount all four blocks to the roof sheathing and try to get the top fasteners into the ridge board.

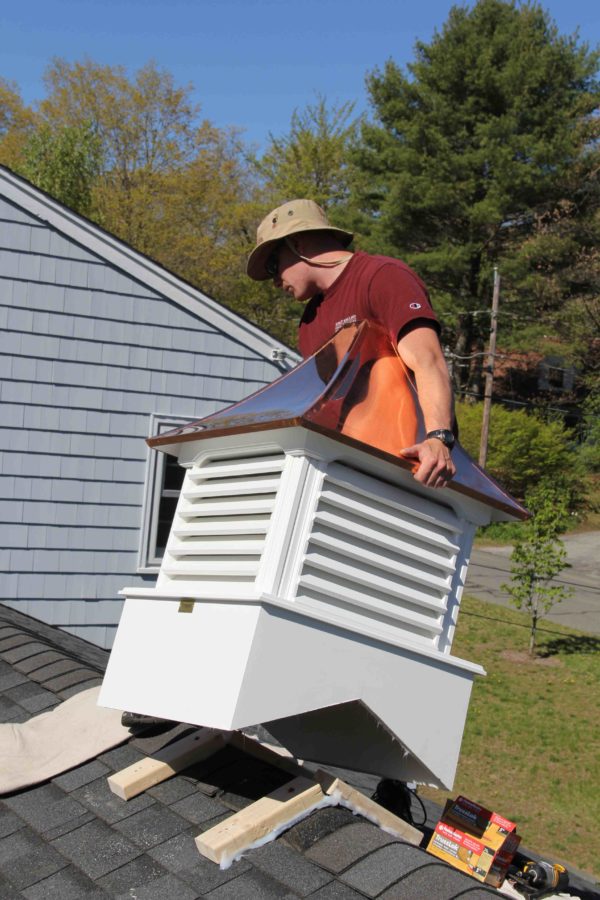
Position The Cupola On The Roof:
Once you are satisfied with the fit on the roof attache the cupola with two to three stainless steel screws into each mounting block. Plug or patch the screw holes. On PVC cupolas I use the Cortex screw and plug system
Apply silicone only to the seams that straddle the ridge and are fastened to the mounting blocks. This will keep angled water from getting under your cupola and getting to your mounting blocks. Leave the lower pitches roof edges open to drain any wind driven snow or moisture that may make its way under the louvers. Use the ridge shingles that you removed, if in good condition, to make any additional patches or to cover and roofing you removed.