How To Apply Thin Veneer Edge Banding

Applying Thin Wood Veneer Edge Tape
This article will address how to apply thin veneer edge banding in the form of iron on veneer tape.
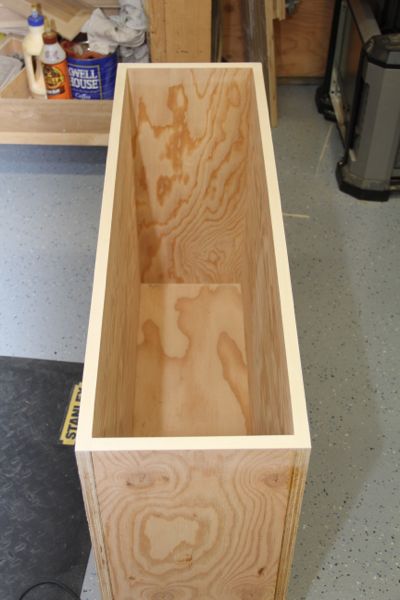
Veneer tape is a pre-sanded, ultra thin layer of wood or other material that is attached to the edge of plywood in order to make it look like a solid piece of wood. Common uses are for furniture and cabinetry.
The veneer edge banding tape we use has a heat-sensitive glue backing and applies quickly with an iron. Using veneer edge banding results in a clean and solid-wood look and is a fairly easy to do project.
Veneer Is Not New
Veneer production has been around for more than 4000 years and was used by the Egyptians. In Egypt, wood was a valued and scarce raw material.
In order to maximize the wood they had, the Egyptians cut logs into very thin boards. Later in the 19th century, new processing methods were developed where sawing lumber was replaced by slicing knives resulting in thin veneer.
Types of Edge Banding
Veneer tape is one way to apply and edge band to cover exposed edges of plywood wood. There are several approaches, all with different results and applications, they are:
- Veneer tape
- Solid edge banding [thin strip]
- Solid edge banding [Thick – allows a routed edge profile]
- Over-sized edge-banding or nosing
- Solid joinery
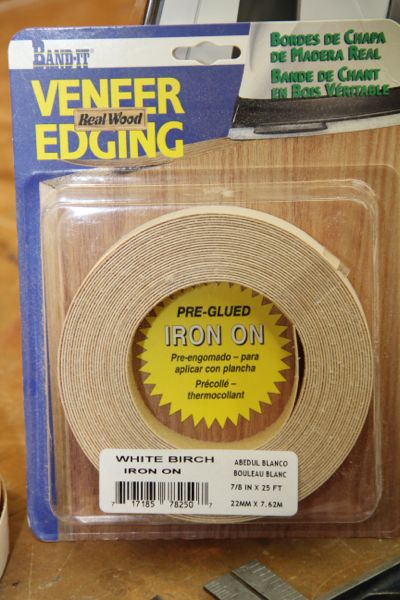
Thin Veneer Edge Tape
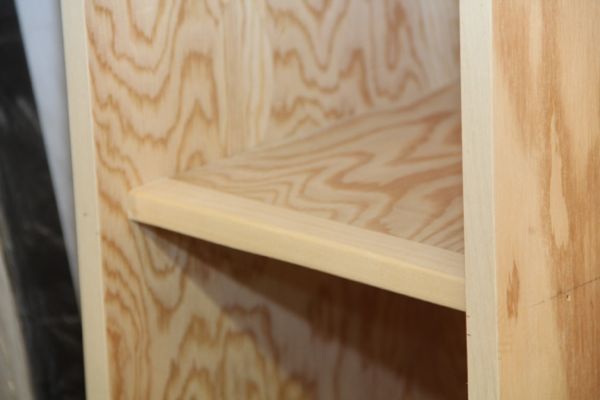
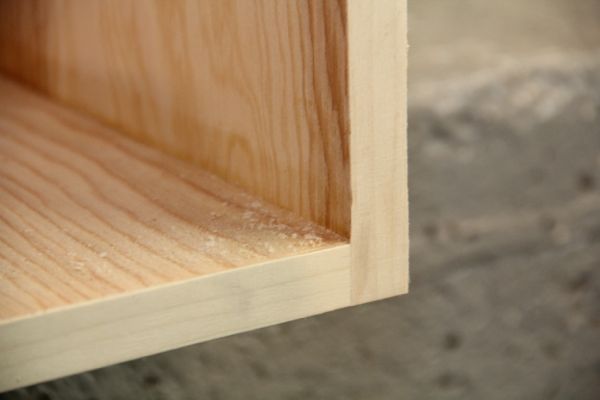
Real wood edge banding comes in several sizes and species of wood. The 7/8″ edge banding is ideal for 3/4″ thick plywood or veneered panels because it allows a bit of overhang and makes it easy to trim flush with an edge-trimming tool.
Veneer edge tape is impregnated with a high-speed hot-melt glue that creates a permanent bond once heated. They also are pre-sanded and readily accept stains and finishes.
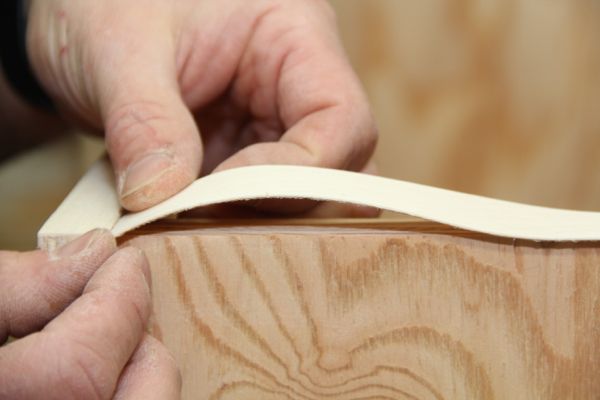
This veneer edge tape, is typically applied with an iron. I prefer to use furniture grade birch tape that’s slightly oversize, like 25/32 or 13/16 inch. By installing a slightly over-sized tape you can trim it to an exact fit.
When applied properly veneer edge tape will look like a solid wood board.
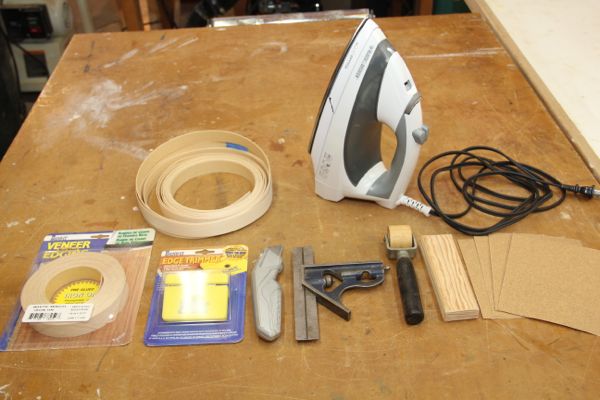
What You Will Need
- Veneer tape
- Iron [household type is fine]
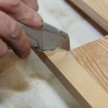
- Utility knife or edge trimmer
- Cabinet scraper can be helpful
- Square
- Sand paper [150 grit]
How To Apply Thin Veneer Edge Banding
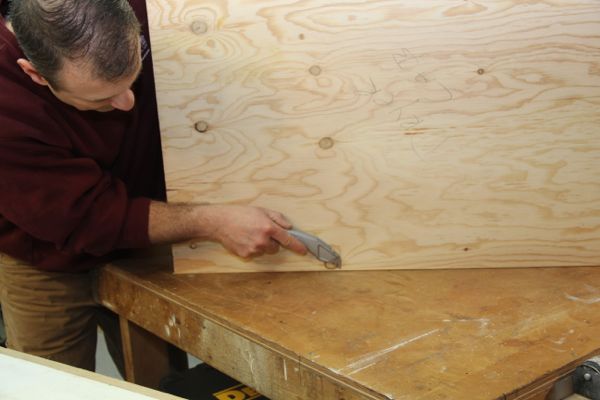
- Prepare your surface edge. Fill any large holes, sand rough spots and remove all sawdust.
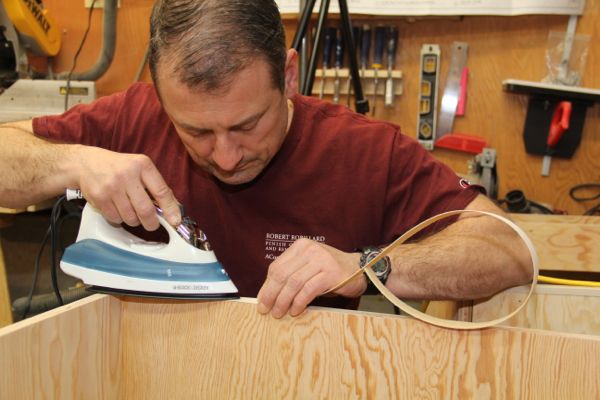
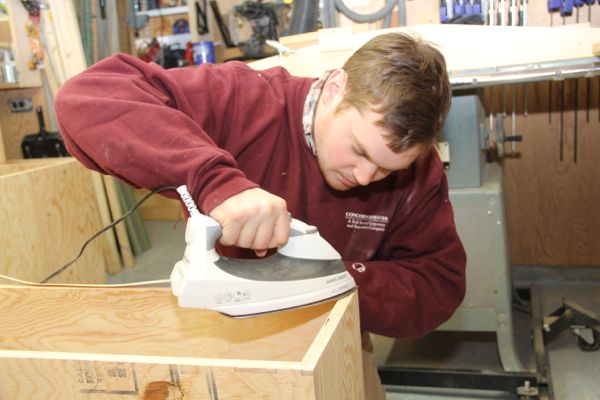
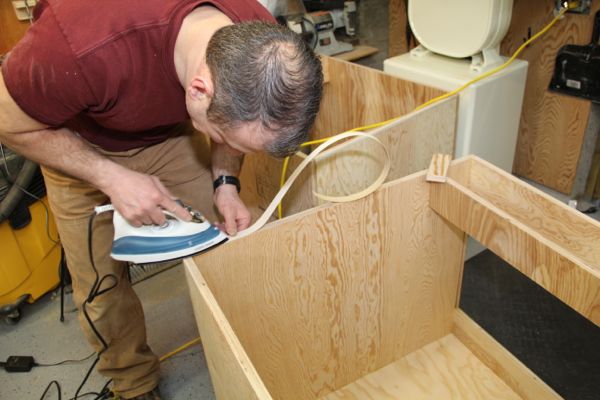
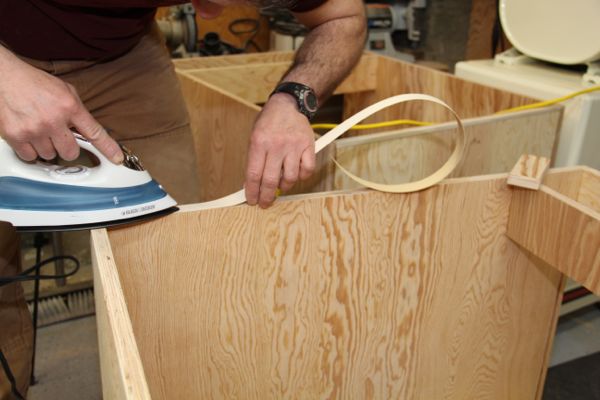
- Heat your iron to just shy of the hottest setting. Use care with placement of the iron while not using it.
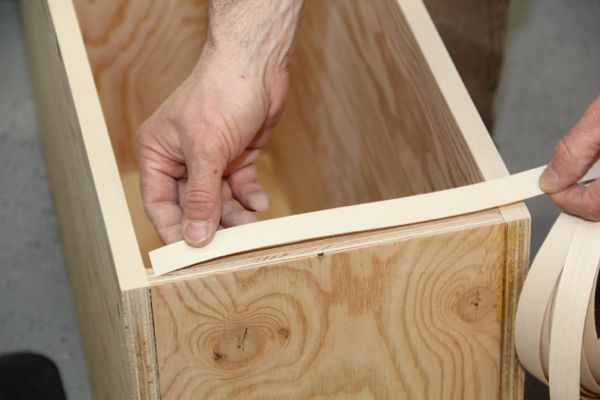
- Cut a section of tape 1-inch longer than needed.
- Using a square and a utility knife square off your starting edge.
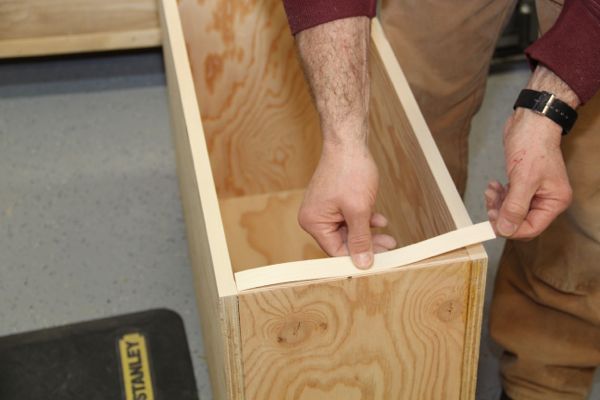
- Position the squared edge on the edge of your plywood or other substrate and smooth it with a few passes of an iron.
- Heat only 6-inches at a time with the iron.
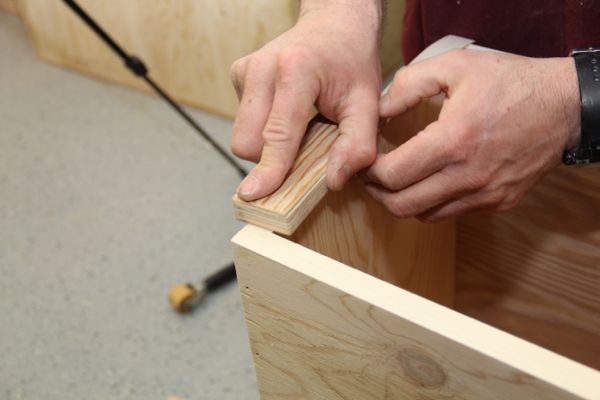
- While the the edging is still hot , use a roller or smooth block of wood to firmly press down the heated section of veneer tape. Go back and forth working the tape glue in.
- Repeat this process until you get to a few inches of the end of tape.
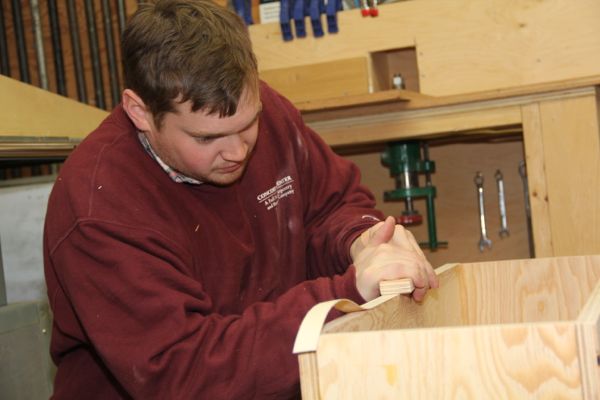
- Use a square and utility knife to cut the end of the tape to fit.
- Iron and press tape
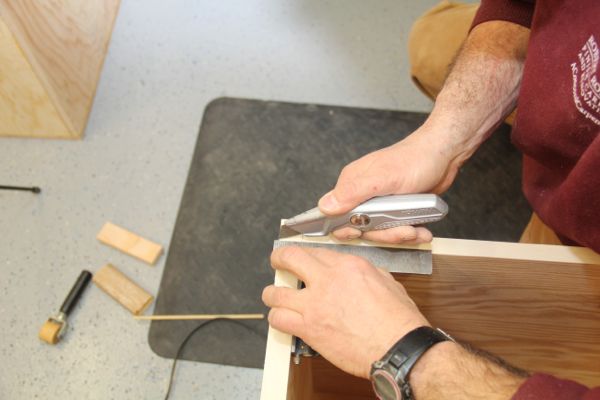
- Allow the veneer to cool then trim excess width and length with a utility knife.
- Sand smooth.
Tip: Apply your over-sized width tap flush to one side. This will eliminate you needing to trim both sides of the edge after the tape is installed.
Tip: Place the material upside down and cut on a wood bench. If access is difficult, as in a large bookcase, use a block of wood as a backer for your knife or an edge trimmer. I prefer using the wood block trimming method.
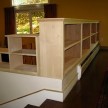
Applying Intersecting Veneer Tape
With built in cabinetry and furniture many times you often have vertical and horizontal areas needing edge tape. I always install the long lengths, usually vertical, first and then work on the perpendicular edges.
The steps are similar to above with a few additional tips:
- Cut a longer than needed strip
- Square up your starting end and but it tightly to the pre-installed veneer edge tape
- Heat and roll or press toward the new joint. This ensures that the edging does not slip away and create an unsightly or open seam between the two
- Heat and roll your tape till you get approximately 3-4-inches from the end.
- Do not heat these last few inches yet.
- Square and cut your end approximately 1/64 longer than the seam.
- Bow up your tape and tuck your seam tight to the edge of the already installed veneer tape. Push the tape down, the additional length ensures a super tight fitting seam.
- Iron and press the tape down to complete the glue installation.
- Trim and cabinet scrape edges.
- Hand sand edges.
Tip: slightly cant your sanding block to smooth edges.


-

- Veneer


-

- Applying veneer