How to Build a Hot-Box

Keep Caulking and Glues From Freezing
How do you keep your caulking, glue, drywall mud and paint from freezing? It’s starting to get cold here in Concord, MA and it’s the time of year when yoIf you’re like me, you bring in my caulking and glue to protect them from freezing. At the end of a long day, the last thing you want to do is unload more crap just so you can reload it again in the morning. Starting to seem like the movie groundhog day! I needed a Hot Box!
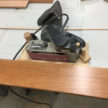
My Early Version of a Hot Box
A hot box is basically an insulted box with a heat source to keep items from freezing or to a certain temperature. A few years back I was working on a large window job and used a cheap Styrofoam cooler and light bulb to keep our caulking flowing. It worked great and I stored that idea away because always wanted to make a permanent solution for my trailer.
For years I would bring my caulking, in and out, or have leave it on my dashboard heater and leave the tuck running. There’s a ton of job site hacks out there. I’m sure we all have a version of this and there are a ton of job site hacks to get to the same place. But I wanted a permanent, reliable solution.

How To Build a Hot Box – Adding Heat
Since my trailer has a shore line I knew I could make a permanent hot box that could use electricity.
To keep the size of the box down, I decided to insulate it with 1-inch of DOW rigid insulation. A 1-inch board offers R-5 insulation value, and this box will be kept in a trailer; out of the wind and snow.
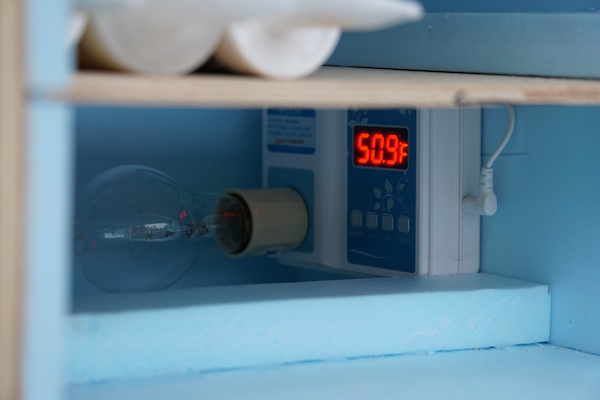
In order to ADD heat to the insulated box I decided to use a 40 watt vibration service incandescent bulb, I may down-size that to an appliance bulb if this bulb turns out to be too much wattage – Time will tell.
Because I did not want the bulb on 24/7 I needed to control it. I purchased a digital temperature controller and will set the low and high temperatures for the hot box interior.
I purchased the temperature controller online with the goal to control the beat bulb to a predetermined low / high temperature. The controller controls a power outlet, and I mounted the bulb and plug socket to that.
Hot Box Size
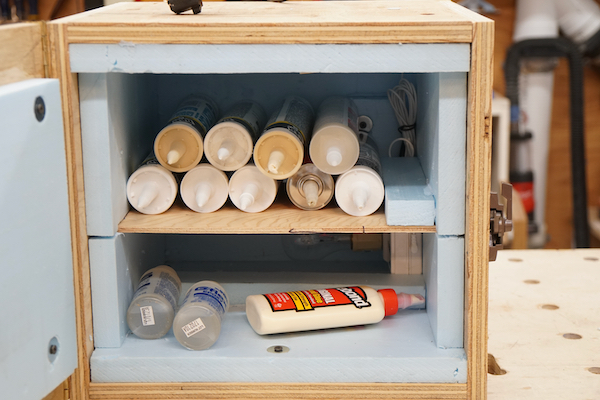
I mainly wanted to build a hot box for my caulking, glue and wood filler. In retrospect, I could have made it larger, and used it for a battery warmer. I still can. But I don’t have a ton of room for a lot of batteries.
To size my box I measured a tube of caulking and added 4-inches to that measurement. The 4-inches accounts for the 1-inch of DOW insulation on each end of the box and air space. I’d be lying if I didn’t also take into consideration what I had for scrap plywood.
The final dimensions were 14w x 14h x 14d.
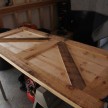
Making the Hot Box
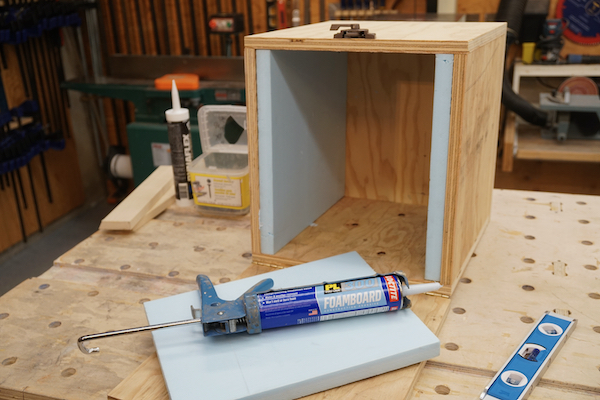
The hot box construction is not fancy. I used a table saw to size all of the parts, including cutting the ridged insulation. A finish nailer was useful to quickly put together the box, and then follow up with 2.5” screws.
Once the box took shape I cut and tightly fitted the ridged insulation, using adhesive to hold it in place. For the side wall I place ridged insulation at the height I wanted my shelf and used 3/8 plywood for a shelf. I purposely kept the shelf 1-inch off the front and back walls, to allow for heat rise and airflow.

Hot Box Temperature Controller
I placed the temperature controller in the far back corner to protect it from damage, and allow heat to rise up behind the upper shelf. When placing the controller I kept it high enough to keep the bulb1-inch off the insulation. I may go back and add a piece of step flashing as a heat shield. I also added a stop in front of the bulb out of ridged insulation to project from glue bottles hitting it.
The controller has a sensor wire , and I ran that to the top front of the box, securing it in place with a screw and washer.
Purchase WILLHI WH1436 Digital Temperature Controller online for approximately $29.00 here.
The top of the half wall was fitted with ridged insulation, as was the door. For the door I added 1-1/4” screws and 1” washers to hold the insulation panel in place while the adhesive dries, as well as, to provide extra support when opening and closing the door.
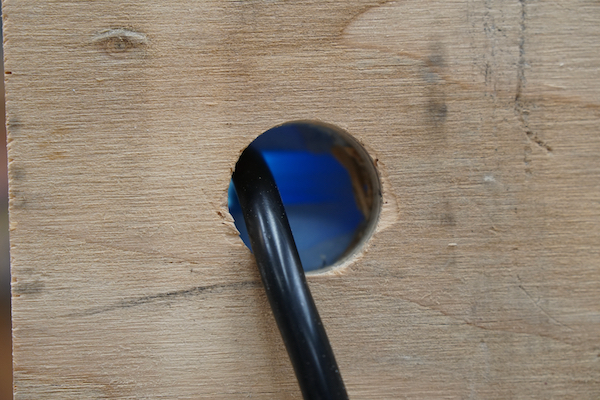
I drilled a hole through the back of the box for the temperature controller plug and secured it to the back of the box with cable staples. To block the plug hole, I notched a scrap piece of insulation to cover the wire and hole. Afterward I filled any remaining void with caulking.
Hot Box Door
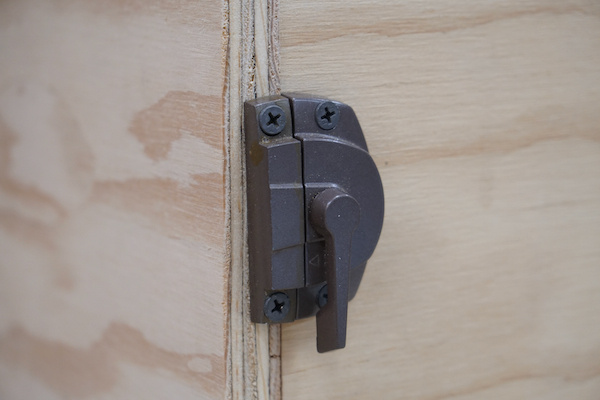
To finish off the box door, I used a recycled scrap of piano hinge and an extra window sash lock. I like the sash lock because as it closes it pulls the door tight.
Hot Box Temperature – What’s the Sweet Spot?
The ideal temperature for applying caulk to a surface is anywhere between 45 and 80 degrees F, as these temperatures ensure that the caulk hardens correctly and sticks to your surface adequately. It is also recommended that when applying caulk in temperatures below 32 degrees that you prewarm the caulking to 70 degrees.
Wood glue application manufacturers recommended application temperature at 70°F, but it can be applied as low as 55°F degrees.
I’m sure that if you work in colder climates I’m sure your violating these temperatures as well as have trouble keeping your caulking and glues from freezing.

How Did It Work?
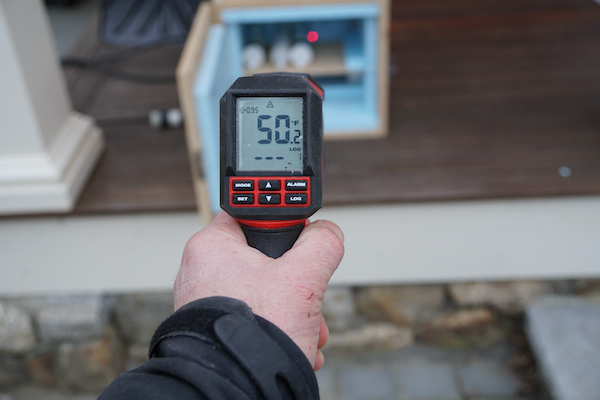
I set my hot box to 60 degrees and placed it outdoors in 24-degree temperatures. The controller is set turn on it the temperature inside the box drops to 40 degrees and will turn off at 60-degrees. I checked with a digital thermometer and recorded to following temperature readings:
- Initially the interior of the hot box took 10 minutes to warm up from 24 degrees. [bulb was off]
- Porch decking 26 degrees
- Hot box exterior 28- degrees
- Hot box interior 50 degrees
So far it seems to be working well. There’s no doubt that the box could be more efficient if it were insulated more.
Materials for Hot Box
I made my hot box for approximately $50. I uses materal where I could. Here’s the list of items I used:
- 2×8 sheet of1-inch DOW ridged insulation board
- Piano hinge – scrap
- Washers, screws – scrap
- Window sash lock – scrap
- AC ¾” plywood – scrap
- PL300 Styrofoam adhesive
- Vibration service 40 watt incandescent bulb
- WILLHI WH 1436 Digital temperature controller $25.00
- Bulb socket

Hot Box – Overall Thoughts
For years I would bring my caulking, in and out, or have leave it on my dashboard heater and leave the tuck running. Building this hot box gave me a permanent, reliable trailer storage solution.