Floor Sanding Dust Containment
By Robert Robillard on Dealing With Dust
Hardwood Floor Sanding Dust Containment Tips
One of my excellent customers called me the other day and asked if I would coordinate having their kitchen / family room floors sanded and refinished while they were away.

These maple floors were installed approximately 15 years ago.

Kitchen floor – high traffic area – heavy wear

Hallway looking to mudroom – heavy wear [3 kids and 2 dogs helped]

Pre-Sanding Preparation
We showed up a day before the floor sanding contractor to remove the furniture, rugs and install protections for dust.
The smoke detectors in this area and the top of the stairs were covered with plastic sleeves that come with new smoke detectors. Every time I buy a new smoke detector I make sure to save these caps and reuse them on jobs like this.

Tape And Drape Saves Time
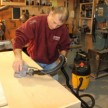
I used a tool from 3-M called the “Hand Masker M3000.” It’s a dispenser to ease the installation of the plastic and tape.
This tool is worth every penny and was a huge time saver. It holds a roll of 3M plastic 99″ long and 1-1/2″ blue tape.
The blue tape is automatically attached to the plastic as you roll it across the surface.

The fireplace has a hand carved ornate wood mask. Instead of moving it and risking damage I opted to protect it in place.

The bookcase shelves on the right and below photo was covered with plastic. I sealed the door seams with 1″ tape.

Cover HVAC Ducts
Below is a photo of a HVAC duct. the floor sanding contractor always vacuums these out after sanding but I wanted additional protection from any dust entering deeper in the ducts.
Read More – How To Protect Vents From Remodeling Dust
Turn Off The HVAC Fan
Before sanding, the heat will be turned off to prevent the dust from spreading through the house and damaging the furnace filters. Fiberglass batts will be inserted into the openings to block the dust from entering deeper into the ducts.
Below: More hanging art protected in place.
Prep Chandeliers:
Below: the dining room “antler” chandelier. We raised the chandelier and removed the bulbs in case someone switched the bulbs on.
Tape Cabinet Door Seams
This photo is looking from the family room into the kitchen. The cabinet door seams are seen taped.
Below: The butler pantry or wet bar.
We carefully stored the homeowners dining room hutch china on the counters and then covered both sides with plastic.
We removed the door to dining room in the back of this room because it will get in the way of the sanding process.
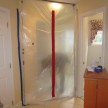
The doorway was sealed with plastic tape.
In rooms adjacent to this area and others we closed every door and taped the seams shut for redundancy.
Clean Refrigerator Coils
The Subzero refrigerator top panel was removed to clean the coils. We plan to clean the coils after sanding as well. This detail is often overlooked.
Photo Below: coils.
Dog hair found it’s way into the condenser coils. We cleaned the coils before this photo and plan to do it again after sanding.
All kitchen cabinet doors and drawer seams were sealed with 1″ blue tape to keep out fine dust.
Desk alcove.
After sealing the seams we installed tape and drape plastic over the shelves.
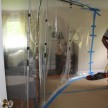
We removed the door on the right and installed plastic.
This kitchen had a ton of doors and drawers!
Close up of cabinet door seams that we sealed to keep out dust.
Below: The kitchen taped off.
~ concord carpenter


