Floating a Floor Over a Concrete Slab
Insulating A Concrete Floor
Mike Hopp a RI remodeling contractor, and friend, asked us to help him frame out a large garage that was being converted into a studio apartment.
The garage was framed with 2×4 walls, a truss roof system and had an existing concrete slab floor. The trusses meant that we did not have any bearing walls inside the structure and meant that we cover the entire floor slab with no interruptions to the perimeter walls with insulating foam board.
We all agreed that this continuous foam board approach would be faster than installing pressure treated sleepers and then having to cut ridged foam to fit tightly between the sleepers, and spay foam them in.
Insulated Floating Floor | Overview
Mike’s plan called for an uninterrupted layer of 2” Owens Corning extruded polystyrene (XPS)foam boards directly on top of the concrete slab, with all the seams taped. This would be followed by two layers of 3/4-inch Advantech sub-flooring floating [not fastened] on top of the foam. The foam additionally allowed us to achieve a complete thermal break and obtain an R-10 insulating value above the concrete slab.
Creating a Thermal Break and Vapor Barrier
In an ideal scenario, the floor under this slab would have been insulated with rigid insulation such as XPS (extruded polystyrene) board, known for its high compressive strength. Utilizing XPS beneath the slab enables the concrete to retain heat effectively.
Our primary objective in covering the concrete floor with XPS foam board is twofold: to establish a thermal break and to implement a continuous vapor barrier.
Thermal breaks are essential for maintaining optimal heat retention within concrete slabs. Their advantages include heightened energy efficiency, enhanced comfort, and the prevention of condensation.
The absence of XPS foam board could result in cold air meeting warm, heat-generated air inside the studio apartment, potentially leading to condensation in the walls or floors and fostering mold growth and other issues.
 Installing the Insulation Board
We used Owens Corning FOAMULAR 400 Extruded Polystyrene (XPS) Insulation boards. [40 psi]
designed for use in load-bearing situations, such as under slab, concrete floors, foundations, roadways and rail beds, parking decks, and cold storage installations.
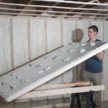
We installed the 2” insulation boards on the concrete floor without glue. Installing the foam boards went quickly. The board cuts easily with a table saw lays flat on a clean, vacuumed concrete floor. Once the foam was fitted on the floor, we sealed all the seams with 3M #8067 All Weather Flashing Tape and sealed the perimeter seams at the concrete walls, and utility pipe penetrations with expanding foam.
This 3M tape is a self-adhering, waterproof flashing membrane designed for seaming damp surfaces such as polyethylene vapor barrier products, building materials and seal to around openings and penetrations in exterior walls. It has a unique acrylic pressure sensitive adhesive that aggressively sticks and stays stuck both at lower and higher application temperatures.
I will note that after installing the XPS foam boards on the floor we all noticed that the room felt warmer.
Note – we also covered the foundation walls, following the same procedure, but used 2” XPS 25 psi foam board as a cost saving solution.
Installing the Subfloor
We then moved on to installed two layers of ¾” Advantech subfloor sheathing. The first layer of sub-flooring was installed perpendicular to the foam, taking care to stagger the ¾” Advantech and foam joint seams. We installed the tongue and groove plywood and ensured an 1/8-inch expansion gap at the butt ends.
Titebond subfloor adhesive was used to glue the first layer of Advantech plywood to the foam board. We used the larger 28oz tubes of glue and averaged approximately 2 sheets per tube.
Note – We recommend having a cordless caulk gun to assist in speeding up the process and save your forearm and grip strength.
The second layer or Advantech subfloor was installed perpendicular to the first layer of plywood, again staggering our joints, and maintaining an1/8” expansion gap between subfloor sheets.
We then glued and screwed this second layer of plywood to the first layer, installing 1-3/4” screws every 6-inches to eliminate any squeaks between the subfloors.
After the subfloor system was installed, we installed our partition walls, and attached them directly to the sub-floor.
Conclusion
The result was a strong and stiff subfloor without having to install sleepers that might loosen, squeak, or twist over time. The big win for us was achieving a thermal break with R-10 insulation value and a continuous vapor barrier.


