Exterior Door Flashing Issue
 Door flashing and Weather-Resistant Construction:
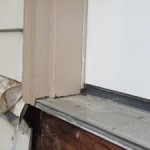
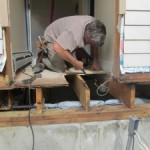
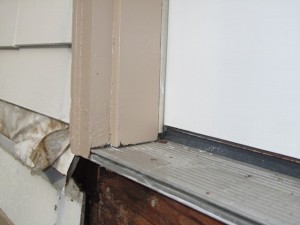
On a recent project we were hired to replace the pressure treated decking and railing on a porch and replace everything with mahogany. A pretty straightforward project, or at least that’s what I thought. The door was leaking at the sill and had an exterior door flashing issue.While removing the decking I decided it was proper to remove the skirt board under the door to evaluate and possibly update the ledger flashing. It was the right thing to do since we were replacing everything, we might as well start off with new flashing.
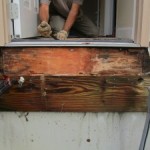
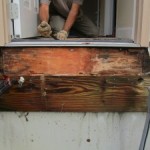
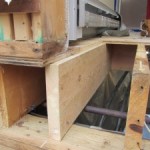
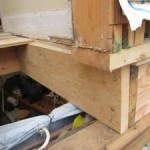
Once the skirt board was off we realized that the door threshold / sill was had been allowing rain water into the building envelope for some time. To make matters worse there was no sill pan or rubber flashing installed to keep the water out of the building. We found rotted plywood sheathing and a rim joist.
When brought to the owners attention they showed us a suspicious black spot that was in their basement. This spot was rot and mold that had spread as a result of the door leaking.
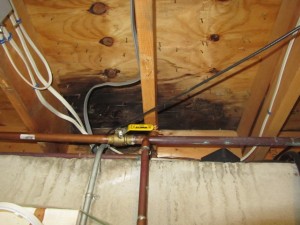
The sad part is this is this is an installation problem and an easily avoidable issue. Proper flashing would have avoided this costly repair.
Without proper water management, water can enter the walls around the door frame; leading to mold, wood rot, carpenter ant and termite problems. With a few simple steps early on, you can keep your doors watertight and resistant to weather damage.
By using flashing material around the sill, header and doorjambs, you can create a watertight seal. It’s a strong defense, which will avoid all the door problems of leaking, warping and molding.
What started off and a fun and easy day working with mahogany porch components and porch trim turned into a complete porch demolition to access and repair structural rot. 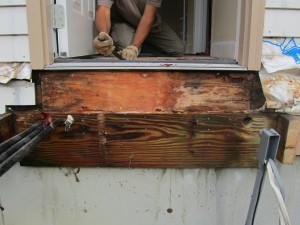
We ordered a new door and demolished the deck. A few days later the door arrived and we started working on the rot repair.
First step was the removal of the porch.
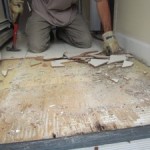
The repair involved removing a section of tile above the sub-floor in order to replace it. We cordoned of hallway with a product called ZipWall. This product allowed us to erect a quick and easily assembled dust protective barrier.
The tile was removed back to a plywood underlayment seam. Removing old ceramic tiles is a fairly straightforward, we wanted to remove them back to a grout joint and not damage the rest of the tile floor.
The trick is to focus on the mortar and the grout between the tiles, as the tiles themselves are harder than either of those materials. Use a hammer and chisel to get started, chiseling at the weakest grout line you can find. The grout will break easier than the tiles themselves, so concentrate your efforts there. Get under the tiles as best you can, hammering at the mortar underneath that holds them to the floor.
Luckily the client had left over tiles from the original installation.
Rot Repair
We then carefully cut back the plywood and rotted joists.
We discovered that the plywood rot extended a few inches into an adjacent laundry room. Carefully cutting with a Fein tool were moved a small amount of rotted plywood in the laundry room without removing tile in that room.
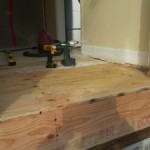
Because the plywood seams were under adjoining wall partitions, we added short joists and blocking to provide nailing for the new plywood seams that we created. A short section of 2×6 wall sill was replaced as was the house rim joist.
New 3/4″ CDX plywood and 3/8″ under-layment was was glued and screwed down. Care was taken to ensure that seams of two materials overlapped and did not line up.
Once all of the structural rot was repaired we installed Vycor rubber flashing to the entire sill area and up the sides of the door opening, attempting to tuck it behind the clapboard seams. A wide band of the Vycor peel-and-stick membrane or metal flashing should run over the band joist and up under the building felt or house-wrap.
A layer of flashing on the sub-sill prevents water from reaching the framing below. Using Vycor, self-adhering membrane, we fit the membrane between the jambs and a few inches wider than the sub-sill. The flashing goes over the sub-sill, adhesive side down, with just enough overhang in front to cover the top edge of the toe-kick. After smoothing out the membrane.
Installing A Sill Pan
The next step was to install a sill pan. The goal for weather-resistant construction is to reduce or eliminate a breach in the outer building envelope.
An adjustable sill pan flashing proven to prevent damage caused by exterior door & window leaks. It is made from high-quality, high-impact ABS plastics. It is impervious to rust, corrosion, galvanic corrosion, electrolysis, and corrosive coastal areas. It helps eliminate condensation from thermal transfer and does not require any adjustment to standard rough openings sizes. all door eventually leak, and all door installations should have a sill flashing and a sill pan.
Proper flashing is critical since leakage at the rim joist could lead to decay and failure of the porch connections. A second cap flashing should direct water over the porch ledger and away from the house.
We decided to install our rubber all the way don to the bottom of the house frame. The porch ledger board would be installed over this rubber, then receive a layer of rubber flashing and topped with a heavy duty PVC ledger flashing.
Additional rubber flashing will be used to seal the top of the PVC flashing and run up and under the sill pan. this way any water leaking through the door sill will follow the rubber onto the ledge flashing and out and away from the building.
Some deck builders prefer to leave an air space at the ledger to assist with drying if the area gets wet we installed our ledger to the building with timber lock structural screws and flashed this area to keep water out.
Installing A New Door
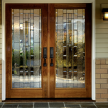
We installed a fiberglass Therma-Tru® Door.
Therma-Tru® Doors, which pioneered the fiberglass door industry, along with its Advanced Technology Center, cconducts extensive research and testing to develop door systems that perform in harsh weather conditions and have the potential to create greater safety for residents in hurricane and tornado-prone areas of the country.
The Therma-Tru has a nice security strike plate, designed to help protect homes by reinforcing the jamb from pry attacks and kick ins. Constructed of 20-gauge steel, the Therma-Tru security strike plate wraps around and reinforces the vulnerable area of the jamb. It then anchors the entire assembly directly to the rough opening structure using two-and-a-half-inch screws.
The Therma-Tru doors can withstand 100 pounds force per square foot – equivalent to the static pressure generated by a 250 mph wind.
After installing the door we carefully and methodically filled in the necessary clapboards using tar paper splines at all vertical butt joints, then caulked all seams.


