How To Make A Pipe Clamp Storage Rack

Pipe Clamp Storage Rack Workshop Tip
I’m a neat freak and hate when my shop is a mess. Part of being neat is being organized.
You can never have enough clamps so recently I decided that I needed a better way to store my pipe clamps. My clamps range from 24 inches to 60 inches. Storing them on a shelf is useless and messy. I decided it was time to write an article on how to make a pipe clamp storage rack and reap the benefits of the article!
A Storage Rack That Works
My goal was to figure out how to make a pipe clamp storage rack that did not take up a lot of wall space and actually worked. A hanging pipe clamp storage rack is not only a neat and orderly way to store your clamps but was easy to access them.
Mounting the rack on the wall made sense and I had seen a similar design in a magazine years back.
Scrap Plywood Pipe Storage Rack
I wanted to my pipe storage rack out of my scrap plywood pile. Plywood is strong and stable so I figured I’d get years of service out of this rack.
Basic Design
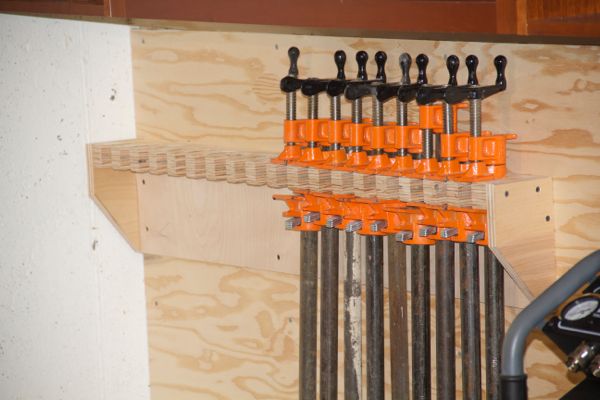
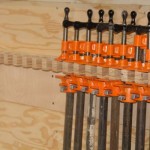
The pipe rack can be as long as you need it and to accommodate as many clamps as you need. Mine holds 18 clamps. It is basically an L-shaped rack and vertical mounting brace.
Each pipe clamp rack hole is the same size and evenly spaced. Here’s how I did it:
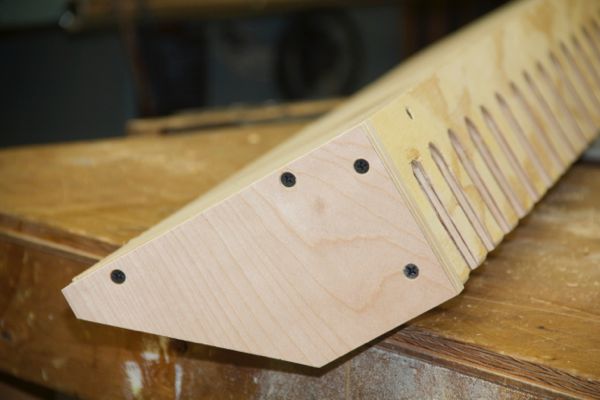
The Rack
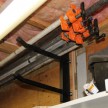
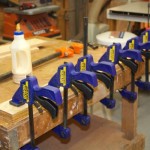
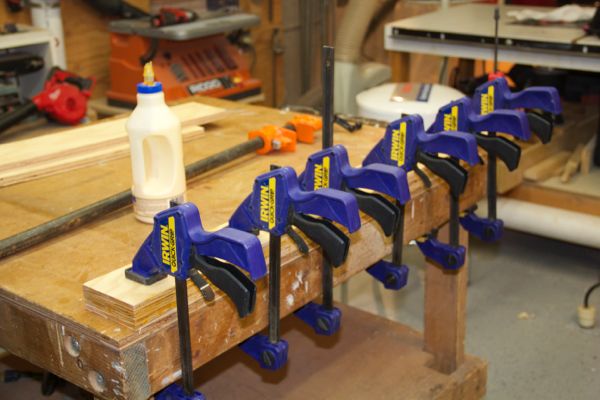
My pipe rack is 41″ wide x 7-1/2″ high and 4″ deep. I glued, “sandwiched,” two layers of AC plywood together to make a 1-1/2 inch thick rack for strength. Glue and clamps these two boards, do not use fasteners.
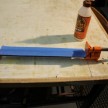
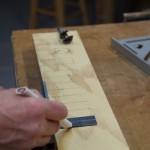
Once the glue is dry, clean the plywood edges and mark your rack spacing. I ran my board through the table saw and took off 1/16 inch to clean the edges.
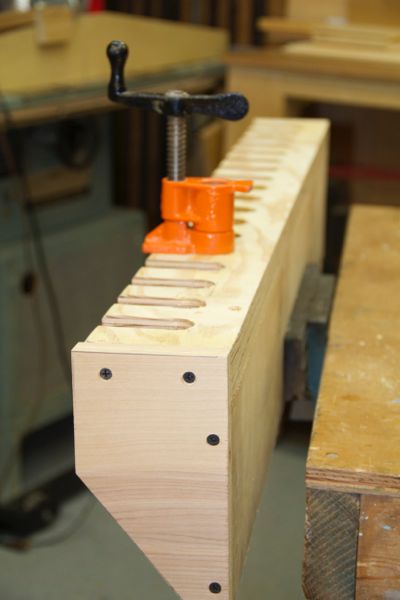
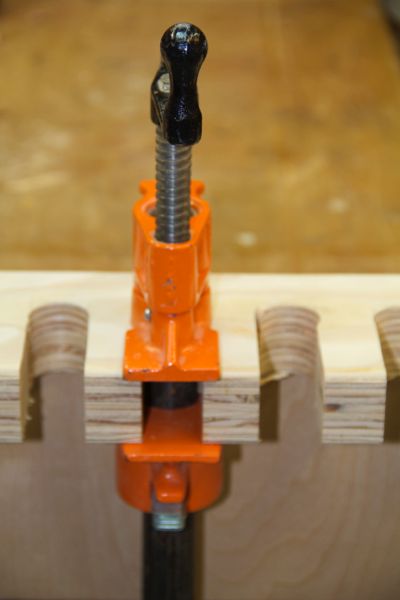
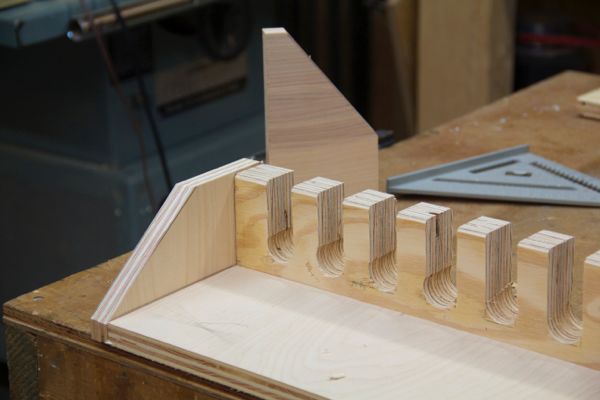
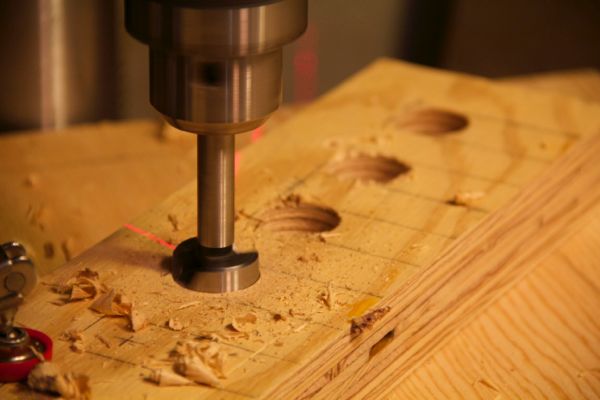
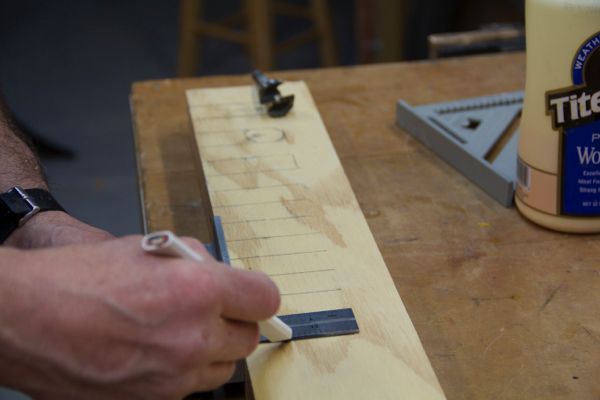
I started with a longer piece than needed. [longer then 42 inches] Using my combination square I spaced the pipe holder slots 1-inch apart which conveniently was the same width of my combination square. The Pipe slots measure approximately 1-1/4 inch wide and are 2-3/4 inches deep which ensure that the clamp sits securely and does not fall off the rack.
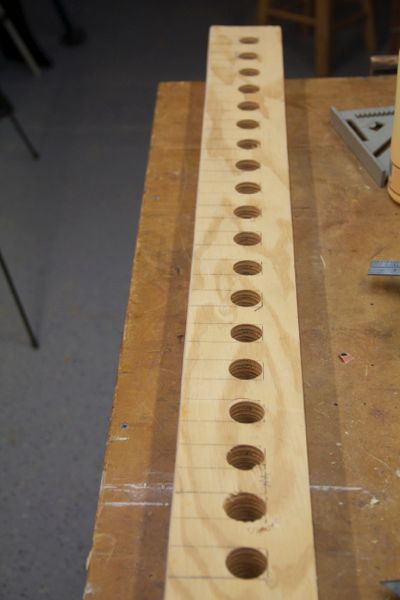
I laid out the plywood board with my 1 inch spacing and 1-1/4 slots until I ended at 18 slots. I added an additional inch at the end and cut it to final length with a miter saw. The final pipe clamp rack length ended up being 41 inches.
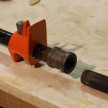
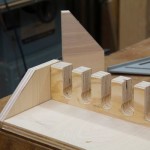
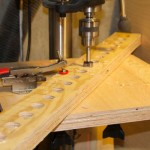
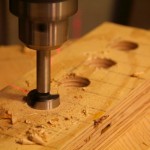
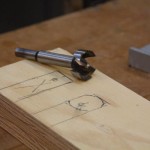
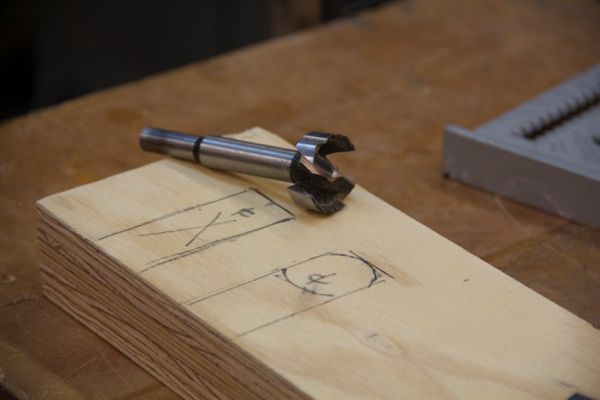
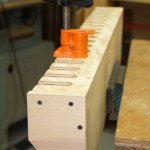
I used an 1-1/4 Forstner bit and marked the center point on the first hole. I then set my combination square and marked each slot at that center-point measurement. Next I drilled 1-1/4 holes at the ends of all the slots.
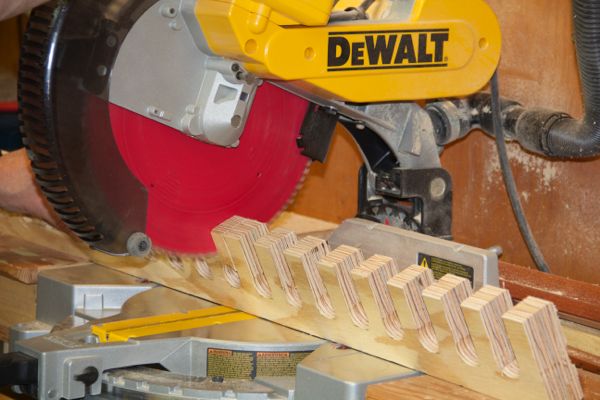
Once all of the holes were drilled I used a miter saw to cut out my combination square lines to make my pipe slots. This leaves with a U-shaped opening for the pipe clamp. You can also use a handsaw, jigsaw, band-saw or table saw with a miter gauge to make these cuts.
The Back Board
The 3/4 plywood backer board is also what holds the rack to the wall and supports the pipe rack. My backer board was also 41″ wide x 6″ high. Several countersunk 2-1/2″ screws hold the rack to the backer board.
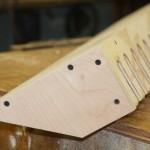
End Boards
Two end-boards tie the rack to the backer-board. I measured down 4 inches and slanted the front edge 45 degrees for a cleaner look and to avoid scraping my knuckles when reaching for the end pipe clamps.
Fasten Pipe Rack To Wall
Assemble the end supports to your plywood first then attach the back panel to the sides of the supports and under your pipe clamp plywood support. Use glue and countersunk your screws.
Using a level, attach to the wall studs securely – these clamps can get heavy.
-
- Pipe Clamp Rack

-
- End boards
-
- slots – Hold pipe clamps
-
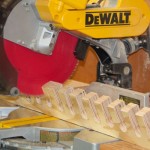
- Cutting the slots
-
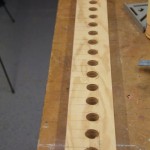
- Holes complete
-
- Drilling holes

-
- Forstner Bit
-
- Combination square to spaceslots
-
- Forstner bit layout
-
- Clamping plywood for rack top
-
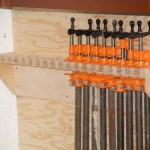
- Rack fastened to wall

-
- Side – End board fastening