How to Install Storm Windows

The benefits of Installing Storm Windows

Source: http://www.harveybp.com/storm_windows.aspx
Leaky windows are the cause twenty-five to forty percent higher heating and cooling costs each year. To me that’s an easy argument to upgrade your old leaking windows.
When full replacement of a window is not an option, whether for budgetary or historical maintenance reasons, a storm windows is an excellent solution. A storm window provides an air space between the storm and window which increases energy efficiency . Storm windows typically cost one-third to one-fourth the cost of a new window.
An additional benefit of storm windows is reduced noise from the exterior of the house. I have been told by customers I have installed storm windows for that they feel like someone “turned down the volume” on the street noise.
Storm windows are simple to install, and do not need to be removed during the summer months.
There are two major types of storm windows, double-track and triple-track. Double-track windows have two tracks: one for the bottom pane of the window, and the other for both the top pane and the screen to share. A triple-track window has an extra track for the screen, so that the top pane and the screen don’t have to share.
Measuring for Storm Windows:
1. Measure window width in three places at bottom, top and middle of window.
2. Use smallest dimension to order new storm window.
3. Measure window height from outside.
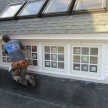
How to Install Storm Windows:
[ You will need caulk, a caulking gun, and a cordless driver.]
1. Determine that the windows are the correct size.
2. Wash the storm windows and house windows.
3. Scrape loose paint from window frame and window trim.
4. Apply a thin strip of caulking to the top and sides of the outside of your existing window. Do not apply caulk to the bottom of the window, as storm windows are designed to allow condensation to escape through the bottom.
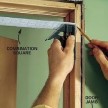
5. Mount the storm windows along the caulking, pressing firmly to ensure a tight seal and to provide the best support. Plumb window and secure with screws provided.
6. Push down the bottom adjustable expander tight against the windowsill. Do not screw down or caulk the expander.