5 Common Household Repairs

Common House Repairs
Many of the common home repairs I come across are actually the easiest to repair yourself. The five most common household repairs are the following:
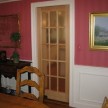
1. Sticking Doors:

There are a number of causes for doors sticking, the most common is humidity. Depending on the time of year the door may work fine or it may stick.
Some doors swell more than others because the top and bottom edges were never sealed when the door was stained or painted.
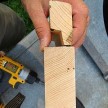
To address a swollen door you should only remove just enough of the door to close it because the once the humidity leaves the door may shrink leaving an unsightly gap between the door and door jamb.I recommend closing the door and identifying where the door is sticking. When closed a door should have a consistent reveal between it and the door jamb. consider the thickness of a nickel as a gauge.
Remove the hinge pins and place the door on a padded surface to protect it. Then use a hand plane or power planer to remove just enough of the material to get the door to close.
Sand any sharp edges and seal the wood. this is a good time to check the top and bottom of the door and seal them too.
Another cause of doors sticking or binding is a loose hinge. Many times grabbing the door on the latch side and gently lifting will tell you if the hinges are loose. When doing this look at all but especially the top hinge for movement.
To repair loose door hinges, pull the hinge pins and remove the door. Try tightening the hinges first, if they spin freely you need to remove the screws in the hinge and fill the hole with wood.
I’ve used tooth picks, golf tees, and wood whittled to size with a utility knife.
Tap your wood into the screw hole, snug, with a little wood glue. Cut off the excess with a utility knife and re-drill your screw hole with a pilot bit.
If your door has a spring like feel to it the problem more than likely is at the hinge is set too deep or too proud in the door jamb mortise. If the hinge is set too deep in the mortise [not flush] then remove the hinge and shim with a piece of cardboard until flush with door frame and test if door now fits proper. See door sagging issue trimming doors.
2. Clogged Drains:
If the door is binding on the bottom, due to settling or new carpet or flooring it may need to be cut. With the door closed us a compass or scrip to create a line 1/2″ off the new floor. Remove the door and cut with a circular saw or power plane. Sand sharp edges and seal the wood. See
Most clogged drains in the kitchen are due to a build up of grease and or grinding from the garbage disposal. The most common cause in the bathroom is HAIR.
For hair clogs, you need to remove the sink drain plug which can usually be accessed from the rear of the drain pipe beneath the sink. Unscrew the cap and pull out the lever, which will free up the drain plug for removal.
Hair is often trapped around the lower end of the plug, remove the hair and test by closing plug and filling an inch or two of water then opening plug to see how fast water drains. Nine out of ten times that is all that is needed. I sometimes us a bent metal coat hanger to scrape out the rest of the hair.
You can also remove the drain plug at the bottom of the pipe trap. Place a pan to catch excess water under the trap and remove the drain nut. You can use your makeshift drain snake to push debris down and out of the drain plug hole. Flush with water and reattach and test.
3. Drafty or sticking windows:
Old windows: First, check the glazing compound around the glass, in most cases it has dried and cracked allowing for drafts. Remove old glazing and re-glaze with a good glazing compound according to the instructions on the container.
Any window: lay a bead of good “30-year” caulking compound around the edge of the window frame where it meets the wall, siding, trim ,etc. Prime and paint.
For sticking windows, on double sash wooden windows most times it is a paint build-up. Using a utility knife or single-edge razor blade, cut through the paint at the edge of the window where it meets the casing frame, then place a block of wood against the window frame and tap firmly with a hammer all around the window.
Usually this will shock the window free from where it is binding. Another cause of this is the runners, where the windows slide up or down the wood area where they slide should NEVER be painted as the paint causes a drag and stickiness, if it has been painted remove as much of the paint as possible and then coat with paraffin. A common wax candle will do the trick, using pressure run the end of the candle up and down in this runner area and the wax (paraffin) will allow window to glide with ease.
I use bee’s wax to lubricate the window jambs and parting bead. “California – mother’s wax” works well too. rub it on and into the wood to lubricate and condition the wood. Slide the window up and down to work it in. Fix a drafty door
4. Leaking Faucets:
Dripping or leaking faucets usually is cause by wear on the rubber washer inside the spigot valve. Turn the valves on the water lines, located under the sink unit, Off and pen the faucet to drain it..
With a combination (crescent) wrench, disassemble the handle portion of the valve, attached to the bottom of the valve by one screw is the rubber washer. Once a groove is worn into the washer or it dries out and cracks you will develop a drip or leak. Remove old washer and replace with proper size new washer using the same screw, reassemble the valve and then turn under-sink valves back On and test for leaks.
5. Crack or hole in wall:
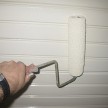
Small holes as from nails used to hang pictures are the easiest, just a little spackling paste forced into the hole with a putty knife or even your thumb. Let dry, in many cases it will shrink and then apply a second coat to evenness of the wall. Sand, prime and paint.
On larger holes you can buy an aluminum and mesh repair plate of approx 1/16th inch thick. these plates area available in hardware stores and usually go up to 4-6″ square.
Place the metal side against the wall at the sight of the damage, press the fiberglass mesh against the wall (there is a slight adhesive coating) and apply one thin smooth coat of mud and let dry, sand smooth and apply another coat ensuring that no fiberglass is visible. When totally dry sand very lightly until smooth and blended to the existing wall.
Smaller holes and cracks, cracks should be opened slightly in an inverted “V” pattern with a utility knife approximately ¼ inch wide. Apply a fiberglass mesh tape over hole or crack and apply one or two coats of drywall mud. Allow to dry lightly sand and apply third and last coat of mud. After all is dry sand to smooth and blend with existing wall. Prime and paint follow.