Warmly Yours Tempzone Radiant Floor System

Warmly Yours Tempzone System Review

WarmlyYours TempZone™ Radiant Electric Floor Heat
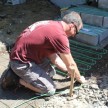
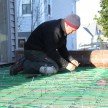
This past winter I installed a Warmly Your snow melting system under a blue-stone walkway with huge success. I was so impressed with this system that I asked Warmly Yours if they would be interested in my reviewing their Warmly Yours Tempzone Radiant Floor System in a bathroom remodel that I was working on.
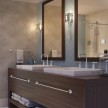
WarmlyYours agreed. The bathroom homeowners were planning on installing ceramic tile and were super excited at the ideal of a a warm tile floor!
What is Electric Radiant Heat?
Radiant heat is a heating technology that can be used both indoor and out for snow melting. Heat is radiated out of a w ire element. A good comparison would be the heating element of a stove but way less heat. Heating element wires are looped back and forth and are pre-determinly spaced to provide even, uniform heat dispersion.
Electric radiant floor heat can be installed in small applications as well as large. The thermostat can be put directly in the room where the heat is so you don’t have to use it when not in use.
Electric radiant heating is an ideal companion to any flooring type. In our situation we are installing under ceramic tile. The tile will heat up and transfer heat evenly into the room.
What is the WarmlyYours TempZone™ floor heating system?
Warmly Yours Tempzone Radiant Floor System is a radiant electric floor heating system that operates like an electric blanket but under your tiles. The TempZone™ system consists of a fiberglass mesh with heating cables attached to it.
The Warmly Yours Tempzone Radiant Floor System is designed to be installed on top of the sub-floor, and beneath your flooring. The system is designed to provided even temperature across your floor generating floor-to-ceiling radiant warmth.
The WarmlyYours TempZone heating mats come in a rolled up mesh mat. This mat is designed to secure the Heating Element in pre-determined spacing for optimal heating. The system is designed especially for installation under tile, stone and wood flooring, they even have a low voltage system for shower floors.
Dealing With WarmlyYours – Designing Your Custom System:
WarmlyYours was super easy to deal with. I measured the room, made a drawing and emailed it to them. The same day I had a FREE detailed heating plan drawing emailed back to me. Once approved WarmlyYours ship the product out. – they  offer same day shipping!
WarmlyYours offers an FREE online design program called “MyProjects™” All you do is input the room dimensions and measurements and you will be presented with an instant quote and free installation plan for your heated floor.
WarmlyYours also offer 24/7 installation support in case you have an issue. I did call them with one question and they were super helpful and resolved my question over the phone. I was super impressed with their knowledge, responsiveness and service ~ well done.
Tip: Double check your measurements two or three times and make sure you do not install your Heating Element under a cabinet or tub. Avoid placing the heat mats under anything that needs to be secured to the floor.
Electrical Preparation:

A licensed electrician should be involved in the installation and testing of this system.
WarmlyYours can work with 120V or 240V wiring. A thermostat comes with the system and requires a deep single or a double gang box with a single gang mud-ring and should be positioned in a convenient place for easy access.
From this gang box, three sets of wires will go to the floor:
- Two 120-volt or 240-volt cold lead wires [2 wires] that power the system
- The low voltage sensor wire
The Floor Heating System must be connected to the electrical service via a Ground Fault Circuit Interrupter (GFCI). On my system the GFCI feature was incorporated in the thermostat.
Prepare the Sub-Floor:
If your sub-floor is existing make sure you inspect it for damage, debris or sharp objects. All nails and screws should be countersunk.
Tip: We started off my securing our sub-floor and installing a cement board underlayment. Follow the standard guidelines provided by the Tile Council of America if your unsure how to do this.
Floor Height:
The installation of the TempZone™ electric floor heating will change the height of your flooring. this is usually only a problem at the doorway where the room meets another room. In my case with the addition of a 1/4 underlayment, the heating mat, thin set and tile raised the floor 1/4″ above the adjacent rooms hardwood floor. I addressed this by adding a marble threshold at the bathroom door.
Installing the WarmlyYours TempZone™ Radiant Electric Floor Heat system:
WarmlyYours provides detailed instructions and has outstanding customer service and support. Make sure you follow these directions and utilize their expertise if needed.
Tip: Dry fit the TempZone mats first before committing to securing them to the underlayment.
We unpacked the Warmly Yours Heating Roll and checked the Ohm resistance between the two conductor wires to ensure there is no break or short in the cold lead conductors or the heat resistance wire. Each Heating Roll is labeled with its size and Ohm resistance.
WarmlyYours provide a Circuit Check™ testing tool to ensure there are no breaks in the wire during installation. The Circuit Check™ continuously monitors the continuity of the circuit during installation of your flooring. The Circuit Check™ beeps immediately when a short in the system is detected alerting you to a potentially damaged cable in the area you are working, before you lay the tile over the floor heating system – use it!
The heating mat essentially rolls out on the floor is cut and flipped and then rolls back in the other direction. To cover very small or odd shaped areas, the Heating Element is used in “Free Form.” A section of the fiberglass Mesh is removed in order to release an appropriate length of Heating Element to fill the space. This “free” wire is placed in areas not reached by the main mat [Heating Elements] of the panels. It is also used to make turns. The heating cable is evenly spaced in 2” serpentine loops.
Tip: When laying out the mats be sure to make sure the mats are placed “wires down” as much as possible. Application of thin-set cement will be easier when the Heating Element is below the mesh and the mesh offers some protection during the tile installation.
Now is the time to make sure everyone on site, including the homeowner to be warned that sharp tools and foot traffic can damage the heating element. Take precautions to protect the element until is is safe under the tiles.
Securing The Heating Element:
We used an electric staple gun to secure the mesh panels to the underlayment, taking care to avoid contact with the Heating Element wires. I installed staples every six inches into the mesh and underlayment. NEVER staple the Heating Element wires.
A hot glue gun was used on loose wires. Double stick tape can also be useful on the panels.
Do not lay the heating panels too close together. The heat travels only 1″ in each direction so a 1″ spacing of the panels works fine.
Tip: Never overlap the wires to avoid a short circuit. Never cut the Heating Element wires.
Periodically check the Ohms on this system. NOW is the time to discover any problems with the Heating Element continuity. Check the Ohms reading of the sensor wire before and after installation to make sure it has not changed. Most sensor wires have Ohms readings of 8,000 to 20,000 and your OHM meter must have a 20 kohm setting for this measurement.
Tip: Install the thermostat sensor under the mesh, centered between two heating element wires and at least 6″ in. in from the edge of a panel.
We choose a two step method to or installation. We secured our mesh mats and heating elements to the sub-floor with a thin layer of a “modified” acrylic thin-set cement. You can use with acrylic, latex or polymer “modified” thin-set cement.
Make sure you DO NOT use the notched end of the trowel over the heating element. Trowel in the direction of the Heating Element wires. Careless use of the trowel can cause damage to the Heating Element.
Once that thin-set had dried – we installed applied a 3/8″ layer of thin-set over that and installed our ceramic tiles.
TempZone Custom Fit Mats:
WarmlyYours also has custom fit matt. Their purpose is to heat specific larger areas of a room with a “no-cut” one-piece square or rectangular mat design, the TempZone Standard Mat (12-watts/sq. ft.) is made to fit areas with fixed dimensions. they are great for blanket coverage!
Custom Mats allow for faster, simpler installations, and arrive in one custom-made mat.
Using TheTempZone™ Radiant Electric Floor Heat system:
Make sure you wait at least 2 to 14 days for the thin-set to cure before you power up your system.
Note – The temperature of your floor can range anywhere between 75 to 95 degrees Fahrenheit. The floor’s actual temperature will depend on a number of factors including the amount of heat loss that the room experiences as well as the room’s configuration.
Ideal for kitchens, bathrooms or any room in your home where you would enjoy radiant warmth and comfort, the TempZone™ floor heating system is easy to install, operate and maintain.
Warranty:
One thing that impressed me was WarmlyYours warranty, it’s like nothing I’m aware of. WarmlyYours offers a 25-Year No Nonsense™ Warranty.
In the event of a defect, they cover repair or replacement of the Tempzone™ warming roll, including labor AND materials required to perform the repair. How’s that for standing behind your product?
Overall Impression:
After the installation we powered up the system, it seemed to take approximately 45 minutes for the tiles to reach temperature. What a delight to be able walk barefoot on the tile.
I liked the The TempZone™ system alot. Its super quality, affordable, backed by exceptional customer support and an unbeatable warranty. How can you lose?
The The TempZone™ system is not just a luxury it’s a solution to the problem of under sized radiators in rooms. This is especially true in kitchens and bathrooms where fixtures, cabinets, tubs, showers take up the wall space where a radiator should be.
Exceptional quality, great value ~ Highly recommended.