Streamlabs Smart Home Water Monitor

 Monitoring Home Water Consumption
~ By Jeff Deitz
These days smart products and monitors can be found in every corner of the home. Its now possible to control almost any item in your home that has a button from your smartphone. I find myself controlling lights, monitoring security cameras and opening garage doors all from the same place. But one area that I had given little thought to, aside from my monthly water bill, was my water consumption and how that too could be folded into my “smart” home. Streamlabs Smart Home Water Monitor is a relatively new device that can seamlessly integrate into nearly any home to help monitor water consumption and more importantly notify a homeowner of minor and major leaks, even when away from home.

Unboxing the Streamlabs Home Water Monitor
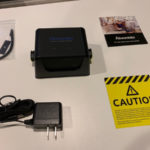
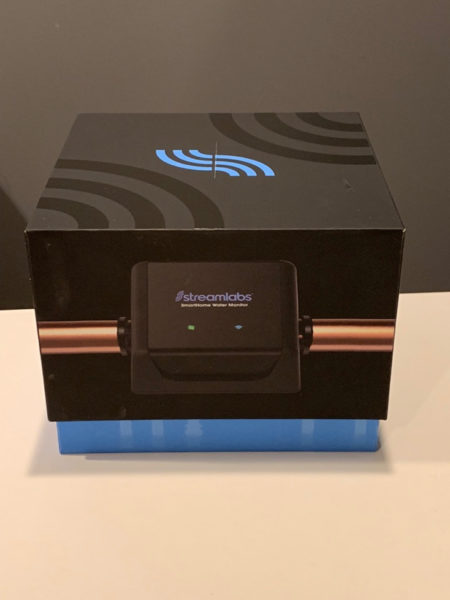
Streamlabs Home Water Monitor is packaged in a simple easy to open protective package that is on par with many of the mainstream tech products on the market that we’ve grown to expect.
The first item you will encounter is a large bright caution notice informing you not to ROTATE, SLIDE, or TWIST the monitor once it is in contact with your pipe. Noted!
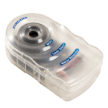
In total you will find 5 components to the product including the aforementioned warning card. These include the pipe mounted monitor, the power supply for the monitor, one small package with zip ties to be used during instillation as well as backup contact pads for the monitor, and lastly a brief but clear and easy to follow instruction pamphlet.

Easy Installation
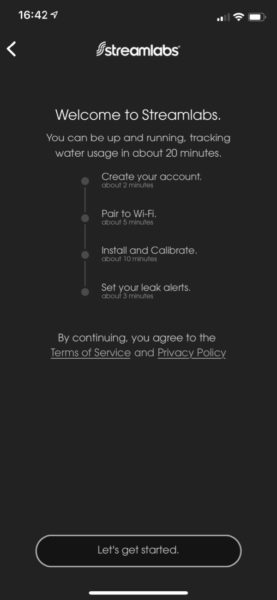
As this is a smart product that requires the use of either an Android or Apple IOS phone or tablet the first step in installation is unsurprisingly to download the official Streamlabs app. As an Apple product user I easily found the Streamlabs app available in the App Store on my phone.
Once downloaded I opened the application to follow the simple onscreen installation steps. The product does require you to create an account with the Streamlabs service and then register your product.
Onscreen Prompts Make Things Easy
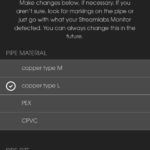
Next, follow the onscreen prompts and instructions to attach the monitor to a main water supply line. The monitor is best installed just downstream from your main supply shutoff valve. It can be attached to either ¾” CTS or 1” CTS Copper L, Copper M, PEX or CPVC pipe. The monitor requires roughly 4” of straight pipe to be attached. In my home I have a split for my supply water to two separate parts of my home immediately after the line enters my home. In my installation I was only able to monitor roughly half of my homes water supply with a single monitor. Aside from this site-specific setback, the monitor attached easily to the supply line and I followed the app through the rest of the setup.
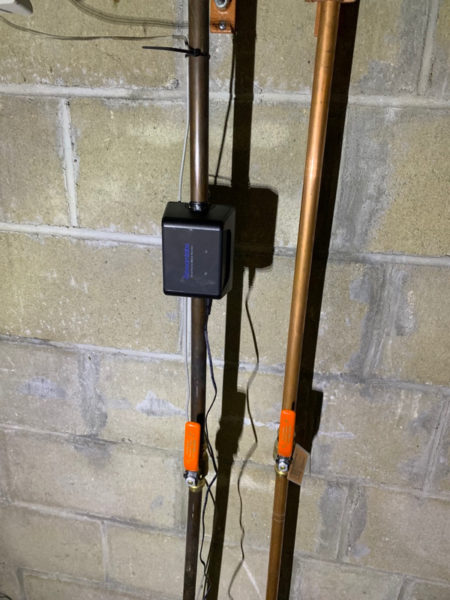
Once the monitor was seamlessly integrated to my home Wi-Fi network, the monitor began using its ultrasonic sensing capability to correctly identify what kind of pipe it was attached to. No user input required!

Calibrating the Smart Home Water Monitor
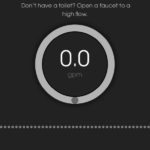
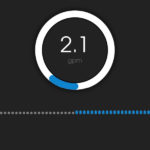
The last part of setup is the calibration process. This requires you to shut off the main valve the pipe is attached to so it can get a zero, no flow reference point. If you don’t have access to a nearby shutoff valve, this can still be achieved by guaranteeing no people or appliances are using any water in the home. After that it asks for a toilet to be flushed or faucet opened to high flow. I elected to open a faucet and was quickly rewarded with my first measurement!
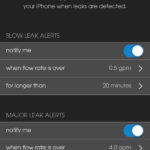
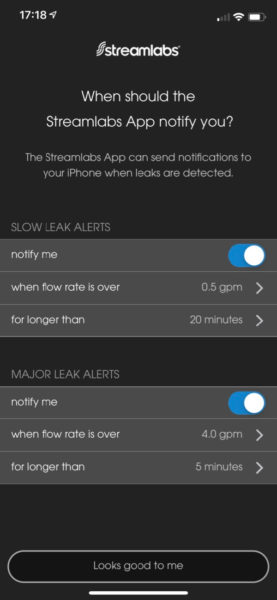
Before you can let the monitor off on it sensing ways, the app will prompt you to select your leak alert levels. At this point I had very little idea of what a normal vs abnormal flow rate in my home would be. Luckily the app suggests a few settings to get started that can be adjusted later.
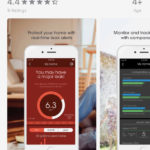
Concise and Easy to Use Interface
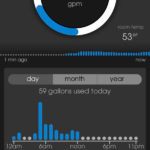
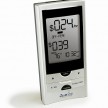
I’ve had the monitor installed and running in my home for about a week now. Throughout this time the monitor and the app have been collecting my water usage data and presenting this in a very concise and easy to understand interface. Its very easy to find out your water consumption at the moment and cumulatively over time in day, month and yearly increments.
System Connectivity
I have had zero connectivity issues with the monitor. This can be trouble spot in some homes if your wi-fi coverage is poor in the location you decide to install your monitor. After the initial setup and some time playing with various faucets and water consumers to see how much they used, I found myself forgetting about the monitor. This is a good thing! I’ve had many smart products end up consuming too much of my time troubleshooting issues.
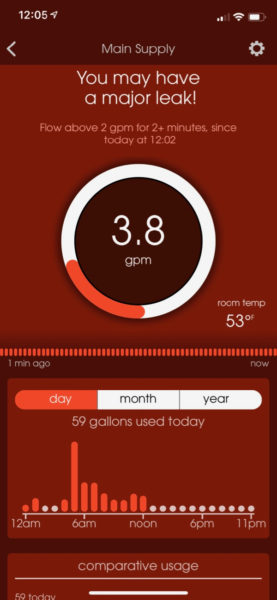
False Leak Alarms? Lower the Alert Threshold!
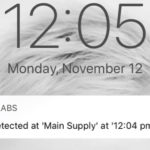
After having zero false positive alarms and notifications for leaks over the week I decided to do one last test. I lowered my alert thresholds to the lowest settings possible and opened up a few faucets so my gallons per minute was above the selected level. After the minimum alert time had passed I was rewarded and comforted by a standard notification on my phone. Selecting this notification brought me right to the application screen which was updated with a fittingly red colored back round, detailing the time and severity of the detected “leak.”
Where to Find
Streamlabs retails for $199 USD and can currently be purchased online here: Streamlabs Smart Home Water Monitor
Specifications
- App Compatibility: iOS 11 or later, compatible with iPhone or iPad, Android 6 or later, phone or tabletCompatible
- Pipe Sizes: 3/4″ CTS, 1″ CTS
- Compatible Pipe Types: Copper Schedule M & L; PEX; CPVC
- Universal Power Supply Input: 100-240VAC Output: 5.9V @ 0.6A UL Listed (included)
- Water Temperature: min. 40ºF (4.4ºC) / max. 80ºF (26.6ºC)
- Operating Pressure: max. 232 psi (16 bar) Limited by Pipe
- Ambient Temperature: min. 32ºF (0ºC) / max. 115ºF (46.1ºC)
- Operating Environment: Indoor use only
- Network: Wi-Fi 2.4 GHz
Overall Impression
The Streamlabs Home Water Monitor has quietly found a welcomed place in my integrated and always changing smart home. I have been very impressed with the ease of installation and no plumber is required! it is a simple, yet useful app, that provide timely and potentially disaster averting notifications. I recommend this monitor for any homeowner who may be interested in having a better idea of their water usage, but more importantly for all homeowners who want the ability to quickly identify one of the worst enemies to your home.
That dreaded water leak!