Router Table Upgrades and Tips


Rockler Pro Router Lift, and Router Table Fence
On the job site we often rig up make-shift router tables with plywood to perform basic routing tasks like cutting dados, grooves, and window sill round overs. In the workshop, a good router table set up should be versatile, accurate sand capture dust at the source. Like many other woodworking tools, it is only as good as the way it is built.
Improving My Router Table
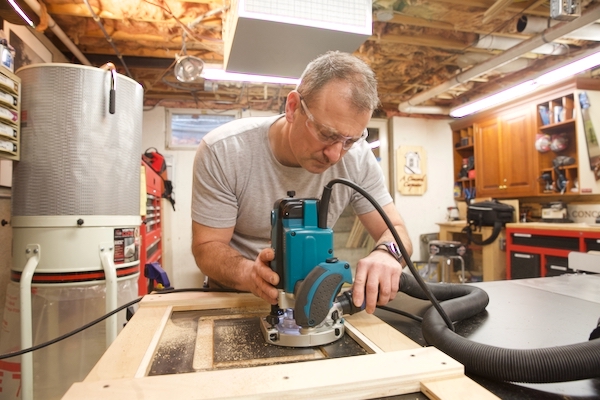
I recently made some improvements to my router table from top to bottom. My router table journey began a few years back when I installed the Rockler Pro Lift in my table saw accessory table.
Rockler Pro Lift Router Lift
The Rockler Pro Lift was made for router motors with a 4.2” diameter body. I was attracted to the rapid height bit adjustment with a 4 to1 gearbox ratio. The snap-lock insert ring releases with the push of a button and has a 1-1/2” opening; additional inserts and zero clearance inserts are also available.
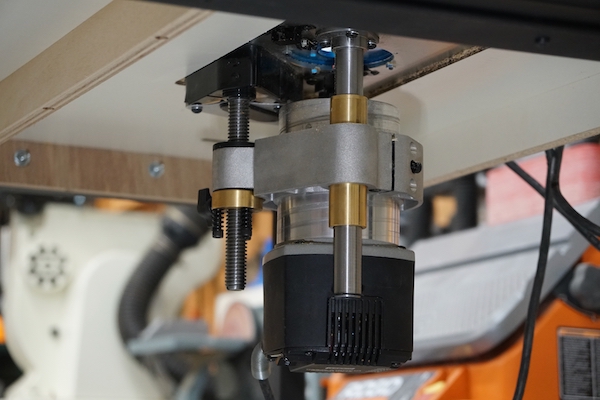
Their lift has is an anti-backlash mechanism to keep the router from creeping downward, which I had to adjust once in 2 years. A simple quarter turn was all that was needed to make this adjustment. A column locking knob provides further insurance when running large milling jobs.
Of all the components on my router table set up, the Pro-Lift was the best thing I ever did.

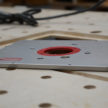
Installing the Rockler Pro Lift Router Lift Plate
I get a lot of questions about how I installed the route lift. There are several ways to cut an opening in the router table to fit a router table insert plate. The goal is to get the router plate to fit perfectly.
I’m a big story pole and template kind of guy. A template reduces error by minimizing tedious measuring. So created a template to first cut the rabbit for the router table insert to sit on and then I added spacer strips to the template to cut out the hole for the router plate/router.
Using a Template with Guide Strips
Making the template itself is pretty straightforward. I ripped four pieces of scrap ¾” plywood, long enough to span across my table saw table. I placed the router plate over my traced lines.
To stay accurate, I ripped scrap plywood “spacer strips” to 2-1/2” and placed them against the router plate. (2-1/2” is the distance from the tip of the router dado bit to the outside of my plunge router’s base) I kept referring to my trace lines and also used the table saw fence, locked down, as a reference and anchor point. I constructed my template around this plate and 2-1/2” spacer scraps. I then screwed the 4 parts together with smaller strips of ¾” plywood.
Once I was sure everything lined up and made sense, I clamped the strips down on the table saw table, double-check everything, and checked for square.
Rout the Recess for the Router Table Plate
To route the recess for the router plate, I set my router bit depth to the thickness of the router insert plate.
I then removed the scrap 2-1/2” spacers and place the router inside the template for a dry fit. Then I routed out the plate recess to the depth of your insert plate.
Cutting Out the Center “Cut-Out”
I decided to use a ¼” straight router bit to cut out the center of the cut-out. I cut ½” spacer strips to add to all four sides of my template. Adding these spacer strips moves the router cut 1/2” out from the previous cut.
That’s how I installed this router lift. I actually did a separate video a while back on this that you can find by searching the Youtube channel for Rockler Pro Lift.
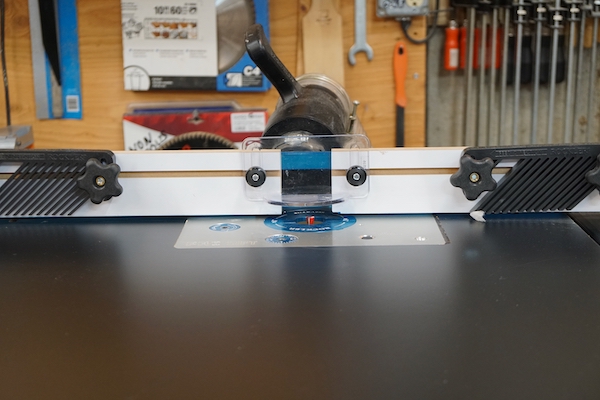
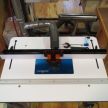
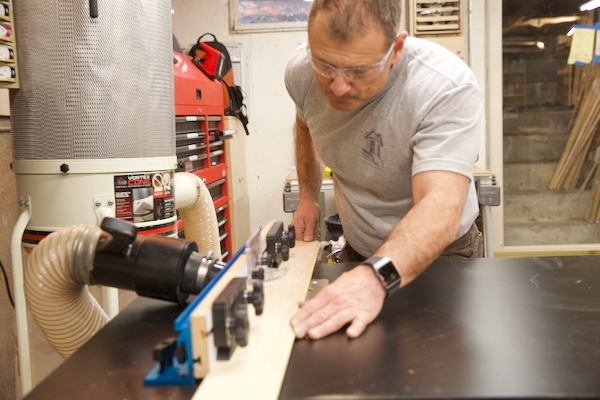
Router Table Fence | Rockler Pro Fence
The next improvement I made to my router table was upgrading the fence. In years past I made a wood fence that slipped over my table saw fence. It worked great but I was unable to use my table saw when my router was set up.
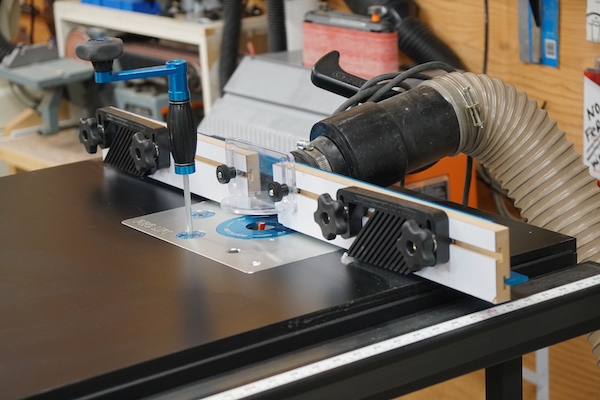
I opted to use Rockler’s Pro Fence. I liked the sliding fence option, dust port, adjustability, and add-on feather boards. But when I first installed it, I didn’t have t-tracks so I just routed two 4” slots in the table and secured the fence with two bolts and wingnuts.
This year I decided to improve the fence by adding t-tracks to the table. I used a ¾ dado bit and routed two 18-inch dados in the table, lined up with the Pro Fence attachment slots. The fence now easily secures to the t-track with t-bolts and I don’t have to reach under the table and use both hands to adjust the fence.
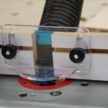
Router Table Dust Collection
For dust collection, in the early days, I connected the 2-1/2” Pro Fence dust port to my Jet dust collector and had a pretty good sawdust collection on top of the table, but a mess on the floor.
To improve this I added a Rockler Dust Right table dust box. The dust box has a 4” and also connects to the 2-1/2” upper fence port to capture dust above and below the table. The door has a magnetic catch that allows easy access to the router, an adjustable vent that allows suction control, and a cord retainer to keep suction.
Final Thoughts
A table-mounted router provides you with a high degree of control, accuracy, and safety, and let’s not forget the ability to collect sawdust. These improvements to my shop are an investment in my health, accuracy, and shop functionality.