Replacing A Wood Porch Post
Wood Column Replacement
Wood columns can make a real statement, whether as part of a grand entrance way or a porch support. Replacing a wood porch post was recently a task needed on one of my clients homes.
This work was coordinated with Mark from O’Lalor Painting. He and his crew will be following my visit with touch up painting.
While replacing some porch flooring and column base trim, I noticed that the bottom portion of the column was rotted.
Using The Proper Wood
This column and others on this house were framed with regular framing material and not pressure treated lumber. I’m still not sure why. It’s possible they felt that the roof was going to protect these posts but the reality is wind driven rain and snow do get these posts wet. The porch roof also does not have gutters so runoff and spray wet the posts as well.
Click on photo to enlarge – notice the pencil sticking out of bottom edge of column.
This column is exposed to the weather on three sides. Water sitting o the porch deck seeped up and into the end grain fibers of the framing lumber. Carpenter ants followed shortly after.
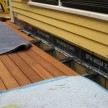
After stripping the column trim it was discovered that the entire structural column and decking underneath it was compromised by rot. [photo below]
Support The Roof
In order to remove this rotted column the roof structure above needed to be temporarily supported. We used 14′ long 2×6 framing material to make a “strong back” support brace.
The brace was installed on the granite step to keep it out of the way of replacing the rotted decking. Before installing the new column we leveled this roof. The old column and decking had rotted and as a result the column to sunk approx 1/4″ to 3/8″ out of level.
Rubber flashing was applied to the exposed framing material before replacing the decking.
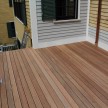
We replaced the decking with similar material. We used 1×4 fir decking and pre-primed the back side and all edges, as well as the section the column will sit on..
Use Pressure Treated Wood
I made the new column out of built up pressure treated lumber and 1/2 pressure treated plywood. The column is approx. 5 1/2″ x 5 1/2″ square.
Structural column installed, plumbed and fastened in place.
Making and Installing the Trim
The new column trim was made on the work bench. We fastened three sides together, installed it, and then nailed the final board on in place.
The column capital or top molding is comprised of three piece of material: a 2×2 square block, 1/2″ x 6 window stop and a bed molding. All of the unpainted wood was back primed and miters glued.
The base of this column is trimmed with pvc 1×6 and pvc scotia molding. Ready for nail putty and paint.


