Nuheat Radiant Floor Heating
Nuheat Radiant Floor Heating Mats – Review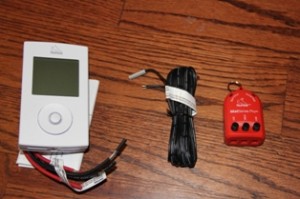
The folks at Nuheat, a manufacturer of an electric radiant floor heating system, recently asked if I was interested in reviewing their radiant floor heating mats.
I agreed as the timing was perfect as I was in the process of remodeling a customers bathroom and they were more than happy to get a free heating mat under their tile.
When deciding on adding electric radiant floor heat to your bathroom you need to realize that this is a decision most people will make once every 10 to 20 years. It’s better to budget for it ahead of time and give yourself the option of installing it then not doing it and regretting it once the tile is installed. Believe me you’ll regret not doing it once 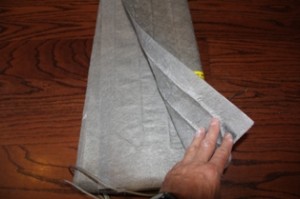 you’ve suffered through your first Winter with frigid tiles.
What Is Nuheat?
The Nuheat System is an electric radiant heat source that can be installed under tile, stone, laminate and engineered wood floors.
It reminds me of an 1/8” thick electric blanket. Each Nuheat mat draws 12watt6s per square foot and produces 41 BTUs per square foot. Heat is dispersed in an even, uniform pattern. Heating temperatures of 80 to 90 degrees Fare height can be reached.
This type of heating system is designed for master bathrooms, kitchens, entryways, mudrooms, shower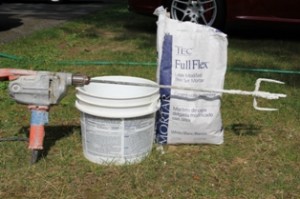 s, saunas and people are even putting them under granite counter tops!
Nuheat offers custom-sized mats for rooms with curves and angles.
Electric radiant heat systems like Nuheat can be the sole heating source or installed to supplement other heating in a room.
The best part of these systems is they run on a dedicated programmable thermostat that can be set to turn on and warm up just in time for the morning shower and at bedtime.
All Nuheat Floor Heating Systems are covered by a 25-year warranty.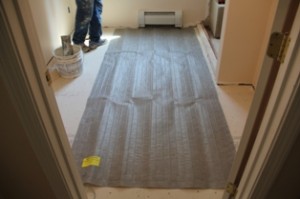
Planning the Job:
Dealing with Nuheat was easy. I had my choice of making a custom mat for this bathroom or going with one of their standard 60” x 108” mat sizes. This job was moving fast and time was of the essences. I chose the later for speed and ease of measuring and installation. Had I known I was going to install this system earlier I most likely would have installed a custom mat.
Getting a quote fro Nuheat is easy. They have an online estimator as well as customer service. If you choose the online route simply select the square footage of the area that you like your floor to be warmed.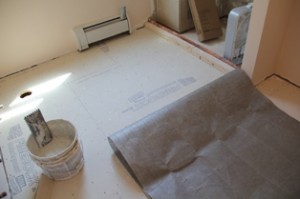
Measuring:
When planning your design you need to think about thermostat placement. All of the mats come with 10 floor leads which can be extended to 22 feet or your electrician can run them to a junction box if needed.
The floor mat should not be installed under cabinets, pedestal sinks of toilets. I kept my standard mat out from the edge of these items.
Types of Mats available:
1. Standard Size Mats:
Nuheat offers standard mats, 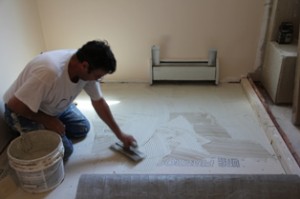 which consist of square and rectangular shaped mats. They have 10′ leads come out of the corner of the mat. You simply flip or turn the mat to get the leads closer to the thermostat location.
Nuheat has over 60 standard sizes that are suitable for most rooms. One or a combination of in floor heating mats can be used to deliver under floor heat for the entire room. All standard mats come in 120V and 240V formats
2. Custom Size Mats:
Their custom mats, require precise measuring of the room as well as the location of the thermostat. When the mat is manufactured, the 10′ leads come out at the thermostat location you provide on your room drawing. The custom mats can accommodate curves and angles in a room.
What’s In the Box:
My floor system arrived in two boxes. They were: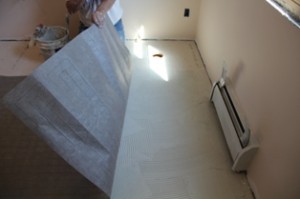
Heat Mat: 60” x 108” Nuheat floor mat rolled up. [photo above]
Thermostat :
□ “Solo” universal floor heating thermostat . [photo above]
□ This thermostat offers features such as a full menu screen, dual voltage (120V & 240V), 7- day
□ program-ability and the ability to network multiple SOLO thermostats within the home
Floor sensor:
□ Electrical fault indicator is a device that simultaneously monitors the hot, neutral and ground wires during your Nuheat installation. Correct Nuheat installation every time.
□ The MatSense Pro electrical fault indicator should be attached to the mat at all times
□ During installation. It does not replace the resistance testing. An alarm will sound if the sensor finds an open circuit or detects a cut or short circuit.
Installing Nuheat Electric Heating Mats:
The Nuheat Mat or mats are easy to install. They are adhered to the subfloor using thin set then cover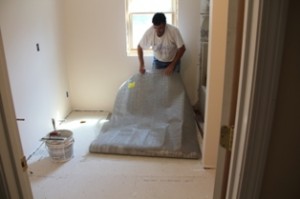 ed with 1/4″ thick layer of thin set and then tile.
List of Materials Needed:
- Acrylic or latex modified thin set
- Duct tape
- 1/4 inch square notched trowel
- Grouting float
- Digital multimeter (ohmmeter)
- Thin set mixer
- Bucket
- Floor material
Sub-floor Preparation:
It is super important that you inspect your sub-floor for damage, debris or sharp objects. All nails and screws should be countersunk.
Tip: Start out with a fresh surface. Install a tile under-layment board. I installing a cement board under-layment on this project. Make sure all of your screw heads are recessed. Follow the standard guidelines provided by the Tile Council 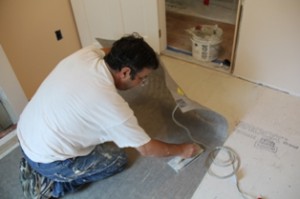 of America if your unsure how to do this.
Floor Height:
The installation of the Nuheat electric floor heating will change the height of your flooring.
This really only matters at the doorway or when your room meets another room. In my case with the addition of a 1/4 under-layment, the heating mat, thin set and tile raised the floor necessitated that I install a marble threshold at the doorway.
Electrical Preparation:
A licensed electrician should be involved in the installation and testing of this system. Before installing ![NU Heat sensor telegraphing [groove in tile bottom] Nuheat floor radiant floor heat](http://www.aconcordcarpenter.com/wp-content/uploads/2011/08/NU-Heat-sensor-telegraphing-groove-in-tile-bottom-300x199.jpg) your mat make sure your electrician conducts insulation & resistance tests.
your mat make sure your electrician conducts insulation & resistance tests.
Nuheat requires that a Class A GFCI or GFCI circuit breaker when feeding mats through a relay with each Nuheat Mat installation. If using a Nuheat control, no additional GFCI is required.
My electrician installed a deep box for me and ran a conduit down to the wall sill, leaving “wire pull string” in place for me to get the sensor wire up to the thermostat box. NOTE: All Nuheat thermostats come equipped with a built-in Class “A” GFCI.
Tip: Insulation and resistance testing should be performed at all stages of this installation. Confirm that your ohm reading is within +10% or -5% of the factory reading listed on the mat tag.
Installing Mat To Sub-floor
There is no “up” or “down” side to Nuheat Standard Mats. You can flip the mat in any direction to place the lead wi res as close as possible to the thermostat or junction box. The custom mats come with the leads in the location that you specify.
- Make sure you have connected the MatSense Pro to the lead wires to monitor hot, neutral and ground wires and leave it connected during the install.
- Dry fit your Nuheat mat on the floor and use a marker to mark will it will go. This will help you during the thin set installation.
- Prepare the acrylic / latex modified thin set according to manufacturer’s instructions.
- Fold ½ of the mat over the other half. Work in a methodical fashion towards the exit of the roo
 m installing the mat in manageable sections at a time.
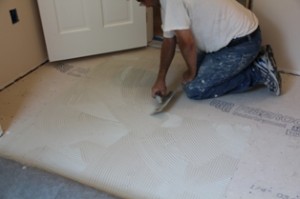
 - Use a 1 ⁄ 4” x 1 ⁄ 4” square notch trowel to spread the thin set over the area to be covered by the heating mat.
- Place the mat into the thin set, using a rubber grout to press it down and flatten it out. The goal is to get the mat completely in contact with the thin set and the sub-floor.
- fold the other half of the mat back and repeat steps 5 and 6.
- Install the sensor probe on top of the mat , a minimum of 12” in from the edge of the heated area.
- The floor sensor wire can be tucked in the edge where the wall and floor meet.
- Nuheat recommends using tape to secure your sensor probe to the mat, in between heating coils.
- Run the sensor wire up to the thermostat location
Tiling Over Nuheat mats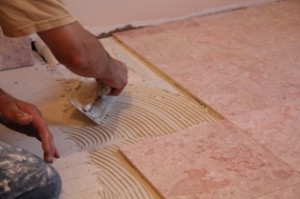
- Using the flat side of a trowel, apply a minimum 1 / 4” thick coat of thin set over the mat and supply leads.
- Layout and install tiles.
- Use care not to damage the heating coils.
Overall Impression:
Probably the most attractive advantage the Nuheat standard mat has over competitors is the Nuheat Mat is easy to install over thin set and can be tiled over immediately. This saves a contractors time, and the homeowners money.
The only thing I’ll add to this is that once the mat is installed the thin set does seep through the mat a bit. So plan on this if your installing tile immediately.
Another nice feature about Nuheat is that the mats can be repaired using a mat repair kit. If you suspect that your mat needs to be repaired, please contact Customer Care department at 1-800-778-9276. You do not need to replace the entire floor in order repair the break.
Overall I was impressed with the Nuheat standard mat system. From dealing with the company ordering the parts to the ease of installation it was simple and painless. I recommend giving this product a try!!
This bathroom will have years and years of uniform, reliable floor heat. Leave those slippers in the closet ~ GO Barefoot!!


