Installing Bondera Tile Mat
Whether you’re a contractor or a Do-It-Yourselfer Bondera will save you time and money!
What is Bondera?
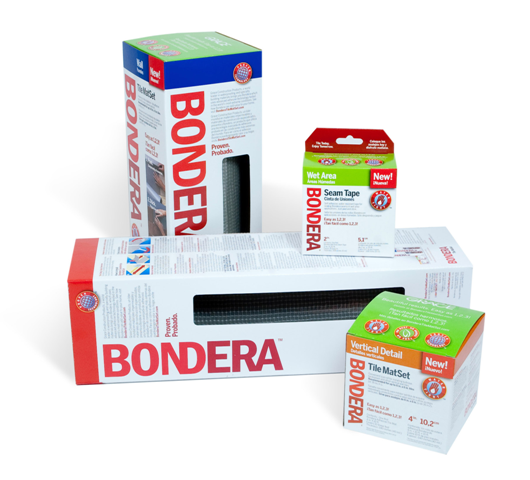
Bondera is a pressure-sensitive tile adhesive that is perfect for counter & wall tile projects. A peel and stick product, it allows you to apply tile directly to it without the need for mastic or thin-set. Once the tile is pressed onto the adhesive you’re ready to grout.
Installing Bondera Tile Mat is really that easy – I’ve done it!
Bondera repels water, ismold resistant, can span and resist crackstoprovide a structurallysound backing for tile. Infact Bondera can resist cracks with up to 1/8” of substrate movement.
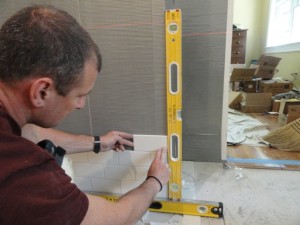
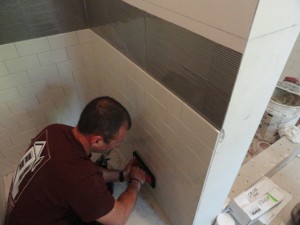
This week I installed Bondera on the walls of a bathroom in Concord, Massachusetts. I found the product super easy to use and even easier to tile on. One thing I liked alot was that Bondera held the tiles in place without them slipping.
Bondera should be applied on any clean, flat, stable surface like drywall, plywood, cement board, existing tile, metal, laminate, Corian® and Formica™.
Why should contractors use Bondera?
As a general contractor I’m always looking for tools, techniques and products that save me time and money. Bondera, used in the right situations WILL save you time and make you money!
Bondera provides an 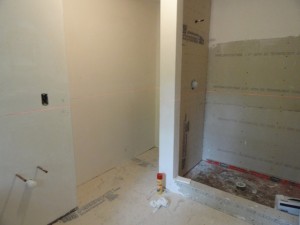 innovative and faster way to install tile in limited spaces such as back splashes or counters. What used to take two trips to back a jobsite to finish a tile project can now be done in the same day.
Bondera is more costly to use that thin set or mastic and I would not recommend it for large projects but in certain circumstances it is faster and makes you money.
With Bondera you can grout in the same day, as opposed to allowing thin-set to dry overnight. For example, take your typical 18” x 20’ kitchen back splash project.
Normally you would have to use thin-set or mastic to adhere your tiles and then walk away only to return another day to grout. No matter how you break that down you are spending part of two days on this project.
In this example, using Bondera, would allow you to adhere the tiles and grout all in the same day. Done!!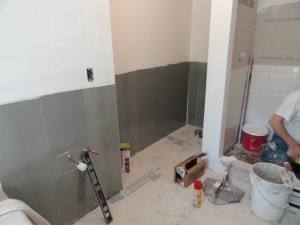 think of the time saved and profit margin on that project.
Bondera is cleaner to use than thin-set, has no odor and does not make a mess like thin set does. Using Bondera in situations like tile inlays on cabinetry where there is finished furniture grade wood makes sense. Situations such as table inserts or wainscoting with mosaic inserts can easily be done with Bondera to avoid the thin-set mess.
Bondera also allows for an easy, clean installation of mosaic tiles. May times when installing mosaics you have to spend time cleaning the thin set that has squeezes through the mesh matting. With Bondera all you need to do is apply the tile to the Bondera mat and grout.
Plus did I mention no dust, no mess, no odor or VOC’s to worry about.
Every product has limitations. Knowing when and when not to use Bondera is important. What I like about Bondera is it gives me profitable options on smaller jobs.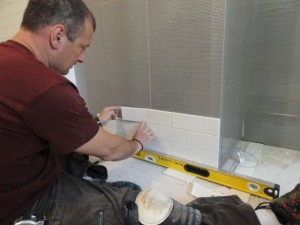
Below are some suggestions and guidelines on how to use Bondera TileMatSet:
No special tools needed:
No special tools are needed to tile with Bondera Tile Mat Set— all you need are a few common items:
• Tile
• Tile spacers
• Rectangular trowel
• Straight edge/framing square
• Utility knife or scissors
• Permanent marker
Bondera Application Guidelines:
- Apply to any flat, clean, dust-free, dry, stable surface: drywall, plywood, old tile, laminate, Corian®, Formica®, etc.
- A fast drying latex primer is recommended over dusty, low-cohesive strength type finishes like plaster or joint compound. Joints in the surface material should be treated to create a continuous smooth surface.
- Tiles must be dust-free and thoroughly dry before applying to Bondera.
- Bondera is recommended for factory-made flat back or cross-backed tiles. Some handmade or stone tiles with rough or uneven backs may result in an impaired bond. Slate tiles are not recommended.
- Maximum tile size for wall applications is 6”x6” or 36 square inches such as subway tiles. Mosaics on 12’x12” backing can also be used.
- To ensure proper bond in any application, it is recommended that you test the tiles in a small area by following the installation instructions.
- BONDERA is not for use on floors and ceilings.
How To cut Bondera:
There are two methods to cut Bondera for your applications.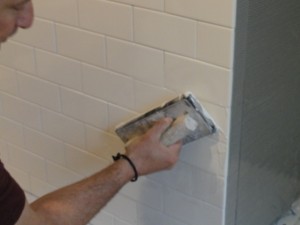
- Use a utility knife and a straight-edge on a safe cutting surface.
- Teflon scissors or household scissors. TIP: Spray a light coat of oil such as WD40 or cooking spray on the scissors to prevent the adhesive from sticking to the scissors. Wipe off excess oil prior to cutting.
Installing Bondera Tile Mat:
- Unroll Bondera and cut to size.
- Using Bondera tab diagonally peel back 2 to 3 inches at the corner of the release liner (the non-mesh side).
- Starting at one corner of the area to be tiled, firmly press exposed corner of Bondera to the substrate. Steadily pull remaining release liner from Bondera and
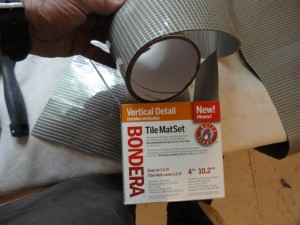 smooth it, wrinkle-free into place.
 - Apply the next piece of Bondera by aligning the edges tightly together without overlapping. Repeat until area is cove
- When you are ready to tile, use the Bondera tab and diagonally peel the top liner in manageable work sections. In wet areas apply Bondera Wet Area Seam Tape to all seams to create a water-tight barrier. Do not remove top release liner until you are ready to tile.
How to apply Bondera Wet Area Seam Tape:
To ensure a water-tight system, the application of Bonder Wet Area Seam Tape is required onto all adjoining Bondera Tile Mat Set seams.
- Apply seam tape ONLY when you are ready to tile.
- Remove top liner of the Bondera so that the adhesive is
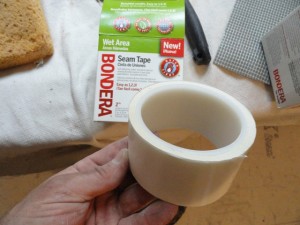 exposed.
 - Adhere the Bondera Seam Tape to seal the seams.
- Remove the white paper liner to expose the seam tape adhesive.
- Apply tile
Tip: To remove white paper liner, fold the corner about 1/4″, just enough to peel back the liner before adhering to the wall.
Pre-folding a 1/4″ to 3/8″ corner of the seam tape will make it easier to remove the paper liner after installation.
How to remove a wrinkle:
Wrinkles will rarely occur as long as you follow the application instructions carefully. However, if you do create a wrinkle, don’t worry, it can easily be fixed!
- Press or squeeze the wrinkle together to make it as thin as possible
- Use a utility knife to cut around the wrinkle
- Pull the wrinkle up removing it from the surface then press cut edges tightly together
- Seal or cover the exposed area with Bondera Seam Tape.
TIP:Wrinkles can be avoided by cutting manageable sizes of Bondera, typically no more than the length of your arm, and, by removing the back liner a little at a time, as you apply Bondera to substrate.
How to install tiles on Bondera TileMatSet:
- When starting a tiling project, plan the layout of tile carefully.
- Pre-laying tile is crucial to a well though out tile project.
- Using Bondera Tab, diagonally peel off front liner (Peel only the amount you can tile and grout within the day).
- Apply Bondera Wet Area Seam Tape to any seams that are not completely pressed together or to all seams if the application is considered a wet environment.
- Support the bottom row of tile with molding, tub edge, countertop, metal strip tile spacer or similar edge.
- Place first and second row of tile lightly in place. apply to the mesh side.
- When tile is squarely in place, press each tile firmly for 5 seconds to bond the tile in place. (For additional information, please refer to instructions for repositioning tile).
- If not using self-spacing tiles, place 1/8″ minimum tile spacer at top corners of tiles to ensure the following row of tiles is square and evenly spaced.
- Must apply grout within 8 hours.
How to fix two overlapped pieces of Bondera:
The directions state to abut Bondera and install each piece as close together as possible. If an overlap occurs simply cut it out with a utility knife and apply Bondera Seam Tape over that area.
How to manage varying tile thicknesses with Bondera TileMatSet:
When using tiles of varying thickness, simply layer strips of Bondera on top of each other to bring the thinner tiles level with thicker tiles.
Bondera Limitations:
Bondera requires that the surface must be smooth and plumb. Use tiles up to 6 in. x 6 in. (36 in.2) tiles only for walls; tiles should be thoroughly dry.
- Bottom row of tiles must be supported by molding, tub edge, countertop, metal strip or similar edge.
- No slate or uneven backing tiles.
- Do not use wall product (vertical installations) on plywood substrates.
- Not for ceiling, floor, fireplace, or exterior applications.
- For any questions regarding application areas or appropriate use of Bondera, cal 1-888-TMATSET.


