How To Patch Cedar Shingles
Weaving Cedar Shingles
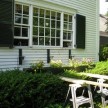
The picture above shows cedar shingles properly woven into an existing wall of older shingles. The photo below shows how not to do it.
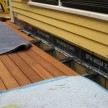
In the picture below the shingles were installed into an old window opening and not woven properly.
This results in two, large vertical seam lines that allowed water to get into the building.
I did not get my camera rolling until after I had started filling in the old window which is too bad because this boarded up, old window was quite a sight.
This job is at a local community theater and I was asked to remove an old rotted window that had been boarded up for years and patch it in with shingles to match the exterior.
After removing the interior trim, sash and jamb I prepared the opening for wall sheathing.
Nailer Strips For New Sheathing
To do this I nailed two vertical nailer strips on either side of the opening to allow a nailer for my wall sheathing boards. The nailers are set back 7/8″ to allow my sheathing to fill in the opening and sit flush with
the old wall sheathing.
I used 1×8 rough spruce boards as sheathing because they are real close in thickness to the 7/8″ old boards.
Matches dimensions and thicknesses is important and can haunt you later if not done.
House Wrap
Nailing
Use a Wood Ledger For Help
To get my shingles in a straight line, I used a scrap wooden straight edge, and nailed it lightly to the wall with the edge at the butt line of the left and right older shingles. In new constructions it’s always good to check for level every 3 or 4 shingle courses.
Concealed Nails For Top Courses
One of the tricks to weaving shingles is concealed nailing at the top course and below the older shingle. Face nailing shingles is a dead giveaway that an area was patched or repaired and should be done only when there is no other options. [i.e, the very top course and some corner applications. In these situations use stainless steel nails.]
I use stainless steel nails in this photo and install two nails at a slight angle.
I then use my nail set to drive the nails in flush. I take care not to set as I want these nail head flush and to move and bend slightly as the shingle is pushed upwards.
The shingle is now in place and the fasteners hidden.
Complete. I will insulate from the inside.


