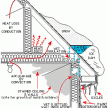
Improper Roof and Side Wall Flashing

Moisture Entering House Wall – Improper Roof and Wall Flashing
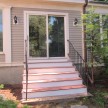
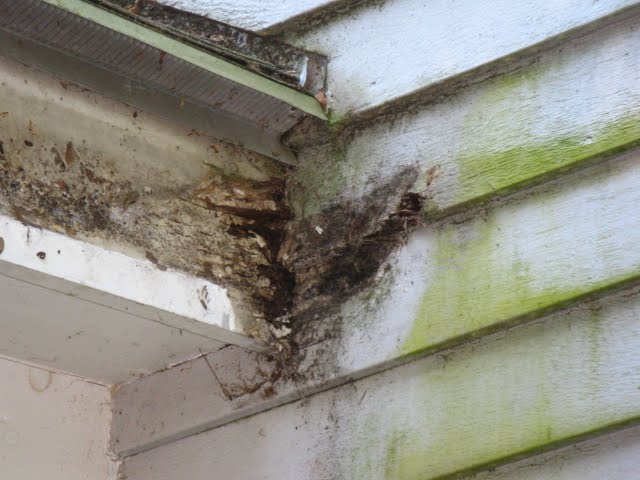
The picture below is a before picture of a recent rot repair job we did. From the driveway this discolored wall looks like a mildew problem that could easily be cured by cleaning with bleach.

Well that’s what I thought too until I was up on a ladder and noticed a small hole and missing and improperly installed roof and wall flashing.
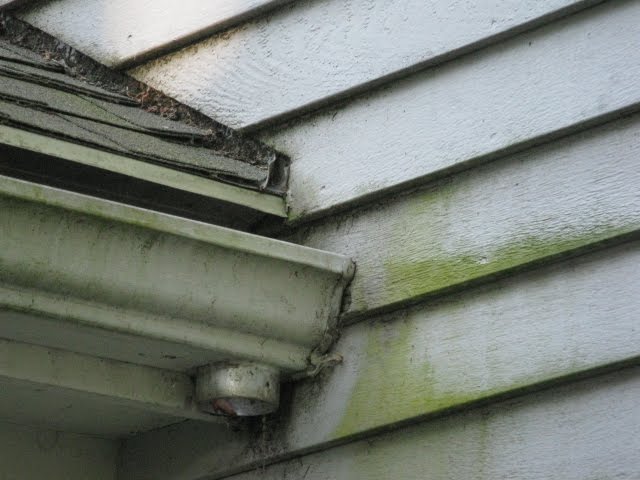
View from above shows a hole on the top section of the fascia and clapboard, hidden from ground view.

Close up of hole. Water has been getting behind the siding. When I pushed on the siding the entire wall flexed which indicated improper roof and side wall flashing – not a good sign.
My nail punch pushed easily through the clapboards and plywood sheathing. Another bad sign.
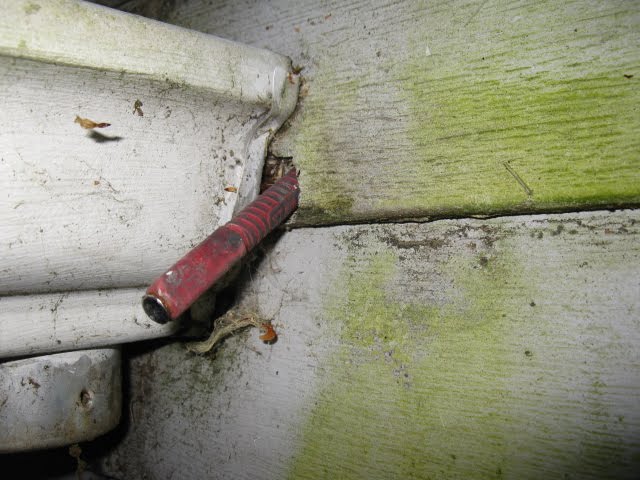
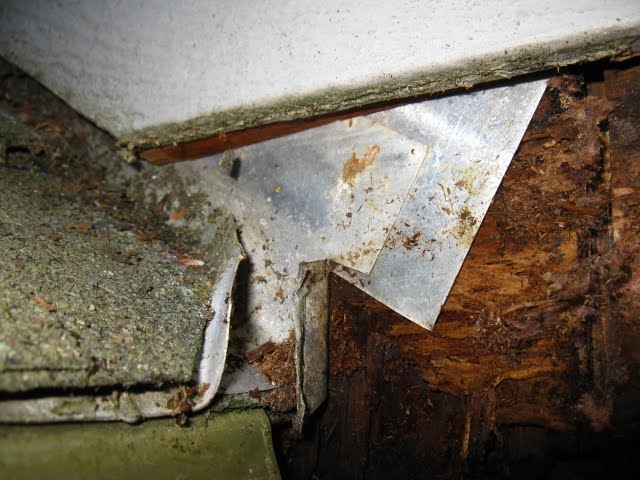
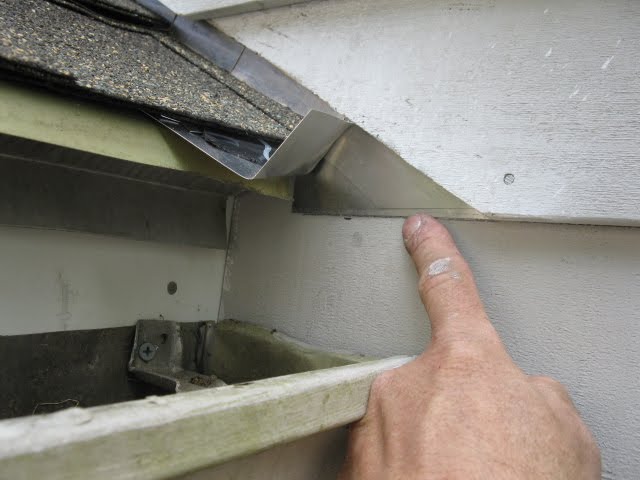
This house is 20 years old the gutter contractor installed this “rain divert-er” or kick out divert-er which probably kept the majority of water out of this wall. [photo below – see angled flashing installed to divert water away from the house wall]
This kick out divert-er certainly helped but was not tall enough and was not installed under the step flashing above it. This house was also missing one final piece of flashing which was the main reason this wall flashing system failed to keep water from entering the building envelope.
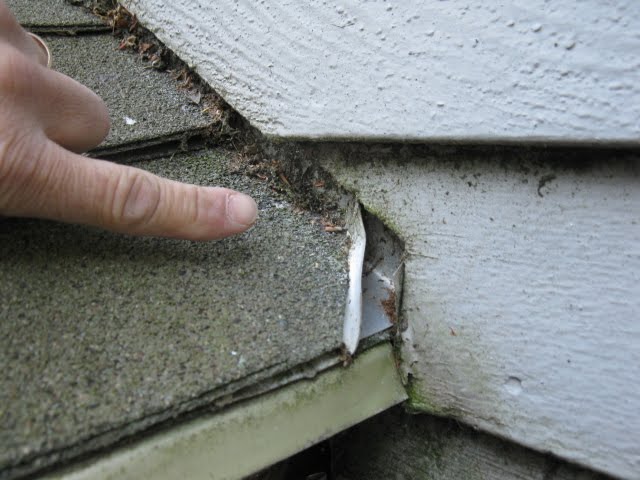
If you look closely where the clapboards angle turns and becomes a vertical butt joint this area should have had flashing installed under it and overlapping the clapboard below. Instead if curls out and ends at the but joint.
Improper Roof and Side Wall Flashing
The problem was Communication and Basic Flashing Knowledge.
The roofer stopped his aluminum step flashing at the roofs edge. The siding contractor then came and he failed to add / continue the flashing off the roof and over lap the siding.
Finally, the builder and inspector missed it!
Flashing works by overlapping coverage. In this case the roof flashing ended right at a seam in the clapboards which is a wide open invitation for moisture to get behind the siding.
This is a very common problem in today’s homes and one that I see often. See my friend Mark Parlee’s guest post on moisture intrusion into a buildings envelope. The gutter was removed below to investigate.
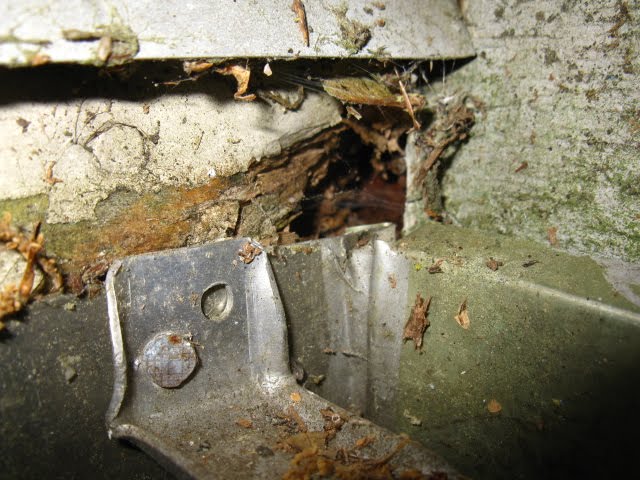
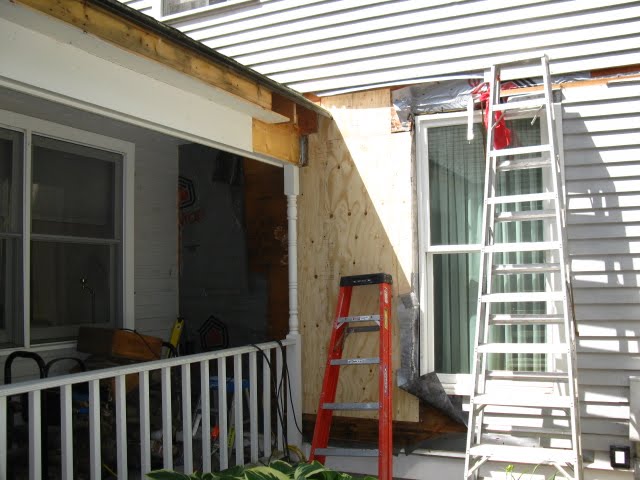
After removing the siding we discovered the 1/23″ plywood sheathing was saturated .

I was able to punch my hand through this wet plywood to the insulation.

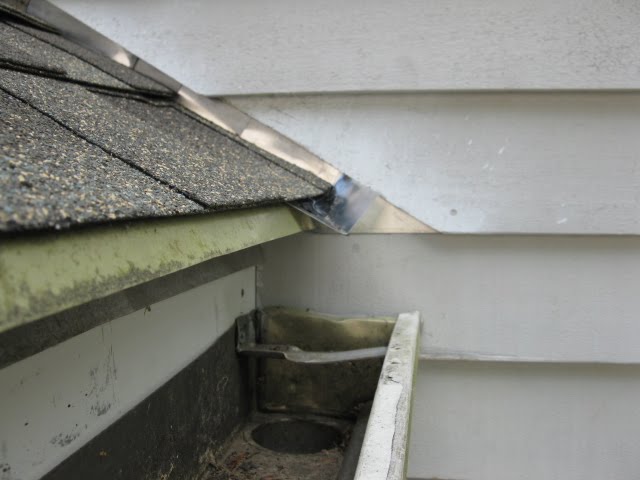
Here is a good photo example showing the roof step flashing ending at the roofs edge. Someone had cut the step flashing and bent it off the wall to cover the clapboard butt joint. The siding contractor probably did this in a half hearted attempt to cover his clapboard seam.
The water migrated all the way down to the bottom wall plate. Luckily it stopped there.
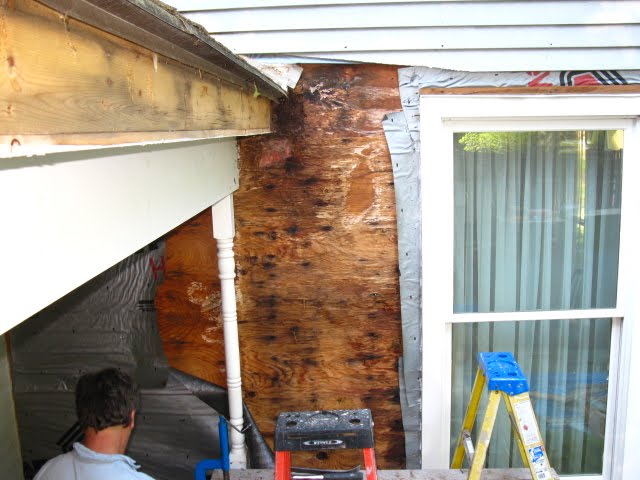
Once we knew where the rot stopped I carefully cut back the clapboards for a speedier installation of new clapboards later. All of the rot and wet insulation was then removed and discarded.
Luckily, the wall studs were ok. New insulation and plywood was installed.
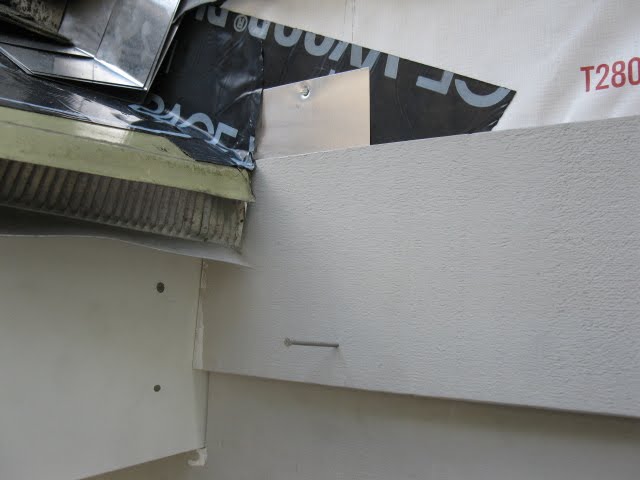
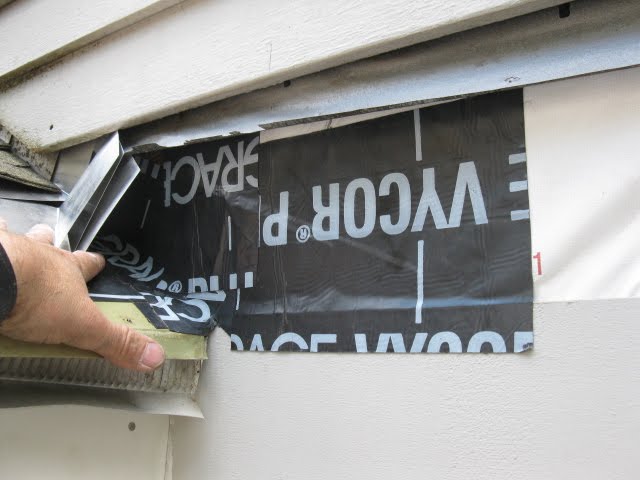
House wrap was installed as well as rubber flashing on the roof and up the side wall above.
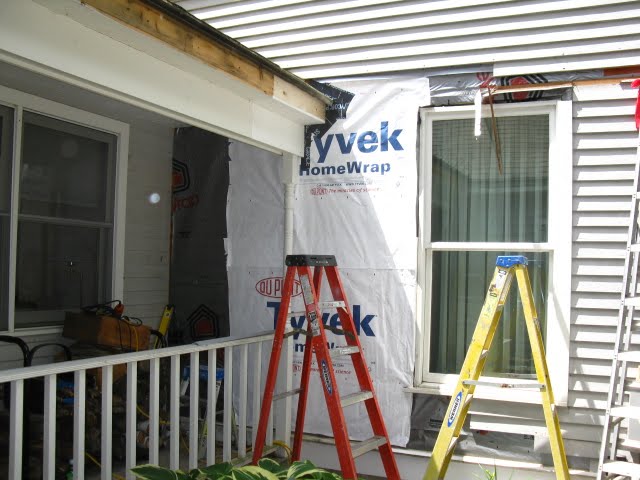
Part of the sub-fascia was replaced due to rot. We installed rubber behind this as well.
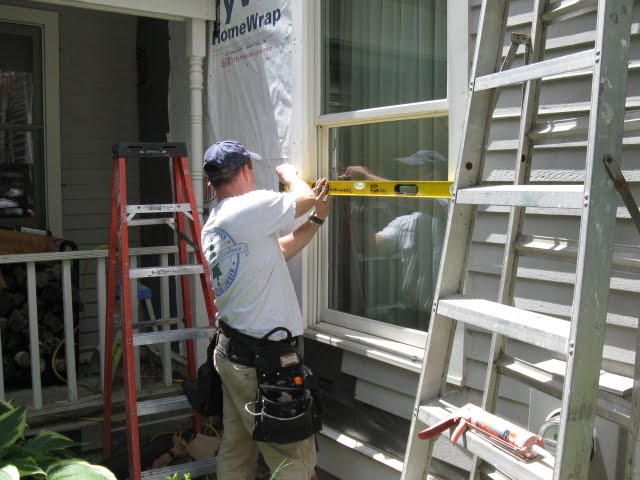
The window trim was reinstalled. Using a level I am transferring layout lines of the cedar clapboards, right side of the window, over to the left side.
The clapboards that I carefully cut back earlier all receive tar paper spline flashing. These splines overlap the clapboard below. any water that gets into this seam will drain out and onto the clapboard below. Remember flashing must overlap.
The vertical butt seams at the window trim also received a tar paper spline.
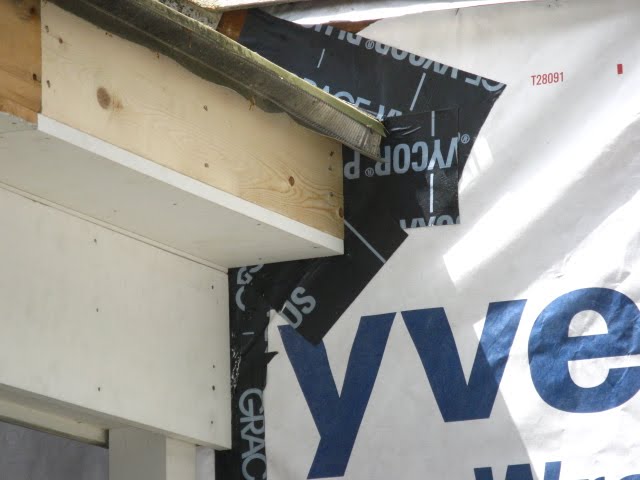
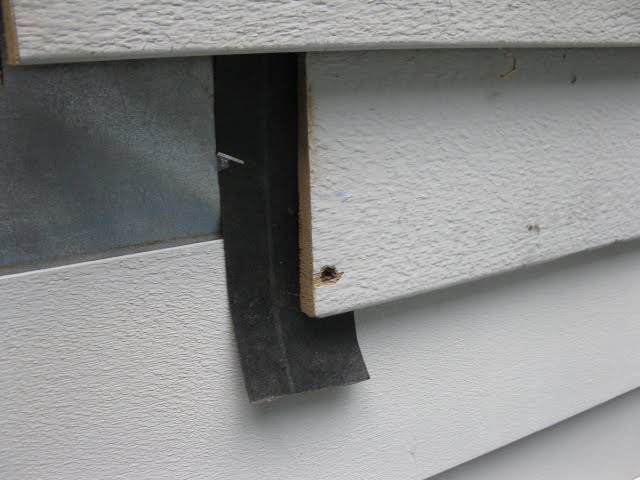
When the clapboards reached the roof line I added aluminum flashing under the last roof, step flashing and down over the clapboard below this one.
Rubber flashing was added as a redundancy layer.
Finally a third layer of step flashing was added over the rubber, which will tuck behind the step flashing. This flashing will stay exposed and will probably be painted with the clapboard to hide it.
A kick out was also added here to divert water away fro the house wall and into the gutter.
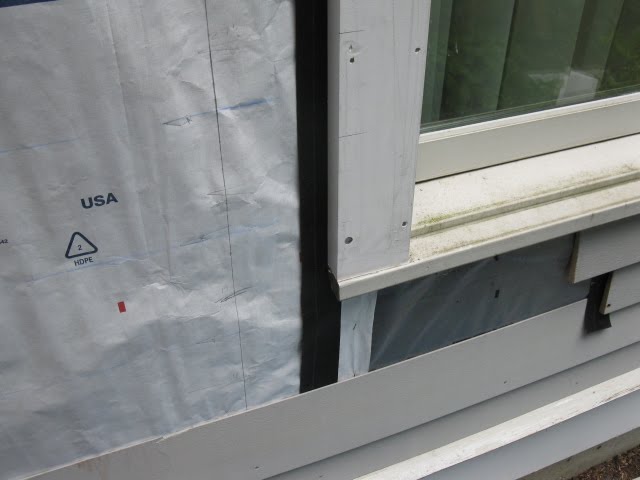
The window flashing was installed over the house wrap. We cut a slit into the house wrap and installed the flashing under it. Now moisture draining down the house wrap will not go behind the window trim.

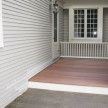
Shingles and gutter reinstalled. This photo shows the kick out flashing and counter flashing over the clapboard below the roof line.
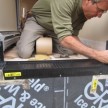
8 hours later the down spout was re-installed and we cleaned up! Ready for paint.

RELATED POST: Importance of flashing exterior lights

If you enjoyed this post, make sure you subscribe to my RSS feed or receive updates via email